ArchivesResources

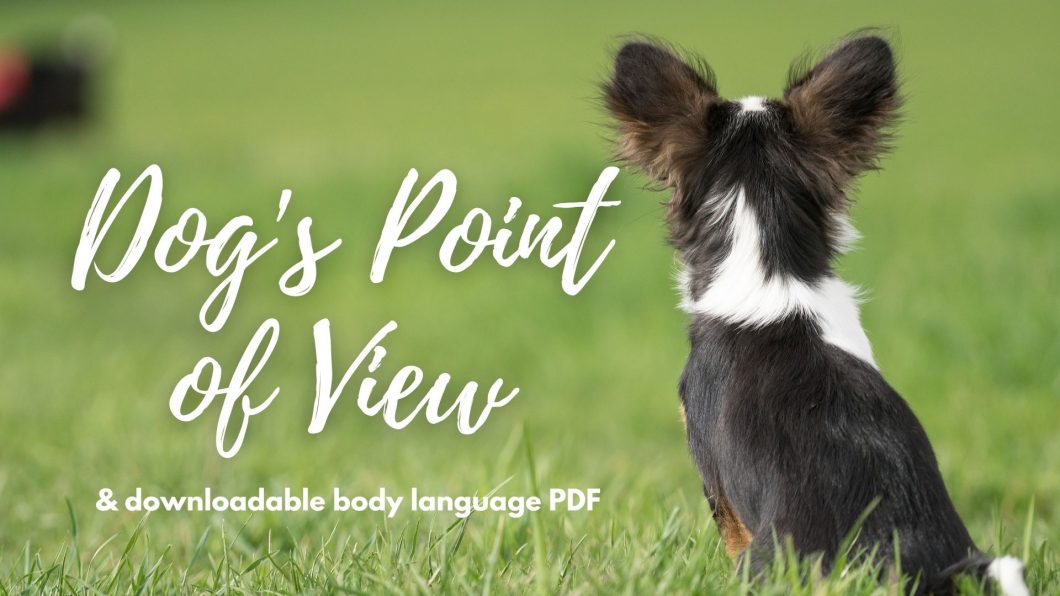
Dog Point of View & Body Language

In this lesson, I’m going to ask you to consider a photoshoot from a dog’s point of view.

I often get asked what to do with “difficult” dogs. These are dogs who:

  • don’t want to look at the camera, they’re always looking away from the camera
  • are over-threshold or too excited to do what we’re asking them to do
  • just aren’t interested

There are a couple of things I want to discuss in this lesson in regards to our dog models. One, is that what we are doing is rather strange for most dogs. If you consider our day to day life with dogs, and consider how we act and behave when we’re taking photos of them, we suddenly act very weirdly. 

Think about it. We’re crouching or even LYING on the ground (usually a signal that we want to play, or cuddle, or interact with our dogs), we have a weird black “eye” in front of our face, or we’re looking down at it and not at them (and most of us spend a lot of time looking at our dogs). We’re making weird noises, maybe even calling their name, but they’re not allowed to move.

In the case of a client’s dog, this might be even more bizarre! Who is this stranger?! Why are they doing this?! Why does my owner seem so tense?! Why do I have to sit here? Why am I not allowed to move?

If someone you’d never met (or even someone you loved and trusted) started acting this way, what would your reaction be?

Classical Conditioning

Let’s say your dog now has a history of you taking photos of them. And for that whole history, they have been given a bit of food for staying still (if they stay still!) or they’ve just run off whenever they’ve had enough of staying, and you’ve been getting more and more stressed about the fact that they won’t stay, or they won’t put their ears up and look at the camera. 

They now have a very conditioned response to photoshoots.

Have you ever heard of Pavlov? He’s not my favourite scientist ever but he did these experiments on dogs. Each day, just before they got fed, he would ring a bell. Then he would feed them. They found that soon enough, when the dog heard the bell, it would begin to drool. Bell = time for food. A conditioned response. 

Have you ever picked up your dog’s leash and it starts going crazy? Leash = time for a walk. A conditioned response.

The same can be said for less positive responses. For example, if I pick up anything that’s designed to kill flies of mosquitos (a fly swatter, a rolled up newspaper, one of those electric tennis racquet things) Loki will run and hide. Fly swatters = violence. (Not against him, but it’s scary enough). Same as how Journey now sees Ana get out the drying rack for clothes and comes and hides. Ana + Clothes = Scary noises when she shakes them violently before hanging them up. These are conditioned responses. The drying rack in and of itself means nothing. It’s the knowledge of what’s about to happen that elicits a response.

What does this have to do with our dogs and photoshoots?

If you’re working with your own dogs, think about what their conditioned response to the camera is. 

Maybe, like Loki, their eyes light up and they are excited and pushy, ready to work. Camera = work + treats! Woo hoo! A great conditioned response.

Maybe, like Journey, it’s a little more complicated. Camera = work (great) but pressure (bad). So while he’ll very happily pose, the more pressure he gets to look alert or look at me, the less happy he looks. 

Maybe, they see the camera and have to almost be coerced into position, and the minute they get a chance, they leave the scene to go do something else. 

Operant Conditioning

All creatures, humans included, work on the principles of Operant Conditioning.

That is the theory that all behaviour stems from either reinforcement, or punishment. Both can either be positive (added) or negative (removed). 

For example:

  • Positive Reinforcement = something good/pleasurable is added, to increase the behaviour. Giving a treat, playing with a toy, getting a bonus at work, being given a sticker for getting a right answer. 
  • Negative reinforcement = something bad is removed to increase the behaviour. In humans, this could be the annoying noise your car makes when you forget to put your seatbelt on – the noise stops when you do the desired behaviour. In dogs, it could be using an electric shock collar (to be clear I don’t agree with these at all but it serves the purpose of this example) and shocking the dog until it does the desired behaviour.
    • Obviously this doesn’t have much place in what we’re doing unless you consider this: Say that the experience of having their photo taken is a bad one. The dog doesn’t like it. If they move themselves away, refuse to stay, or run off, they have enacted negative reinforcement on themselves. The benefit of removing themselves might outweigh any kind of positive punishment, or positive reinforcement you might offer as a consequence for leaving or for staying. They have removed the negative stimulus (being in front of the camera), so the likelihood of that behaviour occurring again increases.
  • Positive Punishment= something unpleasant is added, to decrease the behaviour. This is scolding the dog, hitting the dog, choking the dog with a choke chain, or punishing the dog in some way. Remember, “positive” here isn’t talking about good or bad, it’s talking about adding or removing. Positive = adding. 
  • Negative punishment= something/a stimulus is removed to decrease the likelihood of the behaviour. Say a dog is jumping up to get your attention, and you turn away and leave – removing a stimulus, with the intention of the dog jumping up less. Or those situations where someone puts their hand near a food bowl while the dog is eating. The dog growls. The food is removed. The intention being that a stimulus (food) was removed in order to decrease the behaviour (growling). Obviously this is problematic for a number of reasons, but it’s there for an example. There isn’t really a great photography example for this that I can think of right now. 


So, if we’re thinking about the above, in terms of our dogs and how they act and react when having their photos, can we find any patterns with their behaviour? Have their experiences mostly been positively reinforced? Positively punished (even in small ways, like you sighing in frustration when they move, or simple being stressed can be enough for some dogs for it to be a bad experience), or maybe they’ve negatively reinforced themselves by continually removing them from the situation?

Let’s have a look at the video below. I filmed several scenarios from a dog’s point of view with both me as a bit of a stressed-out new photographer, and being a lot calmer, faster, and more easy going. 

Is the dog stressed?

Knowing, reading and understanding dog body language and expressions is critical to what we do. Not only from a photographic point of view, but also for the dog’s welfare and wellbeing.

We are lucky to have Olivia Moore (MRCVS) in the LC, and she prepared this downloadable .pdf guide on seeing and understanding dog body-language. 

What to do if your dog doesn't like photoshoots?

Honestly, this is a bigger, longer question than we can really cover in a photography course.

Personally, I would:

  • Make sure I knew and understood my dog’s currency
  • build a good working relationship with my dog outside of photography (tricks, dog sports, interacting on walks etc). I’m talking about more than just going on walks together and living together. 
  • made sure by using principles of conditioning, that my dog associated the camera with good things
    • you can do this quickly and easily when you meet a client’s dog. Sit down with it and press the shutter, reward immediately. Shutter, reward, shutter, reward, shutter reward. Soon, the camera noise = reward to come!
  • train whatever behaviours I needed (stay etc) away from photography and photoshoots until they were really solid, comfortable and happy in the behaviour
  • use a leash if they don’t stay, to eliminate my own stress of them moving or running off
  • keep poses fast. Have your settings dialed in already before the dog gets into position. Take a burst of photos, verbally praising the dog for being great. Clearly release the dog, reward.
  • be careful and conscious of unintentional cues that could be taken as punishment especially by sensitive dogs who are very in-tune to your emotions
  • release pressure from the dog. Don’t demand or continually ask for their attention. Sit down and relax with them. Let them choose a pose. Get attention in creative ways and celebrate them when they offer that attention.

Variety Challenges: All about the dog

Here you’ll find a collection of challenges, originally written as “mini challenges” to be spread across the month. However, they work equally well as individual stand-alone challenges so will each count as one challenge toward your Snoot Awards. Each challenge counts as 1 challenge point toward your Snoot Awards. 

These challenges are designed to spark your creativity, get you to step out of your comfort zone, or to give you something to focus on if you’re feeling a bit lost and overwhelmed.

These challenges are designed to help you capture our subjects, their personalities and their stories in a different way to the typical posed portrait in a pretty location. 

Light & Location: Quiz!

Developing your “photographer’s eye” in seeing locations for photos takes time and practise, practise, practise. There really is absolutely no better way to learn how a location will look through your lens, other than to get out there and take photos.

After all, it costs nothing to take photos (except a bit of time). If they don’t work out, then analyse them, try and work out why they didn’t work, then delete them and move on. 

In this lesson, I’ve taken a number of short behind-the-scenes clips for you, with a phone. The idea is for you to take a look at the location and consider whether you think it will make a good spot for photos.

Ask yourself especially:

  • is there enough light on the dog?
  • where is the light source? Is there a secondary light source?
  • what’s the background like? (busy? bright? boring?)
  • is there something about this location that will make it interesting?

Now, keep in mind I was taking photos specifically for this quiz – so these are not necessarily the lighting conditions or locations I would automatically choose for myself! Also, I could possibly have taken better photos in the location by changing my angle – but that wasn’t the point of the exercise. 

I used Loki for the majority of these photos because he is black and white – a challenging colour combination and requiring me to be more careful with blowing out the highlights or clipping the blacks and losing data in his dark fur. Clipped highlights, how much/whether to under expose/the amount needed to preserve highlights vs. blowing out highlights to properly expose the dog is something you might want to consider when deciding if it was a good location or not. If you don’t know what I’m talking about, search the site for “Underexposing” to find relevant lessons.

Each photo will have the Straight out of camera version, a Lightroom-Edit version (just a light edit), and SOME will have a full Photoshop edit.

And keep in mind that if you’re wrong (eg., you said it will be a good location when it really isn’t!) then that’s ok too! Have a read of why the location did/didn’t work, check out the settings and learn from it!

The Situation/Conditions/Gear

For all these photos I was using my Sony a7iii & 85mm f/1.8mm lens. I will be writing the settings for each photo as well – this may well also help you determine if it was a good location or not. After all, if it’s pretty boring/busy/bad lighting and has a ridiculously high ISO, is it worth it?

We started taking photos at 8:45am, early September, in some local woods.

The question to ask as you watch is: will it be a good location?

Location 1

Result

Untitled design (14) Untitled design (14)
DSC00589-2 DSC00589
DSC00574-2 DSC00574

Click below to reveal & view larger

1/400 seconds, f/1.8, ISO 4000

I’m a big fan of ferns, and ferns + backlight are such a fun combination.

Unfortunately in this location, there was no light coming in from above Loki or behind me, and a lot of strong light from behind him. I did use this light to create some light haze/lens flare, and blew out the highlights a bit so I didn’t have to under-expose too much. Under-exposing at such a high ISO already would have meant way more noise/grain when it came to lightening up the image in editing so it was better to try and get Loki closer to a correct exposure. 

The location itself was pretty – just too hard to balance the light and get enough light on Loki’s face – I got Ana to have him looking upward to get more light on his face. It would be even more interesting with some more ferns in the foreground (like in the 2nd set) or going across Loki’s chest to “close in the scene”.

Location 2

Result

Untitled design (14) Untitled design (14)
DSC00711-2 DSC00711
DSC00701-2 DSC00701

Click below to reveal & view larger 

Photo 1: 1/400 seconds, f/1.8, ISO 6400

Photo 2: 1/400 seconds, f/1.8, ISO 4000

Another location in the dark woods, without enough light getting on the face from open sky above or behind. 

I like the location a lot in terms of the mossy log, the ferns, and the few sparkles of backlight… but with an ISO that high, and having to slightly under-expose because of Loki’s white neck and stripe, there’s a lot of detail loss. These photos would be fine for social media once edited up properly, but probably not for anything where you need a lot of detail.


Location 3

Result

Untitled design (14) Untitled design (14)
DSC00850-2 DSC00850

Click below to reveal & view larger & other options

1/400 seconds, f/1.8, ISO 320

This location had a lot of light coming in from the area of open sky above so I was able to keep the ISO down quite low. I also didn’t have to preserve any highlights in the background so I was exposing for Loki’s white area.

The scene itself is quite busy with los of branches and leaves, though I do like the foreground blur effect and the sense of peeking through the leaves at Loki.

In this location, it was quite side-lit so he had to be looking to the left, or, as you’ll see in the photo of him looking straight on, half his face is very shadowed. 

Location 4

Result

Untitled design (14) Untitled design (14)
DSC00716-2 DSC00716

Click below to reveal & view larger & other options

1/400 seconds, f/1.8, ISO 1600

This location is… fine. I don’t like the way the log chops off the back legs.

There’s no foreground in this photo, but if I got down lower he lost all the light in his eyes. In another photo from the series I got some nice foreground from a bush or something to my left so I could have used that.

The sparkly bokeh in the background is nice but it was still a big challenge to balance even that small amount of backlight with the complete lack of light behind me/above us.

Location 5

Result

Untitled design (14) Untitled design (14)
DSC00854 DSC00854-2

Click below to reveal & view larger & other options

1/400 seconds, f/1.8, ISO 320

Oh boy.

Big bright open sky in one corner, facing Loki into the shade so he’s not getting any light on his face…

So making a decision about whether to just blow out that sky, or under expose, or try and find a middle-ground. In this case, this is the middle ground. The sky is still blown out, Loki is still dark. Possibly I could have just blown the sky and background out more to have Loki lighter, but what’s the point? You would end up with a hugely bright background and no way to work with it, a much higher ISO, in a boring location.

Location 6

Result

Untitled design (14) Untitled design (14)
DSC00726-2 DSC00726
DSC00728-2 Backlit photo of a black and white dog.

Click below to reveal & view larger & other options

Photo 1: 1/400 seconds, f/1.8, ISO 3200

Photo 2: 1/400 seconds, f/1.8, ISO 6400

Another super high ISO – similar situations to the other photos so far in terms of lighting conditions.

This one was, perhaps, even more difficult because of the larger gaps between the trees behind Loki and therefore the stronger amount of light. 

This is why I included two photos here. One of them (ISO 3200), I attempt to expose for the highlights (though a couple are still blown out), making Loki very, very under-exposed. Lightening him up has resulted in about as much noise as taking the photo at a higher ISO.

In the ISO 6400 photo, the highlights are much more blown out, but Loki started lighter as well. I could probably fix these highlights areas reasonably easily in Photoshop.

Location 7

Result

Untitled design (14) Untitled design (14)
DSC00832-2 DSC00832

Click below to reveal & view larger & other options

1/400 seconds, f/1.8, ISO 6400

Neither the video nor the exposure I used here really show just how dark this location was. But being under these thick bushes, with no light above or behind meant that it was pretty much totally dark.

 I exposed the image for Loki’s white stripe, meaning his blacks were still quite dark, though not as much as some of the other backlit images where I needed to balance brighter highlights. In this photo, the only highlights I needed to worry about were from him. Possibly I could have gone a little lighter, but his snout has a habit of being deceptively light, so I tend to err on the side of darker rather than lighter, otherwise he ends up with a white blob for a snoot.

The location itself is busy, ugly, and not very exciting 😂 Definitely not one that I would choose for a normal photoshoot. There’s a lot of sticks around and those two thin tree trunks aren’t acting like a frame, they’re just right in the middle of the image. 

There’s no “visual interest”, just a dog lying on some leaves amongst some weird thin tree trunks. 

Location 8

Result

Untitled design (14) Untitled design (14)
DSC00766-2 DSC00766
DSC00769-2 DSC00769-Edit

Click below to reveal & view larger & other options

Image 1: 1/400 seconds, f/1.8, ISO 3200

Image 2: 1/400 seconds, f/1.8 ISO 1600

Similar to the last location, I took two different exposures here: one to try and keep the highlights (ISO 1600 and the darker image) and the other to have Loki brighter but blow out the highlights.

Theoretically in photoshop, I could combine both these exposures particularly over the blown-out highlights section. But I did a full edit on the 2nd, darker image anyway (I really liked his expression) to see how it would edit up with ISO 1600 and being so under-exposed. I don’t love how grey he’s become but this is a pretty common side effect of brightening up an underexposed scene a lot. I would probably be going back and fixing it a bit so he’s not quite so grey.

Important! Just because my camera can do this, doesn’t mean yours can. Learn your camera and work within its capabilities. There’s no point in you shooting underexposed at ISO 1600 if your camera can’t handle it, and you don’t yet have the skills to work with it. 

Location 9

Result

Untitled design (14) Untitled design (14)
DSC00777-2 DSC00777

Click below to reveal & view larger & other options

1/400 seconds, f/1.8, ISO 1600 

This was not a good location. There were wide gaps in the trees behind Loki with a lot of light coming in, and no light behind/above me. 

It was impossible to balance the light. There was no way I could under-expose enough to keep data in the highlights without the image being pure black, but the highlight areas are so large that fixing them in editing would be a huge pain.

And also, the location (at least taken from this distance) is just “meh”. Why is he sitting behind that one random fern? Nobody knows.

Location 10

Result

Untitled design (14) Untitled design (14)
DSC00790-2 DSC00790-Edit

Click below to reveal & view larger & other options

1/400 seconds, f/1.8, ISO 800

Ok I’ll admit, I wasn’t prepared to love this location as much as I ended up loving it. 😂

It was chosen because it has the area of open sky above us and the sun BEHIND me, so I could FINALLY get some light on his face… but I expected the background to be a lot more solid with a lot less bokeh than it has… so I wanted to use it as a “boring background” but it turned out really pretty and became the cover photo for this whole lesson.

Why though? For one, his face is tilted up a bit, getting a nice amount of light from the sky and sun behind me, without there being patchy areas of sun and shadow.

There is blurry foreground detail in the bottom right corner, and a frame of closed in forest blocking the image behind Loki, while he looks into light.

I exposed the image just so a few of the smaller highlights were a little blown out, but that meant I could keep a good amount of light in Loki’s face that wouldn’t be too hard to work with. Those small highlight areas are easy to fix in Photoshop.

It’s not backlit but it was easy enough to bring some warmth to the bokeh in the background.

Location 11

Result

Untitled design (14) Untitled design (14)
DSC00806-2 DSC00806

Click below to reveal & view larger & other options

1/400 seconds, f/1.8, ISO 800

You can’t see it too well from the video, but I chose this spot as another example of getting too much light behind – although in this case it was a bit easier to balance, since there was at least SOME light overhead, though still not enough, and meaning I still had to underexpose it a lot in order to preserve the highlights from the sun. I blocked most of the sun with the tree trunk at least, which meant Loki could get some of that pretty rim light around his ears.

If I was doing this photo for real (and not just the quiz), I would have removed the annoying branch before taking the photo, but since that involved climbing a steep little embankment, I couldn’t be bothered.

Location 12

Result

Untitled design (14) Untitled design (14)
DSC00839-2 DSC00839

Click below to reveal & view larger & other options

1/400 seconds, f/1.8, ISO 320

I found a patch of sun and put him in it.

And actually, it wasn’t quite as awful as I’d expected BUT…. it ONLY worked when he was looking up and into the sunlight, not when he was looking at me, because then the light was hitting the side of his face and throwing the whole other side into shadow.

He was squinting a lot in most of these photos, and I had to do quite some work to fix the highlights and the shadows to even it all out, and even then it’s still a pretty boring location – open, no visual interest, just some leaves on the ground, a solid background, and a lot of sun on him.

Location 13

Result

Untitled design (14) Untitled design (14)
DSC00815-2 DSC00815

Click below to reveal & view larger & other options

1/400 seconds, f/1.8, ISO 800

Surprise surprise, another photo where there isn’t enough light getting on Loki. In this case, there is actually a little gap in the trees above, but the light behind was really quite strong – this resulted in another photo where I would either have to blow out the highlights a bit to ensure he didn’t end up completely black, or lose detail in his fur and risk a ton of noise from lightening it up.

In this photo, a few of the highlights are slightly blown, but I still under exposed quite a lot. So, opting for a kind of middle ground. But since he’s quite far from the camera, there really isn’t a lot of detail on his face now.

While the backlight is pretty, the rest is definitely not ideal, and for me, the bokeh in the background is now very busy, which could be fixed in editing a bit, or used to get some interesting effects, but it’s definitely a lot!

Light Challenge!

As photographers, our job is all about light

Without understanding how light works, we are severely limited in the kinds of photos we can create, both behind the camera, and in editing. So, this month’s challenge and mini-challenges are going to be all about light. 

There are of course all the lessons on light in both the “Improve” course if you’re new to photography, or the “Next Level” course if you want to take your understanding a bit further. 

In this lesson, to help you with the challenge, I’m going to also cover some smaller topics relating to light and how we use it. 

The challenge this month will be to Step outside your comfort zone when using light.

This could be taken in so many directions! For example:

  • you’ve just recently joined, had a look through the light lessons, and realised that full sun isn’t the best lighting for our work… but aren’t sure about shooting in overcast conditions. That could be your challenge!
  • you’ve been here a while but haven’t been brave enough to try backlight. Now’s your chance!
  • you’ve got the basics down but want to start getting more creative. Why not try using side light in a creative way?
  • you’re pretty comfortable with lighting quality, direction, and temperature. How about playing with some lens flare? Or off-camera lighting? Or creative shapes and shadows?
  • you could play with the idea of the absence of light…
  • or how light in small areas can make really interesting effects, when there’s a lack of light elsewhere.
  • you could even really focus on the editing side of things, considering the shape of light, the direction, the perception of light. What do you have to do to edit your photo so the light looks believable (or not…? If that’s what you’re going for)

The important thing to remember with this work is that we still want to create a photo that showcases our subject/tells a story/shows something about their personality. Don’t go just taking a super dark, underexposed photo to showcase the absence of light… for no reason. 😂

These challenges are to give you a way to have a focus for the month, to step out of your comfort zone, and to try new things.

Important Things to Consider

  1. Get enough light on the dog's face

Whether you’re working with shade, overcast conditions, or (especially!) backlight, you need to make sure there is a good amount of ambient light on the dog’s face.

While it is possible to edit photos where the face was shadowed, this becomes much more difficult if:

  • There was a lot of light behind and you had to underexpose a lot, especially if your camera’s dynamic range isn’t that good
  • You’re photographing black dogs
  • There is a bright area behind the dog

Just in general, you will find it more of a challenge to work on a face/subject where the light is dull or lacking, and in my opinion, the results are never quite as nice as when there was some ambient light from the open sky or a gap between the trees, as when it’s covered-over canopy. To me, there’s always something a bit “off” about the colours and details in an edit where the face just wasn’t getting enough ambient light to begin with. I find them much more difficult to edit as well.


2. Be careful of unintentional side light

Some side light is easy. You’re standing there, the sun is hitting the dog from the side, and you’re asking yourself: why am I taking photos in the sun? and also, how can I make half my dog’s face less shadowed?

Now, not all side light is bad. In fact it can make some really interesting effects if used properly, or if you’re aware of it and making sure to point the dog’s face toward the light… but one of the trickiest things is when you’re unaware that the light direction is side light. 

You can see some examples of this in the side light lesson (here) where the ambient light was very soft – not strong enough to even cast a shadow – but because of where the dog was positioned, there was no light at all on one side of them.

Here are two photos with the dog looking in a slightly different direction. I have edited them very slightly in Lightroom, not favouring one or the other.

While both have a “dark side of the face” there is one where the light falloff is quite pretty, as it brushes the top of the face and the eye, before the fall-off, where are the other one has the whole half side completely in shadow. 

One of these photos would be significantly easier to edit, because you could use the natural shape, direction and light that already exists, to “shape the light” further and really give a spotlight impression. The other would require a lot of work to “even up” the light on the face in order for it to feel balanced and make sense.

Here, I’ve added some lines to show the light falloff (from where the light is touching, to where it fades to shadow). Can you spot the light falloff in the original images?

Where would you want to position yourself (or the dog) if you’d wanted to use this location but have the dog looking directly at the camera?

Why was one side of the face dark?

Being aware of even these very subtle variations in light on location can help you create better photos and save you some headache in editing, can help you shape the light more naturally, and tell more dynamic stories.

Sometimes, it’s a really good idea to counteract some side light with a reflector if you have one. Here are two photos, straight out of camera. The photo on the left has a reflector to camera right, bouncing light onto the side of Loki’s face closest to the ground.

The photo on the left has no reflector. Even that tiny tiny bit of extra light made this photo much easier to work with, saved some detail in the very dark areas of his coat, and got a tiny bit of light in his eye – enough for a small catchlight! 

3. Understand how light works to edit more naturally

Developing a solid understanding of the way light works is really important when it comes to editing naturally. 

When should something be lightened up? When should it be shadowed?

This depends on a few things: the location, the natural light in the situation, and how good at editing you are 😉

This concept is one of the main issues I have when I see people putting fake sun haze or fake backlight in their images… especially when the original light direction was very obvious (I’ve seen photos with shadows cast from the midday sun to the left… and a fake sun behind the dog), or they don’t consider how light works.

When you’re editing your images and you want to manipulate the perception of light in some way (and I do this very often, particularly when the dog is looking to one side), ask yourself:

  • where was the light source? (this could be everywhere, or it could be directional) 
  • was there a secondary light source (eg., in backlit images there are clearly going to be 2 light sources – the sun, and the ambient light)
  • where do I want to show the light is coming from?
  • does this make sense with the rest of the image? (eg., is the dog going to be looking into light? Does it mean giving my viewer a path out of my image?)
  • what will be getting touched by the light if it’s coming from there? What will be in shadow? Consider elements in your scene like tree-trunks, roots, stumps, leaves, grasses, etc.

Consider this before and after. In the bfore image, there was no real lighting direction, at all. 

This is a rather extreme edit for me, and I wanted to give the impression of him standing in a shaft of soft daylight that had broken through a gap in the trees.

So, I needed to consider:

  • His standing direction (it works! His face is already 1/2 lit by ambient light from above)
  • what elements in the scene would be getting hit by that shaft of light or any “light leakage” from where the light was fading out, eg.,
    • how much of his stomach would be shadowed?
    • how about his shoulder camera-right? 
    • logs on the ground?
    • tree trunk in the background?
    • where would the light stop on the ground in front of him?
    • how would he cast a shadow, and where would the light his again behind him, if at all?

Here’s another very extreme example. But in this image I had to consider:

  • what would those bokeh spots really look like if it was golden hour? 
    • colour?
    • strength of light actually shining
  • if this was backlit, what parts of him would be receiving that light? 
    • chest fur
    • face
    • sides of the legs camera right
    • side of the log
  • which parts should be in shadow? (the white neck is still bothering me, it’s too bright)
  • how to show the light shimmering through those leaves?
  • how bright would the rest of the background or scene be? (probably a bit brighter than this, with those seedy grasses sparkling in the light, but I was going for drama. So that was a conscious decision to really darken the rest of it)
  • how can I add rim-light to his fur to make him glow?

I run through a checklist like this with basically every photo I create. 

Light will always fall-off, or fade, from where it is hitting. The rate and strength at which it does this depends on a lot of scientific principles that we’re not going to go into here, but it comes down to: the strength of the light, and the distance of the light source. 

This is why, often when you start editing to “shape the light more” I may tell you to soften or blend the edges of your “light tunnel” – because light scatters as it gets further from its source. It doesn’t travel in a direct beam (unless its a laser). It hits things as it journeys to its destination so gets dispersed. In the dark photo of Journey above, there is a very clear “light tunnel” because I wanted it to be a shaft of light. Even then, I’ve interrupted the journey of the light here and there to make it more natural. The edges of those effects that I’ve edited in are usually broken up, or removed, or added elsewhere, as needed.

4. Telling your stories with light

There is so much that can change in an image based on how much or how little visible light is in the scene. More light tends to be brighter, airier, happier photos. Photos without visible light? Darker, more pensive, more mysterious, more secretive. 


4. Getting creative with light

If you are somebody at the very beginning of your photography journey, it is enough for you to focus right now on getting soft, ambient light on your dog, and paying close attention to the light direction, quality and temperature.

If you’ve been doing this a while, then I challenge you to see how you can creatively use light.

As pet photographers, I feel like the majority of images I see are either: lit with ambient light, and some effects added… or lit with backlight, and some effects added. We are not, in general, an overly experimental group.

Now, this does not mean that you should rush out and try and take experimental photos in the full sun. But I do think that there is a lot more we could be doing with light. I’ve listed a few things you could consider at the very beginning of this lesson. I also had great fun recently experimenting by using found objects – bits of plastic, crystals and so on, and using them in the photos. The way the light is bent, changed, moved, or altered by them was so fun to play with – even if they aren’t received as well as my “normal” stuff on social media (hence keeping them mostly to myself. 

Some examples below – a lot of them are totally unedited, or were exepriments in using different materials in my photos. 🙂

Behind the Scenes Livestream: Join us on a Photoshoot!

All things going to plan (weather and internet), we will be meeting up with Natascha and her two beautiful shelties New and Nami for a photoshoot in some local woods, to take you Behind the Scenes.

This is your chance to ask about locations – what I’m looking for, what I’m avoiding, camera settings for each place, how I ask Natascha to pose her dogs (and why), how I move about to find the angles I want, how I get the dogs’ attention and more. 

The woods we’ll be going to have plenty of mossy logs, not much bokeh light in the background (sad) and a lot of tall grasses and general summer greenery that I’ll be trying to avoid. I went there previously to take some test shots with my dogs to make sure there would be enough variety and some good places to get us started, but once we get going the process should flow. 

Unfortunately the internet was not very strong, so it lags quite a bit and is very pixelated. It also didn’t record the whole first part of the shoot (about 45 minutes 😭). I still think the idea has potential, if we can improve the internet connection and use some kind of microphone on me or something. But I hope it’s useful in any case. I will post the edited/unedited photos from the shoot below – there’s 655 total so I’ll be culling and choosing the best ones when I have some time. 

Behind the Scenes: Limited Location

On this day I set myself a challenge: To get a variety of photos within a very small area, without any kind of nice/magical elements, eg., ferns, moss and so on, that I normally use.

Since some people struggle to find locations for photos when there are only weeds, nettles or brambles, I looked for a location that was exactly this: weeds and nettles. It was raining, so the weather wasn’t exciting, although we were lucky to get the sun coming through at one stage, though it was a bit early in the afternoon to be true golden hour.

I also challenged myself to get as much variety in this one very small location as I could – that is, within about a 5m radius, not picking up the camera bag to go somewhere else (though I did pick it up once or twice to get it out of the shot!) just use what was immediately in this small area.

These photos might  not be “award winning” or anything exceptionally exciting, but I do think that for a very fast photoshoot (the first photo was taken at 6:09pm, the last one was taken at 6:30pm, and there was about 5 mins in the middle of experimenting with a slow shutter speed and Loki tilting his head), in a boring location that I’d never been to before, in the rain, without moving to any other location, there is a good variety of photos here, from about 200,  I edited and included 9 in the video. 


The full set of images

Glow Up!

August is here! And that means it’s time for another challenge. As it’s August, some LC students have been with me for 6 whole months now, so it seems like a perfect time to celebrate your achievements, growth and learning. And don’t worry – if you joined in May, you’ll still have plenty to celebrate!

There are two options for this month’s challenge, depending on the amount of time you have/weather conditions etc.

Option 1: Re-edit an old photo. 

Find a photo you took a while ago – it doesn’t really matter when – and give it a new lease on life! Simple as that.

When I was looking through my old photos this morning to find a few to re-edit as examples, these are the ones I was most drawn to:

  • Were technically pretty sound (eg., in focus, no massive blown out highlights, decent composition etc) or could be fixed well enough
  • I could see what I was trying to do with the editing and the story, but I didn’t have the skills yet/my style wasn’t refined enough yet. 
  • they felt like they would be “fun” to redo in a way that could really help them shine. 

This option is easiest because you can just use whatever photos you have already. The point of this challenge isn’t just to “slap a new layer of paint” on an old photo, but to really find one that you can help “shine” – thinking about everything you know now about photography – and then really work your style, the mood, the story into how you edit it.

Don’t beat yourself up if you’re looking through thinking: “oh no! Everything is out of focus/blown out/crazy settings” or whatever. Option 2 might be better for you, or you can check out the Image SOS video and see if some of the tricks used in that lesson will help you!

(A note on style: have a look at how you were editing. For me, heaps of elements of my own style were already showing through, I just didn’t know how to use them or not make them overwhelming yet.)

Option 2: Take a new photo in the same location

This one requires you to go back to a location, and with your new-found knowledge of camera settings, getting the photo in focus and correctly exposed, composition and so on, taking and editing a new photo. 

This is a great option if you have a favourite local spot that you felt you “didn’t do justice to” or want to try again at. It would be great to be able to see that the location is the same, for example if you use an interesting tree trunk, including that tree trunk again, even if it’s from a different angle or perspective. The photos of Luke the Aussie as our banner for this challenge were taken at more or less the same heather field a year apart.

This is a great option if you’re really struggling to find an older photo that you want to work on.

Challenge Rules & Things to Keep In Mind

Keep in mind that whatever you submit to the challenge will be used as your critique for the month, it would be great if you submitted both images (the old one and the new one) so I can see if you updated an older photo, or took a completely new one. That way my feedback won’t be about camera settings if the photo was taken 6 months ago before you knew what you were doing!

All the other normal Critique guidelines apply:

Instructions:

  • Upload one high-resolution jpeg to the google drive. *You can upload your pre-challenge photo too but it doesn’t have to be high-res*
    • Upload as .jpeg. Do not upload other file formats (docx etc). I will not be chasing people up if you’ve uploaded the wrong file type. 
    • You do NOT need to include the settings in the file name. This often changes the file format (because it reads the aperture number as the file format, so tries to make it a .8 file type) so it cannot be imported into Lightroom. I will not be chasing people up if their file cannot be imported to Lightroom or mucking around trying to fix this problem.
  • Make sure EXIF data is included (this tells me the camera and lens that was used, and the settings of the photo). Lightroom (and PS I suspect) includes this by default when exporting unless you’ve changed some settings.
    • I repeat, you do not need to attach the data anywhere additionally. Click here to see what the LR Export settings look like. If you leave it on “All Metadata”, my LR will be able to read the settings of your image.
    • When exporting using Photoshop, go to Export > Save for Web, and make sure that in the “Include Metadata” section, “All” is selected. 
    • If you are using a different software, either do a quick google search for “how to export with metadata using (your software)”, or tell me the software you use and I will do a google search. 
  • Remove all watermarks, I want this to be anonymous
 In regards to the challenge. You will not be judged on your previous photo. Instead, I will be looking for things like:
  •  How well the editing suits the photo / technical elements of editing (is it a good exposure etc)
  • Impact / story / mood / wow factor
  • Growth and improvement between the two photos.

Since this is a bit of a different challenge especially if you’re editing an old photo, the judging for the challenge will need to be a little different than normal, since your photos may be less than ideally exposed/focused etc and it isn’t fair to judge them purely on technicality because of this. 

However I do expect people who choose option 2 (new photo, same location) to do their best with the technical aspects of the photo.

If you don’t want to enter the challenge but still want some feedback on a specific photo, that’s totally fine too! Just upload a single photo and I’ll know that it’s by itself and isn’t part of the challenge.

The winner will receive either one month for free in the LC, or a portfolio review with me!

Some examples

Here are some examples of either re-editing old images, or taking photos in the same location. Since I’m moving around so much this is especially difficult for me, so I don’t have many like that! 😅 I might edit a few more over the next couple of weeks and add them here!

Veronika Shandor: Composites, from Concept to Creation

Perfect Personality


This challenge is about showing your subject’s personality. Our job as photographers is not only about capturing beautiful images that captivate our audience, but about telling a story, or showing our audience something about the subject. I see so many photos of dogs sitting nicely, looking at the camera but I always feel like I want to know more about them. This challenge aims to push you to think deeper about ways you can show who your subject is, whether its your own dog, or a client’s dog. 

The challenge is:

Capture ONE photo that shows us who your subject is.

You can upload it to the “Challenge” topic of Inspawration Connect

The photo should follow the general principles of a photo entered in a competition:

  • it should be impactful, creative, have a mood
  • technically correct (white balance, lighting, composition, focus, etc)
  • be edited in a way that complements the photo and enhances it

Now, obviously no photo is going to show the entire spectrum of your dog’s personality – if they’re anything like my boys, they can be polar opposites, from sweet and cuddly, to intense and crazed, to silly and goofy. Whichever side of your personality you choose to show is up to you – it might be what you see most often of your dog and is therefore clearly, and fundamentally “them”…

or it might be a moment you captured where they showed the silly side, or the serious side, and it was unexpected and delightful. There’s no “right or wrong” answer, but you should aim to use a few elements in order to paint a more dynamic picture of who your subject is. I would say the most important elements in this photo will be:

  • light
  • location
  • expression
  • pose
  • editing
Have a read of the guide below for some tips and ideas. Most of this information is also in the “Next Level” course.

Light

The amount of “visible light” in your photo can affect the mood. The serious intensity of a border collie will show through in a photo without a lot of visible light… whereas a happy goofy puppy will show that happy side in an image that is lighter and brighter.  This doesn’t mean you need to take photos in full sun in order to show that your dog is happy and funny, but thinking about the direction and quality of the light, or how much light is showing in the background can really change the feeling of the photo. Have a look below for some examples of different moods created using more or less light. The more “serious” images are on the left, while the brighter or more wistful or hopeful images are on the right.

Location/Scene

Closely tied in with light in a lot of ways, the location you choose for the photos can have a big impact on their mood and what you show/say about your subject.

Fields of wild-flowers, or warm golden barley is going to have a different impact than deep green mossy woods. You can see this very clearly in the above examples as well. Of course you could have a sweet carefree dog in the mossy woods but you’re going to have to work with the other elements in your photo to make sure everything is cohesive and you’re saying what you want to say about your subject. Something as simple as the location being more open ( a field) or closed (the woods) can really add a mood to the image.

The way you use your location too, can have an impact on the feeling of the image. Close up photos – either head and shoulders shots, or photos with the chin down, tend to be more intimate and confined. Using frames, or peeking through some blurry foreground can also add to the effect of “spying” on your subject. Is your dog aloof and independent? If so, positioning him further from the camera, and shooting through some foreground layer may product the effect of him being “watched” by the photographer as he goes about his business, rather than him “being a very good boy” and looking at the camera for photos. 

If he is posed standing or lying on a log, consider how this feels in terms of the story you’re telling. Most dogs “in the wild” wouldn’t naturally pose like this – so it may not suit the personality you’re trying to convey. A Very Good Boi who does what he’s told and loves to work and do tricks, on the other hand, may suit this kind of more “posed” feeling in his environment. For example, when I ask Loki to hold a leaf or some flowers in his mouth, or wear a flower crown or something, you can see he’s trying extremely hard to be the goodest boy. And this is a big part of his personality, and tends to show him as very eager and very endearing. Journey on the other hand looks like he’s being forced against his will to “perform”, so we don’t have many photos like that as it doesn’t show his true personality (which is to be the goodest boy! Just not in this situation). 

Expression

Expression can have a huge impact on how we perceive your subject in the photo.

In simple terms, closed mouths tend to be more serious and intense, open mouths tend to be relaxed. But even the direction the dog is looking (whether at the camera, extremely to one side, or at a 45 degree angle) can all change the mood of the photo. I’m sure you can take note of Loki’s expressions above and what we learn about him, as well as from the photos in the first gallery.

Have a look at the lessons on expression as well for more information.

Pose

Pose is another big factor in how we perceive your dog. 

Sitting poses are safe and simple. Good dogs sit very nicely and properly (see Loki in the gallery above). Relaxed easy-going dogs might lie down, or dogs with an “old soul” or who are just a bit bored of the photoshoot might lie down with their chin down. Dogs who are interested in the world or who are on the go might stand up and be ready for action. How much tension is in their pose also really changes the story and what you’re saying about the dog. Take the photo of Loki sitting on the beach in the gallery below, compared to the snowy sitting photo of Loki above. One is full of tension, the other is much more relaxed. Both show different elements of his personality.

Making conscious choices about the poses you choose for your subject will help to show more of their story and their personality. 

One other big thing to consider is how posed you want to make your photo. Candid photos can be amazing at capturing a moment in a dog’s personality. Whether they’re being unexpectedly naughty, or if there is a moment of stillness in their chaos. Look out for and be prepared for candid moments, especially if you have a dog who either doesn’t like posing, or maybe likes it too much, so just becomes ” a model” rather than the more genuine version of themselves. This isn’t to say you need photos of them racing about. But sometimes sniffing the wind or a flower, watching a bee, looking at some birds, or pulling up some moss can create a more complete picture and tell a stronger story than a posed head-and-shoulders photo of your dog in some flowers, looking directly at the camera.

The photos above had begun mostly as posed photos of some kind, but then the dog did something  in that moment that make it something else, or showed something else. For example, Loki dragging a stick out of the snow, his face devilish and naughty, was an unexpected moment of naughtiness from him.

Norman in the sun, just closing his eyes for a second, looks like he is really enjoying this evening sunshine streaming in from behind.

Loki on the beach, although sitting there, is leaning forward, ready to fetch his toy, everything alert and intense and focused. He isn’t just sitting, there’s something else going on, another story being told. 

Editing

Lastly, we need to edit our photo so all these elements come together to tell the story we’re trying to tell. There’s no point taking a photo with a lot of light and brightness, in a field of wildflowers, with a happy expression on the dog, to then try and edit it to be dark and moody. Similarly, if we’ve taken a photo of a pensive dog in the mossy woods, it will be difficult to edit it to be bright and light and airy.

Editing decisions like how warm or cool to make the photo can be based both on the ambient temperature of the light, but also on the mood you’re creating. Moodier photos of serious, pensive dogs might be cooler than more hopeful, light-hearted photos. The richness, saturation and tones of the colours in your image can also help contribute to the mood. Less saturated photos will usually be a bit moodier/gloomier than photos with stronger/richer colours. 

The main thing to remember is to use your editing to tie all the other elements of your photo together, to make it cohesive. Personally I try and keep most of the elements of my photos quite natural, for example light haze is added when there was naturally light behind the dog, darkness is added where it makes sense for parts of the image to be dark, and so on. 

15 Minute Tutorial: Face Contouring

I had some questions about contouring/dodging and burning the face, knowing where to dodge/where to burn.

Below is a quick video explanation of my method of learning how to do it, which should be helpful even if you can’t see the highlights and shadows on the dog’s face due to their fur or coat colours.

If you are editing a dog with an especially fluffy face, where the fluff itself is making the face of the shape, then it’s a bit trickier to follow the bones, and better to follow the natural highlights and shadows. Imagine you’re looking at the face, and/or shining a light from above. Where would the light be hitting? What is OUTWARDS that should be lighter, and what would be in shadow, or going INWARDS?