
How to change the colours in a photo is one of my most frequently asked questions. Here, we’ll break down a few methods you can try in Lightroom and in Photoshop, to alter the colours in your images, whether they were taken on phone, or camera.
This article does deal with adjustment layers and masking, so make sure you’ve brushed up on your photoshop basics before beginning. If you’re wanting to learn your way around Photoshop, why not get in touch for a lesson?
Why Change Colours?
Many people seem to want to change the colours of an image simply because they can.
Sometimes, just changing the colour in a photo can look forced, unnatural, or it can be distracting from the dog. So before you dive into the tools below, have a think about why you’re changing the colours, and if it will actually help your image to do extreme colour changes.
What are some reasons it might be a good idea to work on the colours in your image? For example, making yellow-greens a more rich green, or greeny-yellows a more burnt brown?
Analogous Colours (Similar Colours)
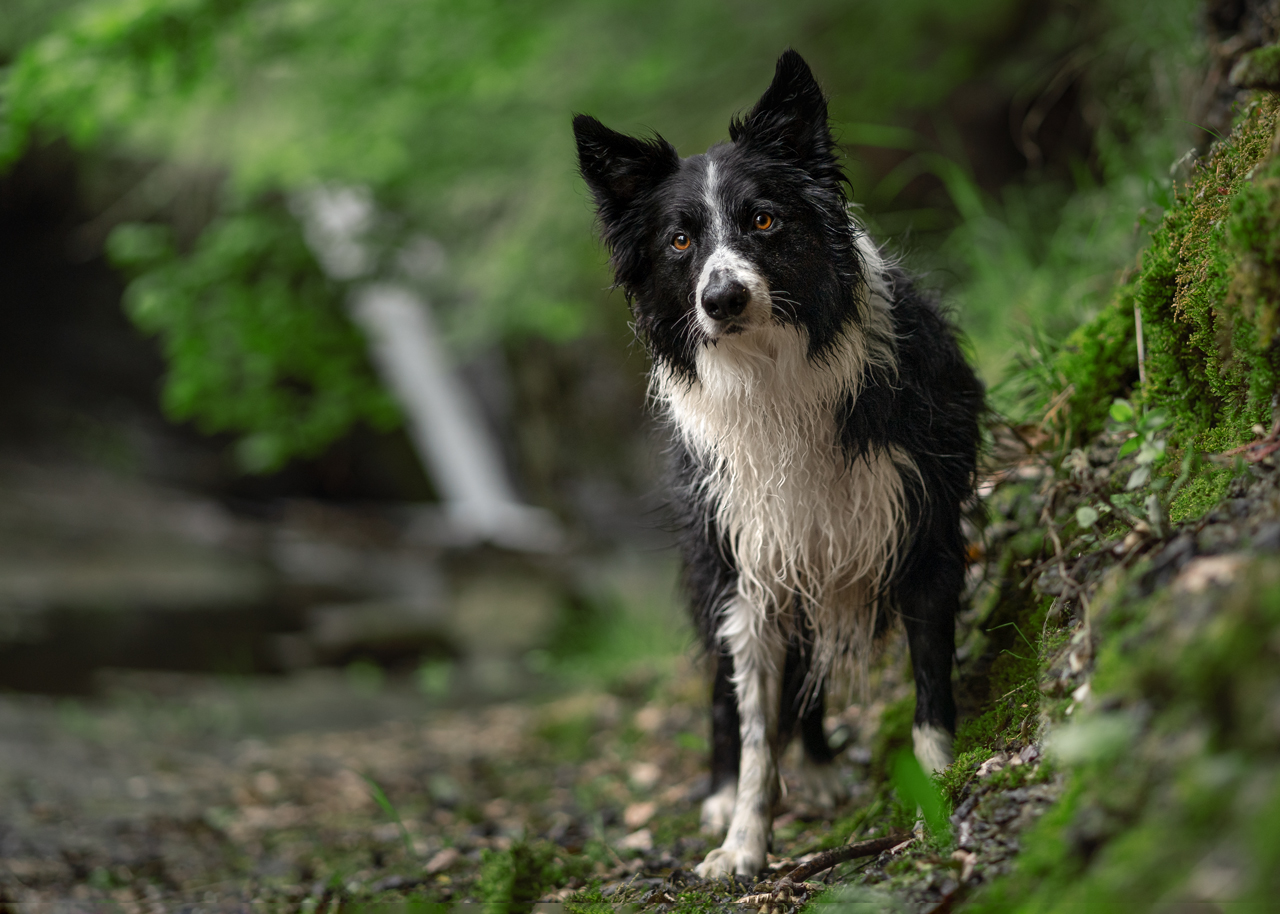
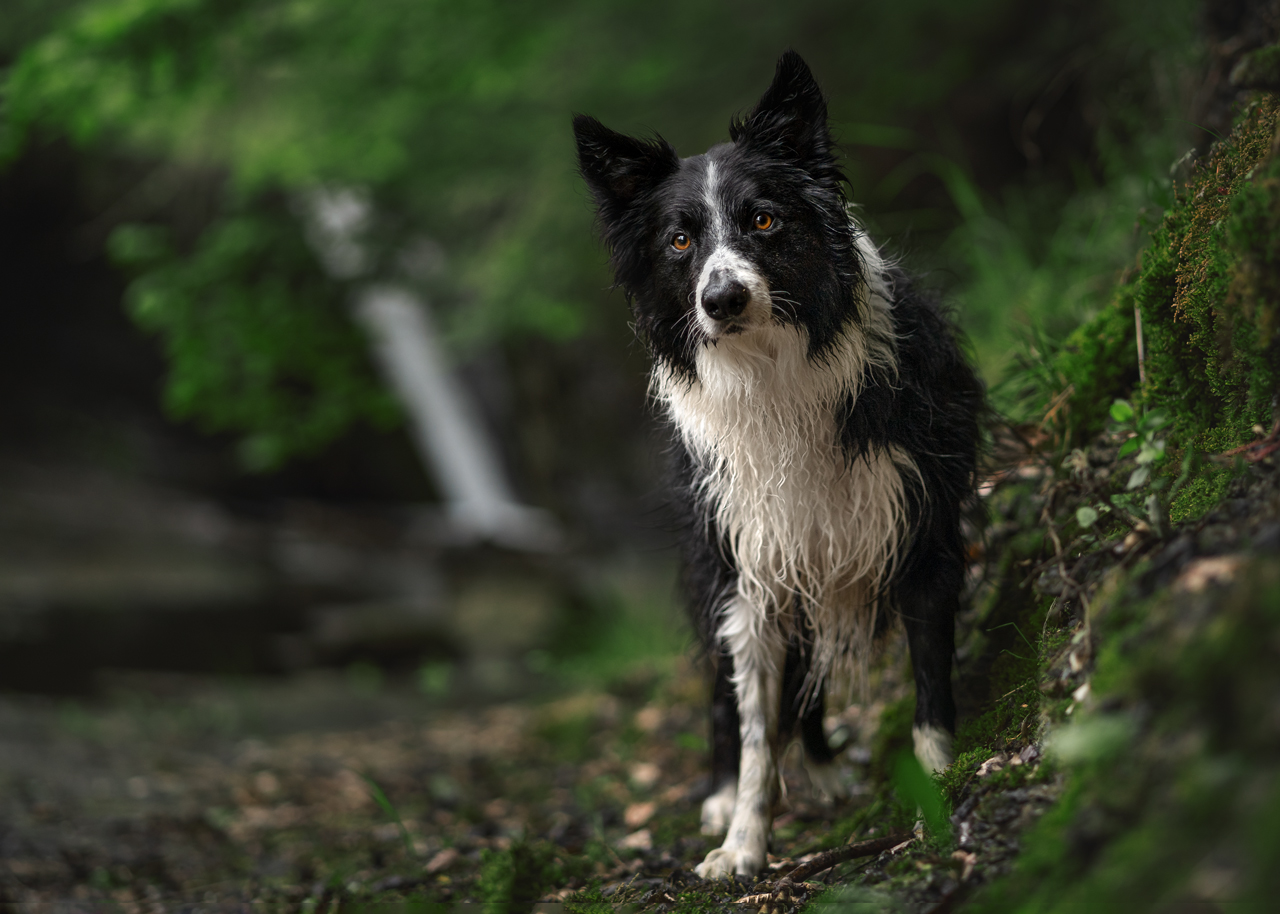
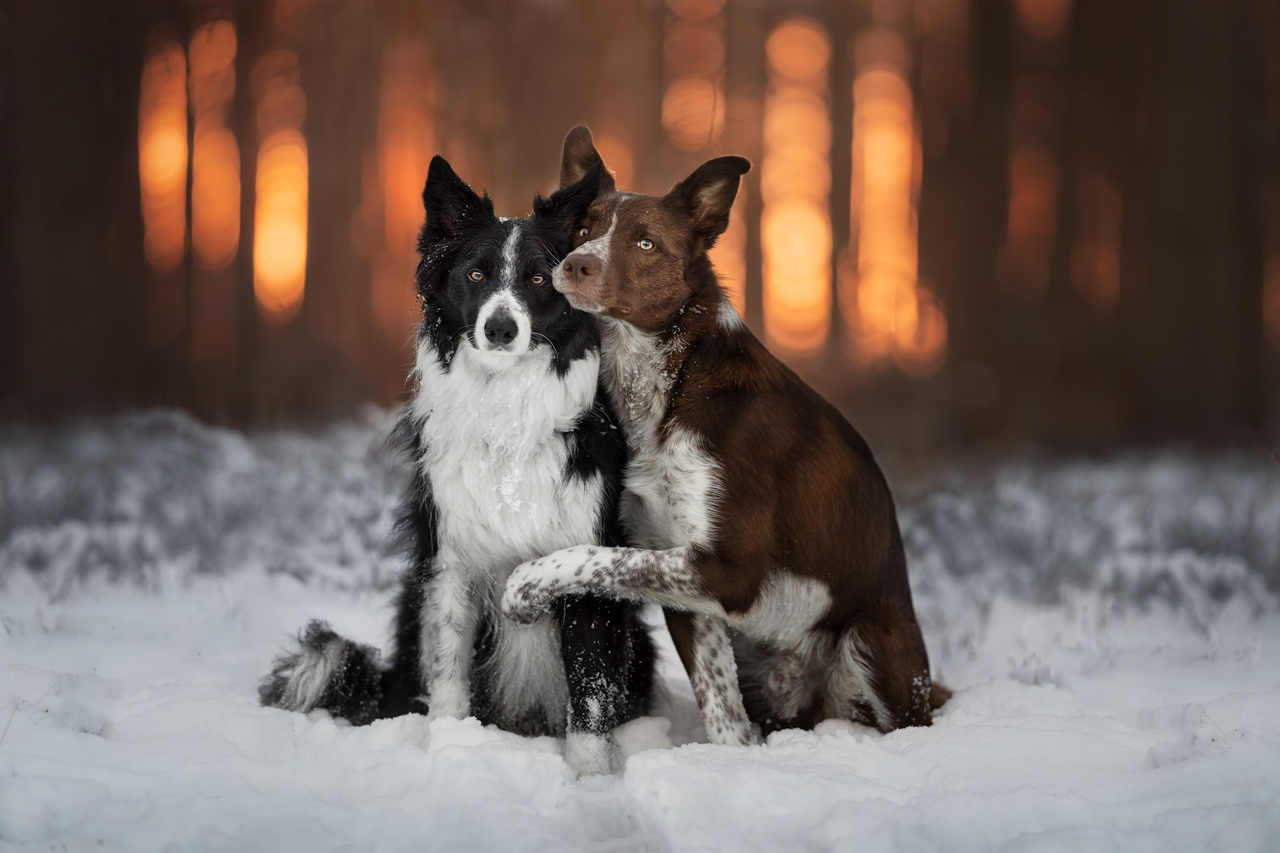
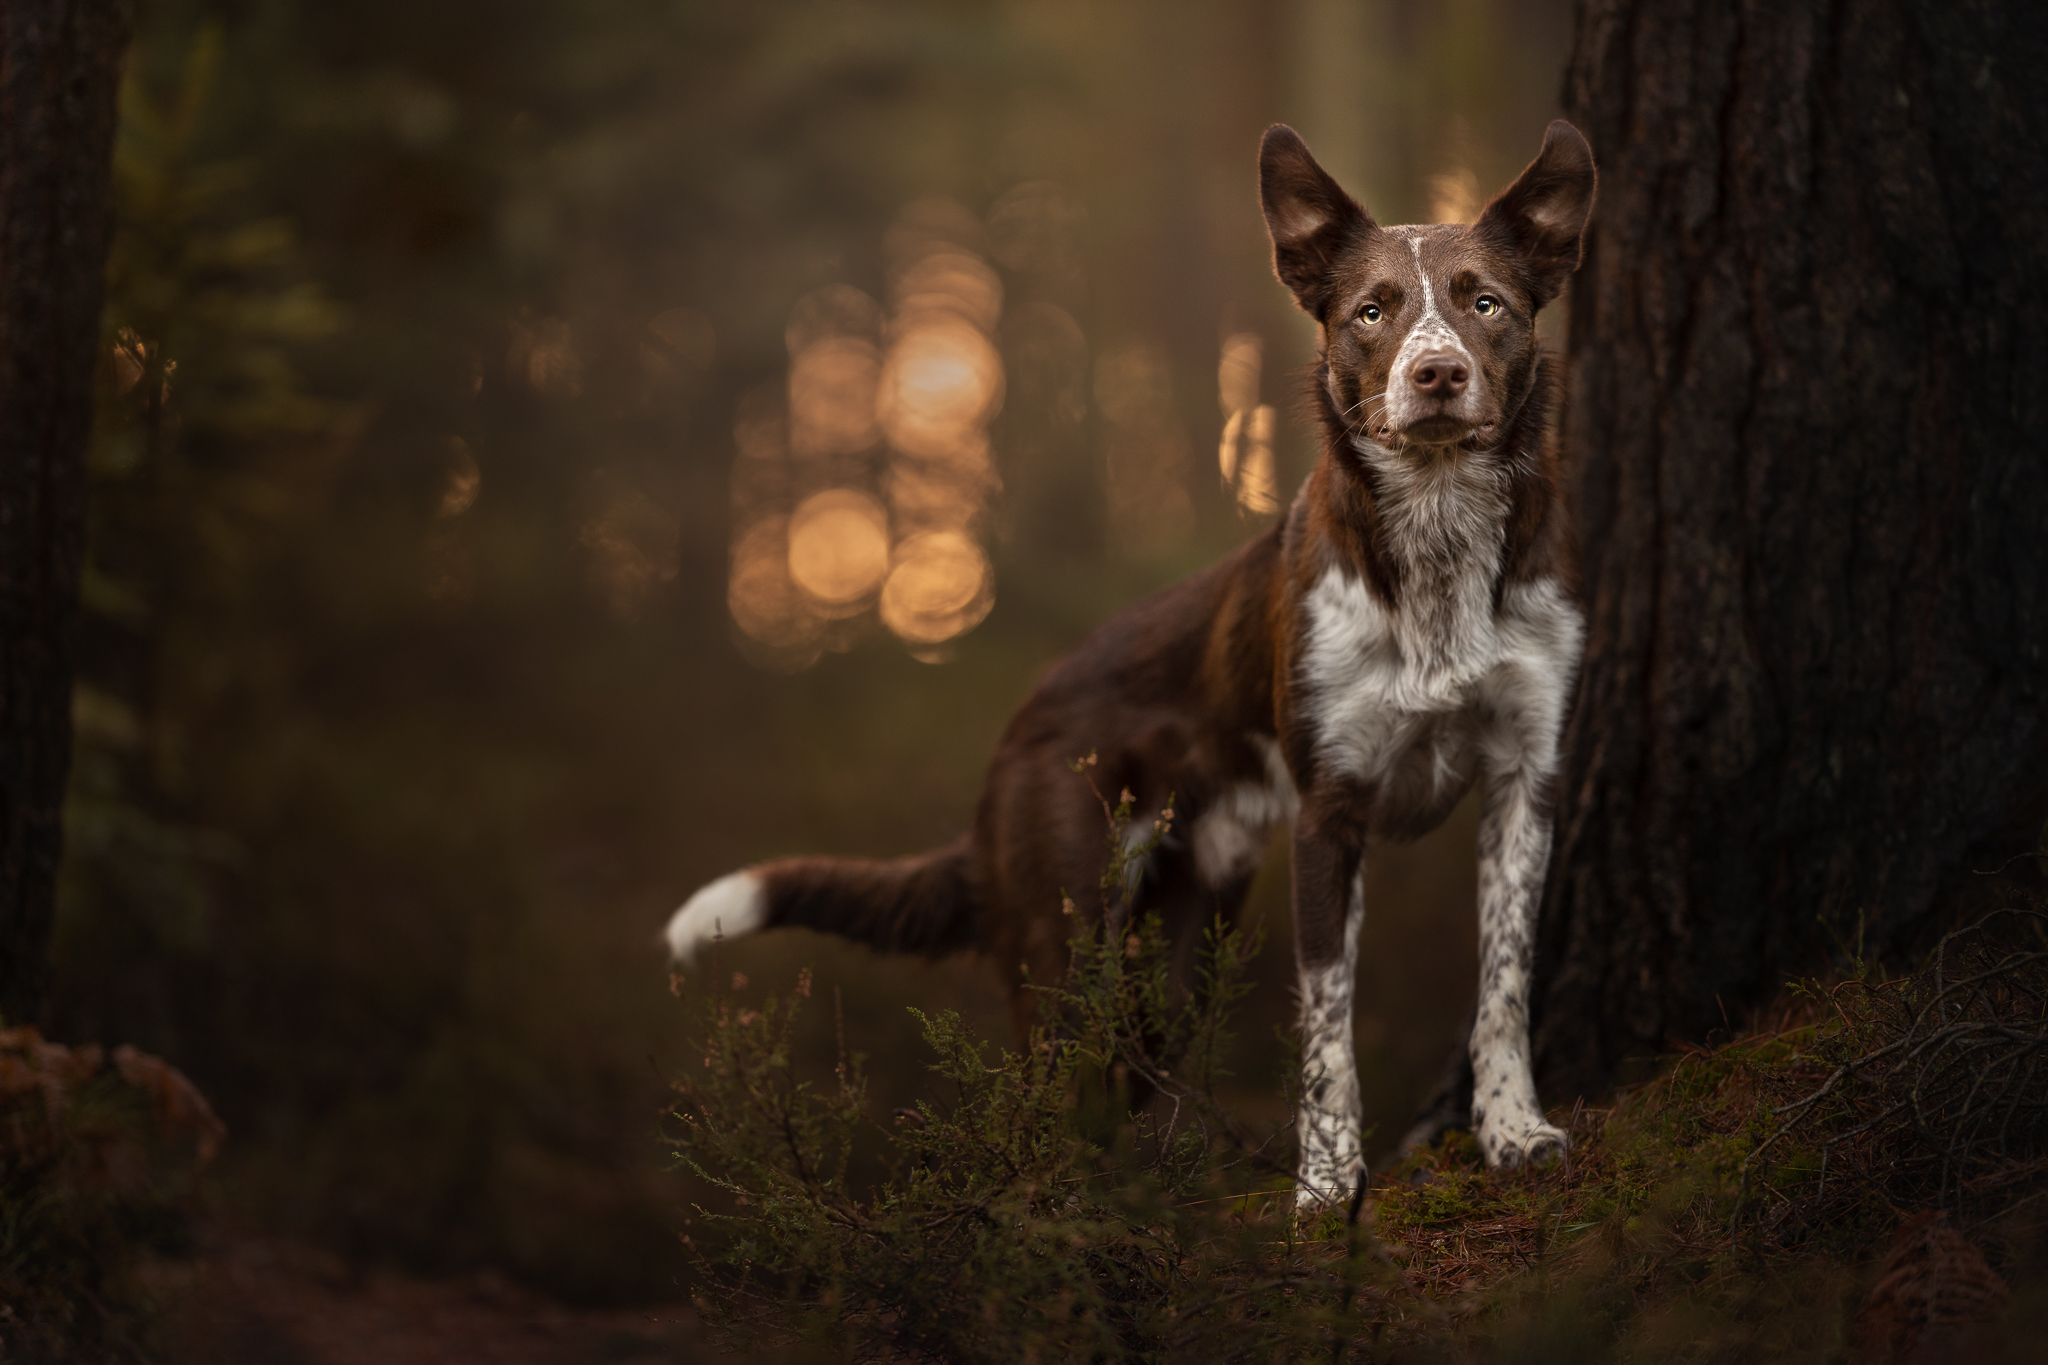
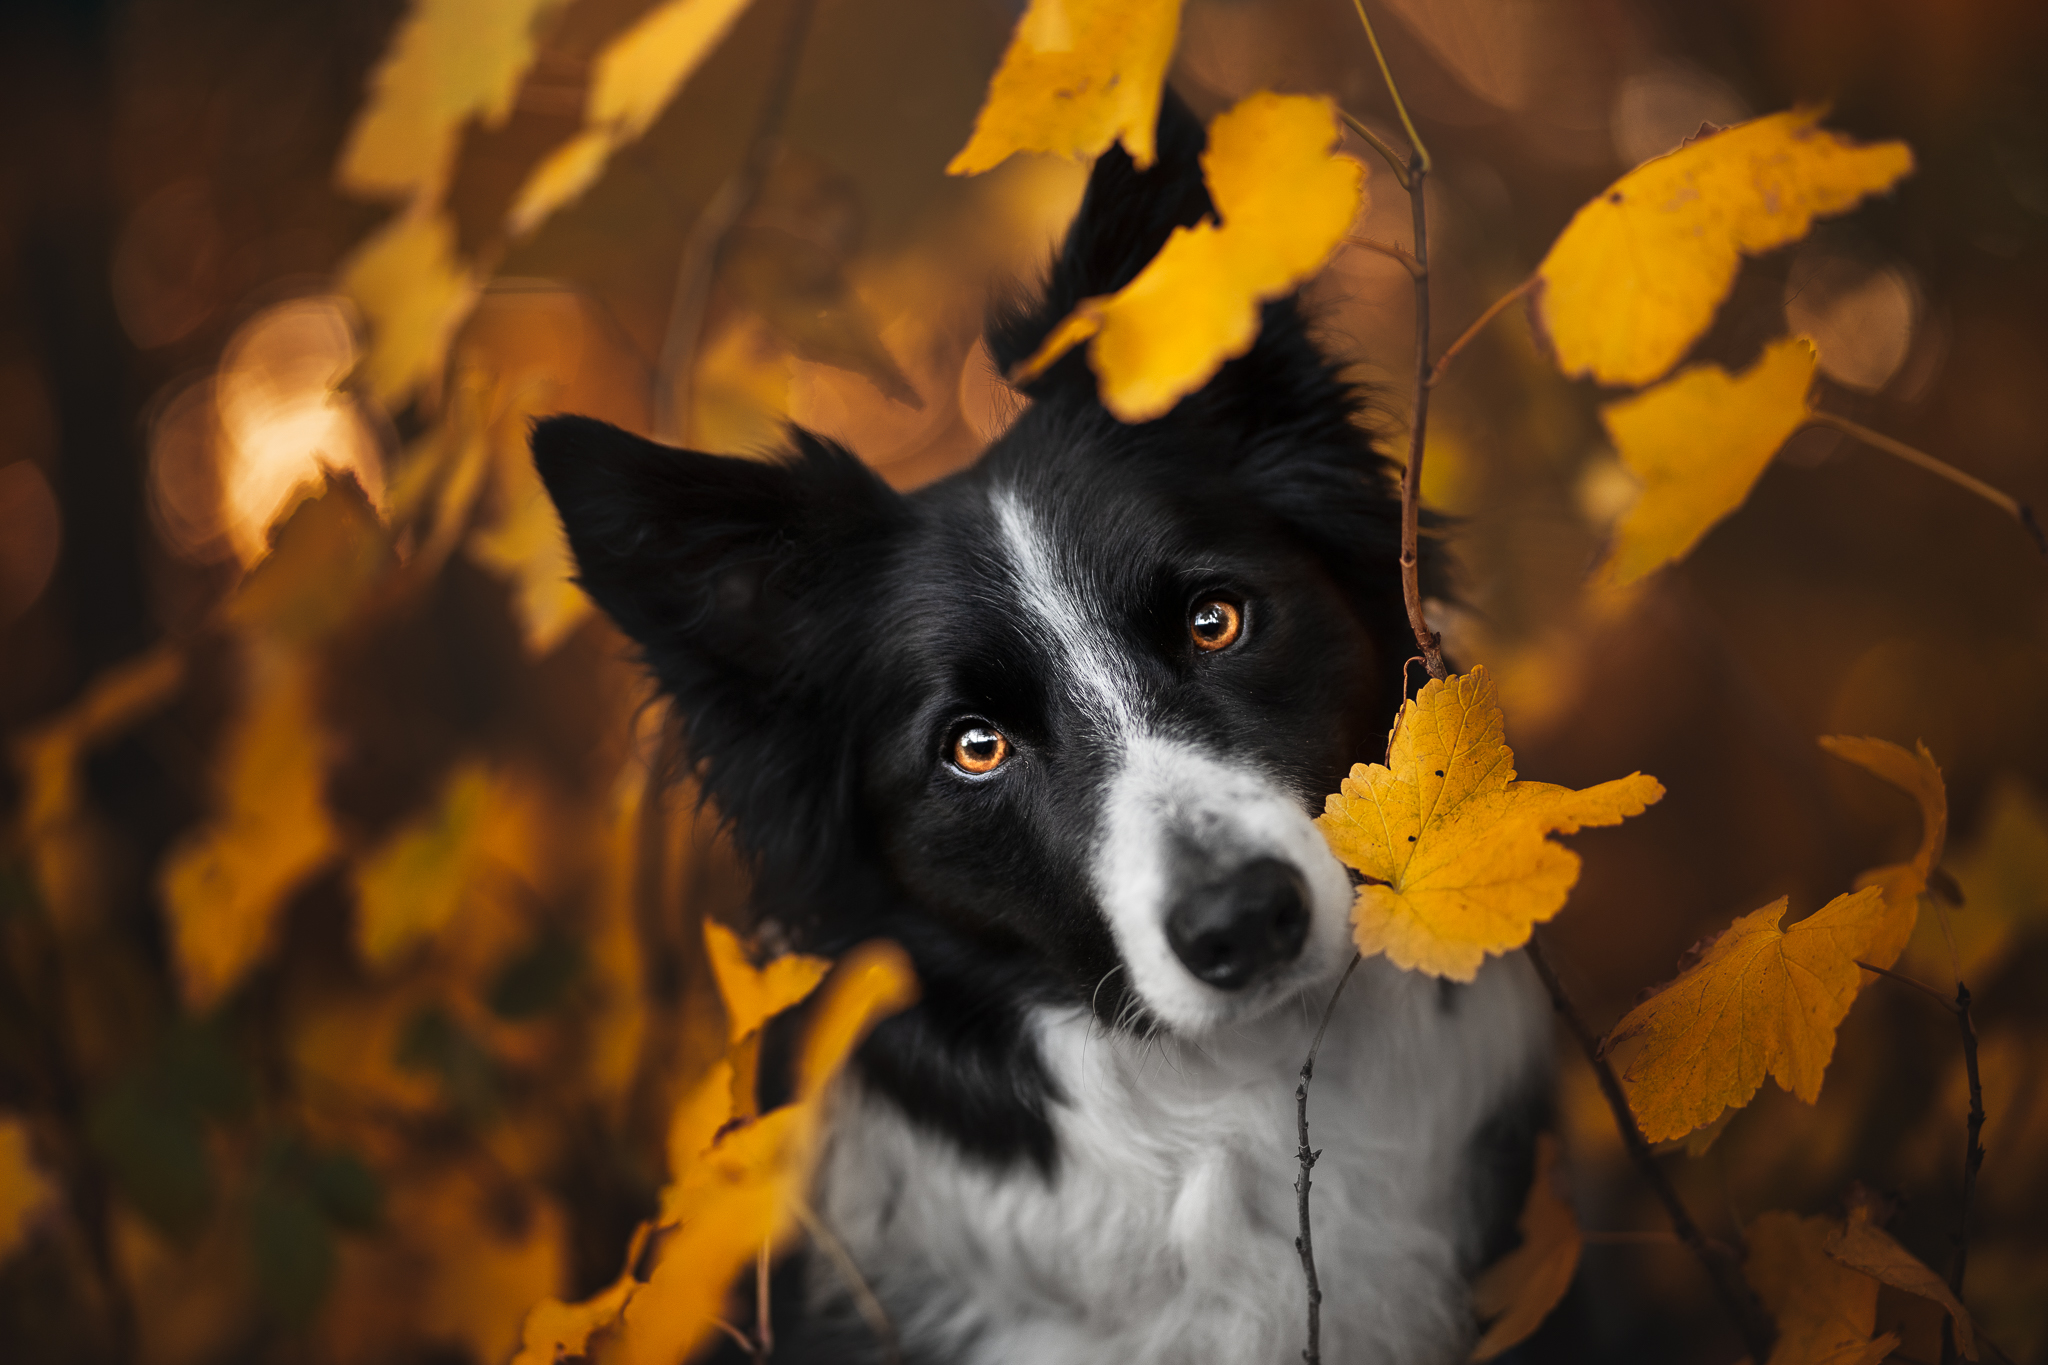
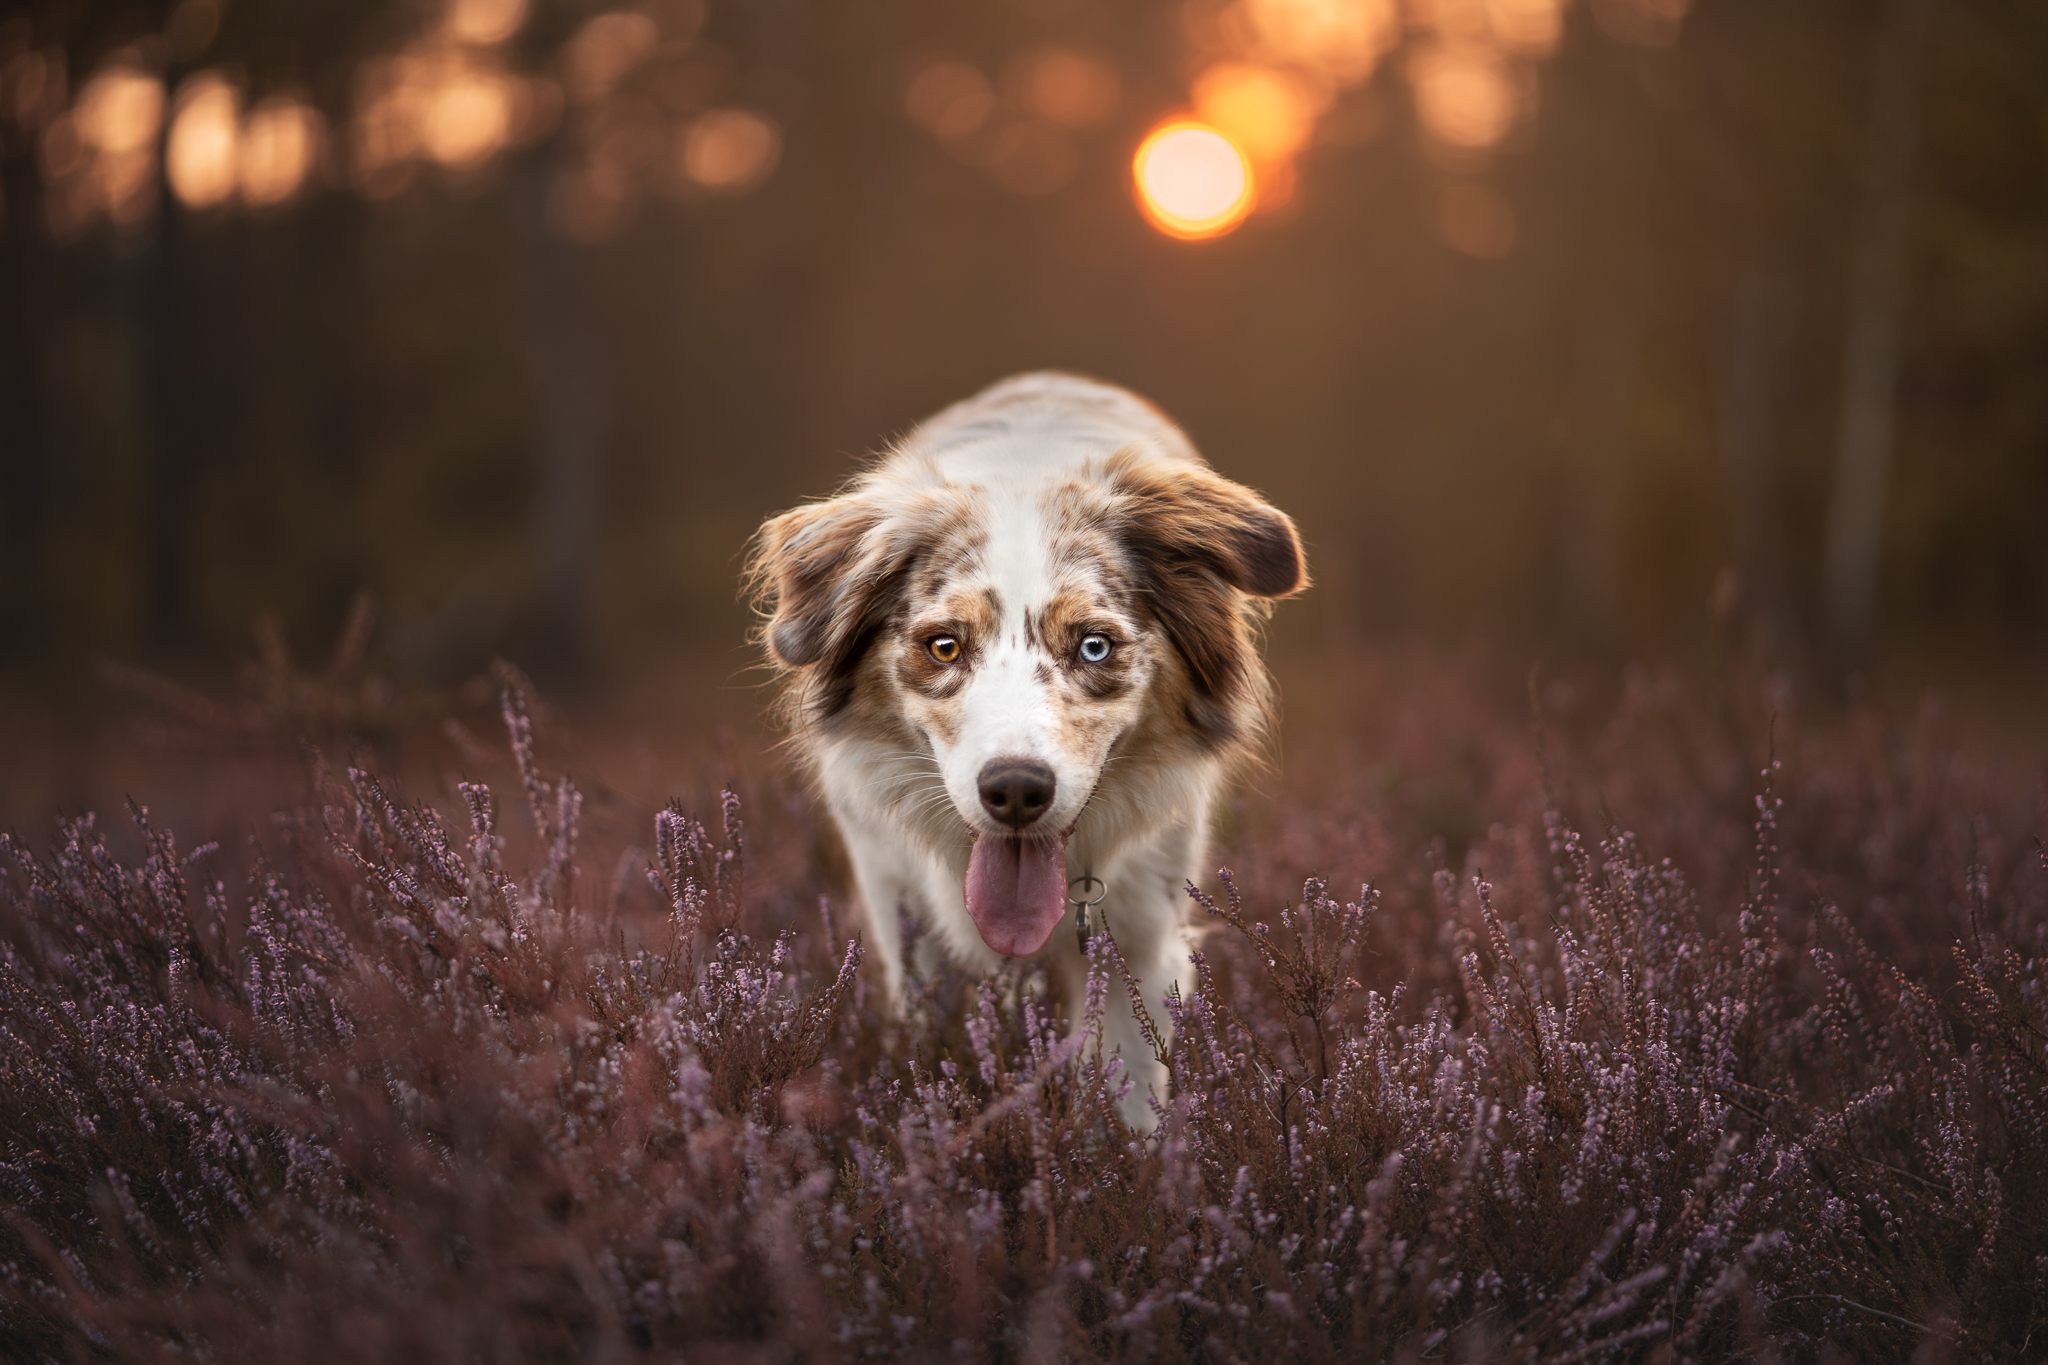
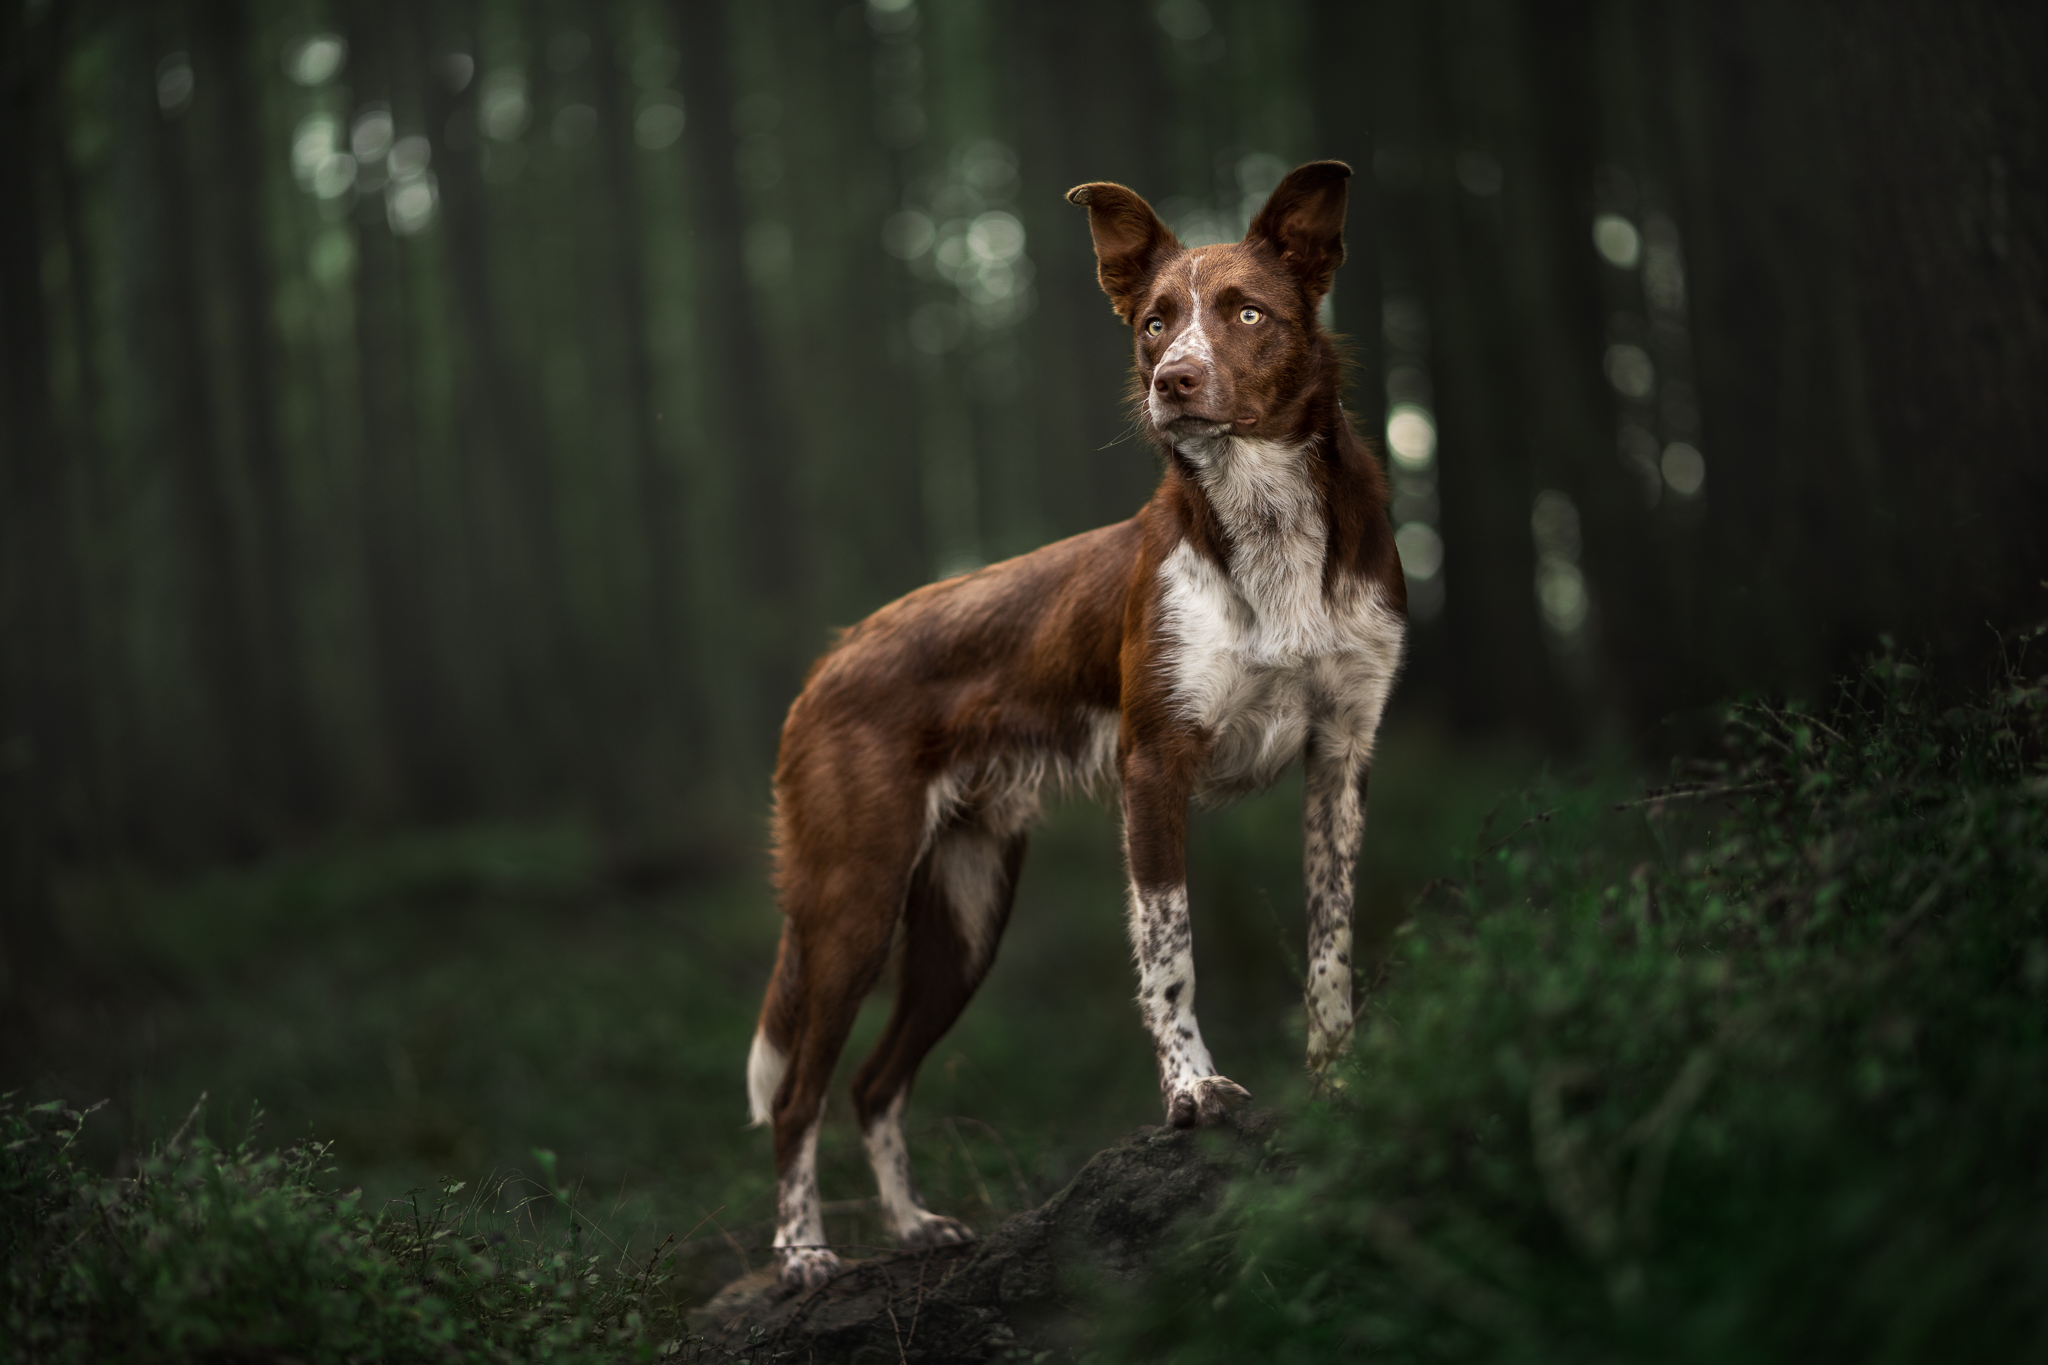
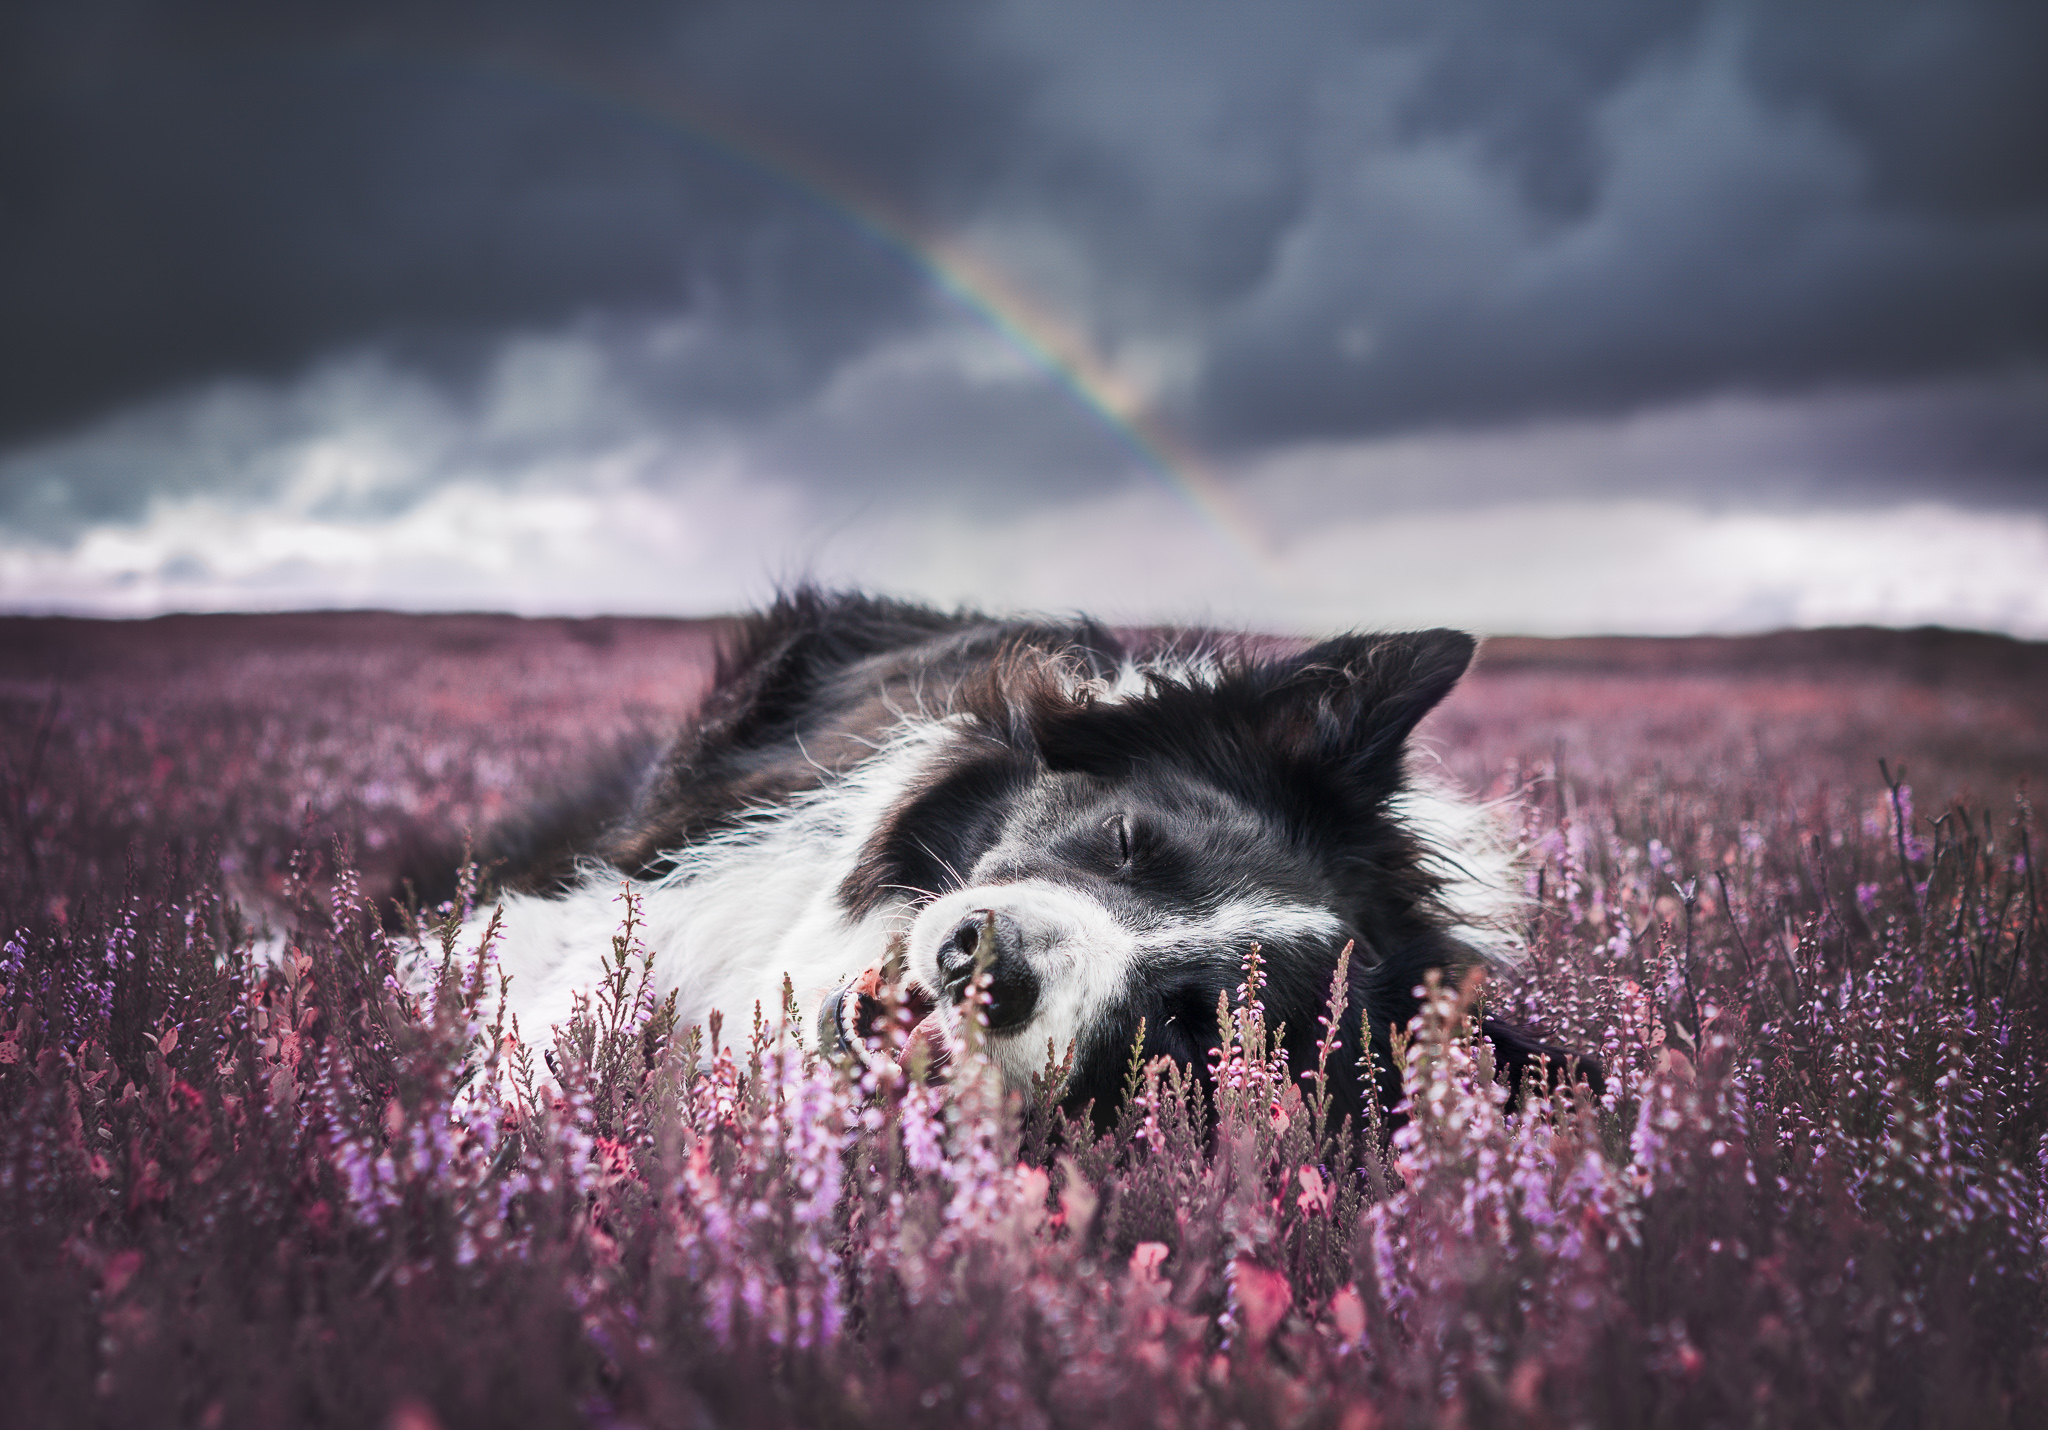
One reason to change colours is to match the tones in our image with one another, so everything is varying shades of yellow/orange/red for example. Have a look below. In the image of Journey, the whole scene is similar shades. With Loki’s headshot, the leaves perfectly match his eyes. And with Luke the Aussie, the background matches his red merle, and the heather matches his pink tongue.
Contrasting/Complementary Colours
On the other hand, using contrasting colours can help our dogs stand out.
These are colours at opposite sides of a colour wheel. For example Red -> Green, Blue -> Yellow, and so on.
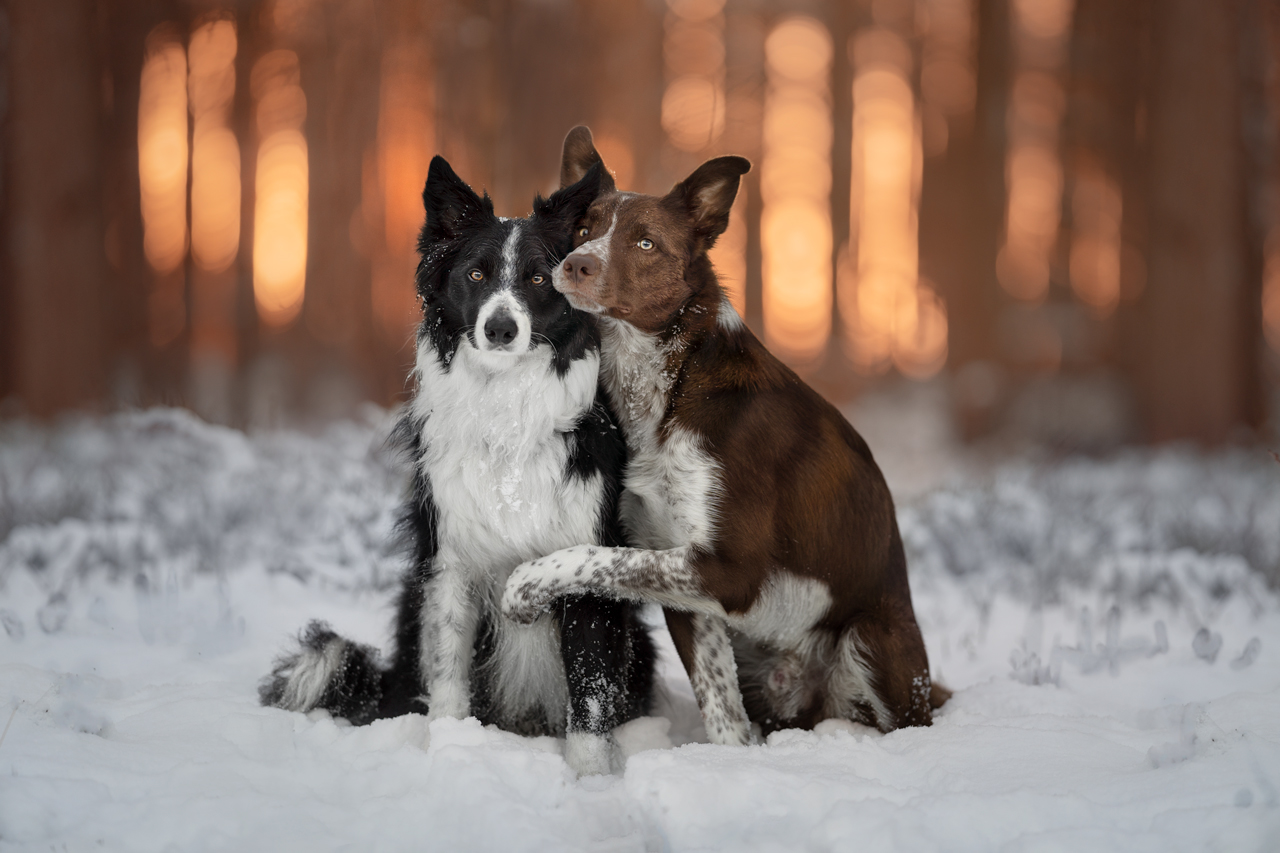
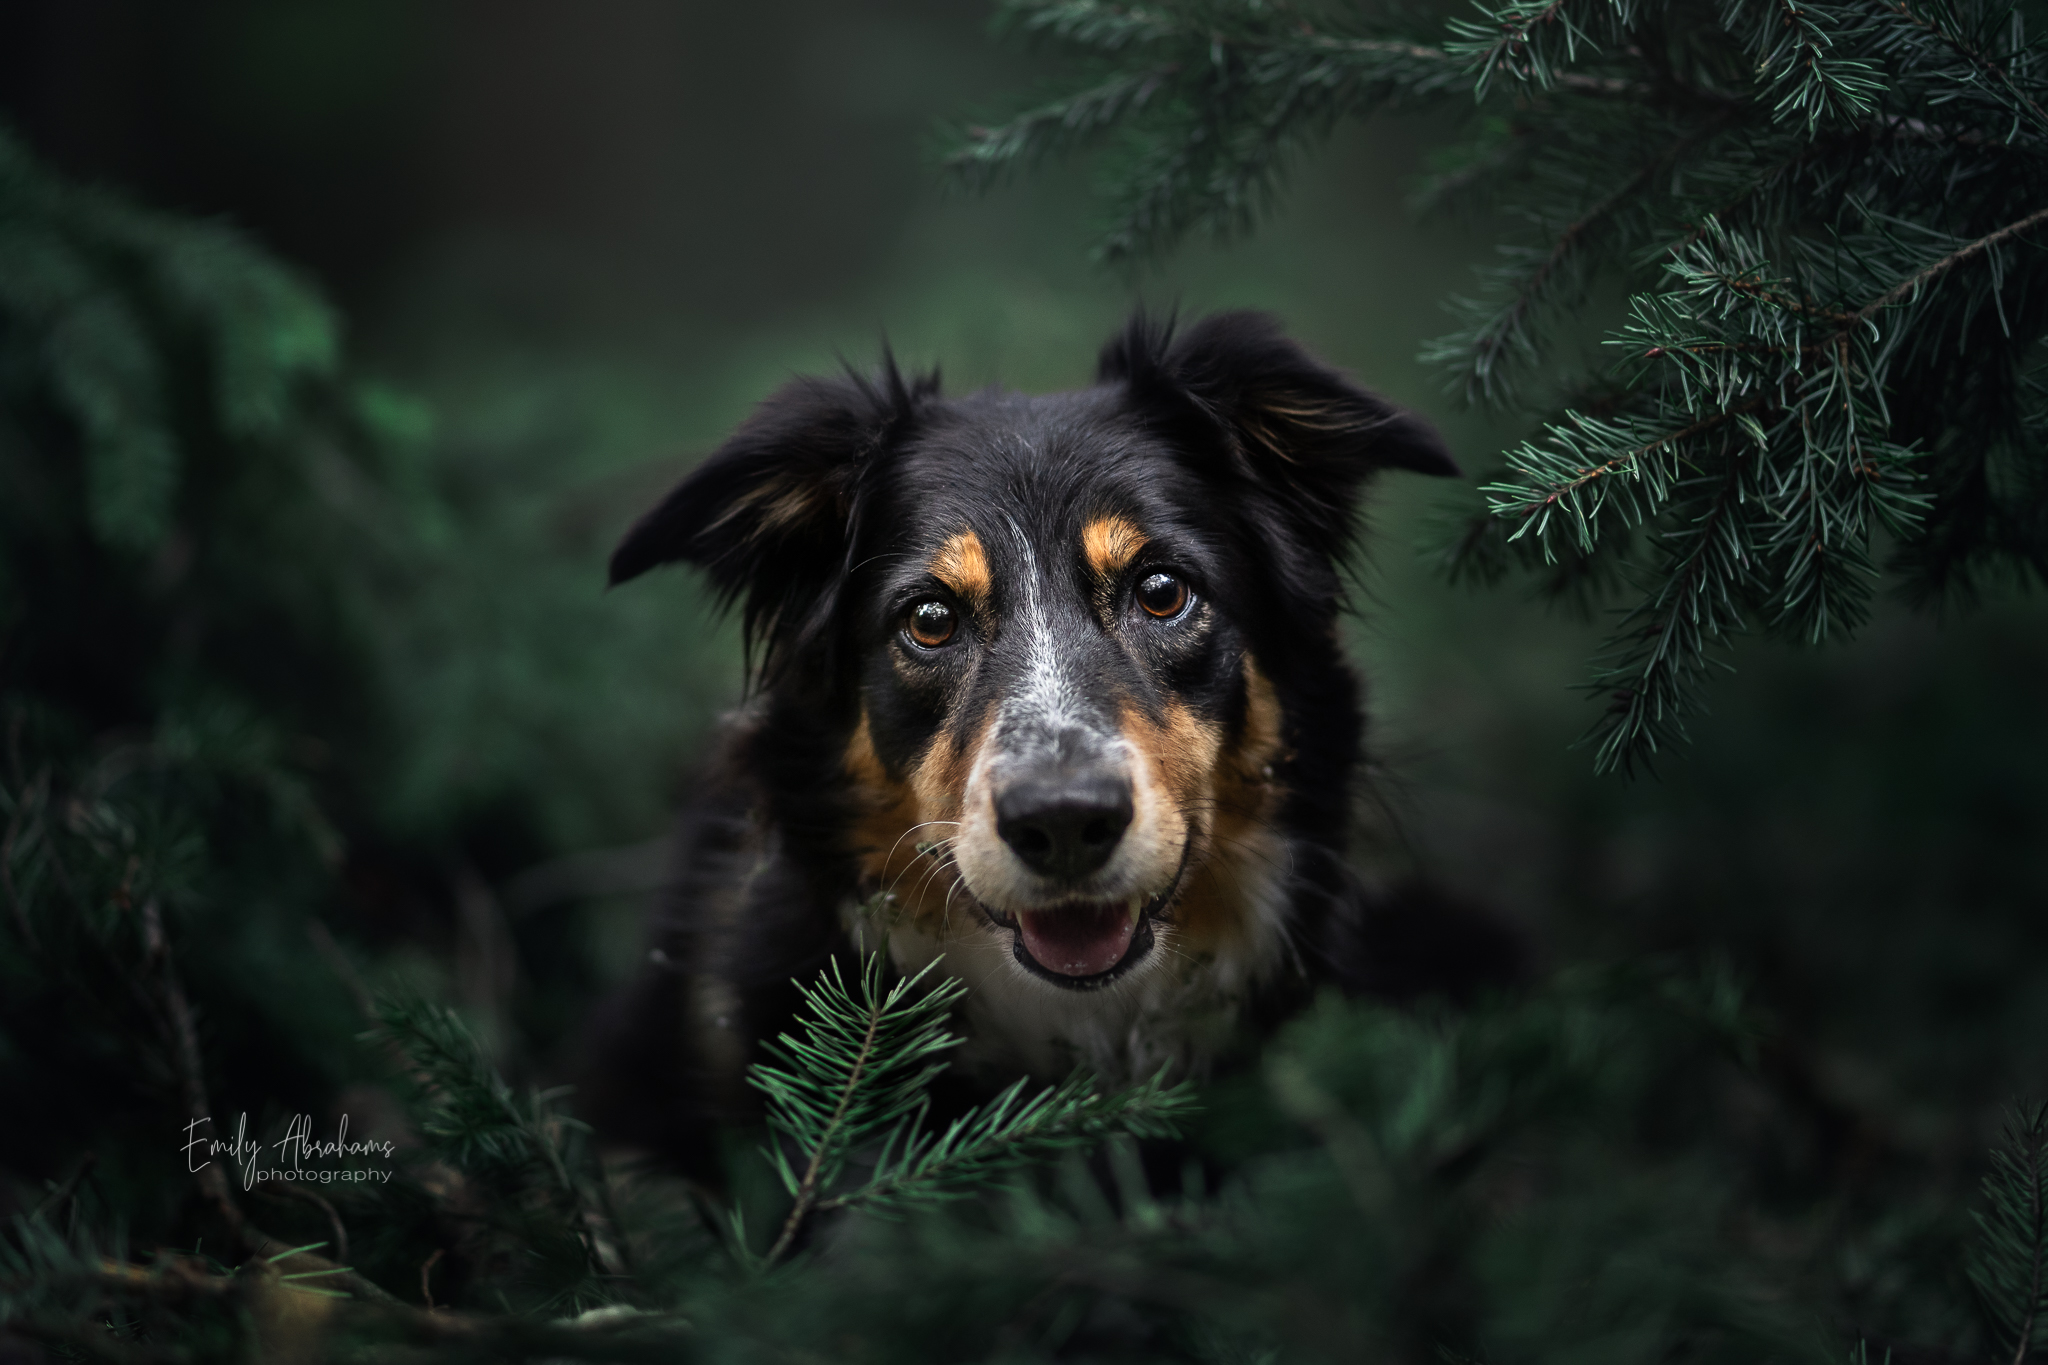
Below we have a dog with tan/yellow cheeks amongst some cyan branches, Journey and Cooper who are both red-toned dogs, amidst deep green surroundings.
You may also want to change colours to fit with a certain season, or to create an effect or mood, or to do something artistic.
The main thing is to ask yourself if you are just doing extreme colours for the sake of it, or if it actually helps your image. Sometimes (often) less is more. Similarly, the more extreme your colour changes, the more specific and careful you will have to be when masking in/out your dog, especially if they are coloured (not black and white) as any poorly masked areas will show up very easily on their coat.
Below are a couple of more “extreme” edits for me. One was a complete fantasy world, and the others weren’t really that much. I’m not a huge fan of big colour changes.
Tools for Changing Colours
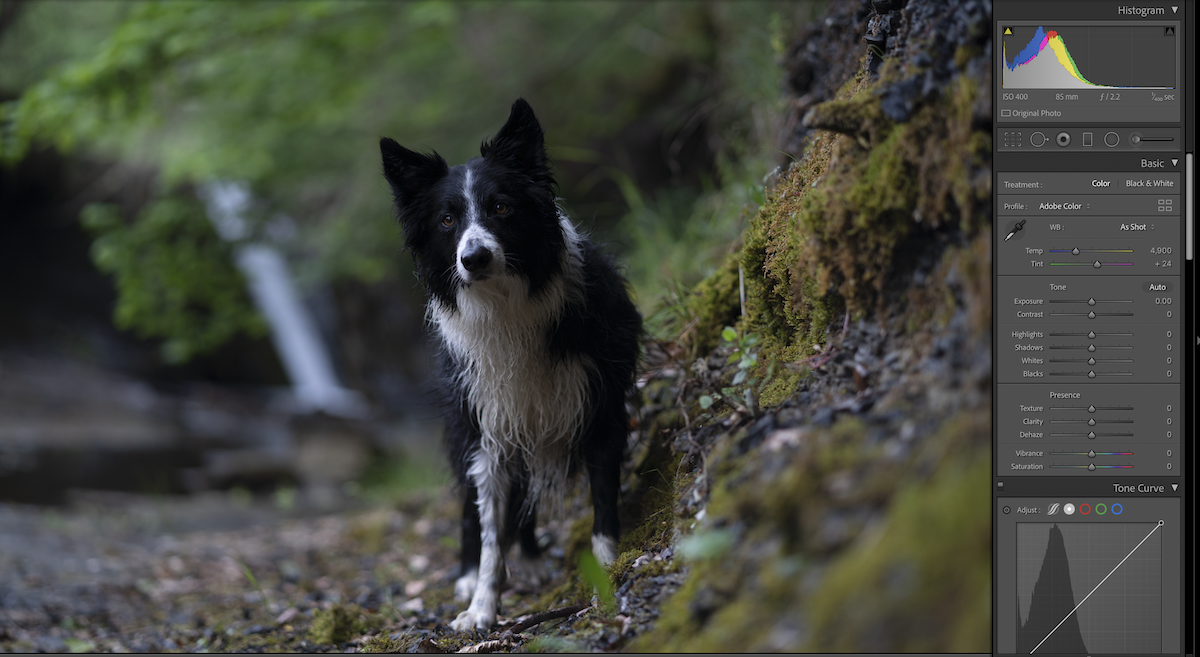
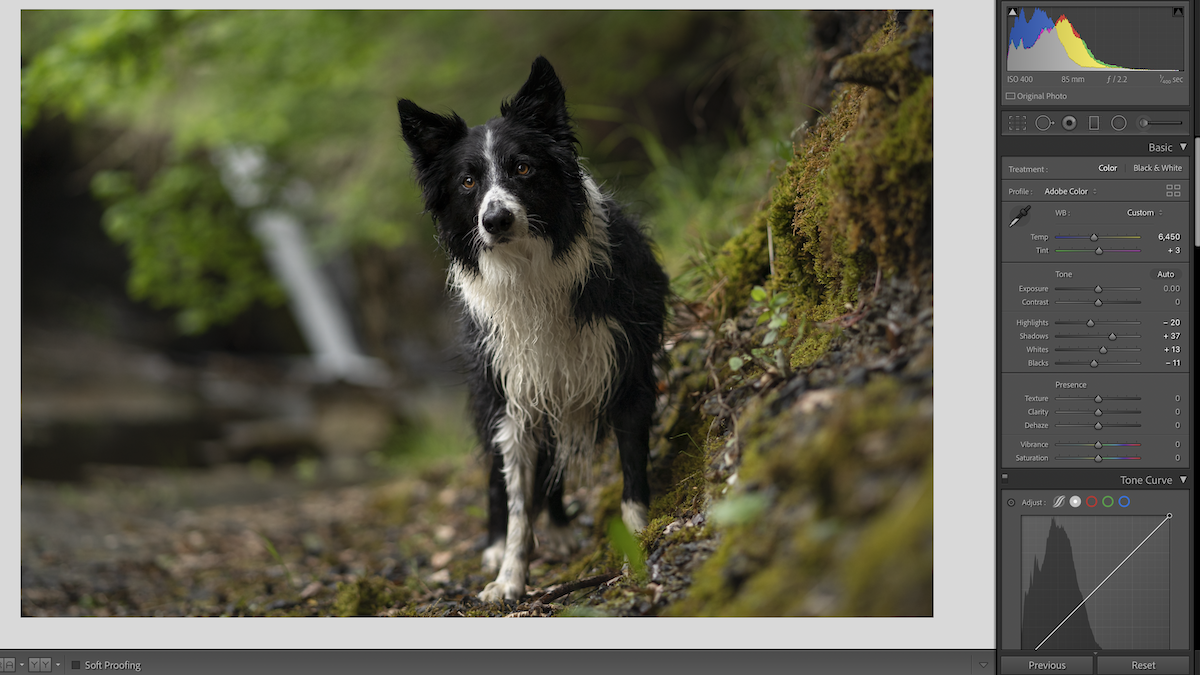
Beginning in Lightroom, the most obvious tool to change colours is the white balance sliders.
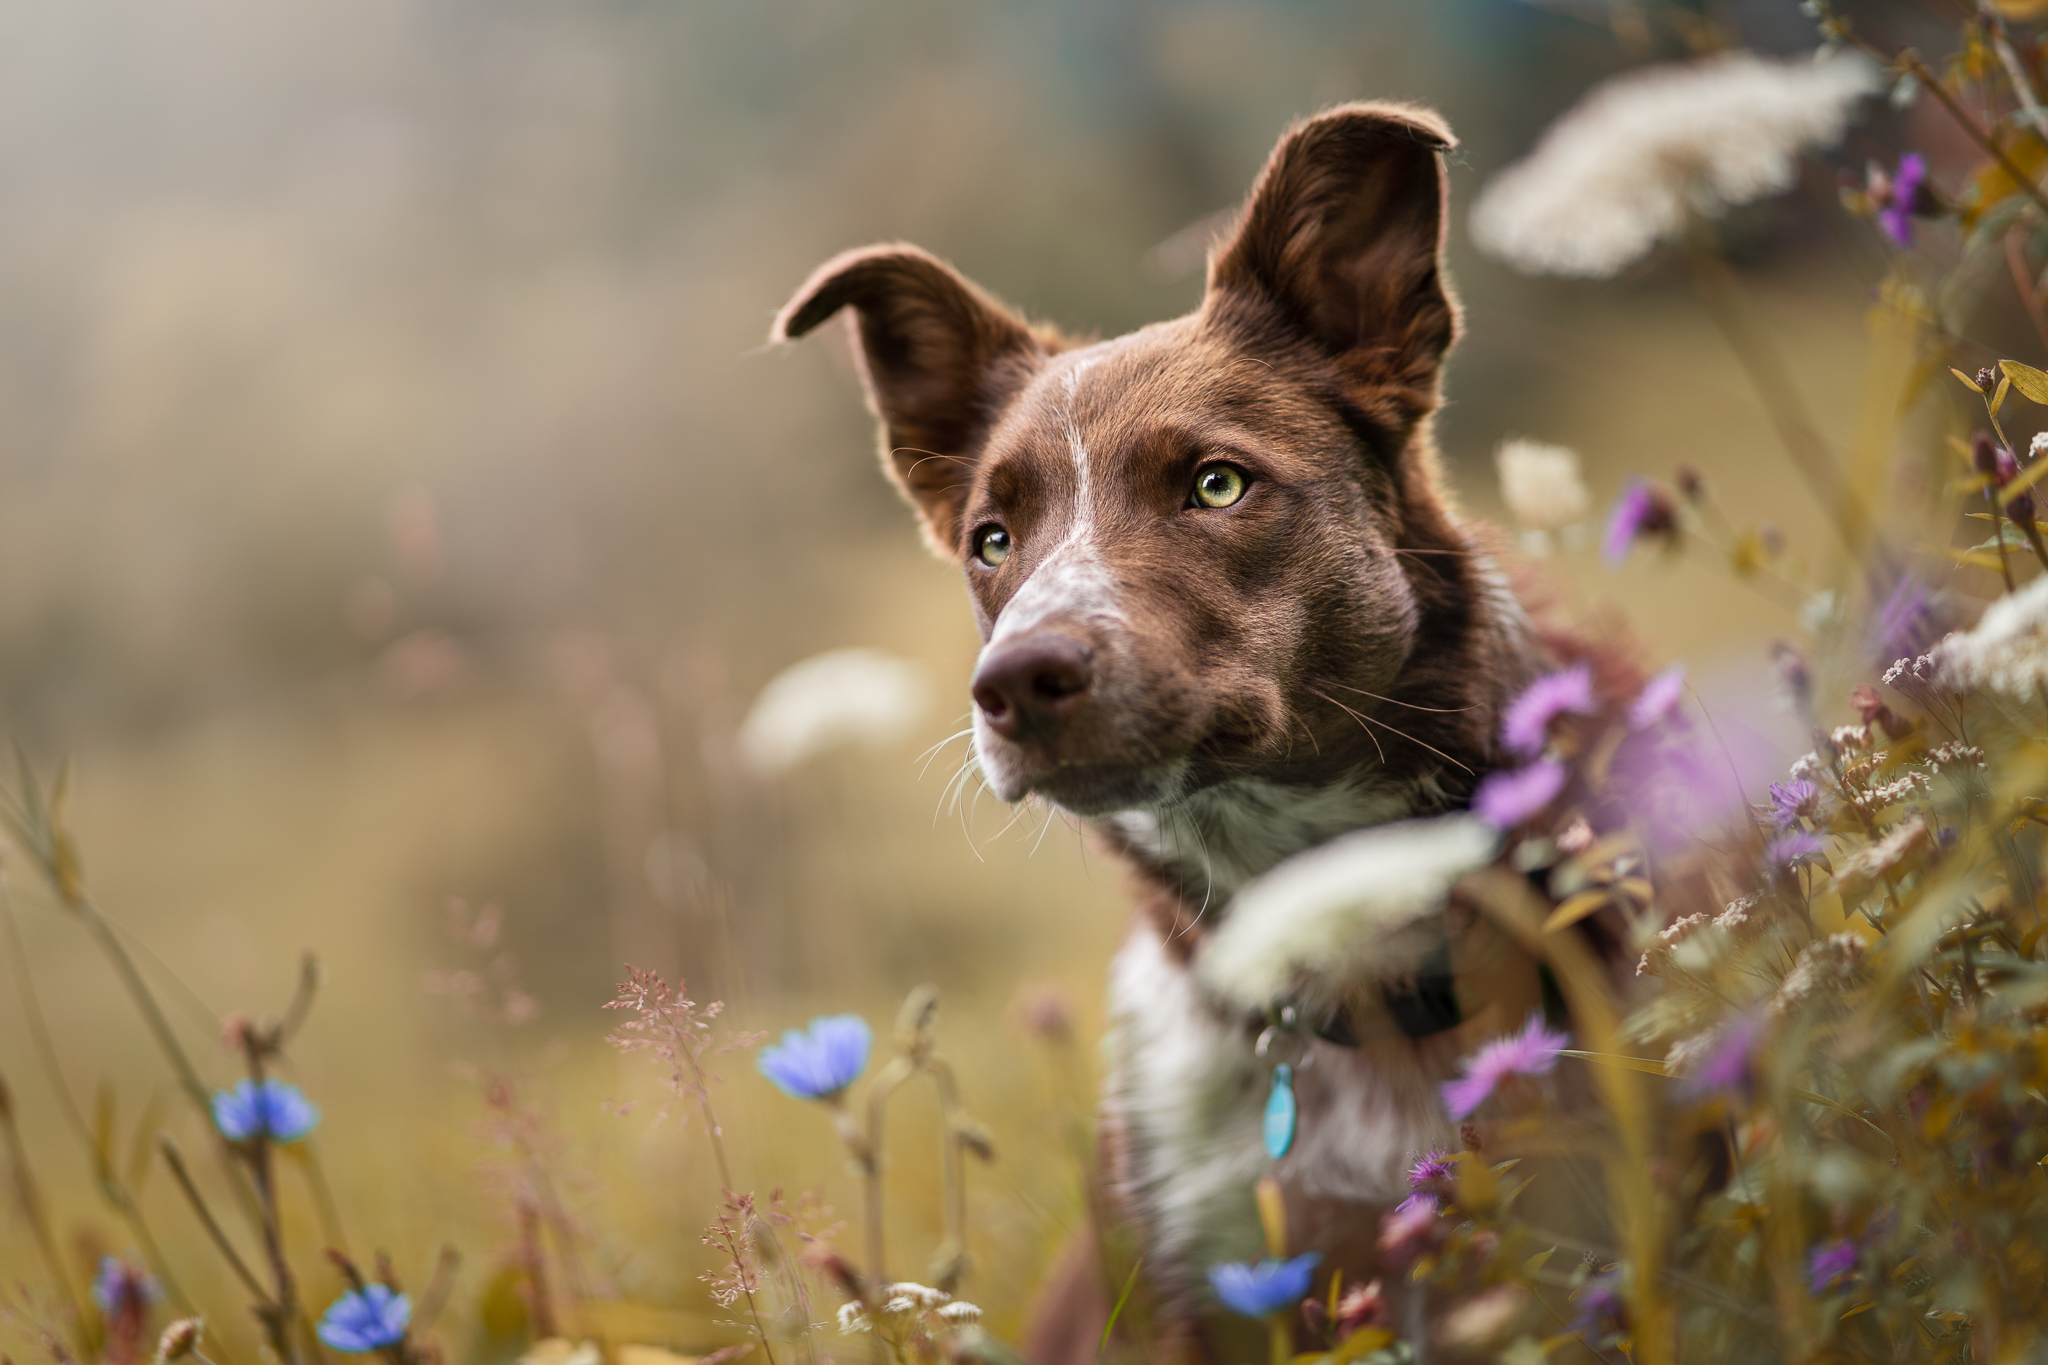
I get asked a lot how I get the rich yellow/orange tones in an image like this:


And the truth of the matter is, 90% of those warm tones comes from the time of day when I was taking the photo, the direction and temperature of the light, and then just adjusting the white balance to be correct.
Most people tend to make their images too cool, so be critical of yourself when setting the white balance, look carefully at the colour of your dog and their eyes even, and see what looks correct.
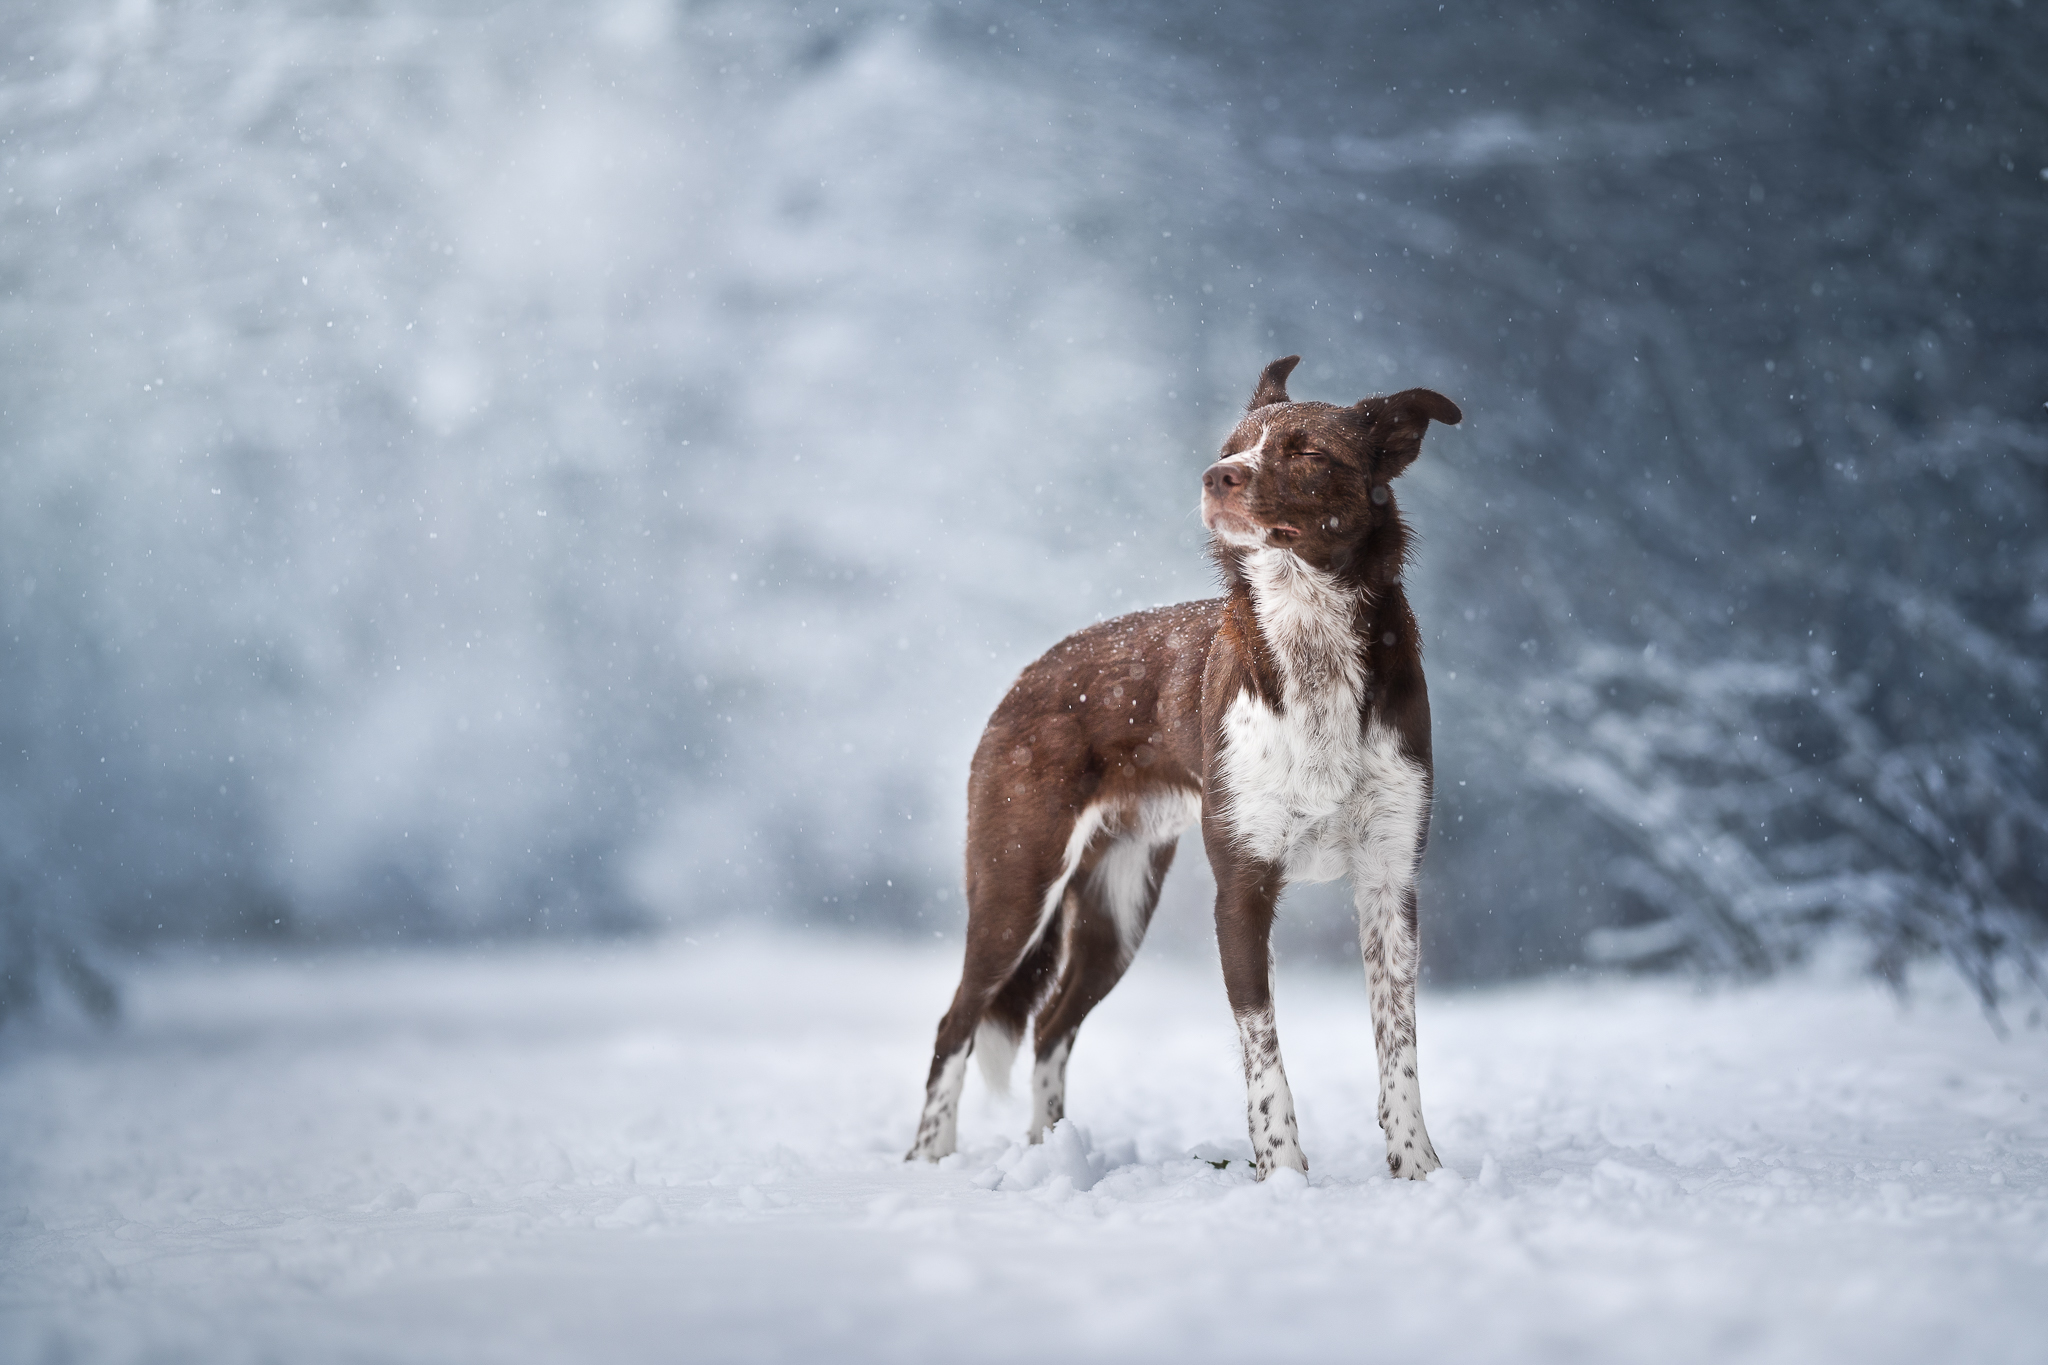
Here is a before & after of just correcting the white balance (and light tones) on an image. See how it’s already warmer?
Of course, changing the white balance is NOT the way to get strong shifts in colour, as it will ALSO affect the colour of your dog, and we don’t want smurf dogs or fluoro yellow dogs in our images.
HSL Panel
Also in Lightroom, you’ll find the HSL Panel.
I rarely use the HSL Panel. I find it isn’t a particularly strong tool, and the colour range we want to effect (yellows, oranges, maybe some greens) are also often found in our dog’s coats or eyes.
If you aren’t confident or comfortable in Photoshop yet, or you’re using your phone or the free version of Lightroom, this is a great place for you to start! Just be careful that the dog isn’t ending up weird colours.
Have a look below. Before -> White Balance -> HSL Panel. I personally prefer desaturated colours, but you can play with these sliders to see what effects you get.
Hue will change the.. well.. hue of a certain colour range. Yellows can become more green, or more orange. Greens can become more cyan, or more yellow.
Saturation changes how strong a colour is (but not how rich). Remember, often, less is more. Many new photographers think more colour = better images. Have a look at the Things I Wish I’d Known post for more mistakes new photographers make!
Luminance changes how much black or white is in a colour. Lower the luminance and there’s more black, making those colours darker. Raise it, and there’s more white!
Want to learn more about how to change the colours in your pet photos?
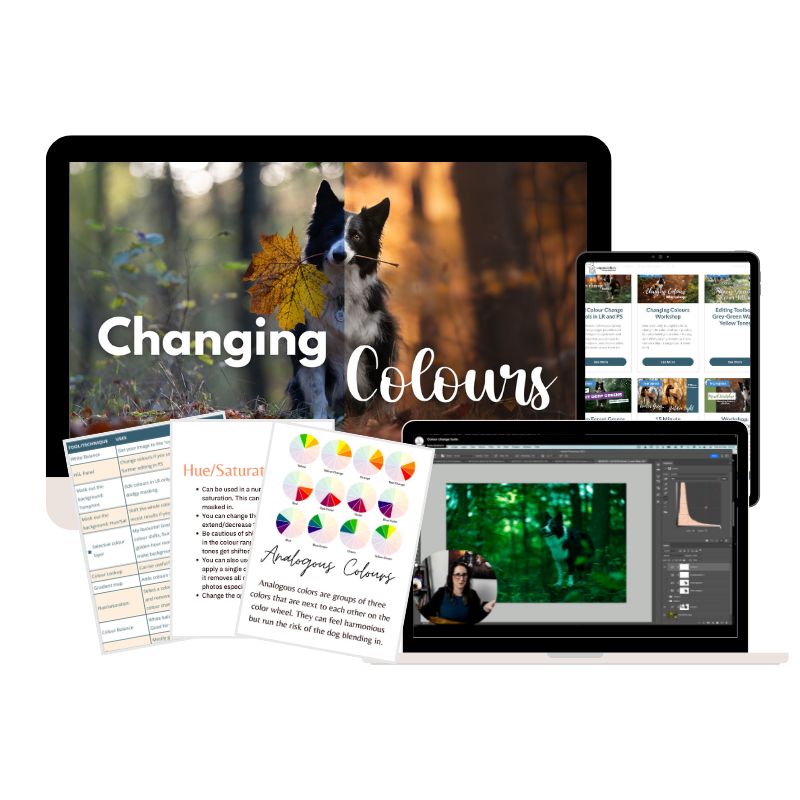

Changing Colours Mini Course
€45
- Two "Changing Colours" Workshop recordings
- 60 minute "All Colour Changing Tools" video lesson
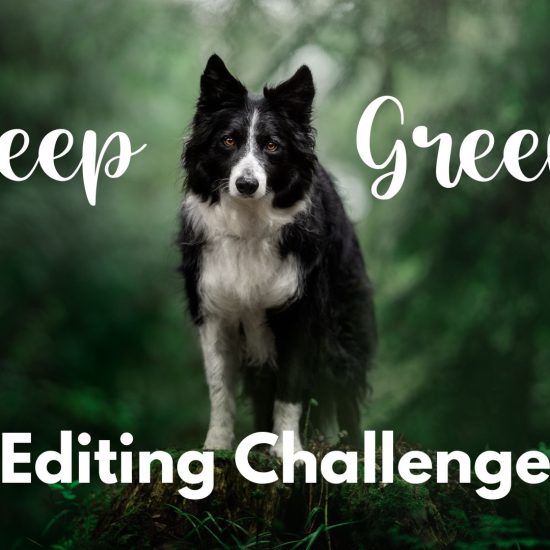
- Deep Green editing challenge
- Grey/Green - Warm/Yellow Editing Toolbox lesson
- .Pdf and RAW file downloads
The Learning Journey
€29-€45
- The entire Changing Colours mini course
- 20+ Editing Toolboxes with editing techniques
- 100s of lessons designed to improve your photography, from editing to location, composition, lighting and more
- 3+ FULL Editing Tutorials for Standard memberships, 8+ Tutorials (plus 2 more each month) for Pro members
- An amazing, supportive Community
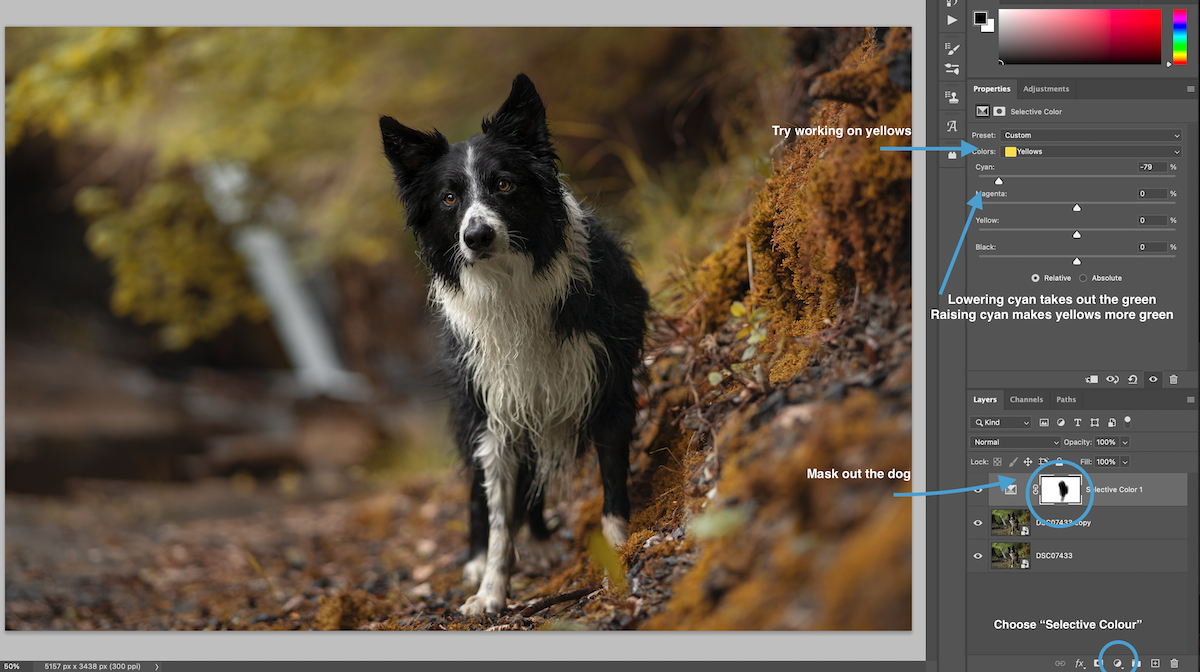
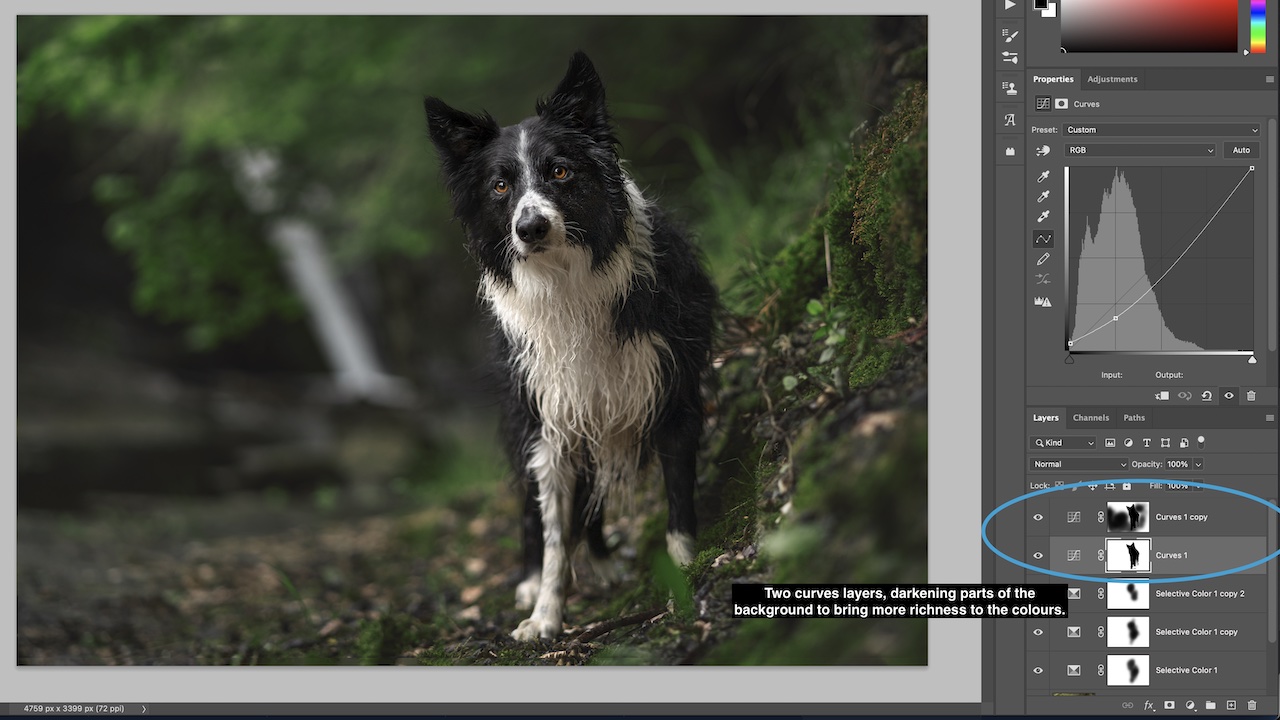
Photoshop Tools - Selective Colour Adjustment Layers
By far my favourite tool for changing colours.
- Create a new “Selective colour” adjustment layer in Photoshop
- Change it to be working on yellows.
- Try reducing cyan to make things more yellow or orange.
- Try raising cyan to make things more green
In a LOT of cases, these are the two main adjustments you will be making.
Changing magenta and yellow will be secondary.
- + magenta will make the colours more pink, or more of a “ruddy green”.
- -magenta will make the images a more fake cyan green, or will make red-oranges more yellow.
- +yellow increases saturation in the yellows & mightn’t do much
- – yellow removes yellow tones, leaving whatever is therefore dominant (magenta pink, or soft pastel cyan).
Note! Be careful when raising cyan. The greens we find most pleasing are NOT as green as we think. There is still a lot of yellow in them. Don’t go overboard.
Don’t forget to mask out your dog!

Hue/Saturation Adjustment Layers
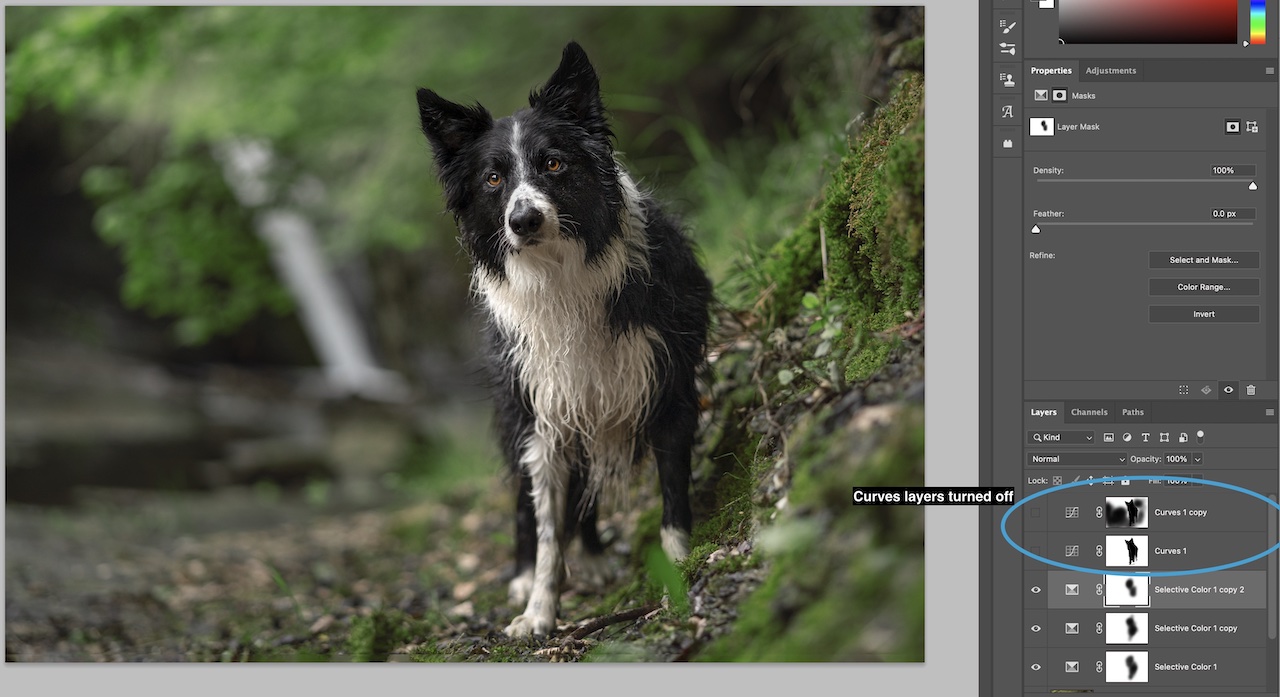
You can also stack more than one selective colour layer on top of one another to build up the effect. The colours may go crazy, so you can desaturate later. Try duplicating the selective colour layer and adjusting the settings until you get a colour you’re happy with – even if it’s a bit strong.
Then, grab a “hue/saturation” adjustment layer. You can change the colour range that the saturation adjustments will affect. This can be useful if you want to target just some tones in the image and not others, for example, you just want to desaturate or shift the hue of purple flowers in a field. You can tell the hue/saturation layer to just work on purples.
You can expand this slider too, so it will affect more or less of that colour range.
Changing how dark or light your colours are can also change how strong or rich, or pale and light they are! Give it a try!

Rich/Strong/Deep Colours vs. Light/Pale Colours
The depth or lightness of your colours isn’t just about saturation!
Deeper colours have more black in them, and lighter colours have more white! Think about when you were a kid, learning to paint. You had your colour on the palette, say – blue. If you wanted to make that blue a rich, deep navy blue, what would you do?
You would add black.
On the other hand, if you wanted to get it to a soft, pale baby blue, what would you do?
You would add white!
The same applies to our photos. Try adding some black or darkness to your image, or some white or lightness to your image. What happens to the colours?
You can add darkness/light however you like. My favourite way is with curves layers, but many people use levels or other tools. There’s even ways to add or remove black from within the selective colour and hue/saturation tools! Remember to mask out the dog so they don’t become weirdly over- or under-exposed.
Most of All - Just Go & Enjoy!
Those are my favourite ways to change colours. Of course with Photoshop, there are so many tools to do the same job! It’s up to you to find which ones you prefer. There are other ways to alter colour too, using a Colour Balance Layer, selectively masking in part of your original image with a different white balance, using a solid colour layer and so on, but I can’t possibly fit it all in this blog post!
So now it’s up to you! Grab a photo and have a play, see what effects you get, just remember the things we spoke about in the first part of the blog! Always be thinking whether your colour changes are going to help your image and draw attention to the dog, or away from it!
If you’ve found this tutorial useful, please feel free to share it with others who you think might enjoy it! I love helping people find their creativity and learn how to use more tools to be more confident in editing their pet photos!
Happy Editing!


Thank you ! Was so helpful, I will start playing around with the tools now ?
Best, Isabella
Woo hoo!! I’m so glad you enjoyed it! Can’t wait to see what you create!
I have a Dalmatian and I would like to add more lighter colors for a photo shoot instead of actually putting dye on my dog. Any iPhone tips?
You’re probably going to need photoshop. Then you might need some powder brushes or similar, or make a colour or gradient layer and change the blend mode or opacity, depending on what look you’re after.