ArchivesFundamentals

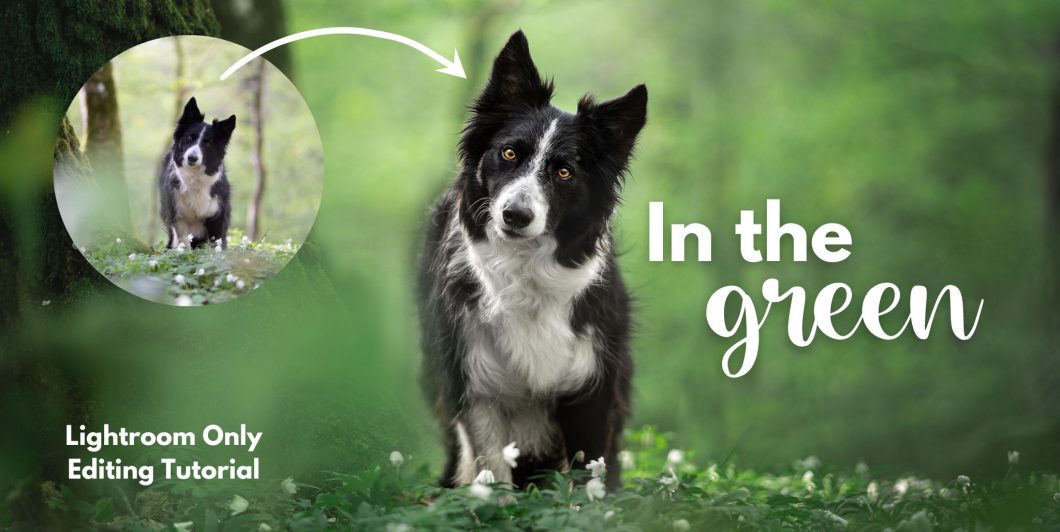
In the Green: Beginner-Friendly Editing Tutorial

This tutorial takes place on Lightroom only, and discusses with some emphasis making editing choices or having an editing rationale, rather than blindly following a tutorial. 

This tutorial will work best if you have explored around Lightroom before, even if you aren’t totally comfortable using it.

We will discuss:

  • what our goals are in editing
  • various methods to set the white balance
  • using the global adjustment panel
  • removing chromatic aberration/fringing
  • using masking, especially radial gradients
  • creating a soft glow behind the dog
  • briefly looking at the clone/heal tool
DSC06683 DSC06683

Photos in Focus

If you have signed up for this course, I will assume that you’re keen to begin taking more control of your camera, to get the results you want.

The truth is, the more control we give our camera, the more mistakes it can make. Depending on the technology, when it comes to focus, by giving the camera control, we run the risk of it focusing on something in the foreground (since it’s so close to the camera), the dog’s nose (since it’s usually shiny and close to the camera), or something in the background (which might be high contrast). 

Most camera autofocus systems operate by finding contrast. Hopefully, this contrast is the shiny part of the dog’s eye. But, with the camera on any kind of wider focus mode, this may not be the case.

Remember! The more control we give to the camera, the more chances it has to make mistakes!

This is true when talking about where and how we want it to focus, as well as how bright or dark we want the scene to be! 

Focus Modes vs. Focus Area

We will be covering two topics in this lesson: focus modes, and focus area. These aren’t to be mixed up, as they perform two very different functions, although both are important and both need to be set correctly in order to achieve the results we want.

Focus Modes

Focus modes tell our camera HOW we want to set focus (not where). Do we want it to focus on one thing, one time? Do we want it to track the subject? Or do we want to set the focus ourselves manually? These can also be referred to as “Autofocus modes”.

Focus Area

This is telling the camera how large or small of an area to search for and apply its focus to (unless we have selected “manual focus mode” from above, in which case it’s up to us). We can tell it to search for the subject/thing/focal point in the WHOLE IMAGE, or in one very small area, and basically everything in between. 

Editing Rationale Talk

On this lesson page you will be able to access:

  • Any downloadable material (pdf booklet and RAW file if included)
  • The link to access the live event, and/or the recording afterwards
  • any other helpful material or resources
DSC01350-2 DSC01350-Edit

Note that the pdf and images in the booklet look VERY pink/red on my screen due to the way my PDF reader renders colours. My images are NOT that red.

LR Update: Masks, Masks & More Masks!

In this lesson we’re going to be exploring how Lightroom’s new masking features, discussing ways we might want to use them, and what to do if we don’t want to use them (hint: you don’t have to do anything differently, if you don’t want to!). We’ll also be talking about some of the traps or pitfalls that we could stumble into if we rely too heavily on the “select subject” feature (hint: do you want your dog to look like a sticker?) and how we can hopefully get the most out of this update for our editing work!

Check your masks

Before moving on to more extreme edits, or exporting your photos, do a good, thorough check of your masks if you’re darkening the sky/background and brightening your subjects, especially if you’re using the “Select Subject” tool. Often, it can miss small bits and pieces (see below example!) and these can look very strange and out of place!

Watch out as well that the new masking features don’t just blur furry parts of your subject, or parts where some fur meets the background and it has a hard time finding the edges. You will want to fix these masks up.

Below: before & after. If you see these blurry edges, just use the brush tool to either add or remove the effect from where it’s blurry.

Mask blurred edges Mask blurred edges 2

Why Does My Photo Look Different?

One question I see getting asked a lot is why your photo looks different from Lightroom to your phone or even from Lightroom to your Internet browser.

There are a few potential answers to this and it really depends on what exactly your situation is, so here we will have a look at the two most common reasons that your photos look different from your computer to your phone.

Computer To Phone

The main issues I see from people here is:

  • photos are much darker on their phone (or have more contrast)
  • photos have a lot more saturation/colour on their phone.
  • photos are a slightly different colour (too blue, too yellow, too green) on their phone.

The reason for this is pretty simple. Phones are made to be quite flashy and exciting; they want you to watch movies and use them as much as possible, therefore they make the blacks very black and the colour is very strong.

This means that when you’re watching movies or scrolling on social media, it’s more engaging, it’s more interesting because there are colours and there is contrast.

Aside from that, different phone models and brands will have different colour profiles. So my iPhone might render things slightly more yellow, whereas your Samsung might render things slightly more blue or more magenta. Your Samsung might not make things as contrasted as my iPhone. It really does very from phone to phone model to model.

So what can you do about it? Not much really. It does depend a bit on the computer screen that you’re using and whether it’s calibrated.

For me for example, I know that my computer monitor is calibrated, therefore it is the correct contrast and the correct colours. If I went to print any of my photos they would print as they look on my computer, assuming I used a good print lab that actually rendered colours and contrasts correctly.

If you take your photos to a cheap DIY print lab than the colours and contrasts might be all over the place. But in general, if your computer monitor is correct, then your images will be “correct”.

That being said if you haven’t calibrated your monitor then it will have its own colour profile which might mean that it is rendering colours and contrast slightly different than everybody else as well, so you’re going to be coming up against two problems. I know some students who have very matte computer monitors, which means their colours and contrasts are very soft and muted, however when they take those photos to their phone, the colours are extremely saturated. In this case, it is a combination of the matte screen AND the added contrast/saturation from the phone!

This doesn’t mean you all need to rush out and calibrate your screen or buy a screen calibrator, unless you’re wanting to become a professional. It’s just worth being aware that even your computer might not be “correct”

One thing I see happening a lot is people driving themselves crazy trying to edit their photos so that they look on their phone like they do on their computer.

To me this just isn’t going to work because while it might look that way on your phone, somebody with a different kind of phone or a different model of phone will actually see those colours and contrasts differently.

The best thing is to try and find a neutral space. Most people will be viewing images with their phones, yes, but it’s impossible to edit for every phone! So find an edit you’re happy with, know that when you finish editing on the computer you may need to lower saturation or contrast a little bit. Get some feedback from others (especially photographers) to see how it shows up on their screens so you can build an understanding of what the general consensus is. If everyone says “it’s too dark” then it’s probably too dark and not just your phone.

But don’t drive yourself crazy trying to make the phone version match the computer version, because the next person who views it will probably have a slightly different colour profile anyway!

Computer to Browser

I haven’t seen this issue come up quite so much, but it does surface every now and then so I’m going to add it here in case you run into this problem.

One thing that I’ve seen happening particularly with Windows 10 (I believe) is that people will see a drastic change in their images from lightroom to the Photo Preview program. I have a Mac so I don’t know exactly what program it is, but essentially this is just the difference between a colour managed program or software and a non-colour managed program or software.

If you see weird problems like this coming up, so for example you’ve edited your photo and then you export it to your browser, and then you look at it and it’s totally magenta, do a quick google search. Put in the name of your operating system and what the problem is. Usually somebody else will have had the same problem, particularly if it something strange and inexplicable like the colour is randomly changing for no reason. 

Workshop: Back to Basics – Learning Our Camera

Dynamic Range Optimization:

From Sony’s website:

Dynamic Range Optimizer/D-Range Optimizer (DRO):

The DRO function analyzes the contrast and produces an image with optimal brightness and recovered shadow detail. You can use this function while the subject is moving or during continuous shooting. The image may appear noisy because the image is corrected with image processing.

But to be honest, when I used it, everything just became insanely dark. Maybe I should try again, because optimal brightness and recovered shadow detail sounds great but it really, really sucked when I had it turned on.

Chat Transcript:

19:57:02 From Rosalind Phang : hii
19:57:12 From irenenyrud : I hear you 🙂
19:57:16 From Alice Nentwig : Hello… I can hear you fine 🙂
20:01:25 From lenorehedemark : I forgot and someone else reminded me 😅
20:02:42 From lenorehedemark : I’m eating donuts in a sweatshirt so my camera won’t be on today 😂
20:03:13 From Rosalind Phang : Baking a cake atm 😛
20:05:04 From Tracey : Emily have you pressed record?
20:06:37 From Tracey : Lol, ok good!!
20:11:15 From olivia : took me ages to figure out my new camera after Christmas after using my old one for 2 years 😂 think I’m still figuring things out accidentally as time goes on 😂
20:11:33 From lenorehedemark : I have mine set up the same! It kept annoying me the other way
20:16:53 From Tracey : I have a nikon d7200 cant find shutter speed
20:17:02 From Rosalind Phang : yes
20:17:15 From Rosalind Phang : Its the dial on the top of the camera
20:17:18 From olivia : dial
20:17:20 From Rosalind Phang : Just move it around with your thumb
20:18:02 From Tracey : oh good!
20:18:23 From Tracey : playing
20:18:33 From olivia : it was aperture on my new Nikon d750 I couldn’t find for ages, it’s a dial on front of camera haha
20:19:03 From Jessica Liu Ek : Anyone with Nikon who knows how to change the shutter button? Like changing which button that affects the shutter. If that makes sense?😅
20:19:07 From Rosalind Phang : yes
20:19:55 From Agnes : I always forget which dial is which 😂. I know it normally but I forget in action
20:19:59 From Jessica Liu Ek : I mean like the dial. So i want the dial that affects the aperture to affect the shutter speed instead
20:20:31 From Rosalind Phang : Jessica, go to menu,
20:20:41 From Jessica Liu Ek : Okay thanks I’ll try to find it
20:20:42 From Rosalind Phang : Then go to the pencil n the left
20:20:57 From Rosalind Phang : It takes you to the controls menu, and then you should be able to find customise command dials.
20:21:14 From Rosalind Phang : Does that help?
20:21:32 From Jessica Liu Ek : Oh yes thanks Rosie. I’ve been looking for that one for ages
20:21:38 From Rosalind Phang : great;)
20:25:38 From lenorehedemark : I’ve had Sony for a year and didn’t even know the fn button was there or did anything til like a week ago 😂
20:25:44 From lenorehedemark : ‘
20:29:23 From olivia : I think this is what I struggle with: focus area
20:30:05 From lenorehedemark : I feel like I switch my focus settings like everyday. I just can’t get it right lol
20:30:55 From Rosalind Phang : Do you use auto focus for self portraits?
20:32:03 From Alice Nentwig : With action shots: do you use expand flexible spot, flexible spot or zone??? I never seem to get the eyes in focus…
20:33:11 From olivia : yes! thank you that’s very helpful!
20:33:45 From irenenyrud : Did it work to send a photo? I don’t understand what the «L+tracking» do.. I have a canon Eos R.
20:35:24 From Rosalind Phang : Helps to have eye tracking! Haha! Mine doesn’t do any continuous tracking or any tracking.
20:36:50 From olivia : I managed to get a couple of action shots today by pre-focusing on the obstacle the dog was jumping over because my camera hates my black dog running at speed 😂
20:37:45 From irenenyrud : Ah, I dint know it was a face 😀
20:38:00 From irenenyrud : Hahaha
20:38:47 From Rosalind Phang : Nope
20:39:01 From Rosalind Phang : I have to keep moving the focus point to focus
20:39:07 From Agnes : Metoo d750 😂
20:40:03 From lenorehedemark : Do you have a dial or something to move your focus point or do you have to go into the menu?
20:40:04 From Rosalind Phang : Ahh ok got it!
20:40:25 From irenenyrud : Me neither 😀
20:40:28 From Tracey : Im glad you asked that Fiona!!!!
20:43:57 From lenorehedemark : I love back-button focus. I set it a few months ago and have been obsessed 😂
20:45:19 From irenenyrud : Do you keep half pressing the shutter at the same time as you hold the «af on»?
20:47:45 From lenorehedemark : Hmm smart! I’ve never thought to do that!
20:48:08 From Rosalind Phang : Thank you! Was always wondering about that
20:48:39 From Jessica Liu Ek : That’s so smart! I was so annoyed when it kept re-focusing before I discovered back focus
20:52:07 From lenorehedemark : Oh I asked a question I think you missed
20:52:25 From lenorehedemark : Do you have a dial or something to move your focus point or do you have to go into the menu?
20:53:21 From lenorehedemark : I have a joystick I think but it just doesn’t work to move the focus point
20:55:12 From irenenyrud : You answered my question about half pressing the button – thank you 😀
20:55:21 From lenorehedemark : Ok thank you. That is what mine does and it’s just a bit of a hassle when shooting so I wanted to know if there was something different
20:55:58 From lenorehedemark : I did but it came in with a broken sensor so I sent it back
20:59:46 From Rosalind Phang : When you took the self portraits with your dogs, I thought you were using your phone as a remote but I didn’t see your phone in your hand?!
21:01:57 From Rosalind Phang : HAHAHAA
21:04:27 From lenorehedemark : I love the “post to instagram” reminder 😆
21:05:39 From lenorehedemark : Oh gosh I definitely need that. My photos are always crooked and I always have to fix it in post
21:10:44 From lenorehedemark : Omg that’s super helpful. I never knew that existed 😂
21:17:03 From lenorehedemark : RAW is a huge lifesaver for events
21:19:36 From Agnes : Colour space: srgb or adobe rgb, or in case raw it is not important?
21:20:43 From Agnes : Thanks 😊
21:23:01 From Teresa : what does the Dynamic Range Optimization do?
21:24:01 From lenorehedemark : What is it supposed to do?
21:24:34 From lenorehedemark : I’ll turn it off and see what changes
21:25:06 From lenorehedemark : Is that DRO?
21:25:20 From lenorehedemark : Oh nice it’s already off
21:26:20 From Teresa : ah thanks!
21:27:19 From lenorehedemark : I don’t think I have anymore. Thank you so much!!
21:27:26 From Rosalind Phang : Thank you:)
21:27:33 From Alice Nentwig : Thank you so much as always!
21:27:44 From Jessica Liu Ek : Thank you Em!
21:27:48 From lenorehedemark : Have a nice night!
21:28:05 From lenorehedemark : Oh yes I won’t forget this time 😂
21:28:21 From Tracey : Thanks Emily, i’ll need to watch again but appreciate your patience with us. xx
21:29:20 From Agnes : Thank you so much 😊

Photo Walk in Our Woods

In this video, join Loki, Journey and I on a wander around our local woods.

I show you some of my favourite photography spots and why I chose them, or why I might avoid them, what I look for in the background and foreground, and show you some example photos taken in those locations. 

I discuss quite a lot about what “type” of background might give you better results, or different moods and effects. We cover this a lot more in the “locations” lesson of the Next Level course.

Gap Between Trees

In the video, I discuss quite a lot the difference between wide, narrow, and no gaps between the trees, and areas of open sky. Below, you can see some comparison images – one where the dog is in focus, and one where the background is in focus. I don’t have an “open sky” example at the moment.

These were all taken with my 135mm lens so there is a lot of compression (super blurry background on the in-focus shots), and they aren’t exactly lined up 100% correctly but it’s in the same location so hopefully you get the idea.

The “wide gaps” example isn’t as “bad” as it often is, due to the very fine branches creating a kind of texture between the trees. Without those, they would have been plain white, empty spaces, which isn’t so pretty.

You’ll see these examples discussed more in the Next Level Course.

DSC04464 DSC04470
DSC04460 DSC04471
DSC04476 DSC04473
DSC00815 DSC00817

Direction of Light

Table of Contents

The more you understand how light works, how it bends and moves around objects, the better you will be able to manipulate it and use it in editing later. 

The more conscious you are of the source of the light, and the strength of shadows, the more you will be aware of potential mistakes in your photos that will make editing difficult.

What is Light Direction?

Unless we’re in the literal middle of a cave, light has to come from somewhere. 

Sometimes, that will be the sun. Sometimes, it will just be a patch of open sky in a clearing in the woods. 

As photographers, we need to be aware of where the light is, and how strong it is, in order to make decisions about where we position ourselves, and how we position our dogs.

The direction of light relative to us and our subject can make a huge difference to how our photo looks.

A general rule of thumb when I’m taking photos is:

If I can see a shadow, I am working with directional light.

Our main light direction options will be:

  • direct light/front light
  • overhead light
  • side light
  • backlight

Below, we will have a look at what each one is. 

These are explored in further depth in the Learning Journey, once you want to start taking more control of your photos and using the light in more purposeful and artistic ways. 

Directional? Non-Directional?

If I’m shooting when the sun is out, that light is obviously going to have a direction… and the direction will be where the sun is. The light could be coming from the side, front, overhead, or behind (backlight). 

Even if the sun is bright behind a cover of clouds, if there’s a shadow, even a faint one, you need to treat the light as directional. Side, front, overhead, or backlit. 

If it is a thickly overcast day like we get in Europe and the UK quite often, and everything is dull and without shadows, then we can consider the whole sky a light source.

This doesn’t mean we won’t have to work with light directionality! If I position my dog with the woods directly to our left, and open sky to our right, where is the light going to be coming from? To our right! Therefore we would want to consider how to position ourselves and our dogs in order to make sure that light is going to work for us.

Direct Light

Light shining directly on the subject from behind you, or from above in the case of the open sky.

Direct light is recommended for full sun conditions. It also works perfectly for overcast days and to create easy, soft, and even light on the dog’s face. You almost can’t go wrong with direct light.

Overhead Light

This is more relevant on sunny days, as overhead light from a grey sky works quite well.

Overhead light occurs when the sun is directly above the subject. Think midday sun. This is rarely flattering and is best avoided. Take photos before or after this time of day, or wait for it to be cloudy.

Side Light

Side light occurs when the light is off to the side! 

This can occur when the sun is shining in from one side, making half the subject’s face bright, and half dark…. but it can also occur when you have, for example a large shaded forest on one side of the dog, and a large area of open sky on the other side. There will be an imbalance of light, making the dog’s face become “split in two” if he’s looking forward at you.

The best course of action when woking with side light is to get the dog to look toward the light source.

Notice how Journey’s face camera left is dark and in shadow compared to the camera-right side of his face?

This is because of the tree trunk and large dark woods to camera left. To the right was a huge area of open sky.

This is the same location, everything is the same, except that Journey is now looking out toward the area of open sky. Notice how evenly lit his face is now. 

Alternatively, I can move myself and Journey around so the forest is behind him, and he’s now looking out into the area of open sky. This is now “direct” light. Notice how even the light on his face is, compared to the first photo.

Back Light

This is when the main light-source is behind your subject. This is my favourite lighting direction and how I achieve the warm orange backgrounds in many of my photos.

This is also one of the most difficult lighting directions to do well, because you have a strong light-source behind your subject (eg., the setting sun)… so you need a secondary light-source (like the open sky) in front of your subject.

If the light from behind is too strong, or the light from in front is too weak, your camera will struggle and you’ll likely end up with either:

  • a sky that is nothing but white because it got too bright
  • and/or a subject that is extremely dark, but a sky that shows the sunset/clouds/colours/whatever, because the camera/you exposed for the sky, leading the subject to be black. 

There’s no magic trick to backlight, and it’s something we explore further, especially if you’re in the Learning Journey. It’s important to remember that the camera/phone can only take a photo at one exposure. Unless you’re doing a HDR type photo, it can only be one level of  brightness. Meaning, if the sky has the sun in it, the sky with the sun is going to be very BRIGHT, so in order to capture that sunset, everything else will have to be dark. Otherwise, the sky will have to be very bright, so the subjects aren’t too dark.

To do backlight well, you need to:

  • filter the main light source through branches, leaves, etc, to make it less strong.
  • get a lot of ambient light from overhead/directly on the dog, so they won’t be so dark.

Master the other lighting directions first, but keep backlight in the back of your mind for a future challenge!

Take a moment to check the light...

Even (especially) the not-so-obvious light!!

In this photo, for example, I was so excited about the pretty backlight that I neglected to notice how much the lack of light from the woods on the left side of the photos was making that side of his face very dark compared to the other side. While I could probably fix this in editing, it will probably look unnatural since both sides won’t easily match, depending on the ISO of the image, I may end up with some noise/grain issues only on that dark side of his face, and in general, it would have been a better idea just to turn his face/our angle more toward the large open sky to my right. Being aware of even very SUBTLE lighting directions like this can save you a lot of heartache later!

360/180 Light Walk

One way to add some variety to your shoots or even to learn the way different lighting directions can change the feeling of the image, is to play with the direction of light. 

Find the light and pose your dog, then walk a 180 or a 360 degrees around the dog taking photos as you go. This is a great way for you to learn how different lighting directions can product different effects, different moods, and for you to experiment, see what you like, and to get more of a feel for different lighting directions. It can also really help you get a feel for how different “gazing directions” can make the face more or less illuminated. 

This video was taken with my phone, more for beginners to see how direct sunlight casts really harsh shadows, but I’ll include it here as I think it’s an interesting concept, and could be worthwhile for you to try as well – whether in video format, or as a series of images. I find Journey’s part toward the end especially interesting, as he’s getting hit on his side by the sun, and how moving his head just slightly can dramatically change how might light it receives. 

I also found it interesting how even in the shade (granted, it was pretty patchy shade) you could really see the difference on Loki’s face for the times when there was even a slight difference between the amount of light/shadow hitting his face. Especially important for black dogs!


Understanding Light

As I mentioned above, developing your understanding of light is really important especially in regard to editing your photos later. If you want to have any control over the light in editing, or if you’re working with low-contrast/flat images and you want to develop the perception of light, you need to understand how light works.

Look at the shadow. Look at the “highlight” spot.
If the light is shining from the top right-hand corner, as the highlight spot suggests, then the shadow doesn’t make sense. If the light is falling from the top left hand corner – as the shadow suggests, then the highlight spot doesn’t make sense!

Being able to “see” light will allow us to use it creatively, work with it while shooting, and bend it in editing.

Consider this image.

There is clearly light hitting the inner part of his body, and the outer shoulder and side of his face are dark. In fact, he is even throwing a very slight shadow!

And yet….

There was really very little light at all! It was slightly more open to the inner side of Journey, however I worked a lot in editing to really create the sense of that cool winter sun hitting his body, even as much as adding a slight shadow.

By understanding how light works, where it would hit, where would be in shadow, how it affects the fur, and so on, allows us to edit light in creative ways. Of course, it’s possible to edit your photos without manipulating light! It depends entirely on how “true to life” you want your photos to be. 

This shows “light fall-off” which we experience as the lightwaves disperse as they get further from their source.

There is a whole ton of nerdy math around this subject (check this out) which deals mostly with artificial light, but it does link closely to our harsh sun vs. soft overcast/shade light (where the light source is very far away in the case of the sun, vs. much closer in the case of the sky) and also with how we can expect light to “fade out” across the surface of an object.

Now, I’m not saying we need to go into a huge study of light and how light bends – that gets all a bit scientific for me, though some people find it very interesting! I’m not 100% sure it completely serves our purpose at this point, however, the more you see, understand, notice and think about light, the more skilled you will be at using and mastering it.