If you’re just starting your pet photography journey, to either take photos of your own dog, or you want to become a professional pet photographer in 2024, this is my ultimate guide to areas of photography to pay especially close attention to if you want to create those eye-catching photos you see on social media.
With more and more people seeing their pets as their children and wanting to celebrate them and their personalities with photo sessions, there’s never been a better time to become a pet photographer! It’s our responsibility to make sure we’re creating beautiful photos where the dog “pops”, through a careful choice of camera and lens and camera settings, the locations you use, and of course, editing.
Below, I’ll share the 4 main “pillars” of photography, and some tips about what to focus on for each, as well as some resources to help you learn and improve your technical and editing skills, because luckily you’re in the right place to learn everything there is to know about the art of pet photography!
1. Cameras, Lenses & Settings for Pet Photos
The first important topic, is gear.
While everyone always asks me what camera I use (the Sony a7iii) and what cameras I recommend (find my answers here, and here), it’s actually the lens that will probably have a much bigger impact on your photos, as well as the settings you choose.
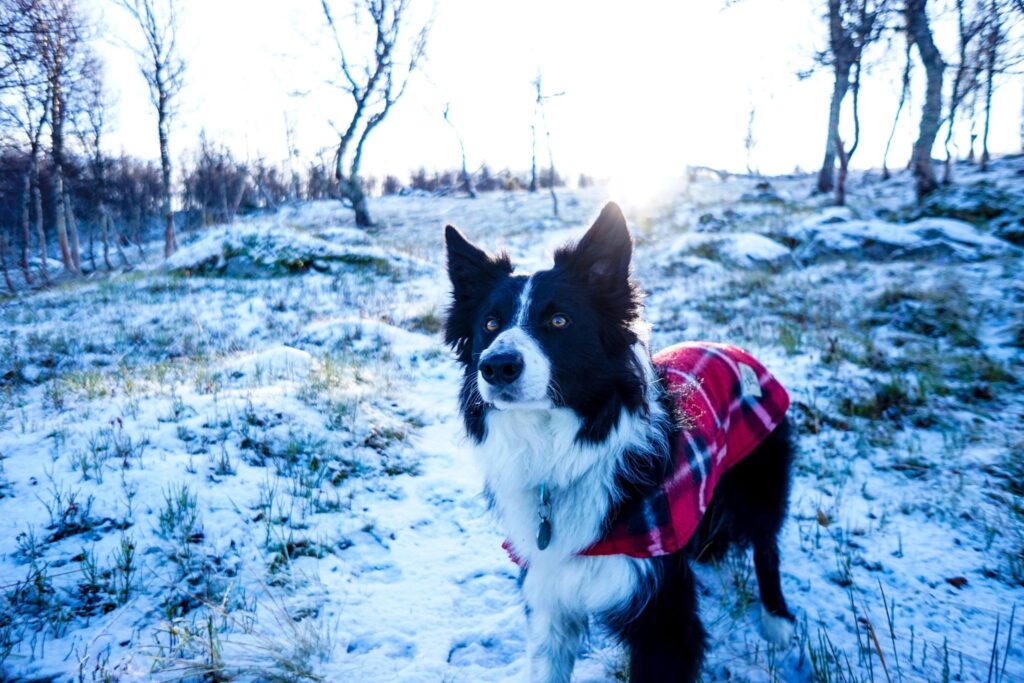
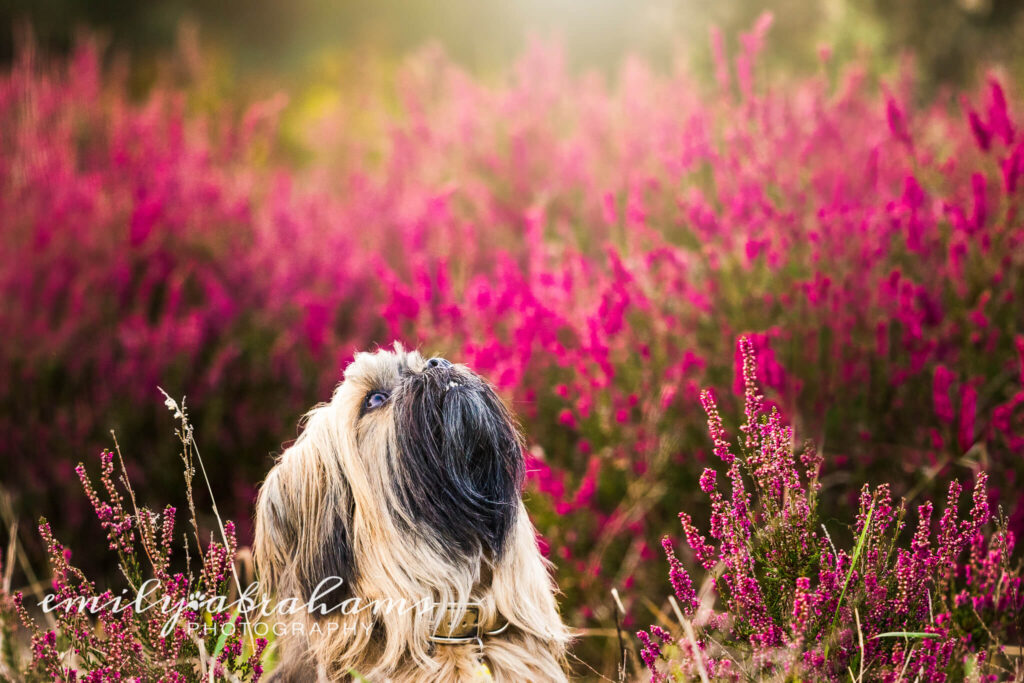
You can read my whole blog post about lenses here, but in summary: longer lens focal lengths (85mm, 105mm, 135mm and 70-200mm) as well as wide maximum apertures (f/1.2 to f/2.8) will give you the ability to create those soft, creamy backgrounds you see in photos.
This background? Not blurred in editing.
But, as anyone who’s bought new gear and ended up with average photos knows… it’s not just the gear you need to master. It’s the settings.
Sure, camera programming has come a long way and there’s a ton of auto-modes that do a ton of things… but only by choosing your own settings will you have control over how your photo turns out.
Getting the eyes in focus often requires a small focus area, placed over the dog’s eye, rather than relying on a wide focus area for the camera to search.
Making sure our dogs are sharp often requires a faster-than-expected shutter speed, to freeze slight movements from the dog. My minimum is 1/400 sec!
Getting those soft, creamy backgrounds generally requires a wide aperture – f/2.8 or wider! And yep, it’s likely that the nose won’t be in focus than (and I personally don’t care!).
If all of this seems like a foreign language, you’re not sure where to start, you’re having trouble getting dogs in focus, OR the whole exposure triangle thing seems super overwhelming, you need to check out my “Master your camera for pet photography” mini-course. It’s only €27 but gives you a ton of lessons, videos, behind the scenes, and exercises to do to get control of your camera and to be taking the photos exactly how you want!
2. Pet Photography Foundation Skills and Knowledge
There is a ton of really important foundation knowledge you need to have in order to create great pet photos.
Most people believe the editing is the most important thing, but if your photo has poor composition or harsh light, all the editing in the world probably won’t help.
Here’s a few tips from the upcoming Beginner’s Course Bundle (which will include the Master Your Camera Course, Light Course, and Beginning Editing Course, and is a part of the Learning Journey).
Composition!
It doesn’t have to be a scary word! In fact, I wrote a blog post about the topic here.
At the very base level: don’t chop your dog, and give the dog space to look into. Also, most pet photos tend to work better in landscape, rather than portrait orientation (don’t tell me how instagram prefers portrait orientation for the likes. I want to make good photos, not serve an algorithm). Dogs are horizontal creatures. Stop squashing them into a box.
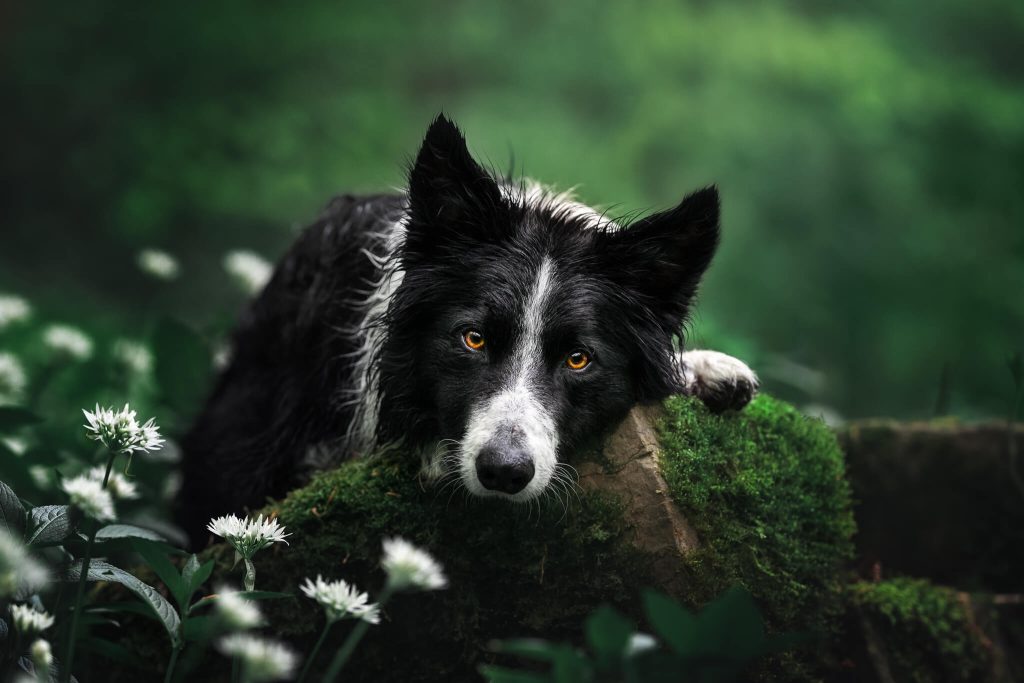
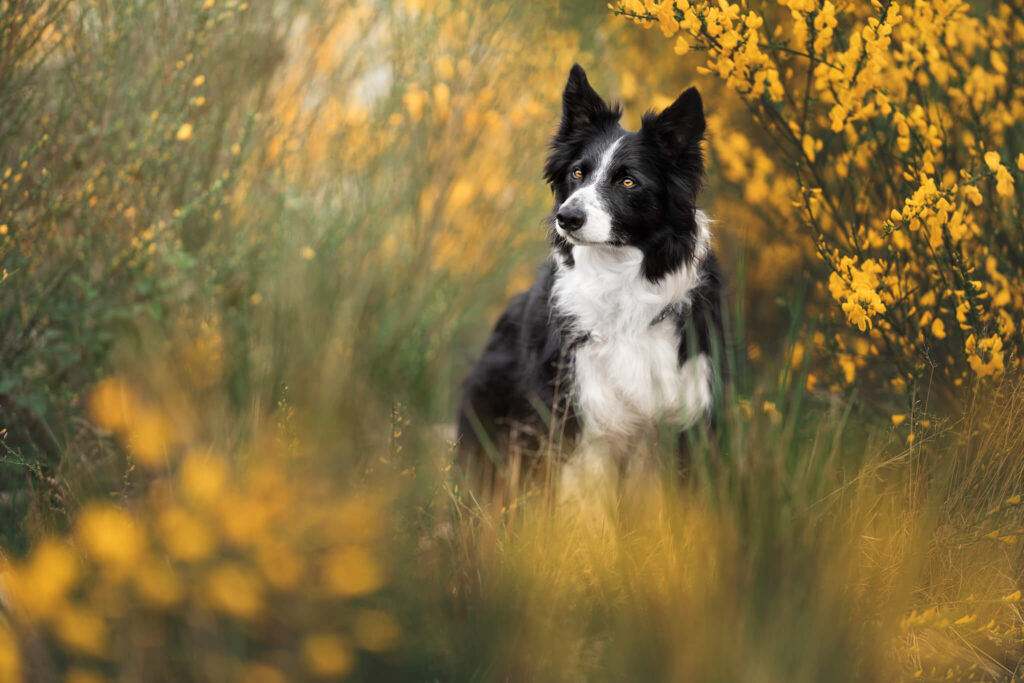
While we’re at it, get down low. I mean REALLY low. Like, I basically don’t want to be able to see much of the ground in your background. A lot of people say “get to their eye level” but I’d go even further and say get to their knees. The dog will look so much more majestic and you’ll see so much more of the background like this.
Chopped off front legs, too high angle, and he’s very centred for a dog looking to the side.
Heaps of space to “breathe”, above below, and around him. Space to look into, and a nice low angle.
Lighting!
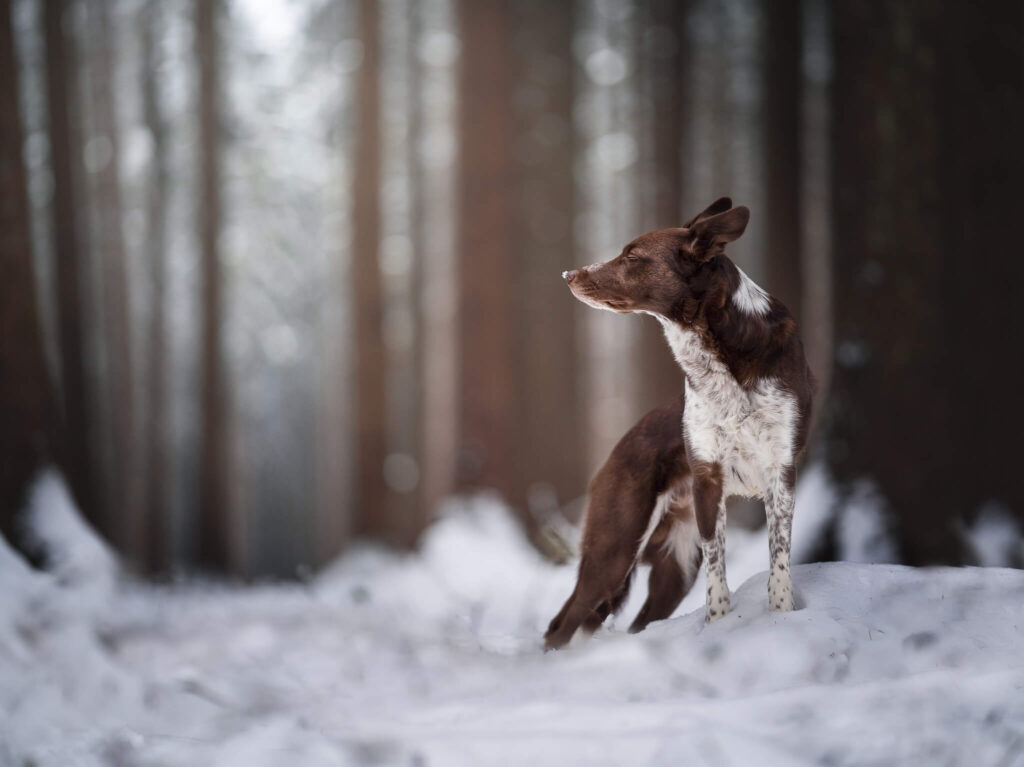
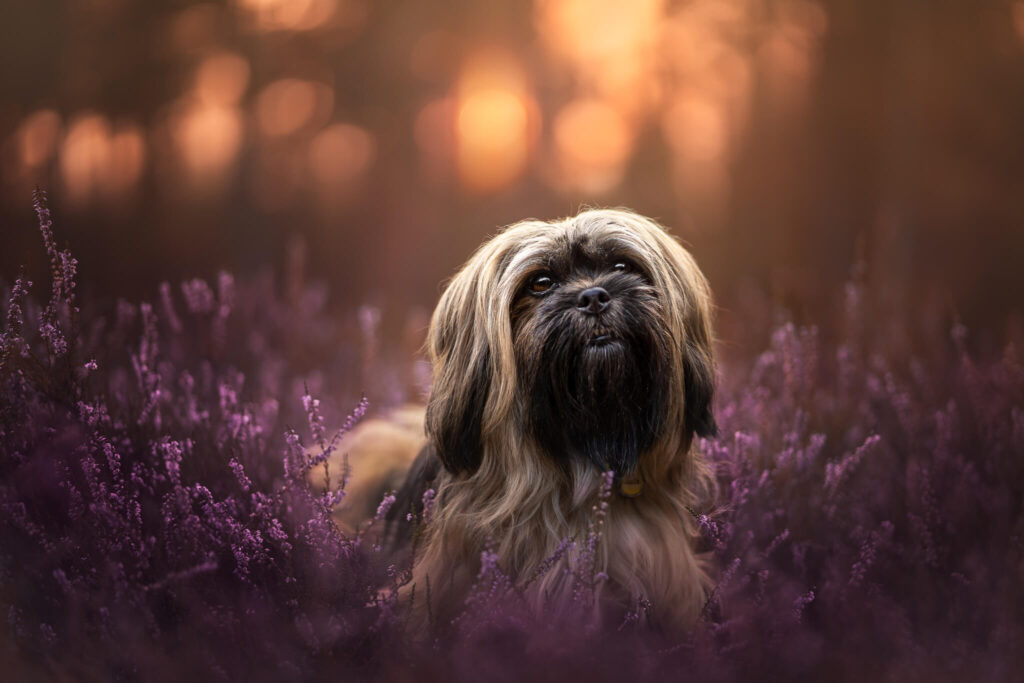
The light in your photo can make or break it. For beautiful portraits, we want nice, soft, ambient light. This means not shooting with the sun shining on the dog, which makes them shiny and has high contrast and is very rarely flattering.
Even when the sun is out – even at golden hour – I tend to put it behind my subjects.
Mastering light quality – making sure you have enough light but not too much! – and light direction, is KEY to getting the kind of look you see in professional pet photography accounts on social media.
No. Firstly, for all the composition reasons mentioned above, but also the light is just not good. If you have a black dog who always looks silver, it’s probably because of the sun.
Much softer light, space to look into, much lower angle.
3. Using Your Locations
Surprise surprise I also have a blog post on locations for pet photos. But here are some tips:
- consider WHY you’re taking the photo at this location. What’s special or interesting about it? How much of it do you need to show us?
- where is the light? Not only the light from the sky, but light areas in the background? It usually works best if the dogs look INTO the light (I talk about this a lot in the monthly critiques in the Learning Journey)
- what shapes are in the scene? Is there a curve? Can your dog’s body also curve in the same kind of way? Or, is there a kind of tunnel that works better with a symmetrical pose?
- is all that bright open sky/twisty tangly branches/rubbish bins going to be a distraction in the background? Can you shift your angle to remove some of those distractions?
- what kind of story can you tell with where the dog’s looking and how it’s posing, in relation to this location?
- is it a good idea to put your black dog in front of a dark background? (sometimes it is! Usually not)
4. Editing Pet Photos
Finally, everyone’s favourite topic, editing!
Of course, I could say so much about editing (hence why I have multiple courses and tutorials available for you!), so again, I’ll try and break this down into the most important aspects, based on what I commonly see on social media and from my Learning Journey members.
- get the right white balance! Most people edit too cool and the dog ends up blue and everything feels a bit dreary and dull. Warming up the photo, especially when it’s golden hour, a happy photo, or something that should be warm and inviting, can improve the moo.
- the edit should match the mood, not create it. Got a super happy cute fluffy smiling puppy in a flower field? Don’t try and edit it dark and moody. It’s not going to work. Similarly, if you put your super happy cute and smiley puppy in a creepy haunted tree and he’s sitting there looking like 🤩 then your creepy haunted tree and the creepy haunted edits probably aren’t going to match your subject
- make them look into light!
- get the basics right. White balance. Straight horizons. Remove little twigs. Brighten their face.
- presets are useful for bulk editing, and not really useful for artistic portraits that need you to “hand edit” small details. They usually discolour dog coats and don’t address distractions in the image.
- don’t make the eyes look demonic.
- go easy on the special effects if you’re trying to hide or fix something. I see a loooooot of “hazy backgrounds” from where there’s a ton of distracting sticks in the background, or a large area of blown out sky… and that weird foggy haze just draws my attention to the background more. If our photo is “missing something” or we can’t figure out why it isn’t working (usually something in the mood isn’t matching up) we tend to over compensate by ADDING a ton of stuff. Overlays. Gradients. Blur. Either the image doesn’t work from a foundation level (remember smiley puppy in creepy tree?), or you’re overcomplicating something that should be simple. Of course it’s hard to give exact solutions and guidance here in a blog post – it’s one reason I love being able to give feedback and critique on my member’s photos in the Learning Journey!
Me from back in the day when everything could be solved by adding light haze and saturation.
Same dog, a few years later. Actually a much more intensive edit, and I probably did a lot more to it, but undoubtedly it’s a better photo from the ground up.
I hope this has given you some things to think about as we head into 2024!
Tell me in the comments: what will YOU be focusing on for the next 1-3 months of your pet photography journey?
If you found some of the tips and advice in this post helpful or interesting, make sure you share this post with your friends and followers! You can use the images below, or even just take a photo of the blog post and share it to your socials!

Instagram Story
Thanks for reading, and keep an eye out for more pet photography tips coming your way.
Emily, Loki & Journey.
PS. If you want to level up your Action Photography, and increase your hit-rate of in-focus, jaw-dropping, wall-worthy photos of dogs running and leaping, make sure you sign up for the 6-part webinar series with Chris van Riel, beginning with the first webinar February 10th! Early bird discount ends at the end of January so don’t miss out on your chance to grab a whole year’s worth of pet photography ACTION, for under €60 per webinar 😱 You can find out all the details by clicking here.