ArchivesFundamentals

Composition Basics

In this lesson...

Composition is a scary word, but it’s all about how our image is put together.

This might include:

  • where the subject is positioned in the photo
  • how much of the frame they take up
  • what other elements are in the photo
  • how much space they take up
  • the over all “balance” of elements in the photo

Maybe the most important thing when it comes to composition, is for the photo to feel comfortable to be in and to spend time in.

Our aim with our images should be to try and find a balance, and composition is a big part of that. Some elements of an image take up visually more space than others, so begin thinking about whether your image feels balanced, or if it’s being “pulled” to one side or another.


Our audience should be able to move through our photo, to return back to our subject.

In this lesson, you’ll find my three most important guides to start thinking about regarding composition, before you consider anything like rules, guides, or grids.

The Most Important Thing: Don't Chop the Dog

In general, we want to avoid “chopping our dog”. 

There are slightly different rules with horses as they are so big, but smaller animals like dogs, cats, and so on, shouldn’t be “chopped.”

This means: chopping through the legs, chopping off paws or toes, chopping off tails, chopping bodies in half, and chopping off the tips of ears, should all be avoided.

Are there exceptions to this “rule”?

Of course, there always are.

For example, head and shoulders photos, where the dog is chopped through the widest part of the shoulder, feels totally ok. 

Some extreme close-up shots can also be fine if the top of the head is chopped, for example. These should be purposeful! If the toes or paws are cut at the wrists, this doesn’t feel purposeful, the photo is awkward and a bit uncomfortable, or it feels unfinished. 

Below is a lovely selection of my old photos from when I had just started learning pet photography (or before I’d even started learning!) of where I make some pretty significant compositional errors, but for the most case the problem is with chopping the dog.

 Compare them to the second gallery, with full bodies and headshots – ALSO from very early on in my learning process so we can’t blame fancy-editing for the improvement.

Some improvement on composition (still some work to be done!)

The Second-Most Important Thing: Breathing Room

Now that you’re not chopping the dog, I bet a new problem has popped up:

Not giving the dog “breathing room”.

What I mean is, giving the dog a bit of room to breathe. A bit of space below his feet and above his head. Behind him, in front of him. Does this mean he needs to be smack-bang in the middle of the photo?

No.

But photos like this:

Can also feel a bit “claustrophobic”. 

Does this mean your dog always needs to be super far from the camera?

Nope.

But being conscious of where their ears, feet, tails etc are during the shoot, OR having the skills and tools to take extra photos to fix your composition if needed (I do this all the time, since I get too excited and just take photos) is really important.

Dusty has plenty of "breathing room".

The Third Most Important Thing: Space to Look Into

In general, if your subject is looking to one side, they will need “space to look into”. 

The more severely they look to the side, the more space they will probably need. 

Giving them space to look into means we can move through the photo, their gaze isn’t blocked by the edge of the photo, and it will generally “flow” better.

These are some not-so-great examples from my past:

You’ll notice I’ve included a couple of photos here where the dog is in the middle of the photo, and he does “technically” have space to look into…

But because he’s looking to the side, but with a centred composition, the balance of the photo is off. You’ll see what I mean (hopefully) with the examples below. 

You’ll notice also a few portrait orientation photos, and you might be spiralling into a panic right now because you’ve been told that photos in portrait orientation do best on Instagram, but how can you possibly give the dog space to look into with portrait orientation?!

Well, there’s a whole lesson on this topic coming up.

But let’s just say that first of all, I believe dogs fit much, much better into landscape orientation pictures, since they’re horizontal creatures.

Second of all, I don’t make my photos for social media. I make them to be beautiful. 

Thirdly, I would say that… 95% of my photos on Instagram are in landscape orientation. I’m currently sitting at 53,000 followers. Similarly, the majority of well-known, high-level, professional pet photographers shoot mostly landscape orientation.

Why? Because the composition will make more sense. 

So… either create photos for a social media orientation, even though I’d argue it makes no difference at all…. or create them to be beautiful and compositionally balanced.

And of course... some much better examples

Hang on Em! Some of these photos are portrait orientation and you just said not to do portrait orientation!!!

Indeed, there are some photos here in portrait orientation. Have a look at the gazing direction of the dog. Is he looking to the side? 

Or is he looking… up?

Can this rule be broken?

Of course! Any rule can be broken! But again, I think it needs to be done purposefully or for a reason… and I don’t have many examples of that!

I think the photo below is probably one of the few times I’ve really purposefully broken the rule, and even then I would argue she STILL has space to look into, as she’s looking up to the top right corner in a diagonal, rather than directly to the right.

Trier Suburban Photo Walk

Join me as we go for a walk through some of the suburbs in my town, and I discuss how and why I would (or wouldn’t) choose certain locations along the way. 

After each location, I show you all the images I captured in that spot, discuss what I would be looking for, and whether they did (or didn’t) work out. 

Example Images from the Walk, at various stages of editing.

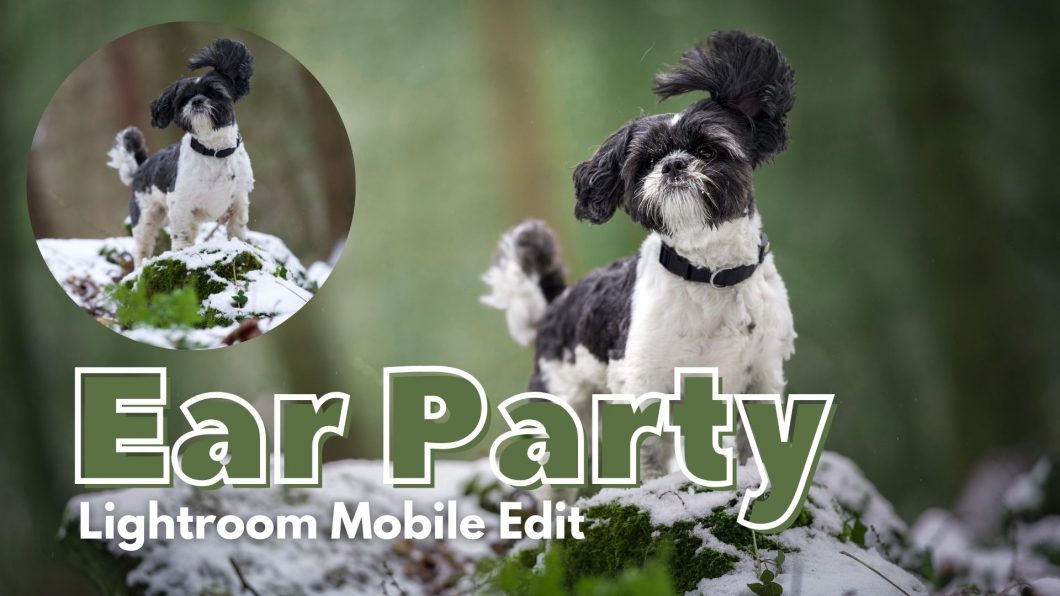
Ear Party: Lightroom Mobile Edit

Some of you may use your phone or an iPad or similar to edit your photos.

I wanted to show you that it IS possible to do a full edit using LR mobile, although I was a bit slower and way less precise than normal – and I think that’s the main point to note. With a stylus or similar, you could likely be very precise, but with your finger, it’s much more difficult.

I did this edit on the JPEG version of the photo as my computer and phone didn’t want to cooperate. You can download the RAW file here but if you can’t get it onto your phone you can download the JPEG version, or if it’s only JPEG version showing up, don’t stress.

Also… I was apparently feeling especially “unmasked” while filming this (I think being on my phone dropped the professionalism a little!) so enjoy this more quirky version of me, including laughing at my own jokes, singing about radial filters and more. 

DSC01871 DSC01871 2

As always, our goal with the photo remained the same:

Draw attention to the dog. Remove distractions.

To do this we:

  • Fix the White Balance
  • Add clarity and texture to the face
  • Lower highlights in the snow
  • Adjust the colour of the background to make it more Christmassy
  • Remove colours from Alfie’s legs and chest
  • Bring detail, colour and light to his eyes.
  • Spotlight effect! Darkening the outside, lightening the inside
  • Slight tunnel effect, dehaze behind Alfie.
  • Some dodge & burn for a 3D effect.

Kit Lens vs. Other Lenses

One of the BIG reasons you may be struggling with photography is your lens. Most people start off with a “kit lens”, or the lens that came in a bundle with the camera. 

These lenses tend to actually be pretty unhelpful for beginners, and often rather limiting. Some of them are better quality than others, but most people who want to do photography properly end up growing out of their kit lenses very quickly. 

My advice to most people looking into equipment is to invest your money in “glass” (lenses) rather than the camera body. A good lens will make an average camera body look much better than it actually is.

There is definitely a difference between cheap lenses and expensive lenses, and if you cheap out with your lenses in the beginning, I suspect you’ll quickly regret it. 

 
What I wanted to do in this lesson was discuss the potential limitations of a kit lens, and in case you don’t believe me about image quality, I also wanted to prove the difference between investing in glass compared to your camera.

For many of the tests below, I use my professional camera, the Sony a7iii with the kit lens attached, and my 10 year old Sony a6000 (which has been beaten and battered and travelled the world) with my Sony 135mm f/1.8 lens (which is considered one of the best Sony lenses available).
 
I think you’ll see pretty quickly that it is the lens that makes the photo.

Kit Lens Limitations

In this case, I was using an 18-55mm f/3.5-5.6. As you learn more about depth of field you’ll quickly understand why this lens was not that fun!


  • Wide-ish angle. Lots and lots of detail in the background, lots of bright sky, not my favourite look.
  • Narrow maximum aperture. This meant that:
    • I didn’t get nice background or foreground blur
    • my ISO was usually extremely high (shooting in the woods on an extremely sunny afternoon with my other normal settings. It was bright for the woods in most of the locations) so the locations I could choose was limited, and I will probably have to deal with a lot of grain
  • the autofocus SUCKED. It was the worst I’ve EVER experienced. You’ll see in the video. I don’t know if this was because it’s a second hand lens (and not the highest quality one either, just the cheapest on that still worked) but I had to turn continuous autofocus OFF, and treat Journey like a bowl of apples. 

Comparisons

For this lesson I took a range of photos. Sometimes I wanted to compare the 18-55mm to my Sigma 35mm f/1.4 (a pretty good quality lens), and then compare it to my 135mm lens on my old Sony.

In typical Em-style I mixed everything up as I went, so just pay attention to the descriptions to figure out what’s going on.

Most of these are completely unedited, except for a couple where Loki was tilting his head or had it toward the bushes, so the side of his face was extremely dark. I tried to make them all a “decent” exposure, both in camera and in editing, to ensure a fair test, but sometimes the exposure varied as the light was changing a fair bit.

Pay attention not to the light, therefore, but to image quality, sharpness, the overall “look” of the image (blurry background/foreground?) and the camera settings I used. When you’re more familiar with exposure settings I recommend you come back here and see what a huge difference the variable & narrow aperture made.

If you want to view the images larger, right click and choose “Open in new tab” to get the full size. Though I exported them quite small so they wouldn’t take forever to load.

Test 1

Almost all the photos taken with the 18-55mm were out of focus as I couldn’t use continuous Autofocus, as it would just hunt. I got lucky with this one!

The photo from the a6000 is definitely softer than I would have expected, but it is a crop camera, and ISO640 is getting up there for it. It’s nothing I couldn’t fix with a little bit of editing, adding sharpness and clarity where needed.

Test 2

Test 3

Test 4

Choosing a Lens

Table of Contents

I’ve made a table below of different lens lengths. Keep in mind I am NOT a lens expert. It’s worth speaking to the people at a photography store (but they will likely recommend a 50mm as that’s commonly used for human portraiture, not pet photography). “Nifty 50s” can be fine beginner lenses but I don’t know ANY pet photographers who use them regularly. Most people who buy one as their beginner lens very quickly out-grow them and need to upgrade (probably to something longer). 

Things to consider when choosing a lens:

  • The best quality lenses, and the best lenses for (almost all) pet photography purposes are going to be “fast”. I’m not talking about how quickly they can focus (although this is important too) but rather how wide their widest aperture is.
    • Basically, a lens with an f-number of f/2.8 or wider (smaller numbers, eg., f/2, f/1.8, f/1.6, f/1.4, f/1.2) are going to allow more light in (allowing you to shoot in lower light conditions), and are going to give you a narrower depth of field (creating that beautiful blurry background and bokeh light spots).
    • A lens with a minimum aperture of f/3.5, f/4.5 or f/5.6 won’t give you a blurry background, is limited in how much light you need before you’re raising the ISO too high, and is therefore quite a lot more limiting. I can’t think of any reason you would want a lens with these apertures for pet photography except MAYBE for landscapes. Look for lenses that have a fixed aperture of f/2.8 or wider.
  • The next thing to consider is focal length, eg., how far away from the dog you need to be to take the photo and therefore how much of the background is included in the photo.
    • The shorter/wider angle the lens, the more of the background, and the longer the lens, the more compression (showing only a very narrow section of the background, giving you the ability to shoot on a roadside by a flowery bush, and have ONLY the flowery bush in the background). 
  • Using a wide angle lens requires you to be much more conscious of things like having trees growing out of the dog’s head (since you can see so much of the background and it isn’t as soft and blurry as a longer lens), and having a lot of open sky in the background, which does not turn into soft and pretty bokeh spots like it does with longer lenses, but stays as big bright speckled patches between the trees – see the examples below.
  • I’m not recommending specific brands/models here. There are literally dozens of 85mm (for example) lenses across the range of brands. Sony e-mount lenses alone have 3-4 varieties of an 85mm lens. 
  • Keep in mind as well, if your camera is a “crop sensor”, that a 35mm will act more like a 50mm lens, a 50mm lens will act/feel more like an 85mm and so on. I’ve listed the lengths below as they are on a full frame camera. I’m also not going to list all zoom variations (eg., 16-35mm, 28-75mm, etc etc) as there are just too many. 
  • “Prime” lenses are fixed lengths, and tend to be slightly sharper than a zoom lens. Prime lenses also usually come in versions with wider apertures than zoom lenses, which generally only go to f/2.8.
  • You tend to get what you pay for with lenses. If a lens is extremely cheap, you need to expect that it won’t be that sharp, may have quite some chromatic aberration, may struggle to focus, and so on. 
  • There are some examples of images taken with different lens-lengths below the table.
 

After reading this lesson, you may be tempted to write in and ask: Should I get the Sigma/Sony/Nikon/Tamron/Samyang…. And there isn’t going to be an answer here. 

First of all, because we don’t own a camera store. Second, because new lens models are coming out all the time. Third, because it can depend on the brand, the system you use, and other factors. 

Best is to look at: 

  • Maximum aperture (f/ number) and decide what works for you. Do you REALLY need f/1.2 or f/1.4 or will f/1.8 be fine?
  • Next is Autofocus speeds. Find some reviews. Is it a brand/model that’s slow to focus? Is that going to be a problem?
  • Next is size and weight. Some lenses are heavy beasts. Others aren’t. Do you want to lug around all that weight?
  • Lastly, price. Some brands will be cheap, but that usually comes at a “cost” – maybe some chromatic aberration (purple or green at the edges of light to dark areas of the photo), maybe some softness at the edges, maybe the lens itself is soft. Good, quality glass costs money, but that doesn’t always mean most expensive = best for YOU. 

Also, there will be no “perfect lens.” Very few things in life are perfect. Pick the one that ticks the most boxes and I’m 99% sure it will be just fine. In my opinion, the biggest mistake you can make is choosing the wrong focal length. Getting a 35mm lens and expecting the background to look like a 135mm lens, for example.

Lens Comparison Table

Lens length
Good for…
Keep in mind
14, 20, 24mm
Landscape photos. Mountains, lakes, wide sweeping plains. Any time you want to emphasise the SIZE of the landscape. Also for “bobble-head” or “dog-selfie” type images.
Can have some distortion when taking photos of the dog up close, enlarging the head and making them look strange.
28mm, 35mm
Moderate landscapes, a slightly different perspective than most “traditional” pet photographer lenses.
Still includes quite a lot of the background, so not great for isolating the pet in an image
50mm
It’s said the 50mm lens is closest to how the world looks from with our eyes, so a lot of people begin with a 50mm as the length feels very comfortable. Used a lot in human portraiture, but considered a bit “boring” as it’s pretty safe.
Not really often used in pet photography as it’s a bit of a “nothing” lens. It doesn’t have a lot of background compression so you still get a lot of the background included, you need to be quite close to your subject to get real background blur/bokeh, which doesn’t work for full body shots of dogs. It’s definitely more a human head/shoulders portrait lens, IMO.
70-200mm f/2.8
I’m listing this as a zoom rather than a stand-alone 70mm (I think the next prime lens is an 85). This is one of the MOST recommended lenses for beginning pet photographers. It usually has good AF speed for action, is very versatile in that you can zoom in and out of dogs moving around. For portraiture, zooming in to 135mm or 200mm gives you a lot of compression (squashes up the background to achieve that narrow depth of field and creamy bokeh). It’s probably not as sharp as a prime lens, but perfectly acceptable for pet photography
Can be pretty big and heavy. The better quality and “faster” versions are usually expensive, but you could use this lens and no other lenses, if you wanted, so it’s worth the investment.
85mm
This is actually one of my favourite lens lengths. The version I have is light and small so it’s super easy to carry around. It was inexpensive so I don’t mind it getting a bit beaten up on our walks. The images are super sharp, and I really like the working length – I’m not too far from the dogs so I don’t have to fall off a cliff to try and get them in the frame, but there’s still a lovely amount of compression and foreground and background blur.
You MAY want more compression for even softer and creamier backgrounds on full body portraits, especially for client shoots. Not so great with action as it’s a bit wide to take in any action happening far away, and you can’t zoom in or out.
105mm, 135mm
I’ve grouped these together even though they’re slightly different. A lot of people love the 105mm, and I believe the Sigma 105mm f/1.4 ART lens produces incredible images (but it ridiculously heavy! Lots of glass in there). Both lenses have beautiful compression of the background even for full body shots. My Sony 135mm f/1.8 GM is my sharpest lens, and currently the lens I use the MOST for clients and my own dogs. I’d say 80% of my photos are taken using this lens these days, and 20% with the Sony 85mm
Likely quite a heavy lens, and probably pricey too. Takes some getting used to working at this focal length, and can be a little restrictive as there’s a LOT of foreground before the subject, so you have to find places that work with the lens. Also you have to be quite far away from the dog, so if you’re trying to shoot in a smaller space (eg., there’s a ditch or hill or something behind you) then you might run out of room. Also if your dog doesn’t stay, you mightn’t be able to get far enough away to use this lens.
200mm+
These super long lenses are usually only used in wildlife or bird photography, when the subject is a long way away and can’t be approached. Of course you COULD use them for pet photography, and you would get amazing compression and soft backgrounds, but I think there are more convenient lenses. I believe Marc Gaub (an amazing photographer who takes photos at the agility world championships) uses a 300mm f/2 lens. It’s a BEAST.
Super heavy!!! So much glass!! You constantly have to be very far from your subject and considering all the foreground that may be blocking the view of your subject. Also usually very expensive too as they’re quite specialist lenses.

Wide Angle Lenses (from 10-24mm)

DSC01170

16mm on a crop frame. Old photo, please ignore the blown-out sky

dog-2785074_1920

16mm (not my photo, from pixabay)

person-731495_1920

16mm (not my photo, from pexels)

beach-1854123_1920

16mm (not my image. From pixabay)

pexels-jacub-gomez-1143369

16mm (not my image, from pexels)

pexels-ray-bilcliff-1509237

10mm (not my image, from pexels)

Taken at f/2.8 with a 24mm lens.

Tamron 17-28mm taken at 27mm, f/2.8

DSC03998-Edit copy

Tamron 17-28mm f/2.8 taken at 20mm, f/2.8

DSC06122-Edit

Tamron 17-28mm, taken at 25mm f/2.8

Mid-length lenses (28-50mm)

DSC03401

28mm f/2.0 Very lightly edited - the huge areas of white/blue behind Journey were just open sky. This was taken in the middle of the woods in winter so there was nothing to filter out the sky. It's not pretty. There was sky EVERYWHERE.

28mm f/2.8 lens

28mm f/2.0This is quite a cute effect. Limiting the amount of sky through the trees, and being close to the dog for a narrow depth of field is really key.

pexels-laura-stanley-2666154

50mm (not my image, from pexels)

AV7A9519

50mm on a crop frame

pexels-helena-lopes-3714060

35mm (not my image, from pexels)

DSC03862-Edit

40mm

DSC04620

52mm

DSC09042-Edit

50mm

DSC02762-Edit

28mm

DSC03908-Edit

35mm

DSC04683-Edit

Sigma 35mm

DSC04903-Edit

Sigma 35mm

Longer Lenses (85mm-135mm)

DSC09703-Edit copy

85mm

DSC01827-Edit

85mm

DSC09329-Edit

85mm

Copy of Untitled

135mm

Socials--8

135mm

DSC03218-Edit

135mm

A fine-art headshot of a border collie backlit and amongst the ferns

85mm

DSC00256-Edit

85mm

DSC08162-Edit

85mm

DSC09297-Edit

70-200mm

DSC02948-Edit

135mm

DSC02341-Edit-2

135mm

I’ll update this gallery soon with some newer photos!

Focal Length Comparisons

The images below will show you comparisons between different focal lengths. I will be slowly building up a “library” of these images – but I generally try and avoid changing my lenses mid shoot, and usually don’t stray from the 85mm or 135mm anyway.

These photos will have been taken at the same location, though I may have moved closer or further away to compensate for the varying lens lengths.

Most of these photos will NOT have been edited, as they were taken for the purposes of this lesson, and it is more useful to see them as they are, rather than with blur added to the background or other things done to change the original look of the scene.

Puck's Glen

This first set of images comes from Puck’s Glen in Scotland. I loved the location but it was extremely difficult as there was no real way to move around – I could really only take the photo from one position. This meant the 35mm included way too much of the scene and the dogs got a bit lost in it… the 85mm had lovely bokeh but a lot of the scene was cut out (though later I would end up making panoramas here).

In the end I liked the 50mm best here! You can see the final chosen and edited image below.


Puck's Glen 2

This was a beautiful little backlit glade, but I just couldn’t quite make it work how I saw it.

I wanted to show the general size and shape of this place, but again the 35mm felt too busy and “flat” for me. I made a panorama of 6 images with the 85mm instead, to get the whole scene included, but also to get it with beautiful bokeh and compression. Below is the single image of Journey with the 85mm, and then the stitched panorama version. This scene may have worked with the 50mm but I’d forgotten I had it with me at this point!

Puck's Glen 3

This was another beautiful spot in the Glen that was very difficult to capture how I wanted to. There were such limited places I could stand before I was falling off a cliff.

Once again, I found that the 35mm included TOO much, and the dog was totally lost in this scene. The 50mm was better, and the 85mm cut out a lot of the scene, making it lose some of its charm.

In the end I ended up making a 10-piece panorama image (see it below) but it’s all a bit much for me! I still couldn’t get close enough to my subject to really get enough detail on him – from the distance I had to stand, he’s really quite pixelated.

Trossachs National Park

This was a pretty simple “tunnel between trees” beside a road but I saw it had massive potential.

While I was there I decided to take several images with different lenses for the point of comparison, though I knew I would only want to use my 135mm for this, for that creamy soft bokeh.

For these examples I tried to have the dog the same size in the frame, and I think it is a brilliant example of how compression changes throughout the focal lengths: from heaps and heaps of distracting, busy bright spots, to the perfect, soft, creamy tunnel of light that I had envisaged. 

I ended up creating a small 2 image panorama. The final edit is shown below.

Castle

As you can see, this was a super sunny bright day, so I really only took these photos of examples of some different lenses in this more landscape situation. I’m sure you can imagine how the 135mm would have looked – all of the background would have been filled with the castle.

In this one, I stayed in the same spot for each photo starting with the 85mm, so you get a sense of how each one looks without moving closer to the dogs, except for the last image taken with the 35mm, where I moved closer.

Spring Green Examples

In these examples, I will use the different lenses I had on hand to show you how the scene changes with each. I tried to keep the dog the same size in the frame, therefore moving myself further away with the longer lens length. Pay atention particularly to the background in each

Full body - far away

Top: 35mm

Middle: 50mm

Bottom: 135mm

All taken at f/1.8

Full body - closer

Top: 35mm

Middle: 50mm

Bottom: 135mm

All taken at f/1.8

Headshot Only

Top: 35mm

Middle: 50mm

Bottom: 135mm

All taken at f/1.8

Extremely Close Headshot

Top: 35mm

Middle: 50mm

Bottom: 135mm (this one isn’t as close as the other two)

All taken at f/1.8

Choosing a Camera

This lesson is pretty text-heavy. Apologies in advance, but apart from random photos of random things I’m not too sure how to spice it up!

There are hundreds of different cameras and lenses out there, spanning over the past 2, 5, 10 years, of all different budgets and abilities and strengths and weaknesses. I know it can be overwhelming to have to choose one. Unfortunately I’m not really going to be able to make your job too much easier – I know about pet photography, but I’m not a camera make and model expert by any means. 

Team Member Ana, however, has done a heap of research on different cameras and their features, and is standing by to help you out. Jump on over to Inspawration Connect > Topics > Gear and @Ana Raičič for her thoughts. Be as specific as you can about what you want from your camera, so only post after you’ve read through this lesson!

Read through the suggestions below, make a list of features or functions you need, then if you can, go to a store, so you can actually handle cameras. Some are much bigger and bulkier than others. 

Professor Snoot

Mirrorless or DSLR

Have a think about whether you want a mirrorless or DSLR. There’s a ton of info out there on both, but essentially, a traditional DSLR has a small mirror in the body that flips when you press the shutter, reflecting the image to the sensor. Because of this, when you look through the viewfinder, you (usually) just see the scene as it is, not necessarily with the exposure based on the settings you’ve chosen. Some (many) new DSLRs have an option to turn on “live view” which shows essentially a movie of the scene, with your exposure settings applied. Sometimes the frames per second of DSLRs can be slower, as they have to constantly flip a mirror. That are usually a bit bigger and bulkier, but a bit more robust, with a wide selection of lenses, and better battery life.


A mirrorless camera is usually a smaller body, as there’s no mirror inside. Through the viewfinder and on the back of the camera, you are constantly seeing a movie projection of the scene including your exposure settings, so you know how light or dark your image will be when you take it. This can drain the battery faster than traditional DSLRs.  Because there’s no mirror, their autofocus can be quicker, and for whatever reason, mirrorless cameras tend to work a bit better in low light conditions. I personally have a mirrorless and I love it. I also believe that mirrorless cameras are the future of cameras, and lenses, technology and updates will be focusing more on mirrorless than DSLRs.

Jump on google images and search for “Mirrorless and DSLR” and you’ll see plenty of cameras side by side, to get a sense of the size.

IMG_1705
Here is my small camera with my small lens. It also has a flip-out screen which is so helpful.

"Crop sensor" or Full Frame?

 Some entry level cameras are called “Crop sensors”. I don’t want to get into the nitty-gritty of this because I don’t think it’s necessary, but basically a crop sensor is a smaller sensor, meaning your camera sees less of the scene (which is again compressed depending on the length of your lens). What does it mean for you? Not that much, really. It will change the distance you’ll need to be from your subject with the lenses you use compared to someone using those same lenses on a full frame camera… you may get slightly less narrow depth of field/blurred background/bokeh with a crop sensor… but that’s pretty marginal. So do your research here and see if there’s a real benefit for you going FF or not. That being said, most hobbiests who want to get more serious do move from crop to FF after a while. 

Low Light Capability

In my opinion and experience, this is something you want to look into for our kind of photography.

Especially since we might want photos at dusk, on overcast days, in the woods, or even indoors. How well your camera can perform under low light conditions and how good its dynamic range is, can really affect what kinds of photos we can take and how much flexibility we have. I want to be able to take photos over ISO 1000 (more on ISO in the following lessons) without them immediately becoming destroyed. But! If you’re just taking photos of dogs at a dog park, or in your back yard, this mightn’t be such a priority.

Dynamic range is also tied to low light capabilities. You’ll see a lot of my “before” images are very dark, but I know I can lighten them without too much trouble as my camera has good dynamic range so it saves a lot of information even in the dark parts of the image. Some cameras (the Canon 7dmkii for example) don’t keep the data in the shadows so well, so when you try and lighten the image, it might get ruined/noisy/grainy more quickly. 

This is a before & after image I shot recently. I had to expose the image this way in order to keep all the detail in the clouds, and the colour in the sky, but my boys and I are very nearly black! Because my camera has great dynamic range, I could raise the shadows a lot to bring detail back into those very dark areas, but even my camera found this difficult in this case – resulting in a lot of noise on the finished image! If my camera HADN’T been so good at retaining detail in the dark areas, it would have been an absolute disaster.

Speed & action shots

If you want to do action photos regularly, or photos of puppies or dogs just moving about, a camera which can focus, take many photos quickly, and track a subject with accuracy is going to be more important than if you’re getting a camera to take photos of your couch-potato pups.

The question you need to ask yourself here is: how much serious action photography am I planning to do?

A few shots of a dog running toward you every now and then is very different to wanting to take photos at the local agility club every single weekend. Dogs moving at speed (think border collies running, any kind of speedy agility dogs, etc) need a very good autofocus system – better than most human/portrait photographers would consider good. 

So if you’re looking for something which can seriously handle actual action photography, take most camera recommendations on what is “good” for action with a grain of salt.

I would consider this "gentle action"
This is much faster, much more intense, and much more difficult.

Other considerations

  • Do you already have some gear? If you already have a large collection of one brand of lenses, you might wish to stay with that brand. 
  • Film/movies. Will you be taking a lot of movies with your camera?
  • Animal-Eye Autofocus. Everyone is going crazy over this feature now that it’s out there. My camera has it. It identifies where the dog’s eye is and theoretically focuses on it. I still use a single point AF and still move it over the dog’s eye. I figure it can’t hurt to have two focus systems both looking for the eye. And even then it isn’t correct 100% of the time. I would worry that relying too heavily on Animal-Eye AF could lead to some missed shots if the camera is making all the decisions.
  • Different types of focus detection (you’ll see Phase AF, Contrast AF, and I don’t even know what else these days.) I’m sure each different method has different pros and cons.
  • Weather sealing. Are you likely to take photos on rainy days? You may wish to get a camera which is weather-sealed.
  • Articulating/flip screen. This is actually a big one for me, and Sony’s screen isn’t even that great. I LOVE that I can flip the screen out, kneel on the ground and still see how the shot is composed. With cameras that don’t have a flip out screen, you may need to be lying on your belly very often. 
  • WiFi & NFC capability. I rarely send images from my camera to my phone or computer via anything but the SD card. However, I do like that I can control the camera via a remote on my iPhone, meaning I can take self-portraits and see the composition before I take the photo with the phone’s remote shutter release. 
  • Touch screen? Some people love touch screens. Probably a good feature for beginners, as you an set the focus point by tapping the screen. I don’t use mine. 
  • Colour profiles. There’s some debate around different colour profiles amongst brands. A lot of Canon people hate Sony’s colour. I figure I can fix any colour with white balance adjustment so I’m not sure what the big deal is, but some people swear black and blue that Sony’s colour is awful. Make up your own mind here I guess.

Editing Software

I use Lightroom and Photoshop for all my photos, but you also don’t need some super fancy editing software to improve your photos.

The main functions that you need will be found on most free software. Of course, you might want to upgrade later, as your needs become more sophisticated and you feel limited by the features of free programs.

Check that you can:

  • crop and rotate your photos
  • adjust the temperature or white balance
  • adjust the highlights, shadows, whites and blacks.

Those are the main things we want to change at least at first so as long as you can do that, you’ll be able to fix a lot of the elements of your photos if they aren’t perfect straight away. 

Lightroom mobile (free version) does most of the global edits you need. Snapseed is another good option, and I’m sure there are others.

Later, we will definitely want to make more specific edits to parts of our photo, so I highly recommend finding an app or program which allows you edit small, specific areas of your photos. 

Snapseed does this (though it doesn’t allow you to be super accurate), as does the subscription version of Lightroom. The reason this is important is to fix specific areas of our image. For example, dogs often have yellow or green chests due to the light bouncing up from the grass. If we desaturate the whole image, well, the whole image will be desaturated. 

Selective edits allow us to JUST edit the colour of the chest. Or, in photos where there are distracting bright areas, we could selectively darken those areas, rather than the whole image. I don’t know every editing app or program on the market, so try some and find one you like, but know that most professional photographers use Lightroom and Photoshop on a monthly subscription. Other options like Affinity Photo and Pixelmator Pro are also options, but I’ve found they lack some of my favourite and important features from the Adobe software.

I recommend though that you stay away from most filters and presets. Why? Because they don’t know what our photos are. They don’t know the lighting conditions or the colour our dog should be. They may look trendy, but I feel they rarely do our photos justice. From presets, I’ve seen plenty of too bright areas which draw our attention from the dog, I’ve seen orange dogs or tan dogs turned cherry-red, blacks pulled up so that the dogs are matte and hazy, and so on. 

Phone or Camera?

Table of Contents

Phones have come a long way lately, but they still have their limitations! I didn’t want to design my lessons just around someone having a fancy camera and lens so in this lesson we’ll look at what limitations a phone might have, a few techniques to try when using your phone for photography, and what software you might want to use for editing.

This is a bit of an old lesson and I need to remake it 😅 It DOES cut out when I’m talking, but you can find the next part of the video in the Raw vs. Jpeg lesson!

Some Considerations When Using a Phone

A phone will work perfectly fine in many cases, and of course it depends on the purpose of your photo and what you are wanting to do with it. They often say the best camera is the one you have with you, and for most of us, that’s our phone! I don’t believe a phone, even the very best one, will ever match the picture quality of a  camera and good lens, but much of the information you’ll learn here will be perfectly relevant and important to you, even when just using your phone as your phone! 

There are some things to consider when using a phone:

  • You won’t always be able to get the soft blurred background (most do have “portrait mode” but it has its issues, especially with fluffy dogs.) Having a DSLR with a zoom lens or prime lens will let you get the soft background & foreground effect (for real, not faked!). One of the MAIN questions I get asked is “How do I get such soft, creamy backgrounds?” and the answer is: with a good lens. So if that is the style of photography you’re aiming for, a phone is going to make that difficult (but not impossible – you’ll see examples below).
  • Shooting backlight, or in any kind of challenging lighting situation (low light, strong contrasts, etc) might have its limitations. A phone just doesn’t retain as much data, and lightening dogs up can be tricky as they quickly become grainy and have less detail.
  • The photos may not have as much potential to be edited just because of the strength of the sensor which isn’t going to be able to capture as much data as a dedicated camera.
  • You may not be able to print your images out to a large size, as there just may not be enough detail (note that I say may, as it can depend entirely on your phone). 
  • You may need to be a little bit more creative about the angles/perspective you use, because you often get the best results with your phone when you are quite close to the dog, but as a phone usually has quite a wide angle lens, this makes things a bit interesting! Composition can be a bit interesting, as the wide angle tends to work better with portrait orientation… more on this in later lessons!

Using your phone will mean you’ll need to focus even more on taking a great image “straight out of camera”. Pay especially close attention to lighting, and making sure the subject’s face is well lit, as you probably won’t have as much flexibility in editing as someone with a camera might have. 

Phone vs. Camera

You don’t need to rush out and buy a super expensive camera. In fact, I think the best thing to purchase is one really good lens to go with your camera a body. I  recommend an 85mm f/1.8 to many of my students. It’s lightweight, good quality, versatile for the kind of portraiture I do, and doesn’t usually cost the earth.
There are a lot of options when it comes to buying a camera and lenses – both the “Choosing a DSLR & Lens” lesson, and the “Depth of Field” lesson may help you to decide. Let’s have a look at some examples of photos taken with both a phone and a camera, in the same location, and edited more or less the same.

Taken with iPhone11, not on portrait mode.

Taken with the Sony a6000, and a Tamron 28-75mm f/2.8 lens. An older camera and NOT my normal portrait lens!

Taken with iPhone11, on portrait mode. I edited it slightly, to try and brighten the face and the eyes, but because of the shape of his head, eyes and fur, and naturally very dark eyes, there wasn’t much I could do. Maybe if I’d tilted his head up a bit more to get some more light on it, the results would have been better. But this is why getting your photos right “in camera”, and paying extra attention to lighting is really important  when using a phone.

Same time & location, but taken with my very good 135mm lens. I probably did slightly less editing on this version. I could brighten his face & eye area more but didn’t want to go overboard. But for sure there was a lot more data I could continue to work with here. 

Now, this one I’m a bit proud of. Below I will explain how I achieved the background effect. But this was taken with my iPhone 11 in very bad photography conditions – late in the day, in the woods. There was hardly any light, even my camera was struggling. I took a lot of time and care to edit this photo, however, so you would be hard-pressed to achieve this photo Straight out of camera – click on the image below to see it unedited.

There are definitely some elements working in my favour here, and I will discuss them below.

This was taken with my Sony a7iii & 35mm f/1.4 lens. The settings were already at a bit of a limit given how dark it was. I’m a little bit further away from Loki in this shot than the iPhone shot, but I edited them more or less exactly the same.

Getting the Most Out Of Your Phone

These photos were both taken with my phone just outside my house (one on one side of the house, the other around the back), which I think shows that lighting, perspective, expression, background, and some basic editing techniques can make the difference between a bad photo, and a decent photo, without needing a camera

Let’s say you want to stick with your phone for now. There are a few things you can do and keep in mind that will help you get the most out of it. As you work through these lessons, don’t discount the lessons which seem like they are specifically for cameras as your phone is a camera too and uses many of the same functions.

  • Pay special attention to light. Harsh light, strong contrasts, or not enough light on the dog’s face (with more light elsewhere) are big problems with phone photos.
  • Use portrait mode.
    • Be careful of backgrounds which are the same colour as the dog. The phone’s software analyses the scene, then blurs what it assumes to be the background. It struggles therefore when there is fur which is the same colour as the background, as it can’t tell which is which. As a result you may get parts of the background very sharp around the edges of the dog.
    • Phones struggle with the very fine detail of long coated dogs and will make the edges of their ear fur very jagged. It might be worth trimming their ear fur, or brushing it so it isn’t so “shaggy”
    •  On some phones, it’s possible to even change the “aperture” to increase how blurred the background is. The photo of Loki on the moss above was taken at (a simulation of) f/1.4. You can see below on some simple, unedited indoor shots of Journey, the “normal” portrait mode (which uses f/2.8) vs. me changing the aperture to f/1.4. If you’re not sure about all this aperture talk, it will become clearer once you read through the aperture lessons.I don’t believe the phone actually changes its aperture, but instead just enhances the perception of a narrower depth of field.
  • Play with Depth of Field by getting closer to your dog, and having them further from the background. More on depth of field in future lessons.
  • Take multiple photos to make sure the eyes are in focus. Tap on the screen to tell the phone where to focus but don’t rely on that only! Phone cameras love to focus on the nose of the dog, especially when we are quite close to them. The nose is then the closest thing to the camera, and it’s usually shiny (contrast!) which sensors are easily able to grab onto and focus on. 
  • Play with your perspective. When you get to the perspective lesson, you may need to experiment to find the balance between being low enough, and so low that it’s ridiculous. Because of the phone’s wide angle lens, when a dog is sitting or standing, we need to be conscious of how much they are “towering over us” and when it becomes too much.
  • Watch the exposure! Most phones will allow you to tap or hold on the screen and slide your finger up or down to adjust the exposure. Most of the time, we want to make sure that the bright areas of our image aren’t ending up too bright (as our attention is drawn to the brightest parts of an image) but also not so dark that we lose detail and date from our dogs – especially black ones.
    • In the case of black dogs, expose so your dog isn’t too dark. More on exposure in upcoming lessons, but you may wish to find the balance between exposing for highlights and saving data in the shadows when you get to those lessons!
  • Get to know your phone. Different brands, and even different versions across brands will have different camera functions built in. Some allow you a lot more control over the camera’s settings, so you just need to find how to change these settings, and have a look through the exposure lessons. 
  • Don’t use the flash. Any forward-facing flash directly hitting a person or animal is rarely flattering.