ArchivesCreating

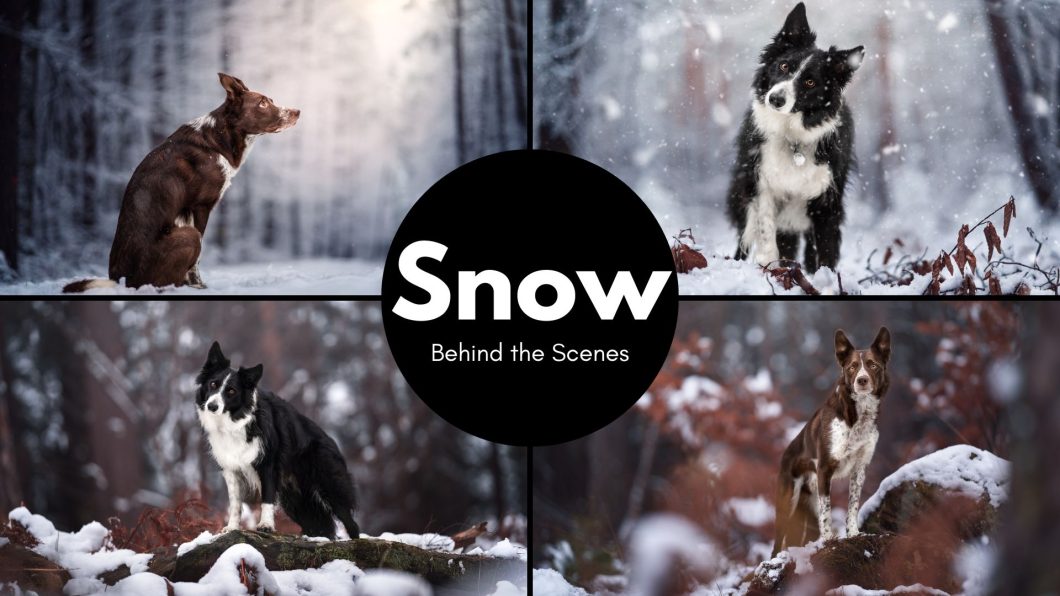
Snow Behind the Scenes

In this 2.5 part series (because the third part is a YouTube video… there IS more footage from this particular day for you guys but it will have to wait until I have time to edit!), my boys and I head out into the woods during a snowy week here in Germany.

I talk about all thing snow related:

  • exposing for highlights
  • what to do with twigs and sticks or having nothing in the foreground
  • snow eyes
  • rules to break when it’s snowy

As well as a TON of general location scouting and shooting advice:

  • how I check a location before my dogs get involved
  • what I’m looking for in a background, foreground, visual interest
  • why some locations work, and some don’t
  • even thoughts on mental health and not feeling like every location needs to be SPECTACULAR – even if I’m cynical and jaded!
So even if you don’t have snow ever, or you’re watching this in the middle of summer, I highly recommend you still watch. I can almost guarantee you’ll enjoy it and learn a thing or two. And if not, you know where the comments box is. 😉

Part 1

Part 2

YouTube Snow Video

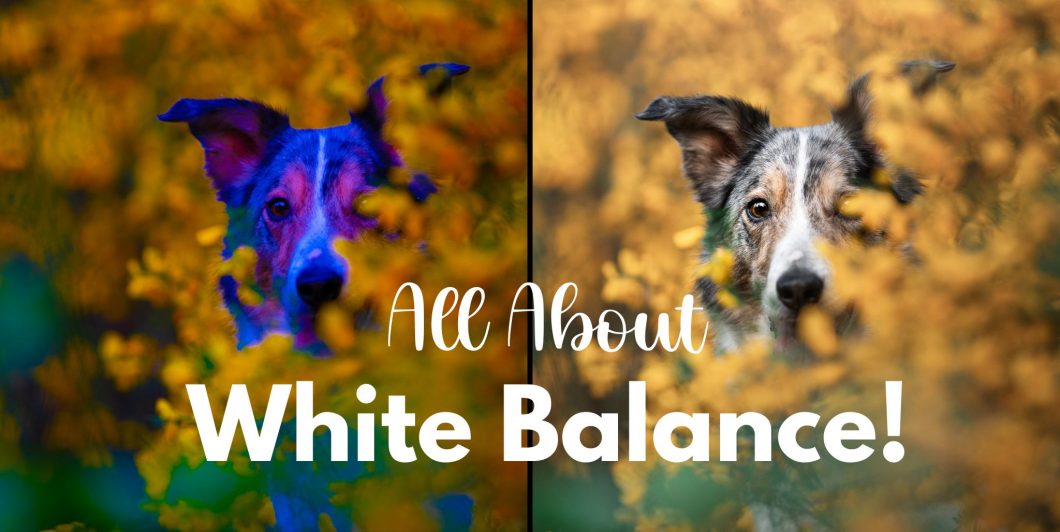
All About White Balance

White balance is the overall temperature and tint of your image. I personally try to keep mine relatively “true to life”, and there are a number of ways you can go about getting the correct white balance in your images, from camera settings to editing.

Keep in mind though that:

  • nobody cares as much about the WB as we do about our own work. Don’t drive yourself crazy with it. 
  • WB can be shifted in one direction or another for artistic reasons/choices. 
  • The WB can be “wrong” because of the light temperature making everything warmer. This is ok.  

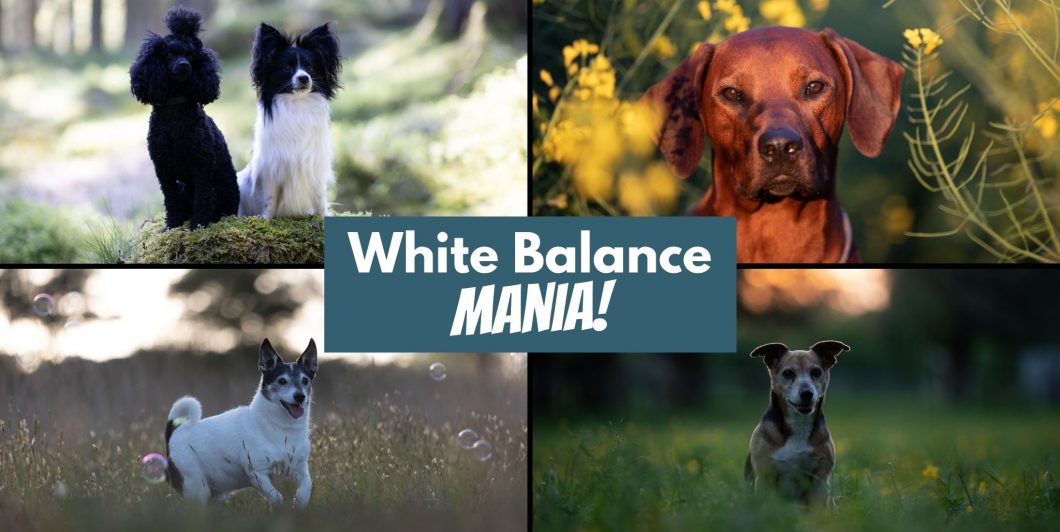
White Balance Mania

You guys uploaded 20+ images and I went about fixing the white balance on all of them, discussing what I’m looking for and at in order to set the right WB, tricks I use to help me, things to consider, and even what to do about colour casts.

Note that although I used Lightroom for this, you could easily use Adobe Camera Raw. I would not recommend using just Photoshop or working on a jpeg file. Why? Because all the subtleties of the RAW data has been lost, so instead of making small, subtle changes, you’re smashing your WB with a sledgehammer. 

Any questions? Ask below!

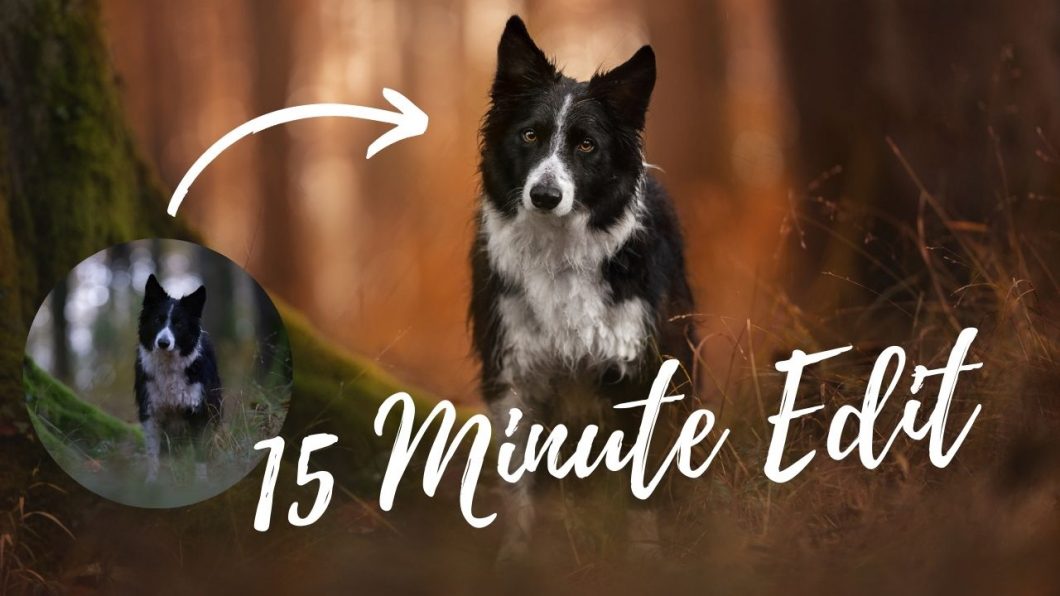
Two 15 Minute Autumn Edits

Do you feel like you need to spend over an hour on every single photo, whether it’s for your social media or for a client?

I sometimes get the sense that in Pet Photography world especially, we are a little obsessed with long, fancy, gruelling edits. The more layers, the more time, the more effects we apply, the better. It is a phenomenon I see only rarely in other genres of photography, where the photographer might apply an action, put a fake sun somewhere, do a bit of dodge and burn and skin smoothing and call it a day. Wedding photographers edit 800 photos in an hour. Meanwhile, we are here, agonising over every tiny detail, spending 3 hours on a photo so we have the most perfect gradients known to man. For what?

I’m not saying attention to detail isn’t important. I’m not saying we should slap a preset on everything and call it a day (you might know by now how I feel generally about presets). I’m saying that for the sake of our mental health, we should not feel the need to struggle. What we do, this process of creation should not be a struggle. If you love editing and it feels like a kind of therapy for you, by all means, edit for as long as you want.

If you don’t enjoy it, if it feels like a chore for you, if you’re creating photos only for your social media (because I would recommend putting a bit more time into client photos, IF you’re offering full service. If you’re doing Shoot & Burn for €10 per photo, you need to really carefully consider how long you dedicate to each photo.) then don’t spend hours on it. You can get perfectly good, artistic photos in 15 minutes.

What I wanted to do here, was to edit two photos as quickly as possible, to remove this idea that you need to spend hours on each edit.

Were my masks perfect? Nope. Would anyone on IG notice? Highly unlikely.

Do I know what I’m doing/my process/the steps I want to take? Yes. And of course this will make it much faster. 

Is the photo “perfect”? Probably not. But I honestly doubt anyone on social media would notice.

The point is… you do not need to spend an hour or more on each photo… Unless you want to. Making art is one thing. To truly get lost in an image and want to make something beautiful from it.

Churning out content for social media is another thing. There is a huge expectation on SM to post consistently, every day. If you can edit for 1-3 hours and keep up with that demand, power to you. If you are finding that it stresses you out, consider this your permission to sometimes take a bit less time, worry a bit less about perfection, focus on the photos that inspire you and that you want to put your heart and soul into. Find a way of working that you enjoy and that brings you joy.

Below are the two edits. I’ll include the RAW files for you too because why not. You’re welcome, as always, to share them on SM with credit/tags back to me, and not for commercial purposes. I didn’t narrate these edits because there would be no way for me to explain the process and go as fast as I wanted to. It’s my normal process in any case, just with less attention to detail. 

Autumn Loki

Autumn Journey

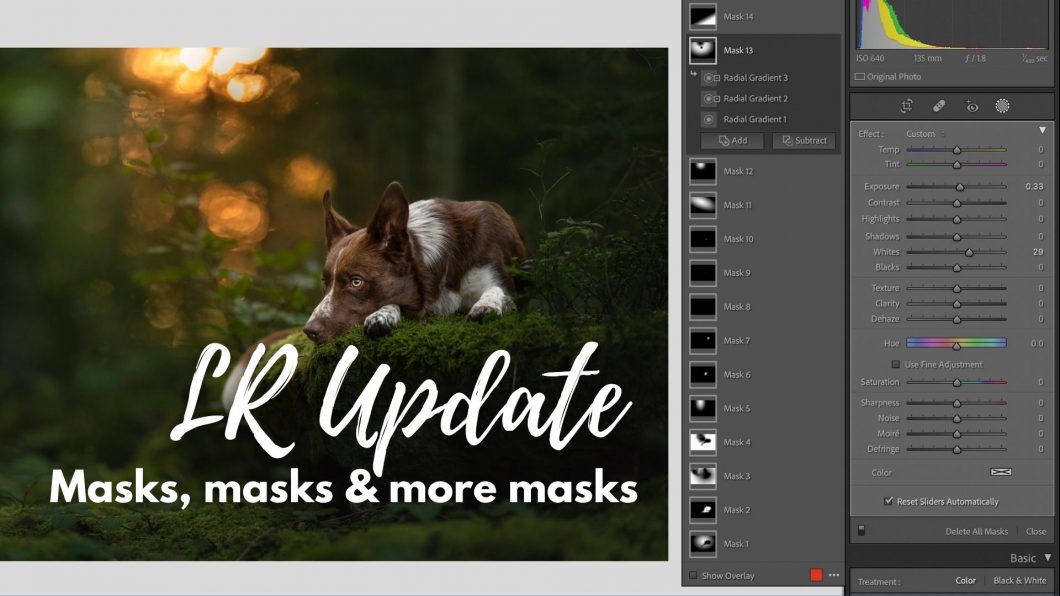
LR Update: Masks, Masks & More Masks!

In this lesson we’re going to be exploring how Lightroom’s new masking features, discussing ways we might want to use them, and what to do if we don’t want to use them (hint: you don’t have to do anything differently, if you don’t want to!). We’ll also be talking about some of the traps or pitfalls that we could stumble into if we rely too heavily on the “select subject” feature (hint: do you want your dog to look like a sticker?) and how we can hopefully get the most out of this update for our editing work!

Check your masks

Before moving on to more extreme edits, or exporting your photos, do a good, thorough check of your masks if you’re darkening the sky/background and brightening your subjects, especially if you’re using the “Select Subject” tool. Often, it can miss small bits and pieces (see below example!) and these can look very strange and out of place!

Watch out as well that the new masking features don’t just blur furry parts of your subject, or parts where some fur meets the background and it has a hard time finding the edges. You will want to fix these masks up.

Below: before & after. If you see these blurry edges, just use the brush tool to either add or remove the effect from where it’s blurry.

Mask blurred edges Mask blurred edges 2

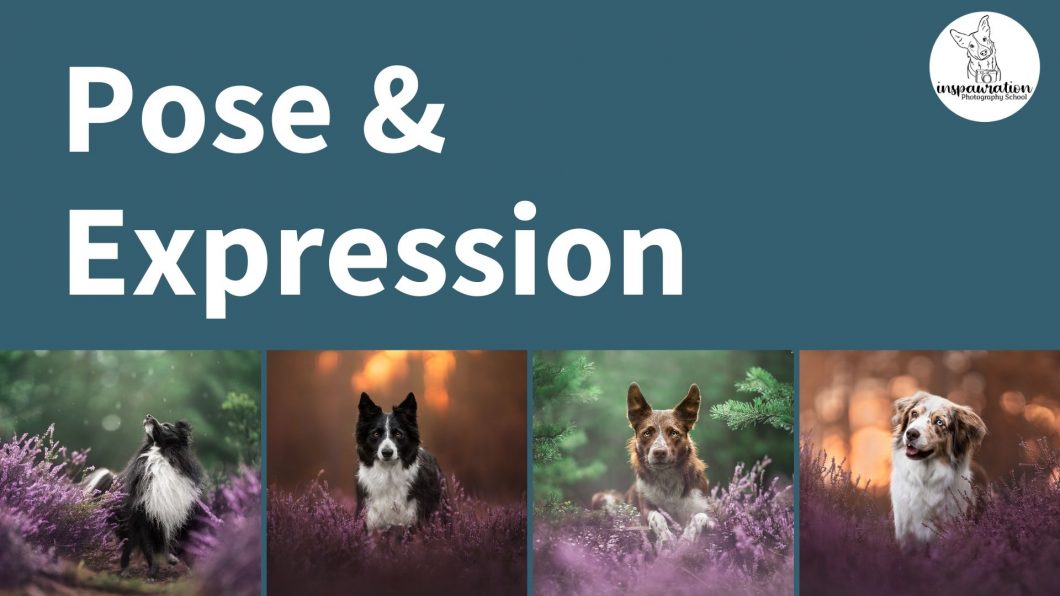
Workshop: Pose & Expression

We often forget that one of the most crucial elements in our photo is..

the subject!

And yet, so many photos I see have a dog plonked into a sit somewhere, the ears listening in two different directions. 

There is so much we can do with our subjects to create photos with strong moods and stories, and yet I think they are one of our most under-utilised resources! 

In this workshop, we’re going to explore different expressions and the feelings we might get from them, how gazing direction can change the feeling or story of the photo, and how we can use different poses for different purposes.

Download the .pdf booklet below.

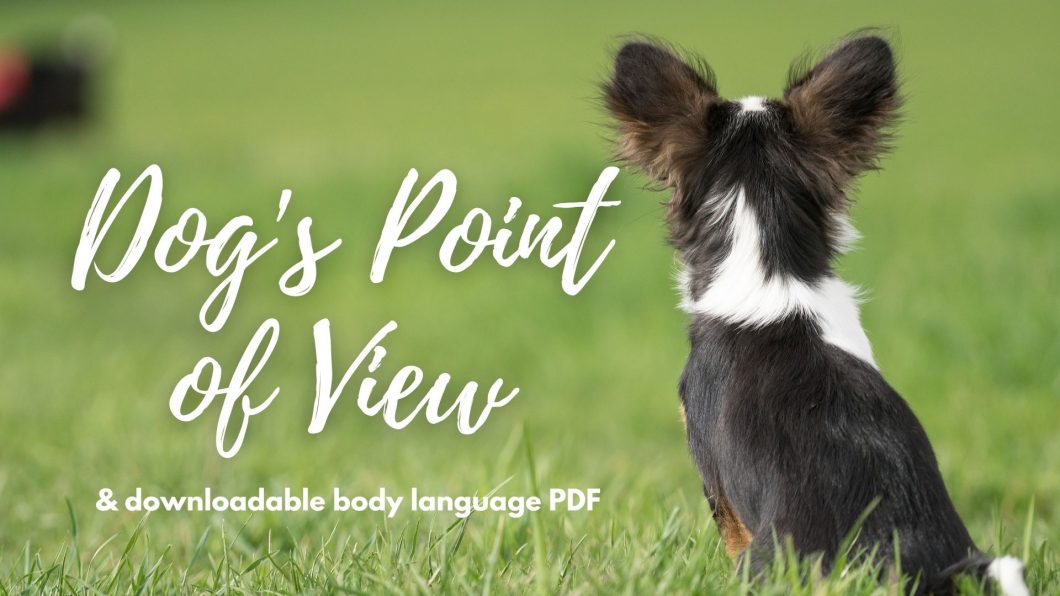
Dog Point of View & Body Language

In this lesson, I’m going to ask you to consider a photoshoot from a dog’s point of view.

I often get asked what to do with “difficult” dogs. These are dogs who:

  • don’t want to look at the camera, they’re always looking away from the camera
  • are over-threshold or too excited to do what we’re asking them to do
  • just aren’t interested

There are a couple of things I want to discuss in this lesson in regards to our dog models. One, is that what we are doing is rather strange for most dogs. If you consider our day to day life with dogs, and consider how we act and behave when we’re taking photos of them, we suddenly act very weirdly. 

Think about it. We’re crouching or even LYING on the ground (usually a signal that we want to play, or cuddle, or interact with our dogs), we have a weird black “eye” in front of our face, or we’re looking down at it and not at them (and most of us spend a lot of time looking at our dogs). We’re making weird noises, maybe even calling their name, but they’re not allowed to move.

In the case of a client’s dog, this might be even more bizarre! Who is this stranger?! Why are they doing this?! Why does my owner seem so tense?! Why do I have to sit here? Why am I not allowed to move?

If someone you’d never met (or even someone you loved and trusted) started acting this way, what would your reaction be?

Classical Conditioning

Let’s say your dog now has a history of you taking photos of them. And for that whole history, they have been given a bit of food for staying still (if they stay still!) or they’ve just run off whenever they’ve had enough of staying, and you’ve been getting more and more stressed about the fact that they won’t stay, or they won’t put their ears up and look at the camera. 

They now have a very conditioned response to photoshoots.

Have you ever heard of Pavlov? He’s not my favourite scientist ever but he did these experiments on dogs. Each day, just before they got fed, he would ring a bell. Then he would feed them. They found that soon enough, when the dog heard the bell, it would begin to drool. Bell = time for food. A conditioned response. 

Have you ever picked up your dog’s leash and it starts going crazy? Leash = time for a walk. A conditioned response.

The same can be said for less positive responses. For example, if I pick up anything that’s designed to kill flies of mosquitos (a fly swatter, a rolled up newspaper, one of those electric tennis racquet things) Loki will run and hide. Fly swatters = violence. (Not against him, but it’s scary enough). Same as how Journey now sees Ana get out the drying rack for clothes and comes and hides. Ana + Clothes = Scary noises when she shakes them violently before hanging them up. These are conditioned responses. The drying rack in and of itself means nothing. It’s the knowledge of what’s about to happen that elicits a response.

What does this have to do with our dogs and photoshoots?

If you’re working with your own dogs, think about what their conditioned response to the camera is. 

Maybe, like Loki, their eyes light up and they are excited and pushy, ready to work. Camera = work + treats! Woo hoo! A great conditioned response.

Maybe, like Journey, it’s a little more complicated. Camera = work (great) but pressure (bad). So while he’ll very happily pose, the more pressure he gets to look alert or look at me, the less happy he looks. 

Maybe, they see the camera and have to almost be coerced into position, and the minute they get a chance, they leave the scene to go do something else. 

Operant Conditioning

All creatures, humans included, work on the principles of Operant Conditioning.

That is the theory that all behaviour stems from either reinforcement, or punishment. Both can either be positive (added) or negative (removed). 

For example:

  • Positive Reinforcement = something good/pleasurable is added, to increase the behaviour. Giving a treat, playing with a toy, getting a bonus at work, being given a sticker for getting a right answer. 
  • Negative reinforcement = something bad is removed to increase the behaviour. In humans, this could be the annoying noise your car makes when you forget to put your seatbelt on – the noise stops when you do the desired behaviour. In dogs, it could be using an electric shock collar (to be clear I don’t agree with these at all but it serves the purpose of this example) and shocking the dog until it does the desired behaviour.
    • Obviously this doesn’t have much place in what we’re doing unless you consider this: Say that the experience of having their photo taken is a bad one. The dog doesn’t like it. If they move themselves away, refuse to stay, or run off, they have enacted negative reinforcement on themselves. The benefit of removing themselves might outweigh any kind of positive punishment, or positive reinforcement you might offer as a consequence for leaving or for staying. They have removed the negative stimulus (being in front of the camera), so the likelihood of that behaviour occurring again increases.
  • Positive Punishment= something unpleasant is added, to decrease the behaviour. This is scolding the dog, hitting the dog, choking the dog with a choke chain, or punishing the dog in some way. Remember, “positive” here isn’t talking about good or bad, it’s talking about adding or removing. Positive = adding. 
  • Negative punishment= something/a stimulus is removed to decrease the likelihood of the behaviour. Say a dog is jumping up to get your attention, and you turn away and leave – removing a stimulus, with the intention of the dog jumping up less. Or those situations where someone puts their hand near a food bowl while the dog is eating. The dog growls. The food is removed. The intention being that a stimulus (food) was removed in order to decrease the behaviour (growling). Obviously this is problematic for a number of reasons, but it’s there for an example. There isn’t really a great photography example for this that I can think of right now. 


So, if we’re thinking about the above, in terms of our dogs and how they act and react when having their photos, can we find any patterns with their behaviour? Have their experiences mostly been positively reinforced? Positively punished (even in small ways, like you sighing in frustration when they move, or simple being stressed can be enough for some dogs for it to be a bad experience), or maybe they’ve negatively reinforced themselves by continually removing them from the situation?

Let’s have a look at the video below. I filmed several scenarios from a dog’s point of view with both me as a bit of a stressed-out new photographer, and being a lot calmer, faster, and more easy going. 

Is the dog stressed?

Knowing, reading and understanding dog body language and expressions is critical to what we do. Not only from a photographic point of view, but also for the dog’s welfare and wellbeing.

We are lucky to have Olivia Moore (MRCVS) in the LC, and she prepared this downloadable .pdf guide on seeing and understanding dog body-language. 

What to do if your dog doesn't like photoshoots?

Honestly, this is a bigger, longer question than we can really cover in a photography course.

Personally, I would:

  • Make sure I knew and understood my dog’s currency
  • build a good working relationship with my dog outside of photography (tricks, dog sports, interacting on walks etc). I’m talking about more than just going on walks together and living together. 
  • made sure by using principles of conditioning, that my dog associated the camera with good things
    • you can do this quickly and easily when you meet a client’s dog. Sit down with it and press the shutter, reward immediately. Shutter, reward, shutter, reward, shutter reward. Soon, the camera noise = reward to come!
  • train whatever behaviours I needed (stay etc) away from photography and photoshoots until they were really solid, comfortable and happy in the behaviour
  • use a leash if they don’t stay, to eliminate my own stress of them moving or running off
  • keep poses fast. Have your settings dialed in already before the dog gets into position. Take a burst of photos, verbally praising the dog for being great. Clearly release the dog, reward.
  • be careful and conscious of unintentional cues that could be taken as punishment especially by sensitive dogs who are very in-tune to your emotions
  • release pressure from the dog. Don’t demand or continually ask for their attention. Sit down and relax with them. Let them choose a pose. Get attention in creative ways and celebrate them when they offer that attention.

Snoot School: Train a “Look”

In this Snoot School, we look at how you could train a dog to look at a target, from the beginning steps, to increasing independence. This trick could come in handy to get dogs to look at the camera, or to look somewhere else if you’re by yourself and need them to look to one side.

As with all training, don’t rush, work on this over multiple sessions, build up understanding and independence and make sure the dog is confident in what’s being asked of it before taking it outside and using it as part of your photo sessions.

Light & Location: Quiz!

Developing your “photographer’s eye” in seeing locations for photos takes time and practise, practise, practise. There really is absolutely no better way to learn how a location will look through your lens, other than to get out there and take photos.

After all, it costs nothing to take photos (except a bit of time). If they don’t work out, then analyse them, try and work out why they didn’t work, then delete them and move on. 

In this lesson, I’ve taken a number of short behind-the-scenes clips for you, with a phone. The idea is for you to take a look at the location and consider whether you think it will make a good spot for photos.

Ask yourself especially:

  • is there enough light on the dog?
  • where is the light source? Is there a secondary light source?
  • what’s the background like? (busy? bright? boring?)
  • is there something about this location that will make it interesting?

Now, keep in mind I was taking photos specifically for this quiz – so these are not necessarily the lighting conditions or locations I would automatically choose for myself! Also, I could possibly have taken better photos in the location by changing my angle – but that wasn’t the point of the exercise. 

I used Loki for the majority of these photos because he is black and white – a challenging colour combination and requiring me to be more careful with blowing out the highlights or clipping the blacks and losing data in his dark fur. Clipped highlights, how much/whether to under expose/the amount needed to preserve highlights vs. blowing out highlights to properly expose the dog is something you might want to consider when deciding if it was a good location or not. If you don’t know what I’m talking about, search the site for “Underexposing” to find relevant lessons.

Each photo will have the Straight out of camera version, a Lightroom-Edit version (just a light edit), and SOME will have a full Photoshop edit.

And keep in mind that if you’re wrong (eg., you said it will be a good location when it really isn’t!) then that’s ok too! Have a read of why the location did/didn’t work, check out the settings and learn from it!

The Situation/Conditions/Gear

For all these photos I was using my Sony a7iii & 85mm f/1.8mm lens. I will be writing the settings for each photo as well – this may well also help you determine if it was a good location or not. After all, if it’s pretty boring/busy/bad lighting and has a ridiculously high ISO, is it worth it?

We started taking photos at 8:45am, early September, in some local woods.

The question to ask as you watch is: will it be a good location?

Location 1

Result

Untitled design (14) Untitled design (14)
DSC00589-2 DSC00589
DSC00574-2 DSC00574

Click below to reveal & view larger

1/400 seconds, f/1.8, ISO 4000

I’m a big fan of ferns, and ferns + backlight are such a fun combination.

Unfortunately in this location, there was no light coming in from above Loki or behind me, and a lot of strong light from behind him. I did use this light to create some light haze/lens flare, and blew out the highlights a bit so I didn’t have to under-expose too much. Under-exposing at such a high ISO already would have meant way more noise/grain when it came to lightening up the image in editing so it was better to try and get Loki closer to a correct exposure. 

The location itself was pretty – just too hard to balance the light and get enough light on Loki’s face – I got Ana to have him looking upward to get more light on his face. It would be even more interesting with some more ferns in the foreground (like in the 2nd set) or going across Loki’s chest to “close in the scene”.

Location 2

Result

Untitled design (14) Untitled design (14)
DSC00711-2 DSC00711
DSC00701-2 DSC00701

Click below to reveal & view larger 

Photo 1: 1/400 seconds, f/1.8, ISO 6400

Photo 2: 1/400 seconds, f/1.8, ISO 4000

Another location in the dark woods, without enough light getting on the face from open sky above or behind. 

I like the location a lot in terms of the mossy log, the ferns, and the few sparkles of backlight… but with an ISO that high, and having to slightly under-expose because of Loki’s white neck and stripe, there’s a lot of detail loss. These photos would be fine for social media once edited up properly, but probably not for anything where you need a lot of detail.


Location 3

Result

Untitled design (14) Untitled design (14)
DSC00850-2 DSC00850

Click below to reveal & view larger & other options

1/400 seconds, f/1.8, ISO 320

This location had a lot of light coming in from the area of open sky above so I was able to keep the ISO down quite low. I also didn’t have to preserve any highlights in the background so I was exposing for Loki’s white area.

The scene itself is quite busy with los of branches and leaves, though I do like the foreground blur effect and the sense of peeking through the leaves at Loki.

In this location, it was quite side-lit so he had to be looking to the left, or, as you’ll see in the photo of him looking straight on, half his face is very shadowed. 

Location 4

Result

Untitled design (14) Untitled design (14)
DSC00716-2 DSC00716

Click below to reveal & view larger & other options

1/400 seconds, f/1.8, ISO 1600

This location is… fine. I don’t like the way the log chops off the back legs.

There’s no foreground in this photo, but if I got down lower he lost all the light in his eyes. In another photo from the series I got some nice foreground from a bush or something to my left so I could have used that.

The sparkly bokeh in the background is nice but it was still a big challenge to balance even that small amount of backlight with the complete lack of light behind me/above us.

Location 5

Result

Untitled design (14) Untitled design (14)
DSC00854 DSC00854-2

Click below to reveal & view larger & other options

1/400 seconds, f/1.8, ISO 320

Oh boy.

Big bright open sky in one corner, facing Loki into the shade so he’s not getting any light on his face…

So making a decision about whether to just blow out that sky, or under expose, or try and find a middle-ground. In this case, this is the middle ground. The sky is still blown out, Loki is still dark. Possibly I could have just blown the sky and background out more to have Loki lighter, but what’s the point? You would end up with a hugely bright background and no way to work with it, a much higher ISO, in a boring location.

Location 6

Result

Untitled design (14) Untitled design (14)
DSC00726-2 DSC00726
DSC00728-2 Backlit photo of a black and white dog.

Click below to reveal & view larger & other options

Photo 1: 1/400 seconds, f/1.8, ISO 3200

Photo 2: 1/400 seconds, f/1.8, ISO 6400

Another super high ISO – similar situations to the other photos so far in terms of lighting conditions.

This one was, perhaps, even more difficult because of the larger gaps between the trees behind Loki and therefore the stronger amount of light. 

This is why I included two photos here. One of them (ISO 3200), I attempt to expose for the highlights (though a couple are still blown out), making Loki very, very under-exposed. Lightening him up has resulted in about as much noise as taking the photo at a higher ISO.

In the ISO 6400 photo, the highlights are much more blown out, but Loki started lighter as well. I could probably fix these highlights areas reasonably easily in Photoshop.

Location 7

Result

Untitled design (14) Untitled design (14)
DSC00832-2 DSC00832

Click below to reveal & view larger & other options

1/400 seconds, f/1.8, ISO 6400

Neither the video nor the exposure I used here really show just how dark this location was. But being under these thick bushes, with no light above or behind meant that it was pretty much totally dark.

 I exposed the image for Loki’s white stripe, meaning his blacks were still quite dark, though not as much as some of the other backlit images where I needed to balance brighter highlights. In this photo, the only highlights I needed to worry about were from him. Possibly I could have gone a little lighter, but his snout has a habit of being deceptively light, so I tend to err on the side of darker rather than lighter, otherwise he ends up with a white blob for a snoot.

The location itself is busy, ugly, and not very exciting 😂 Definitely not one that I would choose for a normal photoshoot. There’s a lot of sticks around and those two thin tree trunks aren’t acting like a frame, they’re just right in the middle of the image. 

There’s no “visual interest”, just a dog lying on some leaves amongst some weird thin tree trunks. 

Location 8

Result

Untitled design (14) Untitled design (14)
DSC00766-2 DSC00766
DSC00769-2 DSC00769-Edit

Click below to reveal & view larger & other options

Image 1: 1/400 seconds, f/1.8, ISO 3200

Image 2: 1/400 seconds, f/1.8 ISO 1600

Similar to the last location, I took two different exposures here: one to try and keep the highlights (ISO 1600 and the darker image) and the other to have Loki brighter but blow out the highlights.

Theoretically in photoshop, I could combine both these exposures particularly over the blown-out highlights section. But I did a full edit on the 2nd, darker image anyway (I really liked his expression) to see how it would edit up with ISO 1600 and being so under-exposed. I don’t love how grey he’s become but this is a pretty common side effect of brightening up an underexposed scene a lot. I would probably be going back and fixing it a bit so he’s not quite so grey.

Important! Just because my camera can do this, doesn’t mean yours can. Learn your camera and work within its capabilities. There’s no point in you shooting underexposed at ISO 1600 if your camera can’t handle it, and you don’t yet have the skills to work with it. 

Location 9

Result

Untitled design (14) Untitled design (14)
DSC00777-2 DSC00777

Click below to reveal & view larger & other options

1/400 seconds, f/1.8, ISO 1600 

This was not a good location. There were wide gaps in the trees behind Loki with a lot of light coming in, and no light behind/above me. 

It was impossible to balance the light. There was no way I could under-expose enough to keep data in the highlights without the image being pure black, but the highlight areas are so large that fixing them in editing would be a huge pain.

And also, the location (at least taken from this distance) is just “meh”. Why is he sitting behind that one random fern? Nobody knows.

Location 10

Result

Untitled design (14) Untitled design (14)
DSC00790-2 DSC00790-Edit

Click below to reveal & view larger & other options

1/400 seconds, f/1.8, ISO 800

Ok I’ll admit, I wasn’t prepared to love this location as much as I ended up loving it. 😂

It was chosen because it has the area of open sky above us and the sun BEHIND me, so I could FINALLY get some light on his face… but I expected the background to be a lot more solid with a lot less bokeh than it has… so I wanted to use it as a “boring background” but it turned out really pretty and became the cover photo for this whole lesson.

Why though? For one, his face is tilted up a bit, getting a nice amount of light from the sky and sun behind me, without there being patchy areas of sun and shadow.

There is blurry foreground detail in the bottom right corner, and a frame of closed in forest blocking the image behind Loki, while he looks into light.

I exposed the image just so a few of the smaller highlights were a little blown out, but that meant I could keep a good amount of light in Loki’s face that wouldn’t be too hard to work with. Those small highlight areas are easy to fix in Photoshop.

It’s not backlit but it was easy enough to bring some warmth to the bokeh in the background.

Location 11

Result

Untitled design (14) Untitled design (14)
DSC00806-2 DSC00806

Click below to reveal & view larger & other options

1/400 seconds, f/1.8, ISO 800

You can’t see it too well from the video, but I chose this spot as another example of getting too much light behind – although in this case it was a bit easier to balance, since there was at least SOME light overhead, though still not enough, and meaning I still had to underexpose it a lot in order to preserve the highlights from the sun. I blocked most of the sun with the tree trunk at least, which meant Loki could get some of that pretty rim light around his ears.

If I was doing this photo for real (and not just the quiz), I would have removed the annoying branch before taking the photo, but since that involved climbing a steep little embankment, I couldn’t be bothered.

Location 12

Result

Untitled design (14) Untitled design (14)
DSC00839-2 DSC00839

Click below to reveal & view larger & other options

1/400 seconds, f/1.8, ISO 320

I found a patch of sun and put him in it.

And actually, it wasn’t quite as awful as I’d expected BUT…. it ONLY worked when he was looking up and into the sunlight, not when he was looking at me, because then the light was hitting the side of his face and throwing the whole other side into shadow.

He was squinting a lot in most of these photos, and I had to do quite some work to fix the highlights and the shadows to even it all out, and even then it’s still a pretty boring location – open, no visual interest, just some leaves on the ground, a solid background, and a lot of sun on him.

Location 13

Result

Untitled design (14) Untitled design (14)
DSC00815-2 DSC00815

Click below to reveal & view larger & other options

1/400 seconds, f/1.8, ISO 800

Surprise surprise, another photo where there isn’t enough light getting on Loki. In this case, there is actually a little gap in the trees above, but the light behind was really quite strong – this resulted in another photo where I would either have to blow out the highlights a bit to ensure he didn’t end up completely black, or lose detail in his fur and risk a ton of noise from lightening it up.

In this photo, a few of the highlights are slightly blown, but I still under exposed quite a lot. So, opting for a kind of middle ground. But since he’s quite far from the camera, there really isn’t a lot of detail on his face now.

While the backlight is pretty, the rest is definitely not ideal, and for me, the bokeh in the background is now very busy, which could be fixed in editing a bit, or used to get some interesting effects, but it’s definitely a lot!

Behind the Scenes Livestream: Join us on a Photoshoot!

All things going to plan (weather and internet), we will be meeting up with Natascha and her two beautiful shelties New and Nami for a photoshoot in some local woods, to take you Behind the Scenes.

This is your chance to ask about locations – what I’m looking for, what I’m avoiding, camera settings for each place, how I ask Natascha to pose her dogs (and why), how I move about to find the angles I want, how I get the dogs’ attention and more. 

The woods we’ll be going to have plenty of mossy logs, not much bokeh light in the background (sad) and a lot of tall grasses and general summer greenery that I’ll be trying to avoid. I went there previously to take some test shots with my dogs to make sure there would be enough variety and some good places to get us started, but once we get going the process should flow. 

Unfortunately the internet was not very strong, so it lags quite a bit and is very pixelated. It also didn’t record the whole first part of the shoot (about 45 minutes 😭). I still think the idea has potential, if we can improve the internet connection and use some kind of microphone on me or something. But I hope it’s useful in any case. I will post the edited/unedited photos from the shoot below – there’s 655 total so I’ll be culling and choosing the best ones when I have some time.