What is "White Balance?
White balance is how warm or cool, and green or magenta our images are. It can make our photos feel more natural, or can be adjusted for aesthetic reasons.
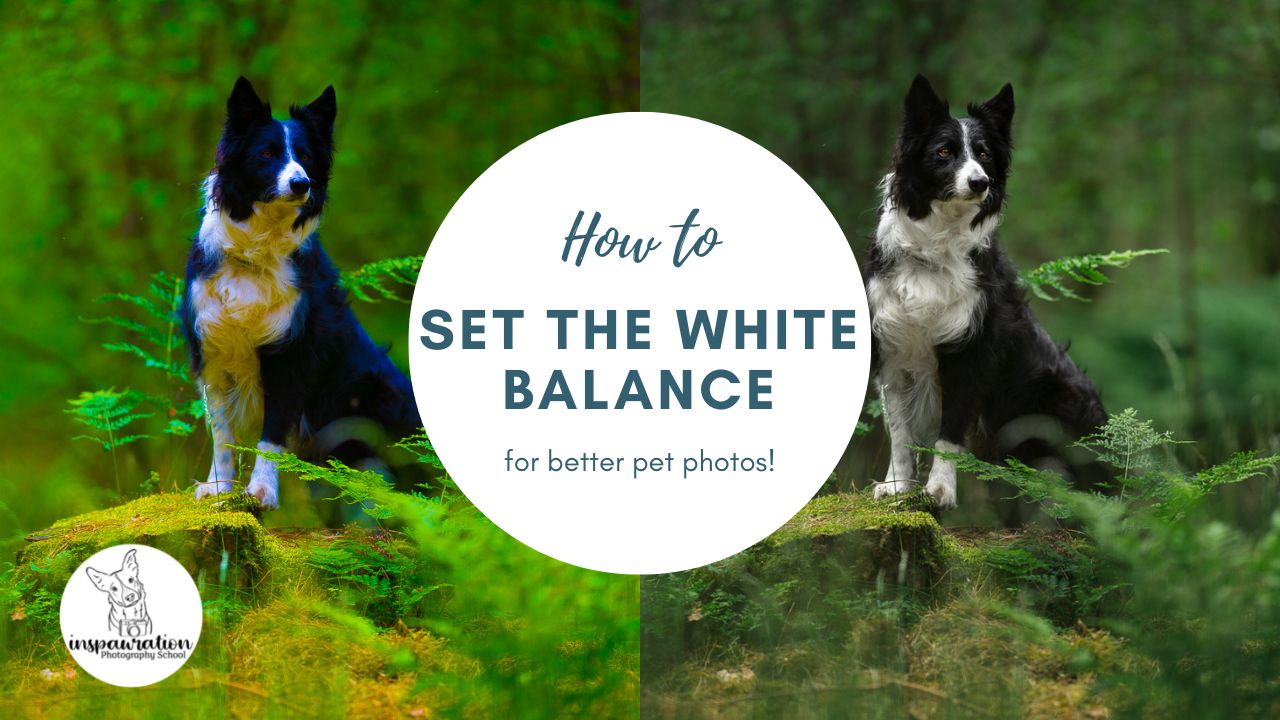
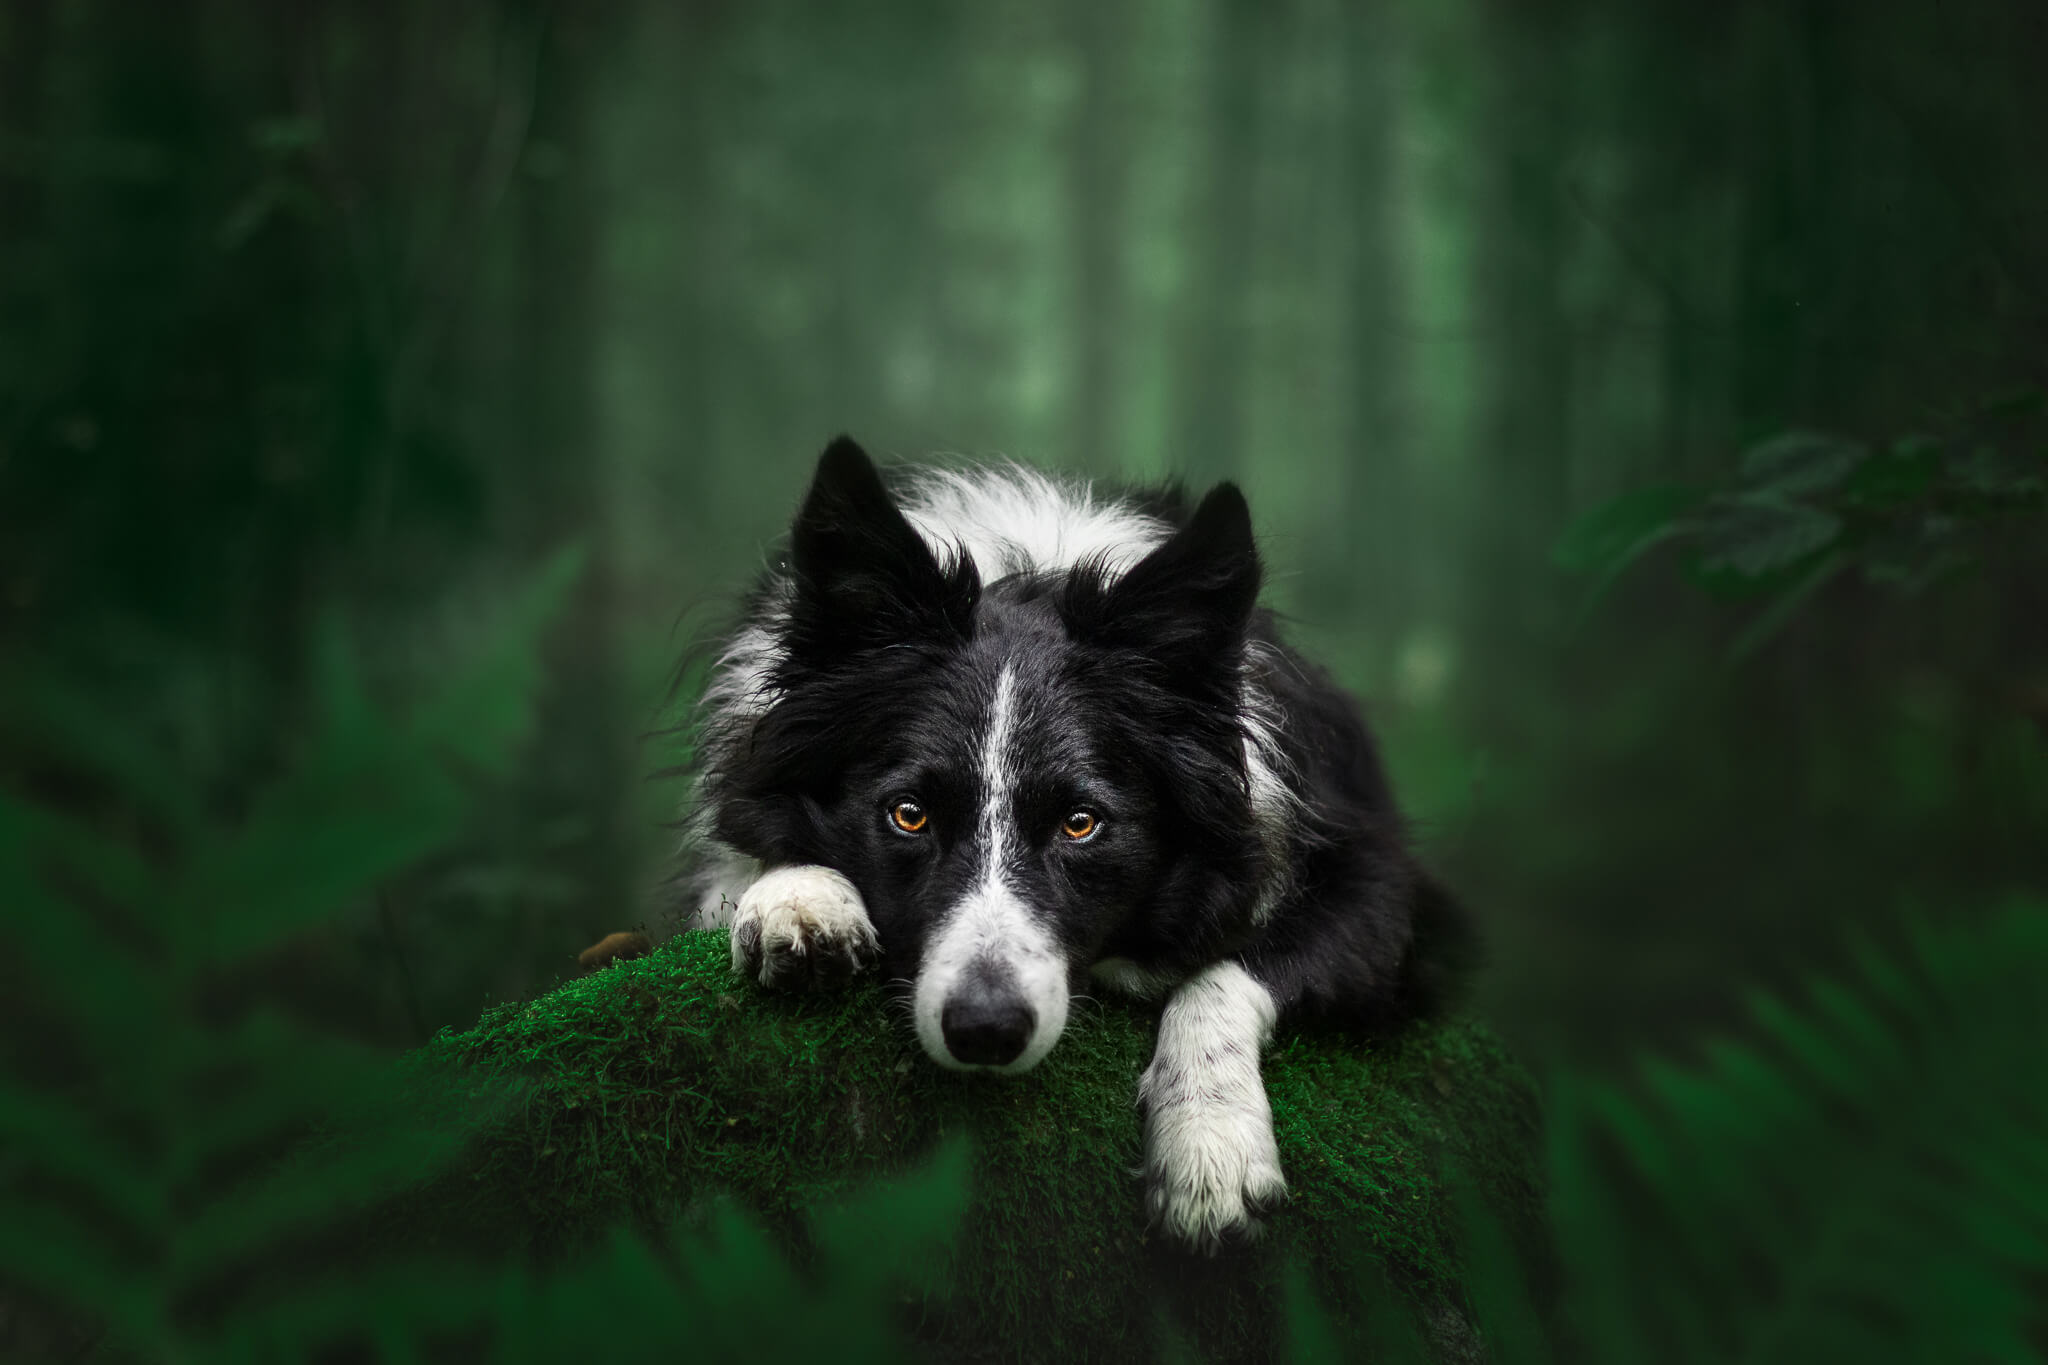
Ideally and generally, we want our photos to have the correct white balance… for me, this means my dog (or subject!) should be the correct colour.

The white balance (WB) of your image will change depending on:
- location
- light
Forests are going to throw around a LOT more green tones than the beach, and the WB will need to be adjusted accordingly.
Golden hour is going to have a very distinct warmth compared to midday under clouds, so the WB will need to be adjusted to suit!
How to fix your WB: On-Location
Many cameras have built-in presets for setting the white balance in camera, eg., Shade, overcast, flash, indoor tungsten and so on. This just assigns a white balance to the photo, which of course you can change later in editing (even better if you shoot in RAW, which I hope you do!).
Since my camera doesn’t really know what on earth is going on half the time, I’m definitely not going to be trusting it to get the white balance correct, and not make any changes in editing.
Another option is using a grey card: essentially, a card, which is grey (surprise!) that you take a photo of on location, then use it to set the WB later in editing. I have some grey cards but never use them, mostly because I forget, or I don’t have a helper who can hold the card where I need it in order to photograph it.
One more option is an expodisc, which screws onto the front of your camera. I’ve never used one so I can’t speak to how useful they are/how accurate, etc. If you’ve used one, let me know your experience in the comments!
How to fix your WB: in editing
There’s three main ways that I fix the WB of my pet photos in editing… the thing is, there’s rarely a “magic solution” to anything editing related. Sometimes you need to use one tool, sometimes you need to use 3. Yes, every editing program probably has an “automatic” magic wand that’s supposed to do the trick, but I trust it about as much as I trust my camera!
Therefore, my first method for fixing the WB is…
1. Train your eyes
Yep, it’s boring I know, but it’s true.
The more you edit, tweak the WB, consider the light of the scene, look very closely at the fur of your pet and try and get the photo version as close to realistic as possible… the more sensitive your eyes will be.
I honestly believe this skill like a muscle. The more you use it and practise, the better and stronger you get.
They don’t match up perfectly since I changed the crop, but here is the difference of 3 years in terms of editing and white balance. Loki is looking extremely blue in 2019, but by 2022 he’s more or less pure black and white. Note! This comparison is NOT a competition about which photo you prefer more, thaaannksss.
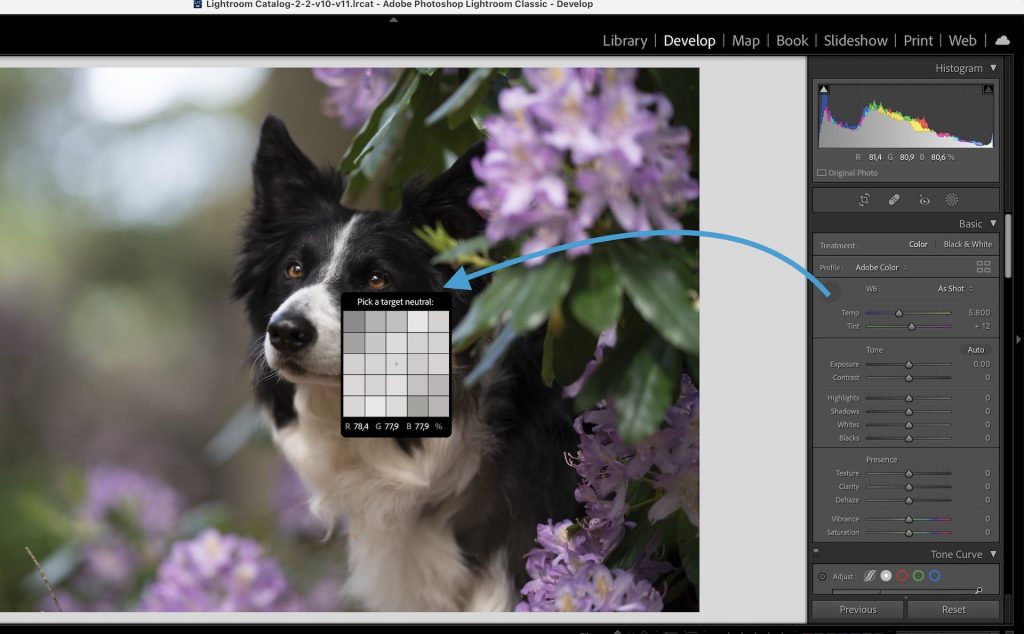
2. Use the "Eye-dropper" tool
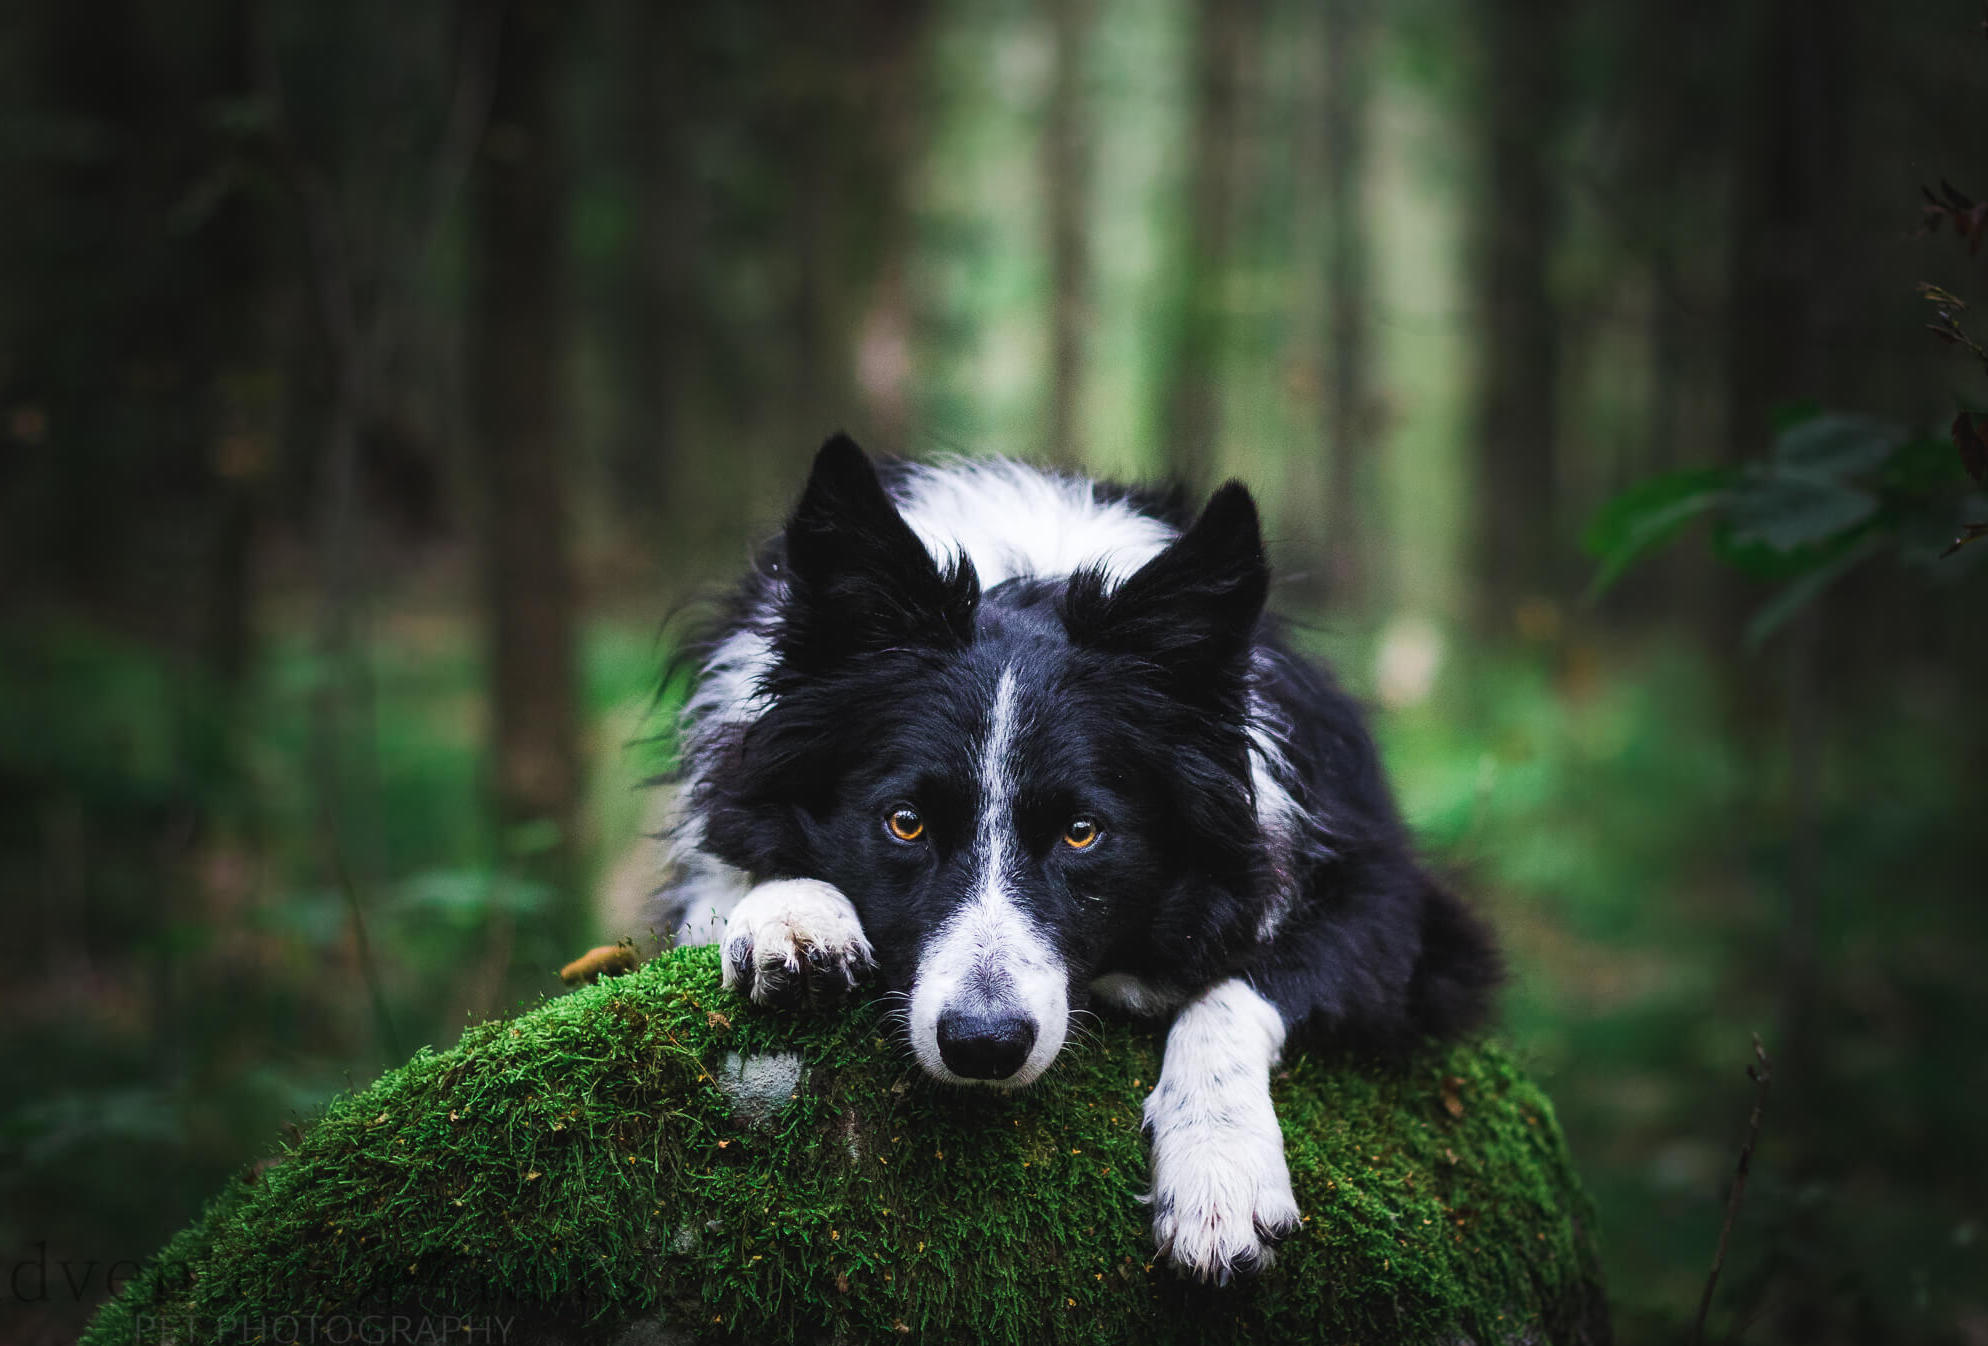
Your editing program might have an “eyedropper tool”. This basically allows you to click somewhere in the image and say, “Hey! This area is supposed to be pure white/black/grey” (ONLY those pure shades will work!).
The program will then adjust the WB of the image for you.
Click around a little to find other areas that might work better – I personally use between the eyes when I can. Keep in mind that individual coat colours, colour casts etc will change the result.
This is a good starting point, but not a “be all, end all” solution!
3. Turn the saturation way up!
This works particularly well for black/white/grey dogs. I do use it for Journey sometimes, but it takes a lot more practise to really SEE what colour he’s supposed to be when his fur is nothing but neon orange!
In your editing program, turn the hue/saturation and vibrance all the way up. Take a look at your dog. Is he the right colour?
If you’re looking at a black dog, he shouldn’t be blue, yellow, purple or green. Adjust your white balance until no single colour dominates his coat. There may be patches of blue, purple, yellow or green, but one colour shouldn’t dominate the others.
I use this technique ALL the time in my edits and I love it. It’s a really quick way to set a “base” white balance, and then tweak it if needed.
That’s all for now! If you use one of these techniques on your photos, make sure you shout me out in your socials, I LOVE seeing when people have put my advice to use!
Until next time!
~Emily
Ps. Did you know I do private editing lessons, online via zoom? If you want to dig deep into editing the white balance, or any other editing technique or process, just get in touch and we’ll set up a time!