Archivesintermediate

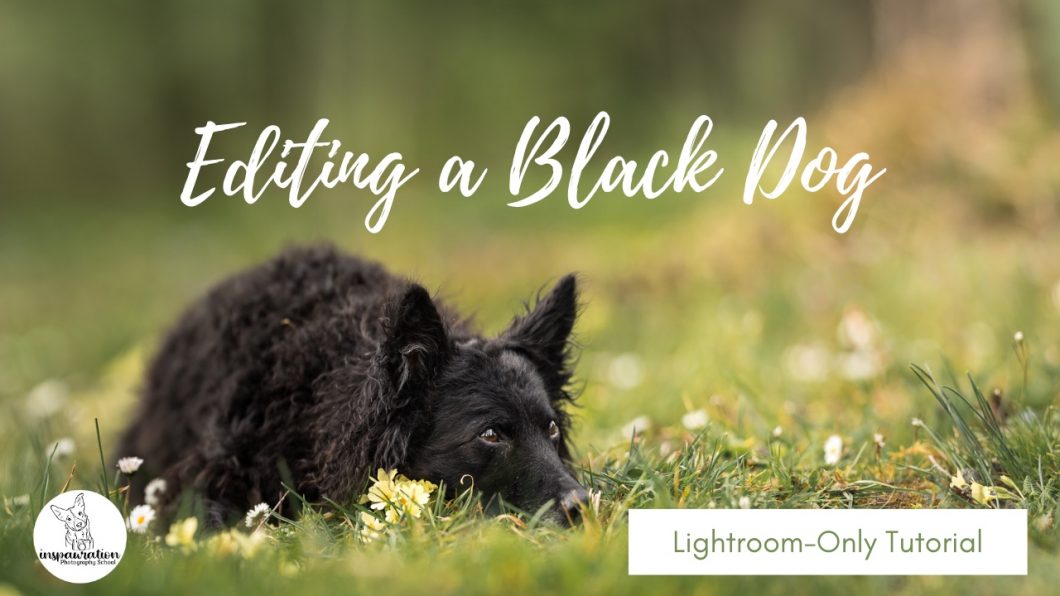
Springtime Šaj: Black Croatian Sheepdog: Lightroom Only Tutorial

In this tutorial, we are going to take the panorama of Croatian Sheepdog Šaj from the image on the left, to the image on the right, just using Lightroom. Be prepared for a lot of radial filters! This will be an interesting one for you if you aren’t confident with PS yet, or just don’t want to use photoshop, as it shows how you can really create a pretty dynamic image just in Lightroom. 

I chose this photo specifically because it was well exposed, and we wouldn’t have to do a LOT of work brightening her up or doing anything especially crazy to the background or surroundings.

Note: this tutorial was recorded before Lightroom updated their masking functions.

DSC00105-Pano DSC00105-Pano-2

Edit Together: Forest Sheltie

In this tutorial, we combine 3 RAW file images to create one panorama, giving Petrie enough room below his feet and space above his head for him to look into. We also use a fern overlay for some foreground blur/to add a bit more depth. You can find the files in the download folder.

This is one of those images that I came back to later in Lightroom and made some reasonable changes to, from the point where we finish the tutorial.

Namely:

  • darkening the bright green branches that had been bothering me the whole time (lower highlights and exposure)
  • lower exposure a LOT around the outside of him, not including his looking direction (so a 3/4 vignette, I guess). I lowered exposure by -1.5 😱 and raised blacks +6. 
  • added +20 contrast to his face
  • removed some green colour cast from the top of his head and the camera-right side of his snout
  • lowered highlights on his white chest a little bit more
  • in the HSL panel, Hue: green +17, Sat: greens -30, luminosity: greens -25

Yess I could have achieved the same effects in PS but I couldn’t be bothered opening it there again when I knew LR could do the job I wanted anyway. 

Below: Before / After the Tutorial / After my LR edits

A Touch of Magic: Lightroom-Only Tutorial

In this Lightroom-Only tutorial, we’re going to work on this photo of Loki. Some of the skills we’re going to work on are:

  • brightening up a black dog
  • changing the background colours
  • creating a bit of haze & warmth in the top corner
  • using range masks to automatically mask certain things in or out
  • contouring his face for a 3D effect
  • removing colour-casts
  • making sure his blacks stay black
  • bringing nice detail and texture to his face
  • shaping the light to create a gentle “spotlight” on his face, and help our viewer be drawn to him.

Backlit Amie: Full Tutorial, PS Only!

DSC07186 DSC07186-Edit

In this tutorial, I work on a reasonably underexposed image of Amie, that I took for a collar company (hence the weird composition of the photo!) .

I had recently jumped on a couple of zoom calls with some LC students who were using programs other than Photoshop, and neither of them had access to radial filters, so had made their own work-arounds, which is amazing, but, the problem with these work arounds were that they  couldn’t be re-edited later.

A big part of my process and the way I work, is ensuring that any of my edits are able to be changed later down the track – whether at the very base level of being able to easily adjust the white balance of my RAW file by working with my photos as smart objects, or by using adjustment layers and keeping any changes to the “base image” at the bottom of my layers panel. As much as possible, my process allows me to be flexible, to come back at any point and make changes to the edited image. 

This isn’t always possible (for example when doing a content aware fill or content aware crop that covers the original image file. But for the most part, my edits can always be undone, turned off, changed slightly, added to, etc. 

What I realised from these zoom calls was that a) not everybody had access to radial filters, and b) possibly some people find them fiddly and time consuming, or just don’t like them. So in this editing tutorial, I ditched them completely. No radial filters at all.

I use Camera Raw Filter to begin with – this is basically Lightroom and includes all the most basic functions of any editing software, making global adjustments to the image/RAW file.

The rest I do in Photoshop. 

There are some slightly different techniques in here to what I’ve shown before, a bit of an explanation about how I would organise my layers when needing to do some clone stamping or healing spot brush, and some other interesting bits and pieces that I don’t think I’ve shown before. 

The tutorial will probably be best if you have a reasonable knowledge of Photoshop (or your editing program). I don’t explain how to mask something in or out in detail, for example.

Edit Together: Flower Crown

A lovely simple little edit in a warm summertime style, taken nice and slowly so should be suitable for most students unless you’re very unfamiliar with Photoshop (in which case, check out this workshop first!). 

Apologies for being sick but since you can’t catch it via Zoom I figured it was better to “soldier on” rather than reschedule. 

Below are the before / first edit / this edit. Since this was a re-edit I’m not surprised it ended up a bit differently. I actually love this new version more so lucky you guys. 😊

You’re welcome to share your edits in the group, or on your social media, just remember to make it clear that it’s my photo 😊

Reflections: Full Tutorial

In this tutorial, we work through the pretty under-exposed photo above and  take it to the photo on the right. 

I thought it was going to be complicated, but since we didn’t have to work much on the face and eyes (compared to a more forward-facing image) it only ended up taking about 30 minutes, so this is the perfect tutorial for when you only have a little bit of time.

You can download the RAW file to edit along with me.

Edit Together: Forest Boxer

_E2A2089 _E2A2089-Edit

During this Edit-Together session, we are going to work on the lovely boxer in the woods taken by Clara Allansson (@echothewhippet). You can download the RAW file (or a .tif version) by clicking the buttons below.

Please note, the photographer has asked that the edited image not be shared on social media. If this is going to be a problem for you, edit a similar image of your own which you can then upload to your socials. 

If you’re desperate to upload to socials (???) but don’t have a similar image to work on, you can download this one of Loki which has a similar mood but is much brighter.

Please note that the Zoom DESTROYED the image quality last night, severely desaturating and removing contrast from everything. I’m literally on a chat with Zoom now to see if we can fix this.

Your Image, My Edit: Amie

I chose this photo for our first “Your Photo, My Edit” because I liked this spring scene, the criss-cross log and the curving bushes behind Amie. Rosie (@amieaussie) is kind enough to let you download the RAW file so you can edit it yourself 😍😍

This tutorial is probably more geared toward Creators & Sages (intermediate/advanced) as I do quite a few small, subtle changes especially to the colours. I’ve been wanting to film a tutorial for a while where I just experiment and play like I do when I’m not recording, and this is about as close to it as I’ve come and better represents the chaotic, unplanned way that I often work when I don’t “have an audience”. 

To that end, it’s a bit unstructured, and maybe a bit messy, but maybe that is also your sign that you can create without a vision or a plan, and still make something wonderful. 

This was the first time using subtitles/closed captions. They’re automatic so they’re not perfect but I really hope they help some of you and that they’re better than nothing!

Here is the transcript. The times won’t match up as I cut sections and sped them up in the video, but this way you can translate the whole page to your language and read the text if you don’t understand something.

11:43:47 Hey guys, so welcome to the first I edit your image. I’m also trying as you can see here to use the auto captioning function by having me filming in zoom, which will hopefully give us a transcription at the end, so that you’ll be able to read through

11:44:06 what I’ve been saying, and translate it into your own language hopefully so that’s the plan. Let’s see how it works out it’s a bit of a test run.

11:44:16 So I’m going to put myself in the corner now.

11:44:21 So, for I edit your image, I had some of you upload a photo to the Google Drive, and I’ve decided to pick this one, and I know I’ve edited Amie before.

11:44:36 Although I don’t think that it’s uploaded in the members portal, and she’ll be a bit fun because she’s got this white face but also we’ve got some green tones going on here, it’s not backlit, we’ve got a bit of haze going on over here and I like the shape of

11:44:52 these kind of trees or branches that are behind her.

11:44:56 So I thought that that might be bit fun to work with, and to utilize this shape.

11:45:04 If I can do this fast enough then possibly I’ll work on a second image but let’s start here and see how we go.

11:45:12 The idea is to make this into a nice springtime kind of feeling but also not too bright and airy because she is looking pretty serious and pretty intense.

11:45:23 We don’t have a lot of visible light in the background. So, you know we can’t really make it super yeah bright and springtime.

11:45:33 But we can’t go to dark and moody either because it is a spring scene, there are flowers there and that kind of thing. So, let’s get straight into it, I’m gonna check the white balance, I mean it’s looking pretty reasonable, but let’s use the eyedropper

11:45:47 anyway, kind of in the middle of her forehead and yeah, it’s brought down the magenta, which is what I kind of thought it would do.

11:45:57 I’m just checking I thought I saw a little bit of fringe in there but it’s not too bad so I don’t think I’m going to worry about it too much.

11:46:04 And I might actually add a little bit of sharpening in general here.

11:46:11 It’s probably just with this lens with her being a bit further away. It’s just, you know, our lenses can only capture so much information.

11:46:21 So, you know when they’re further away it’s like, you can’t see things in as much detail when it’s further away as when it’s close up. So, same with our lenses.

11:46:31 Lots of people expect real miracles from the lenses and why isn’t my photo sharp when the dog is really far away. Well it is, it’s just there’s only so much information that it can actually picked up and record it’s not going to pick up the same amount

11:46:44 of information if the dog is further away as when the dog is closer up.

11:46:49 So let’s do our basic adjustments here bringing the highlights down a little bit the shadows up just a tiny bit she’s really well exposed so she doesn’t need shadows up very much and if we raised the shadows here,

11:47:03 It’s going to wash her out and  we’re going to get, you know, more detail that we don’t need.

11:47:10 I don’t want to raise the whites on the global scale because her little snout here is looking quite bright already and blacks actually I’m going to bring down a little bit because I would like a bit more contrast in her and in her blacks there you can

11:47:27 see she’s just now gotten a little bit of a richer black that we lost a little bit from raising the shadows but this is such a nicely exposed image that we don’t need to do a heap with it.

11:47:39 So let’s go into the radial filters here, going to start with one just over her little white snout to lower the highlights there. I don’t want it to go sort of gray and muddy so let’s just go as far down, you know, before that point.

11:47:59 Okay, and I’m going to use to radial filters, either side of her face just because it can’t be bothered using the eraser to brush it off of her the snout there.

11:48:10 So raising the whites to make her face nice and bright.

11:48:14 right click to duplicate, and we’re going to drag it over and twist it on to that side of her face.

11:48:20 I’m going to put a radial filter here for clarity, I’m not going to bring up the clarity on her nose because I don’t feel like it needs to be sharper. It’s a little more detail on her nose, not when she’s this far away anyway.

11:48:34 And then let’s zoom in and work a bit on her eyes, definitely got a little bit of sort of highlights happening here but that’s okay.

11:48:44 If there’s no detail there, you know you can kind of see the edge. We really can’t do anything much about that. It’s, there’s no data there’s not anything that I can do.

11:48:54 If I just keep bringing down highlights none of those things are going to bring any detail back, we can possibly raise the texture to try and get a little bit more for texture out of this part of her nose here but these parts here are pretty much gone,

11:49:09 if we take that exposure all the way down.

11:49:14 mean that’s not too bad so possibly we can do something with this

11:49:24 strange that such a sharp edge but it’s not saying that it’s blown out.

11:49:45 Lower the clarity a little just to see if we can get rid of that really sharp edge part,

11:50:04 Exposure be here I don’t want to do it too much. I don’t want it to end up looking muddy, just trying to make it a little bit less crazy bright.

11:50:02 Okay, let’s do the eyes so radial filter then raising the clarity.

11:50:09 And one over the catchlight to raise the white highlights and maybe the exposure a bit.

11:50:17 And then just lowering the saturation, right click to duplicate, and we’ll put it over on the other eye.

11:50:29 If we wanted to get some more brightness from the eyes, we can raise the whites here a bit as well, then that way this brown kind of color will stay nice and sort of rich.

11:50:48 Right, let’s zoom in we’re going to do a big radial filter over this hazy part, and we’re going to use the Dehaze tool to just start taking some of that haze away until it because it adds black we can end up with a bit of a problem as you can see,

11:51:04 like right in the middle of the radial filter.

11:51:07 So we’re going to work on it a bit gradually. Let’s dehaze it and then remove some saturation because part of the problem is that it’s green.

11:51:15 And you can see now it’s looking a lot better.

11:51:19 Let’s put another radial filter here and dehaze

11:51:28 Maybe one more underneath here.

11:51:40 Just another one on this part.

11:51:43 We don’t want this other guy too dark so we just need to be a bit careful but that has made a big difference. We’ve now gotten rid of that green hazy globe.

11:51:58 Right. So now let’s take some of this yellow green out from under the chin here so let’s just desaturate, raise the whites just a tiny bit. It doesn’t need very much to saturate this little small part here on the chest as well.

11:52:23 Just need to look at to make sure it’s not going this kind of weird gray color.

11:52:29 And if so, that’s where we need to just back off the desaturating a little bit.

11:52:47 Sometimes raising whites, or shadows can help them to get rid of that sort of gray color.

11:53:03 Or we can go brush and erase.

11:53:07 Maybe just see if we can take it off this little gray section of it.

11:53:17 Let’s see if we can make the legs, more white, less yellow.

11:53:39 Okay that’s looking pretty good for me. Let’s just lower the highlights here.

11:53:49 And then this plant.

11:53:54 Even just along this foreground parts lowering the highlights to help it fade in a bit.

11:54:06 Notice I haven’t cropped the image or anything yet I always leave that till Photoshop, in case I want you know part of the frame or copy it somewhere else or need to feel something in so many ways leave that for a bit later.

11:54:20 So anyways, leave that for a bit later. Okay, I think that that is pretty much where we can leave it for here, one thing we might do is go down to the HSL panel.

11:54:33 And just lower  saturation of the colors a little bit because I do like this. Great Green

11:55:00 just starting to shift the colors in the green direction that I want nothing overly extreme.

11:55:13 I don’t feel like the color edit in light room are really the best or strongest tool that we could use but I think that’s kind of fine there where it is.

11:55:22 So let’s go into Photoshop.

11:55:53 Okay so, right click new smart object file, copy, now is when I want to have a look at the crop

11:56:08 I’m wondering about just straightening her up so that her eyes are level.

11:56:15 Before, it was straight with this log, but I feel like I want her eyes level on a line here.

11:56:23 I also don’t think we need all of this side of the frame.

11:56:28 And I wouldn’t be cropping this too tightly in because I think part of the appeal of it is having it sort of a bit further out and using this kind of curve from the branches.

11:56:50 The question I’m debating right now is where do we fill one third of the frame with this foreground and the log. Then the third and then have her in the top third,

11:57:01 or whether we do something else.

11:57:51 dead in the center with her eye on the third line.

11:57:58 Still have these curving branches.

11:58:02 Even though she her body is curved a bit in this direction.

11:58:08 I think it works to have her pretty centered because we’ve got these curving branches to closes in here, you have a little bit more space on this side to balance out the body.

11:58:21 And I think if we brought it in any more, we either have to make some space on the right hand side of the image.

11:58:40 Really quite like this being at these two kind of intersecting points here.

11:58:55 So either way we’re going to end up with a bit more space on the other side.

11:59:09 I think it’s fine there.

11:59:41 Okay, so let’s make our curve layers.

12:00:10 Right, so we’re going to just drag down on the curve and drag up the blacks a bit just to get that nice matte look.

12:00:28 If you’ve got a tablet now’s the time to use it. whenever I am masking or doing some kind of painting, that’s when I’m using my tablet I don’t use it to click around things or to make me layers or anything like that I really just use it to paint.

12:00:45 So we’re just gonna mask her out now nice and gently.

12:01:20 So I’m going to duplicate this layer now with Command J.

12:01:26 And this time I don’t want the blacks raised quite so much because it’s really starting to get very mad.

12:01:44 and even just kind of softening around her a little bit just really gently brushing it on, and creating that effect of these curving branches being the edge of my frame,

12:02:02 And just making sure she doesn’t have a kind of a glowing line on the outside of her,

12:02:09 which was masking some of this back in.

12:02:14 Okay. And you can see we’ve got some nice, rich colors happening now as well.

12:02:19 Get a duplicate the layer again, because now we’re getting quite a nice deep mood in our image. I’m going to take it off of this top part

12:02:33 here just places where it’s getting a little bit dark bit more off of the log.

12:03:02 We might get the elliptical marquee tool.

12:03:08 You can draw an oval and just have it hitting her back, get another curves layer we’re going to raise it so a spotlight coming in from above.

12:03:20 We’ve got a really soft feather on this tool is 300 pixels so you can see that the edge of the mask here is really soft.

12:03:30 And now we just need to take it off of some places that shouldn’t be getting hit by this light from above.

12:03:38 So for example,

12:03:45 underneath her chin here probably shouldn’t be lit up anymore.

12:03:51 Back should be, but not this part.

12:03:55 And then if we’re thinking about where else should be getting hit from with some light from above, maybe kind of part of her leg here, top of this log.

12:04:07 And we just want to make sure that it’s blending in really nicely with sort of the rest of this area so that it’s not an obvious light to dark transition.

12:04:20 This is one thing I’m seeing a lot of people doing at the moment.

12:04:23  They’re trying to make a spotlight effect. And so for example, they’re making it nice and light.

12:04:40 And then they’re masking it in.

12:04:47 There’s a real difference a sudden difference almost a sharp difference between the light part in the dark part so just be making sure you’re blending things in and that it makes sense where is light and where is dark, there’s a whole lesson in the members

12:05:02 portal and the resource library, which is called a note on adding darkness, and it talks about, you know, when something’s should or shouldn’t be darker because, you know, maybe it doesn’t make sense for part of the image to have a really strong change

12:05:19 in light, so just be careful.

12:05:26 Just realized my brush was on 50% hardness, that didn’t help.

12:05:37 actually don’t mind this little bit of extra light but rather than do it with raised curves layer.

12:05:44 We might even just take it off of one of our darkening layers a little bit more.

12:05:57 Now you can see there’s a very big dark patch here and a very light patch here and I’m not loving that at all. So I’m actually going to just add this darkness back in here a bit.

12:06:09 It doesn’t really make sense for this part of the forest to be very randomly dark. So we even have to go to our other curves layer, and just blend that out a little bit more so take it off of here have that light spreading out so that the transition from

12:06:27 light to dark just isn’t as sudden or strong

12:06:56 Let’s do some work with the colors.

12:07:02 I’m Just going to take some of this darkness off of the top of These plants here.

12:07:15 And let’s get a selective color layer will put it at the top of the list, change the colors two yellows, and we’re going to add some Cyan.

12:07:27 We don’t want this to become kind of like a fake greens, we just have to be a bit careful.

12:07:45 Just going to see about adding one more curveS layer and this one just purely darkening.

12:08:01 I have a certain color in mind that I’d like to get to, but I think that it needs more black and more richness in it.

12:09:27 right now is trying a bunch of different color combinations to find the kind of color that I want and I don’t mind at the moment if it’s too strong or, you know, if it’s a bit weird I just want to get the kind of green that I’m trying to get to.

12:09:45 And just trying some different options to see what’s happening, both in the background and with these trees here. And I know that when I desaturate this color turn that it will look different, so we might even just put that on there now.

12:11:20 So one thing you want to do now is to make another Hue Saturation layer,

12:11:28 and just see what colors are happening, kind of in the background here, it thinks yellows.

12:11:35 I think it’s more of a kind of a yellow, red, but if I turn this up now I can see exactly what colors are going to get affected.

12:11:44 They actually just want to make them go, somewhat more toward green.

12:12:11 not too worried about having a perfect mask with me because she’s, mostly black. Yeah, I need to fix her legs, obviously, but it’s also just so I can see the colors that are happening right now.

12:12:32 So now in the background I’m getting more toward the color that I’m kind of looking for.

12:12:44 And this is all kind of because I was in the mood to do this with some of my wild garlic shots that I got last year, but you could take this in a completely different direction.

12:12:55 You don’t have to use these kinds of green tones, but if you are in the woods over spring is kind of fun to get these more rich greens happening.

12:13:11 The main problem for me at the moment, are these areas of sort of weird gray in the background.

12:13:17 So what we might actually do is come back to our camera raw file.

12:13:23 Camera Raw filter, go down to the HSL panel.

12:13:31 And just remove the desaturating that we did before. Let’s just see if we can get a little bit more color out of the background there.

12:13:53 Just see exactly what’s being affected by these tones.

12:14:01 That’s quite pretty especially with her tan color but I really wanted to go more green this time.

12:14:24 Then one thing we can do is actually turn that change on an often safe it’s helped at all.

12:14:30 We have a bit more green kind of coming through. Yeah, there is some more green in the background so that’s good but it has also made our greens here stronger which means we need to go back to this group.

12:14:42 And just tone that down a little bit so it’s not quite such a fake green

12:14:55 I could also see if anything’s being affected in the greens section. Ooo.

12:15:10 This is completely different style for me but I kind of really love this green.

12:15:17 I think because it’s quite a cyan compared to her orange colors so okay let’s roll with this and this is kind of the fun thing guys and this is how I work a lot of the time is just to if something’s bothering me, then I will just play with it, and I’ll

12:15:36 see what colors I can create and see what happens if I go into the green section and I know in most of my lessons I’m saying, don’t go in the green section.

12:15:46 It’s not going to do anything, but also that can be kind of limiting so if you’re playing with a photo and you want to see what happens if you change the greens, by all means change the greens.

12:15:58 I’ve always said in my lessons and hopefully you guys have all picked up on this that none of what I say is gospel. I work the way that I work and I know why I work the way that I work and most of the time it does the things that I want it to do.

12:16:14 But also I don’t want it to limit your creative exploration. Because you miss an opportunity to change the greens to some cool cyan grey green because Emily said you don’t play with the greens you know so

12:16:32 once you have the tools and you started using them, then by all means be going and seeing what happens when you do different things with them.

12:16:52 So I actually now want to match the color of this log to Amie’s kind of orange color. So I’m going to get a selective color layer on yellows, actually bring the cyans down a bit.

12:17:21 And the yellows, a bit.

12:17:19 And this is the thing I find so fascinating because I’m looking at this right now and I almost really like the effect that’s happening in the background as well even though I was just really in love with this whole green color I also don’t mind it with

12:17:36 this kind of effect as well.

12:17:39 And now of course I’m asking myself is that where we just started from. And am I just doing and undoing a whole bunch of different things all the time but

12:18:01 There’s something really lovely about the orange tones in the background and how they match with her fur.

12:18:10 And that kind of soft green that we have, sorry if we just removed, remove this color from her.

12:18:47 We’re going to duplicate that layer and clear the mask.

12:19:12 invert and we’re just I’m just going to brush it in on the log here because I just want to see how it looks.

12:19:29 Little bit strong but we can bring down the saturation pretty easily.

12:19:39 Nice, I really like that.

12:20:47 Let’s lower the saturation of the log, a little bit.

12:20:58 This is giving me an idea,

12:21:06 Now I even like this soft color more. And I’m just wondering what would happen if we almost do a duplicate of this layer that’s making everything a bit more orange.

12:21:16 What would happen if we did another one of those.

12:21:24 Everything soft.

12:21:35 Thinking particularly the orange the parts in the background.

12:23:13 I’m just realizing this is hardly doing anything in terms of the yellow.

12:23:29 Okay, kind of like that.

12:23:50 Like, how the tan points of hers are now being linked into parts of the background.

12:23:58 There’s a bit more cohesion between her the log the background the scene rather than her amongst a field of green kind of that doesn’t make as much sense.

12:24:50 Sorry, this is not going to be the most exciting one to watch but it is a lot of just figuring out the colors that I want, and where I want them to be.

12:26:16 I feel under this immense pressure right now.

12:26:20 Because this is quite an unusual edit for me.

12:26:25 And that always suck. Stress exactly but trying to show you something different.

12:26:35 is. Yeah, a bit strange I guess

12:26:44 just trying to make it so it doesn’t end up ridiculous.

12:26:49 And still having to trust the process and the concept.

12:26:56 When I start an image like this and I don’t have necessarily a vision in my mind where I want it to finish it’s hard to just have faith that it’s going to get to a point that makes sense.

12:27:11 And that I’m happy to share with all of you.

12:27:15 And that will be educational and useful for you guys and not just me playing around with it for an hour, if that makes sense.

12:27:25 But what you’re seeing in this video. In fact, and this is probably not that useful for beginners or maybe it is, is a very authentic look at how I work, basically.

12:27:41 And I hope that that’s maybe helpful for some of you who feel like you’re struggling because you open up a photo and you don’t really know what to do.

12:27:49 This might be your permission to just do like to not overthink it and to not feel like you have to go in there with some kind of plan and, you know, knowing exactly what you’re going to create.

12:29:15 actually labeling them today because I’m having a hard time keeping track of the two different color shifts that I have the orange parts, and the green part so if I label it then I will maybe remember a bit better what’s going on, where

12:29:43 interesting thing is that this has got the green tones in the top.

12:29:54 There’s just a few parts with green tones, but I’m not entirely happy about what they’re doing. So I’m just trying to figure out where they are and how I can make them the color that I want them to be

12:30:14 I might get another Selective Color layer and just

12:30:20 find that color that we’re looking for.

12:30:36 And then just painted into a few little bits and pieces.

12:31:04 So the other little part that’s bothering me is just down here.

12:31:08 Let’s see if we can maybe just color match it with the rest of the background of it and we’ll add some curves layers to darken these bright leaves a bit.

12:32:16 The color that’s above her head.

12:32:19 That’s what’s bothering me at the moment so I’m just trying to see what options I have to maybe undo something that I’ve done that will bring the color that I’m after.

12:33:37 Just kind of brush some of the light off from above her I’m not should add a bit of richness back into the colors.

12:33:55 Let’s go ahead and we’ll put a radial gradient behind her.

12:34:02 Now the trick is going to be the color here because if we make this white. Everything’s just going to get really pale and washed out and it’s not going to do what we want it to do.

12:34:14 If we make it yellow it’s going to change the color of our greens.

12:34:27 If we make it cyan it’s going to change the color about oranges. So I’m thinking.

12:34:30 Let’s start with a kind of pale green grey.

12:34:40 Let’s fade it out to a kind of

12:34:44 orange just seems like the most bizarre come color combination that I’ve ever done but that’s where we’re at the moment.

12:34:54 And I’m going to move the orange is up so that it’s a bit closer to the center.

12:35:01 Let’s just make this.

12:35:04 I don’t know, again, this is just me playing around and seeing what kinds of effects we can get

12:35:20 white to green, orange, or at least a very pale

12:35:27 green.

12:35:34 This way it shouldn’t affect our colors that we’ve been working on quite so much.

12:35:40 But let’s mask her out and we will see.

12:35:58 So I’m just using my Refine Edge tool over here.

12:36:03 I’m just going to kind of go around her from, you know, the lower part of her because it’s a Radial Filter coming from above, I’m not so concerned about it know including her legs, 

12:38:17 Okay, since that was going to slowly I’m just going to mask it myself. Usually I would recommend to use the tool, but Photoshop just cannot handle it right now and I’m just really afraid that it’s going to crash, if I try and I haven’t saved my work recently.

12:38:34 So let’s just let it save and then I will just mask it by hand but usually I would want to use that selected mask tool and the refined edge tool to clean up the for around her ears, it’s just not going to work right now and I don’t want it to have a heart

12:38:48 attacks or

12:39:03 I think.

12:39:09 Looking down here at this kind of weird stuff that’s going on. That’s going to be caused from one of our color adjustment layers.

12:39:18 So I’m just going to see if I can find where that is, and maybe just smooth edges a little bit.

12:39:26 When you’re doing these big kind of color edits it’s worthwhile just double checking that everything’s okay normal, possibly it’s even from okay so it’s kind of just like that.

12:39:39 She’s not that helpful but somewhere along the line it’s been kind of heightened a little bit so let’s see if we can just use a brush to kind of mask the edges a little bit and just soften them out.

12:39:54 Quite so stupid.

12:39:59 Could also possibly do like a Gaussian Blur layer.

12:40:05 Just below this background a little bit more but you can see right now just gently going over the edges with black brush is just softening these edges a little because it’s not trying to do.

12:40:19 The big color changes from orange or yellow and green, and separating those two color tones.

12:40:30 I’m not noticing a big difference in the color turns themselves so I don’t think it’s going to be that big of a problem.

12:40:52 This is one where because we’ve done quite a bit of changes, we just need to make sure that everything is marked pretty nicely. I mean, in this case, I’m taking the mask off of this area I’m just going to check what’s happening.

12:41:09 It’s just that I noticed this part of her butt was glowing a little bit.

12:41:13 I just wanted to make sure that that wasn’t going to be a problem.

12:41:24 Probably from here.

12:42:13 turned off.

12:42:21 Possibly, we can just pay in this one little glowing part.

12:42:26 Even if it’s naturally there sometimes looking out for these glowing areas that look like they’re fake is really important because otherwise, yeah they look like you’ve made a mistake, even though

12:42:40 they could possibly get rid of these little glowing.

12:42:44 But thing is, I probably would maybe in the next step.

12:42:51 And just checking the edges of these colors for anything super weird.

12:42:57 They look relatively okay.

12:43:34 That seems really counterintuitive to have a layer that’s lightning the image and then one that’s darkening it but if you turn one or the other off they don’t make sense so I guess they kind of like counter each other out, be turned off this lightning

12:43:59 It’s just one of those images I think where you can work on it and work on it and work on it and it will still be weird somewhere.

12:44:38 I hope you can see how we wouldn’t want white up here because of how pale and washed out that is already. So if we ever really bright pale white color, it’s just going to get more washed out what we really want to do is try and kind of match with the

12:44:47 rest of the color that we have going on here and just use it for a little bit more lightness,

12:44:58 don’t actually want that top part anymore pale.

12:45:01 It just like this kind of pop of haze and light behind the dog.

12:45:06 And it also is helping this part become a little bit more green, and also bringing a bit more of that orange into the image to.

12:45:19 One thing I wanted to check when I was zooming in was whether there was a bit of blue on army’s head.

12:45:27 So, let’s get a hue saturation layer and turn it up.

12:45:31 Yeah, so there is a little bit that’s my fault I forgot to do that in light room, but possibly we can just de saturate it now, a little bit, and take it off of those specific areas.

12:45:49 It’s not bad. It’s just I thought I noticed a bit of color in the face where it wasn’t meant to be.

12:45:58 And while we’re here on desaturating things we can also take some saturation off of her neck and just

12:46:09 remember that we don’t want it to go super, super flat grey. I would never try and take all of the color out of the chest or the neck, because it just ends up becoming a problem now you can see there’s a bit of an issue here.

12:46:25 I suspect from this mask, we can probably just really soften up the edges of that mask because that hazy light doesn’t really need to be coming through between the legs anyway.

12:46:55 Check all the ears and stuff because we know that the mask wasn’t that good.

12:47:02 Back to our Hue Saturation layer, and just take it off of the back that’s a bit blue.

12:47:12 This part is a little bit of a blue tinge looks help if I was on the right layer

12:47:27 was wondering why it was having such a big effect.

12:47:55 The other thing I just noticed, was this side of her face has got a bit of a green tint, which is really normal when they have light bouncing around here and there.

12:48:05 Just be keeping an eye out for things like that so you can see compared to the other side this is that kind of rich, r&d 10, this is sort of more weird ish yellow, which to me is telling me it’s a bit too green.

12:48:18 I’m going to use a selective color layer because I’m working on yellow tones here interface all I need to do is remove some cyan and it will go to the right color.

12:48:27 For me, with a dog with orange or tan points, or even a red or yellow color dog. If you see a color cost.

12:48:35 You can just remove that color from their yellow to get it to the turn that you want somebody pointed out to me in a less than the other day that they’ve never seen it done like that.

12:48:45 And I realized that it’s not something that I often talk about because it’s, it makes sense to me that if you’re working on a yellow color, you could do Selective Color to remove the green from the yellow, so I don’t need to make a whole Selective Color

12:49:01 layer or you know have the opposite color I can just take that color out, obviously doesn’t work on black because that’s a different color than, but in this case because we’re working on yellow tones, any way.

12:49:16 It makes sense them.

12:49:21 Now I’m going to say that once I leave this image for a few hours I’m highly highly likely to come back and play with these greens in the top here.

12:49:32 They’re not 100% where I want them.

12:49:35 But I think that they my eyes need a rest from them before I actually fix them up properly so let’s get rid of these little doodads here. J on my keyboard for the healing spot brush and I’m just going to paint over the top and see what happens.

12:49:55 It’s not too bad for instant.

12:50:18 Really what I just need is a bit of black fur here, it’s pretty soft anyways just because it’s so far away so it doesn’t really have to be perfect.

12:50:36 Photoshop is slow slow moment. See if this one or disappear.

12:51:41 There’s also grass across her leg here but.

12:51:47 So it’s quite a bit annoying because it moves in kind of this shape here. So, you have to try and get the shadows and everything and the interest right maybe it’ll be okay.

12:52:01 My Photoshop is going so slowly that every time I try and select a new target for the clone stamp it just doesn’t do it..

12:53:37 I’m going to actually put a high pass filter on the eyes.

12:53:41 If you saw the image SOS video from a couple of weeks ago, you will have seen me use it there it basically is just an action makes a new layer runs the high pass filter and then.

12:53:54 Yeah, makes the layer how it needs to be I will put it up somewhere in the members portal at some point for you guys to download, but basically it is a sharpening layer.

12:54:08 That’s really strong often too strong. So, you can do it over the eyes and then just gently over the face.

12:54:17 If I turn that on and off.

12:54:22 And see, it is a huge effect.

12:54:24 So it’s really important to turn down the opacity.  So it’s not too crazy, just brings a little bit more sharpness in.

12:54:34 And let’s do some contouring layers on Amie’s face.

12:54:43 And then we’re pretty much done for now until I decide to come back and play with those greens just a little bit more. But honestly, working, some time to give your eyes and the image of break, especially if something isn’t quite feeling right to you.

12:55:03 That’s a really important part of your workflow. Don’t feel like if you finished editing something that you need to post it up immediately.

12:55:14 I’m sure you have other things to post and if not, just give it a night. Leave the image for a few hours or 24 hours or, you know, a day or two and then come back to it.

12:55:28 Because we can often see things then that we didn’t notice beforehand.

12:55:35 And we can then present a much more polished image, and one that’s much closer to what we were hoping for. Then if we just either a give up, or be, we rush it.

12:55:51 Or we just don’t.

12:55:53 Yeah, we don’t figure out what the thing is, that’s bothering us and take the time to come back to it.

12:55:59 So definitely don’t feel like you have to post everything immediately.

12:56:04 It’s a really, really good idea to give it a break and come back to it when you’re feeling refreshed.

12:56:12 And I’m pretty sure your work will be much, much better quality if you do that, because it’s really easy to pick up on small things that you want to fix when you’re coming back to it later on.

12:56:29 Okay, so hopefully you’ve all seen some of my editing videos by now so you know exactly what I’m doing.

12:56:38 If not, they will be lessons on this, some point.

12:56:53 this line here I’m guessing it’s for this

12:56:59 other one that we did really fast.

12:57:16 have been a hue saturation layer, maybe

12:57:28 needed.

12:58:29 Sometimes you just have to check the original image and see that like that line was actually pretty sharp to begin with. So, I don’t think we’re going to be able to get much more from that but I’m also noticing that this leg is looking a bit green.

12:58:42 So I’m going to use the same Selective Color layer as I did on her face, which should just paint out the green.

12:59:09 Right, let’s get one more curves layer at the top here for a bit of highlights.

13:01:20 Okay.

13:01:22 So I think that’s going to do for now like I said it’s highly likely that I’m going to come back or want to come back and do something with this.

13:01:28 This green he kind of turned up here that’s sort of an in between color it couldn’t really decide what it wants to do.

13:01:35 But in general, I think this is a really interesting one and I quite like this. Soft cyan green with the more orange tones in the background.

13:01:45 I think that’s really interesting and something a bit different for me and for you guys to work on as well, just yeah playing with some different colors and color ranges and seeing what you can kind of come up with a bit.

13:02:02 Yeah. So, if I remember I will try and record.

13:02:08 Coming back to those colors.

13:02:11 But I feel like part of my process especially while I’m filming and edit, is to first come back to it, and then just go and play with it, without the pressure of knowing that you will be watching it, and that allows me some extra creative freedom in my

13:02:31 own head.

13:02:32 So I’m sorry that that is the way it is I do try and show as much of the process as possible, but also it’s like having an audience and there is a certain pressure to need to be able to figure it out quite quickly.

13:02:46 So, if I remember and if it makes sense in my brain to do it that way for you when I am coming back to play with it I will try and remember to record it and add it to the tutorial.

13:03:00 But otherwise, you know that’s the general kind of place that it’s at at the moment.

13:03:07 These leaves are still pretty bright but I feel like it’s been an hour and 20 minutes so it’s quite a long one for me and that is what happens when I am just playing around and trying some different techniques, and there are a lot of small things that

13:03:21 I want to work on so you know needing a lot of layers to get specific effects here and in small different places.

13:03:30 So, given that it’s an hour and 20 now I need to give my brain a little creative breast.

13:03:37 Yeah. And if I come back to it I will try and remember to film it but certainly having a look at the greens up in this corner and even in these gaps here is something that I would be considering, and maybe trying to possibly just D saturate these leaves

13:03:53 a little bit more.

13:03:55 Let me try I have got a saturation layer so quickly do that and see if that’s what I would.

13:04:03 Yeah, even that’s going to make them fade in a lot more.

13:04:07 That’s much better already. Can you say the difference that that made to those leaves much much more subtle and subdued now so

13:04:18 definitely not a bad idea just to de saturate there a little bit.

13:04:27 I like this lady, that’s made me much happier. Okay, thank you for watching all the way through. I hope it’s been interesting and useful it’s been really fun to take this image in a bit of a different direction, try a different kind of feeling a different

13:04:37 color thing it’s not my normal very rich, deep colors are a lot paler a lot more matte, a lot softer than what I normally do.

13:04:47 But this is probably part of what I was saying at the very beginning that the kind of spring feeling didn’t really lend itself to being very dark and Moody, but because of armies expression and yeah her intensity and the center of the image.

13:05:04 It didn’t want to. It couldn’t be very bright and airy and I think that this edit is quite in between those two moons, so you know you have a very intense expression in a spring seed and so we had to find a middle point for that.


Edit Together: Spring Theme

A bit of a technical hiccup in the middle there so just skip over that bit.

As always Zoom has destroyed the colours and tones. Here is my finished image. I ended up going back the next morning (I highly recommend you ALWAYS go back and look at your work the next day before posting it! Refresh and reset your eyes!) and doing a green-green version instead of the red/brown-green colours. I also added another layer pretty severely pulling up the blacks for an even softer grey look. 

I really have a sense of wanting to make this photo very soft and almost… pastel tones? And since this is quite different to my usual style, it takes a bit more playing around after the fact – when I’m doing the live events I don’t feel like I can just experiment & try things in the same way as I do when I’m working on it later.

Please feel free to post your edits in the Discussion Forums, or on the FB group! I’d love to see what you create!

A Video Guide to Taking & Editing Snow Photos

In the video, I discuss some difficulties we may have in terms of taking and editing snow photos, then go through a full tutorial, trying out some new techniques (please don’t worry about the “channels” thing just yet. I’ll explain it further when I figure out how it’ll be useful for us!), do some colour changes and so on. 

There are some parts where I skip ahead in terms of masking things in or out. You will probably be able to follow this tutorial pretty well if you are at an intermediate level (or advanced). At the end, I break down how I constructed one of my favourite snow images of Journey. 

Remember as well the free blog post which has some more snow tips!

Any questions or comments, please let me know below, or in the group, and remember to use the #inspawrationcommunity on Instagram!

The Main Points

  • Snow photos do not usually give us much opportunity for a foreground (or mid-ground) so we need to look for other interesting things in the scene, like “tunnels” of light in the background
  • We can’t go overboard doing crazy editing with snow photos (usually) because we don’t have as much to work with in the foreground/midground and a lot of darkening or vignetting will be obvious and unnatural. 
  • We can shift the colours slightly to blue, but need to make our own stylistic choices as to HOW blue we make it (I prefer to err on the side of “still more or less realistic” but you might want to make it more fantastical).
  • Eyes can get weird with the snow reflection. Try a bit of “dehaze” to take it away a bit.