Whether you are new to pet photography, an aspiring professional, or petfluencer, it’s important to be able to take the photos that you WANT to take, whether indoors or outdoors. Photos that are sharp and in focus, without blown out highlights, and with whatever noise level you choose.
I set up this challenge to help you learn exactly what your camera is capable of, so you know how far you can push it before your photos are blurry, dark, or too noisy. It is perfect for novice photographers, who are just getting to know their cameras, or more advanced ones, who have recently upgraded and are looking to familiarise themselves with their new equipment.
We’re about to talk a LOT about the exposure triangle. If you find this especially overwhelming, or just something you can’t seem to “get”, make sure you sign up for my Get off Auto Mode Workshop! It’s being held live on the 5th of March at 20:00 CET, or you can watch the recording as soon as it’s uploaded!
Noise is not a bad word!
If you’re wondering why you should participate in this challenge, let me tell you this: knowing your camera and its limits is never a bad thing and it will make you a better, more knowledgeable photographer.
Lightroom and/or another denoise program can fix a reasonable amount of noise.
But you not taking that photo because you were scared of the noise that might not even be as bad as you think it is?
That’s a moment you might never get to capture again.
It is better to have taken the photo, than to have not taken it at all.
A while ago, I was booked for a photoshoot of a lovely senior dog.
I started by taking photos of him and the owner, and we proceeded to shoot for about an hour and a half. And then he got tired, so we decided to give him time to rest, and I then took photos of the owner with their other dogs.
After wrapping up with them, I noticed the senior dog resting in a field behind us, just as the last light of the day was fading away. I quickly dialed my settings, setting my shutter speed as low as I could afford to still get a photo that’s in focus and bumped up my ISO as much as I could dare, knowing that underexposing too much would make the photo unusable after lightening it up.
I knew that these would be the last photos of the day and, quite possibly, the last photos of this dog, ever. So I took my chance. I took about 30 photos, changing my angle slightly in the process.
I knew these photos wouldn’t be perfect but I also knew that having these photos is worlds better than not having taken them at all.
The Under-Exposing Challenge
The first part of the challenge, is the under-expose challenge.
The goal of this challenge is for you to learn your camera’s capabilities. To do that, be prepared to take some photos that will never see the light of day. They may never make it to Instagram or Facebook. But they will provide you with a valuable learning opportunity.
So, here’s what you should do:
- Find a situation where you’d need to under-expose your image and have a relatively low ISO. An open space with a lot of ambient light and some soft, filtered backlight should do. If you’re not sure, check out this blog I wrote about it.
- Take at least 3 photos. One, where you’d expose normally. One, where you expose it darker. One, darker still. Take as many as you want and go as dark as you dare.
- Lastly, when you get home. Do a quick edit on your photos and try to bring out the detail in the shadows and blacks. How much detail is left? How much noise? Any clipped blacks? Make a mental note on your observations and your settings.
For a variation on the challenge, you could try to see how your camera handles highlights. Just take the photos brighter, instead of darker.
You can do this experiment as many times as you wish with different ISOs, different amounts of editing or underexposing. For example, try and under-expose with a higher ISO and edit it brighter. How is your photo then? What is your camera’s relationship and limit between ISO and under-exposing? For mine, it’s about ISO 4000 – depending on how severely i need to under-expose, of course! Try to think about it and keep notes of your reflections.
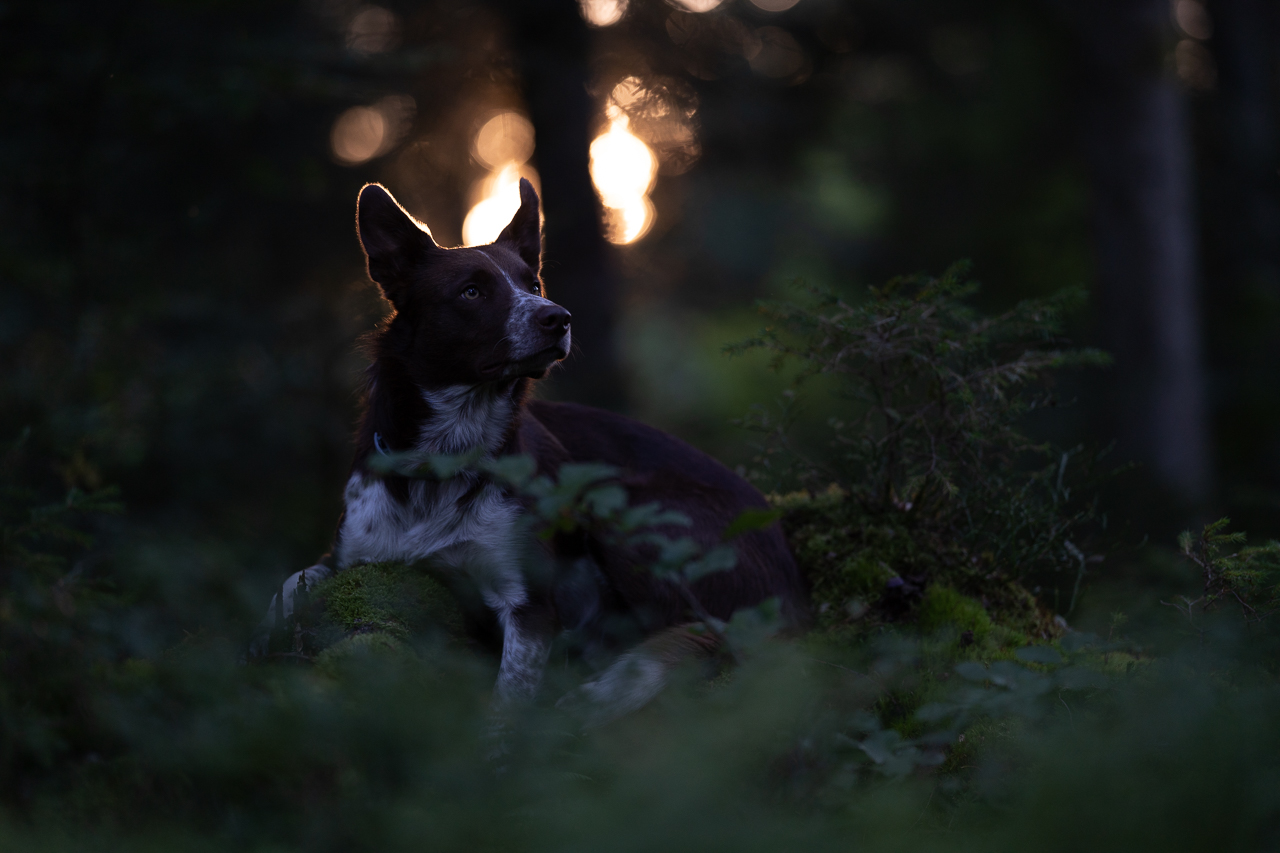

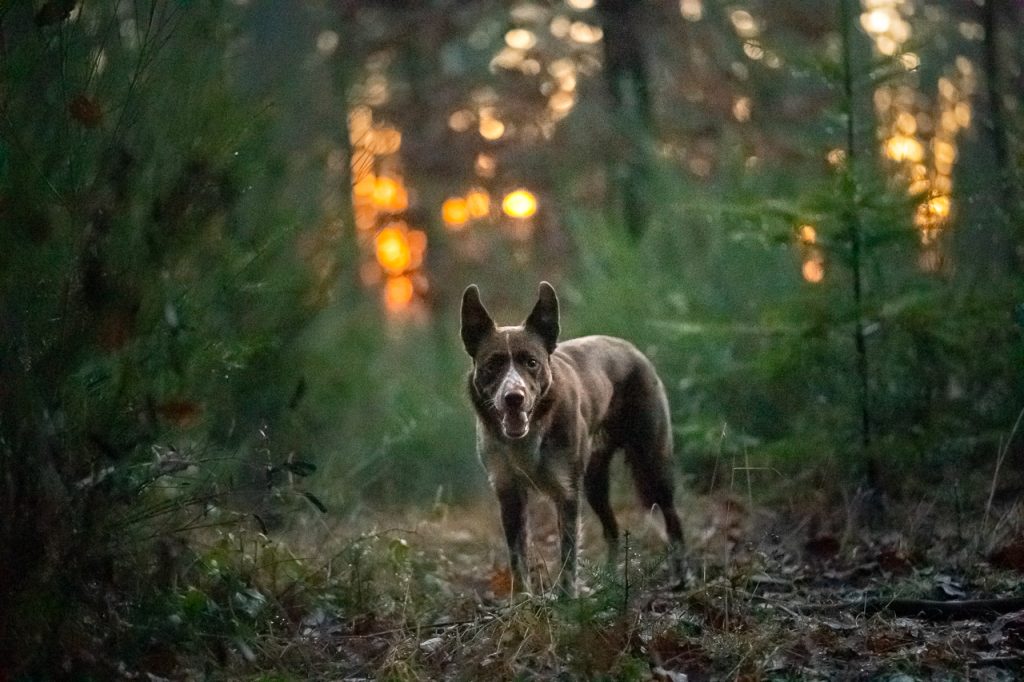
Would you have dared to go this dark? My camera can under-expose even further but to save myself a bit of time and effort in editing, I blew out the highlights just a bit. I edit this photo in a full step-by-step tutorial as part of my Photoshop Course, if you want to learn how to do it!
The Shutter Speed Challenge
In one of my recent lessons, a student asked why I set my shutter speed on 1/500 even when the dog is standing still.
The answer is: I have found that if I have my shutter speed at 1/320 or slower I notice a significant increase of motion blur in my photos. I don’t know why, it may be because I move around so much or I may really just have unsteady hands, but at a shutter speed of 1/500 or higher, I don’t notice these issues at all.
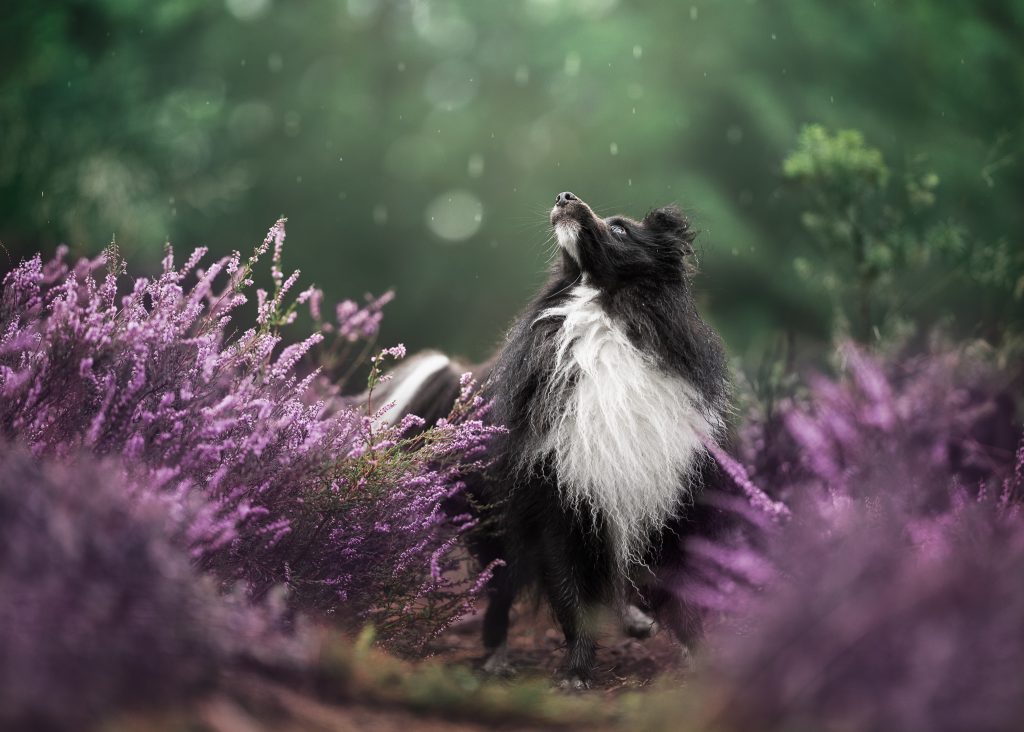
What shutter speed would you choose for a completely still dog, to get a 80-90% hit-rate of photos without motion blur? What if the dog was moving just slightly like Piet here?
The Challenge
- Take your dog for a mini photoshoot somewhere with reasonable lighting conditions, be careful not to choose somewhere too bright as we’re going to want to drop the shutter speed..
- Use your “normal”, go-to, most used lens.
- Take some photos at a correct exposure with the shutter speed set at 1/500. Then slowly start lowering your shutter speed to 1/400, 1/320, etc. Don’t forget to adjust your other settings in the process.
- You can take as many photos as you want, in several locations. You want to have a reasonable number of photos.
When you get home, inspect the photos and pay special attention to the focus and blur and the way they relate to the shutter speed. Observe the percentage of photos that are in focus vs blurry at a certain shutter speed and make your own decisions about what percentage of “useable photos” is acceptable.
The ISO Challenge
So far, we’ve successfuly tested your camera’s capabilities in under-exposing and how steady your hands are.
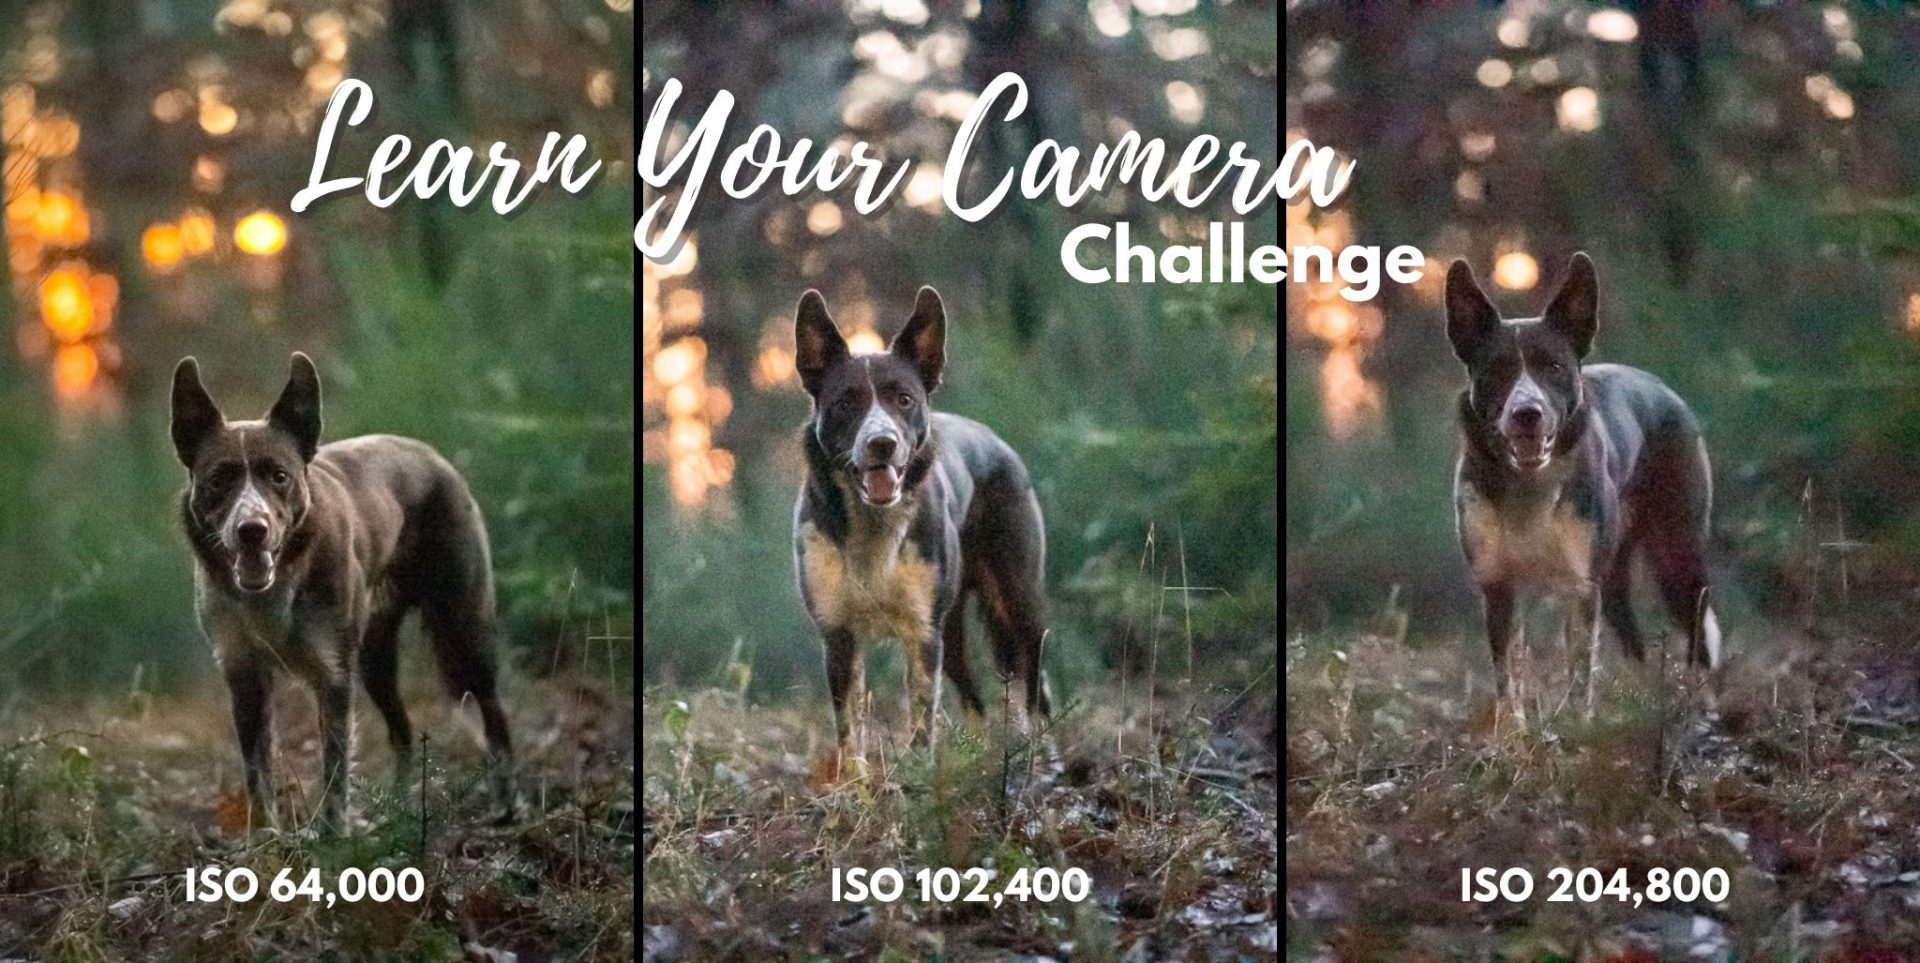
In this challenge, we’ll test what your camera can handle in terms of ISO.
- Once again, take your model pet out in a not too bright location.
- Set your camera to a correct exposure with the ISO ideally at around 200-400.
- Take a series of photos where you continuously raise the ISO to 400, 500, 800, 1200 and so on. You could try to go as high as your camera will allow. Don’t forget, you need to adjust your other settings accordingly to adjust for the extra light.
Note: I would never go to this extreme on a client shoot or even for myself. We do this for educational purposes only.
When you get home, once again, look at the photos. Try to play around with the denoise feature in Lightroom. How much noise is there and at what point does it become unbearable? What happens if you try to lighten it at all?
The goal of this challenge is to get to know your camera’s capabilities, so don’t worry if your camera didn’t perform the best.
By participating in this challenge, you now know its limitations and will be able to apply your new-found knowledge in future photoshoots!
If all these settings still confused you a little bit or you found yourself wanting to know more, you can read my blog about using natural light in your photos or join my workshop: getting your camera off Auto mode on March 5th at 20:00 CET, so don’t forget to check it out here.
And remember, if you participated in the challenge, make sure you tag me on Instagram (@inspawrationphotography) and use the #inspawrationcommunity hashtag. I would love to know what you learnt, if the challenge helped you to find out more about your camera, and if you were surprised at the results!
Happy photography, until next time!
~Emily, Loki & Journey