In pet photography, having an understanding and control over lighting is everything. It’s the foundation for the entire mood, feel and texture of your shot. It weaves the story you’re trying to tell and allows us to capture that magical essence we love about our animal companions.
And while, of course, we can use our editing know-how to manually enhance this or draw out certain aspects, there’s really just no substitute for a really strong foundation in understanding and harnessing natural light.
Because without it, we’re relying on flash photography and taking photos in the dark. Or in a studio.
For me, natural light is at the very core of creative, natural dog photography. It is the most readily available, most natural, and is everywhere, all the time, in various qualities, directions and temperatures.
So how do we use natural lighting in pet photography? What’s an ideal dog photoshoot setup? What should you be looking for when scouting a location and a time to start creating magic?
I’m here to share some of my top tips on how to understand and utilise natural light for your dog photography.
Starting with what is probably my biggest piece of advice…
1. Brighter isn’t always best
You might wake up, throw open your curtains and smile wide at seeing a beautiful sunny day. You might want to grab your pooch and run down to the local park to snap some shots, as they’re sure to be amazing. After all, it’s such a stunning day right?
But what you end up with is super shiny fur, very harsh highlights, and sharp, dark shadows. Now you’re not smiling anymore!
I get it, I’ve been there. It took me a while to realise that brighter isn’t always better.
This is because when the sun is high in the sky like that, it’s a single bright source. This is never really conducive to good photos, as the light is just too stark.
2. Soft light is always more flattering
Sometimes a cloudy day can be the best weapon in your pet photography lighting setup!
The natural diffusing that occurs without bright harsh sunlight can do wonders for your composition, and reduce those crazy contrasts.
Generally, this won’t create any of those unflattering shadows, but you’ll still have to keep an eye on where the light is hitting, how your camera settings are reacting and how the weather is changing around you.
Don’t forget that contrast is an easy effect to add in editing, removing it is much more pesky and time consuming!
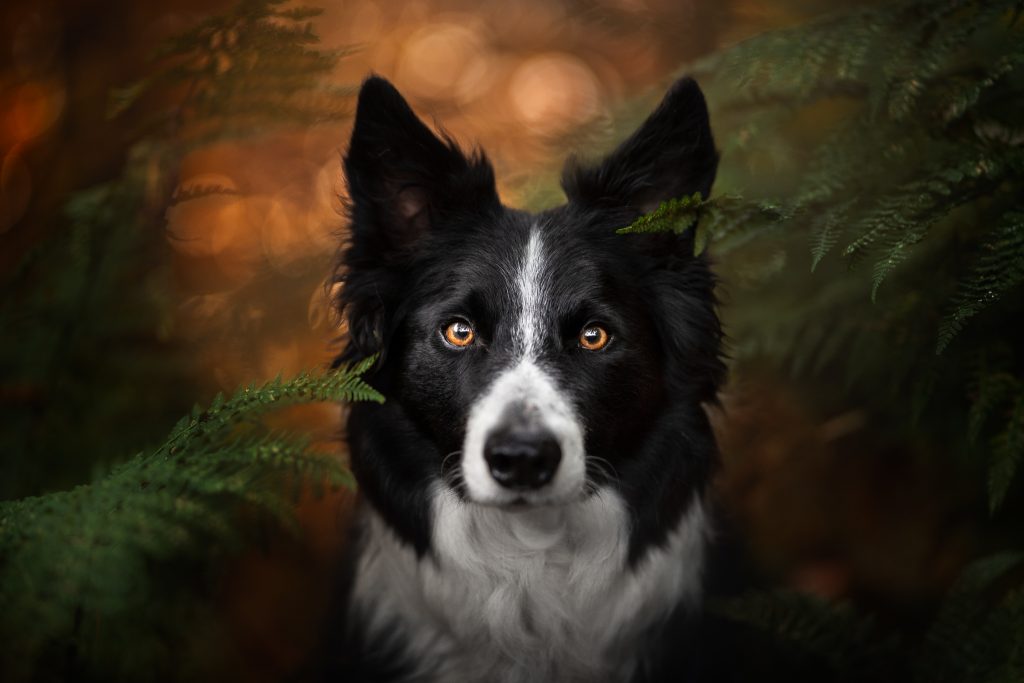
3. Direction is key
Being able to understand where light is falling and how that will affect your subject is a huge learning curve for all photography students.
The easiest approach with natural light is to use direct light.
For this, have your subject facing the light source. This way, the light is falling directly on the dog’s face from behind your camera, which should mean the dog is getting nice, even lighting across the whole face and perhaps even a sparkle in the eye!
I usually find that using some kind of open sky area and pointing your dog’s face towards it works really well here.
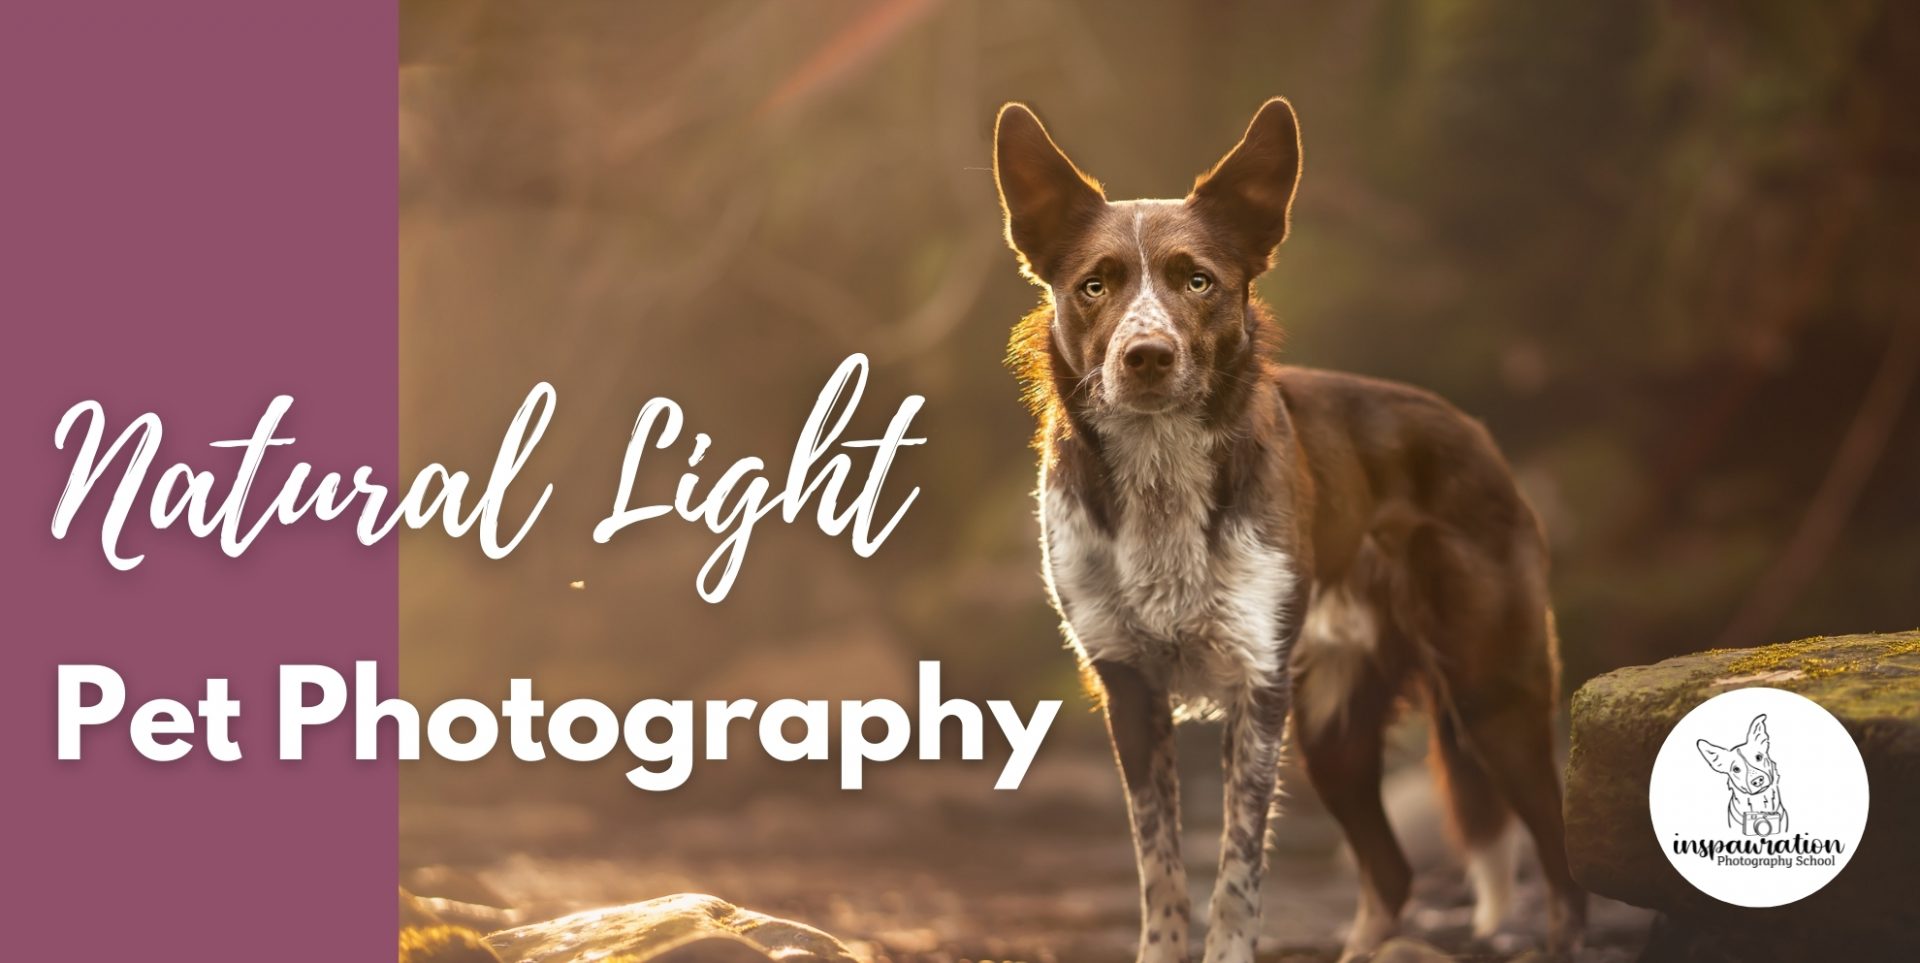
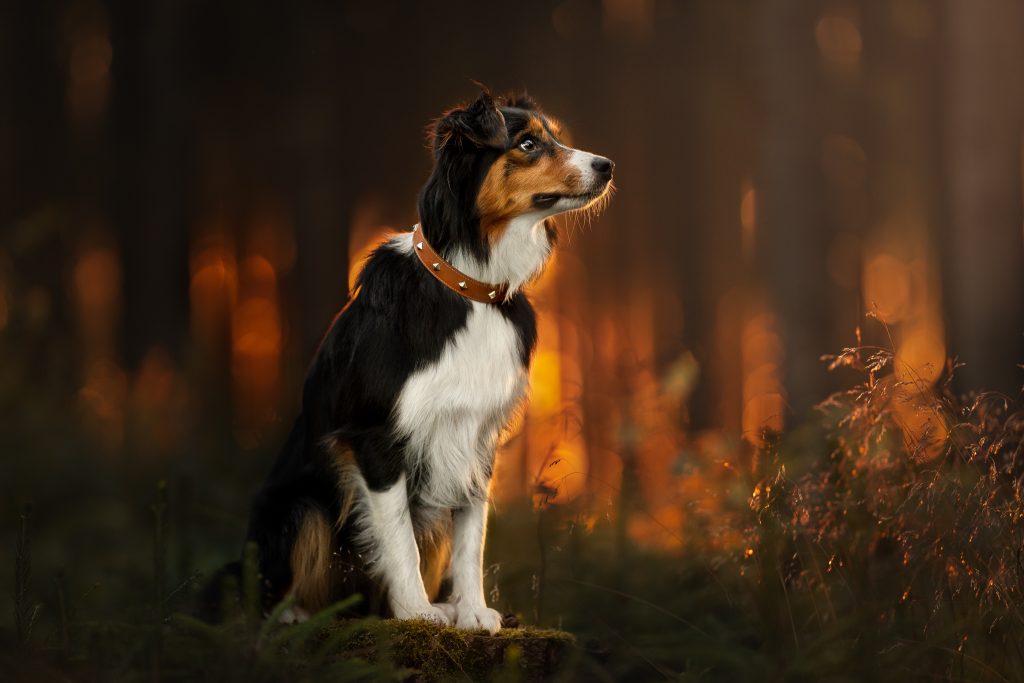
4. Experiment with backlight
Backlight is when we have a secondary lighting source coming from somewhere behind the dog.
This can make for a beautiful glow and a creamy image, but you’ll need to make sure that you have a good ambient light source on the dog’s face, especially if you need to under-expose the image. Otherwise their face is just going to end up too dark.
You may also need to underexpose the image to ensure you can balance out the light from behind, particularly if it’s a strong source.
5. Think about your story
When choosing your location and assessing your lighting conditions, think about the story you want to tell and the mood you want to portray.
Those brighter days, with wider areas of light, obviously have a more uplifting, energetic, optimistic feel.
The more closed in shots, with more diffused light, will have a darker, ambient, electric and moodier feel.
Working and experimenting with a mix of these, or light from different sources is a really exciting way to surprise yourself and make a new discovery in your style. So don’t be afraid to play around and break the rules either!
Of course lighting isn’t the only factor here – but it’s a biggie.
6. If in doubt, revisit
If you find yourself getting frustrated, and nothing seems to be working right, then don’t despair. Sometimes natural light just isn’t in our favour and the conditions aren’t conducive to good work. It happens.
Just keep trying – use a different angle, move to a shadier area or experiment with your exposure.
Or better yet, come back at a different time of day, or a different day completely with different weather! Sometimes it takes time to find our ideal conditions and how we like to work. And that’s ok!
I hope this post has given you some exciting new dog photography ideas, and pet photography lighting setups to try.
But before you go – here’s one last insider’s tip. The nuances of natural lighting really come into their own in the edit suite.
This is why, as part of the Learning Community, I made sure to include training specifically focused on helping you to both use natural light and light editing techniques to your full potential.
Whether you’re a pet parent, aspiring photographer or you’ve recently gone pro, the Learning Community has been designed to really elevate the quality and professionalism of your photos. I teach you skills like how to change the perception, presence & direction of light in any photo, as well as a sophisticated approach to vignetting, plus creating both subtle and dramatic spotlights that enhance storytelling in an organic way.
Keep an eye out for my next intake of students into the Learning Community. Or if you’re an eager beaver and would love to dive into mastering these skills ASAP, you can check out my online courses here.
Happy snapping!