One thing to consider when finding and setting up locations, is our goal as photographers.
Which is to captivate our audience.
If you remember back to the lessons on style, we talked about wanting to captivate our audience and keep them in the image for as long as possible.
Location can play a big part in this! As you’ve seen by now, using layers can create depth in our images, using frames can draw focus to the centre or the subject, but we can get even more specific and look at things like the curve of a branch or a leaf.
Ultimately, our viewers go on a subconscious journey when they land on our image:
They land on the eyes first, then their eye will be caught by something. It may be caught by an area of bright bokeh, by some sharp and detailed grasses, or by a colour which clashes. If we do our job right, the elements in the image will help to lead our viewer BACK into the image and back to the dog’s eyes. If we don’t, we set up opportunities for them to leave.
Bright bokeh along the edges of an image give the viewer clear “exit signs” to leave. There is no reason to circle back around. Similarly, bokeh BEHIND the dog who is looking in one direction, with dark space in front of the dog, will draw our eye backward and out of the image.
Ferns or branches curving toward the dog near the edge of an image, or even near the dog, may help to flow the view back toward the dog. On the other hand, ferns, leaves, grasses and so on curving AWAY from the dog, especially near the edge of the frame, is a clear sign to leave. Let’s have a look at some examples of this in action.
And I want to note that this does NOT mean that I am constantly on the lookout for perfectly and strategically placed ferns, leaves, grasses and weeds… however… they are WELL worth being aware of, especially in editing, when you can make some decisions then as to whether you should remove those elements altogether, or subdue them, or make them work more in your favour by having them enhance the flow through the image.
Wow lots of lines!
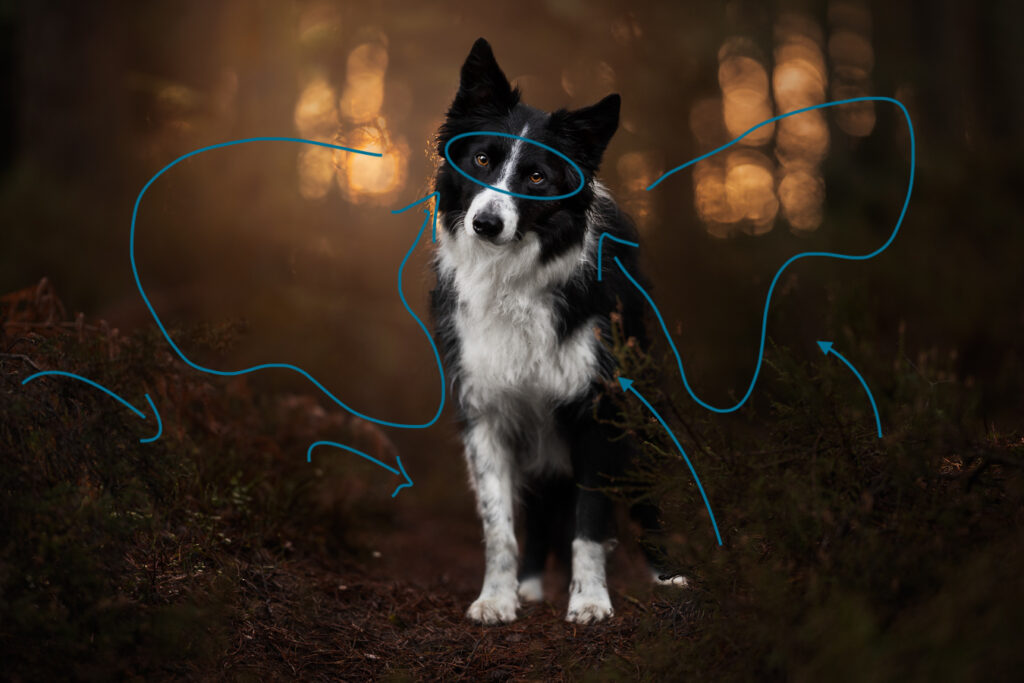
Basically, with each of these images, I land you in the image on the dog’s eyes (circled), then show you how a viewer’s eye MIGHT flow through the image, and why it might be successful, or not.
In this one, I predict the viewer would get drawn to the left of the image first, to the bright spot, before hitting the darkened area and being drawn to the ferns and plants which curve downward to the dog. So you end up at the dog again, and maybe this time get drawn to the right, where you hit another quite dark area, and reach some other plants curving back toward the dog. As such, you end up kind of “transfixed” at the dog, because all elements are curving you back inward.
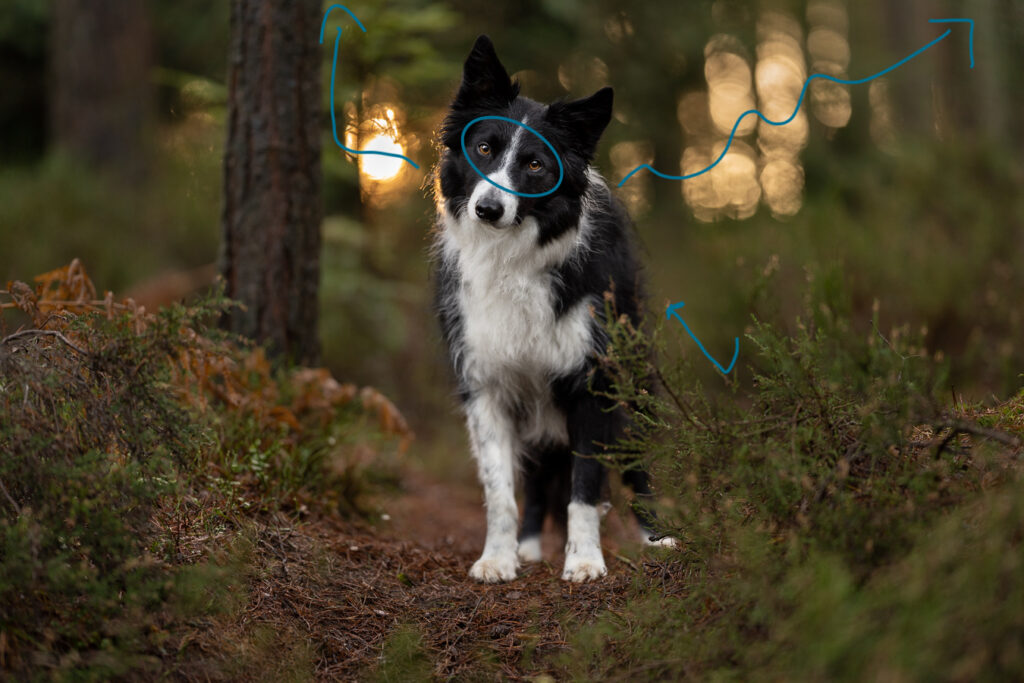
Let’s compare this to the less edited version of this image….
Can you see why I might have removed that tree trunk in the middle?
In this case, we begin on the eyes, and are immediately sucked to the very bright spot. We hit the tree trunk, and ricochet out of the image because it’s awkwardly in the middle of the frame. If we were to go to the right, there is nothing stopping our escape. The plants near Loki are trying to help, but they’re not doing much.
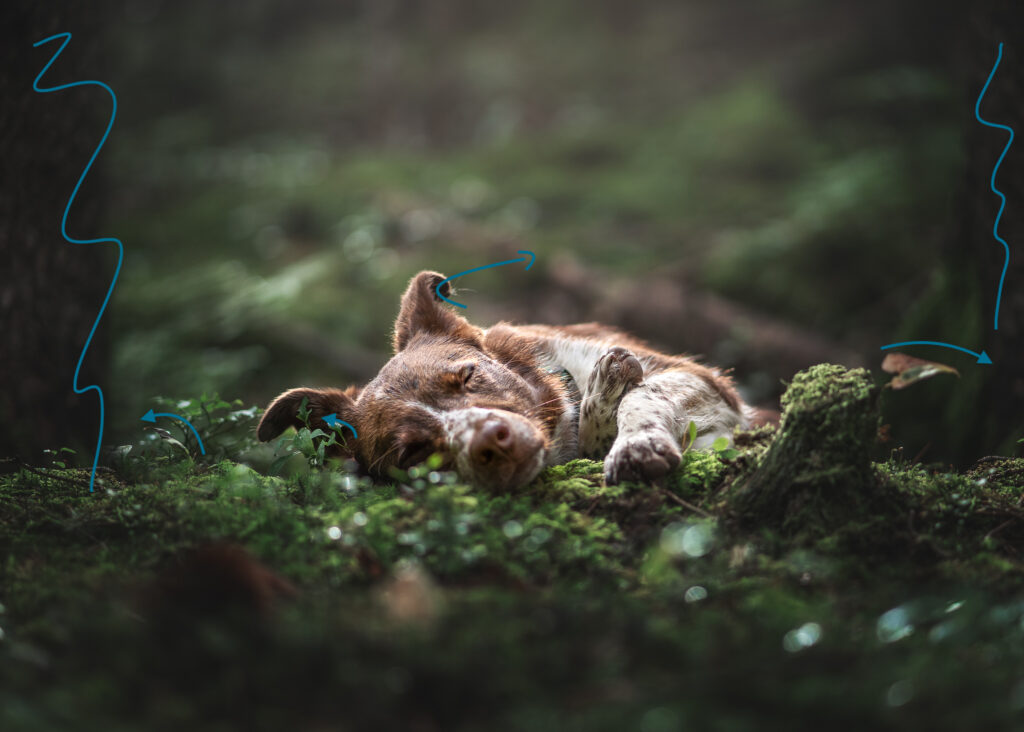
Here is a LOVELY simple example. This image is framed on either side by trees (I think I photoshopped the tree on the left in as a copy)… but, there are many elements curving outward, including his ears, and especially that beautiful leaf on the mossy stump. Let’s see what happens if we tidy up the image a little and flip that leaf…
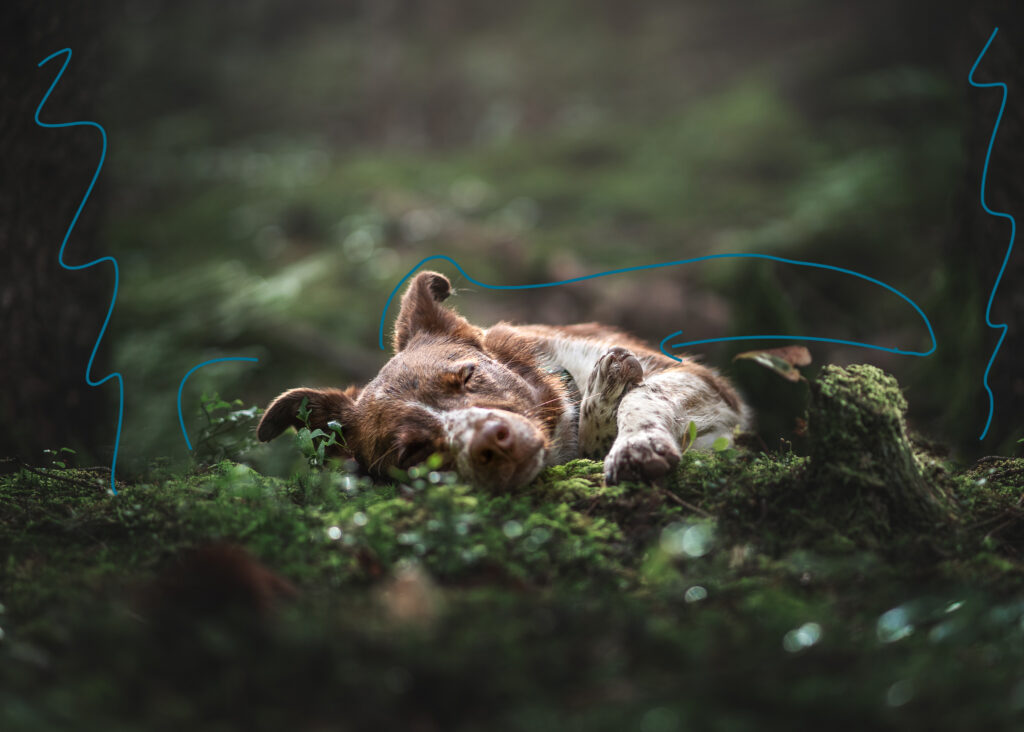
What do you think?
It might not seem like much, but these small factors CAN help our image fit together better. Here are a lot more examples – hover over the image for some information about each one.

