Archivesfundamentals

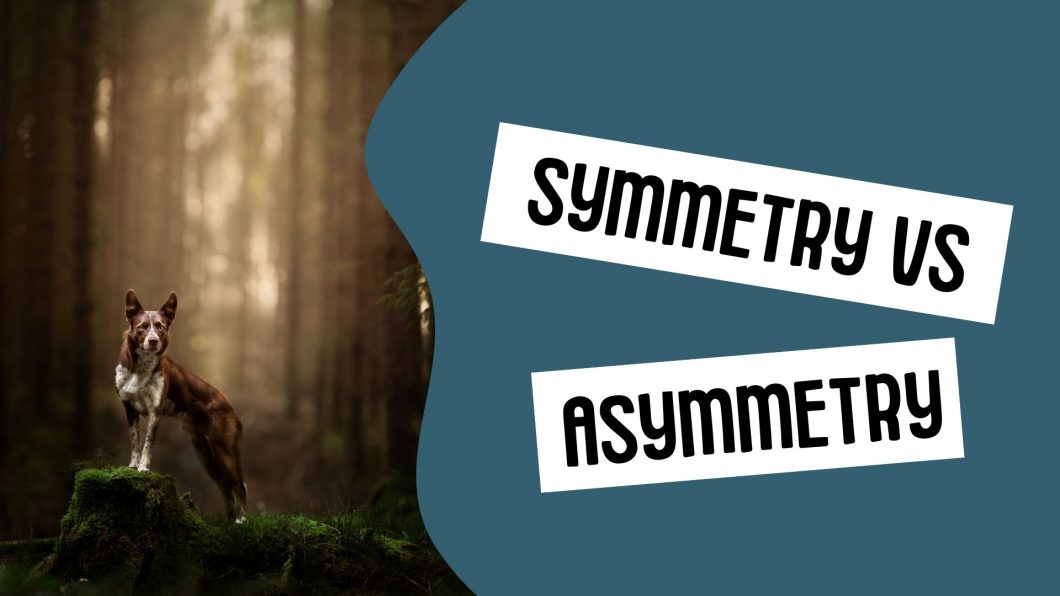
Symmetry vs. Asymmetry

The first and most obvious thing to decide is whether your image will be symmetrical / centered – with the dog straight in the middle, or asymmetrical, with the dog off to one side. 

When I’m talking about symmetry here, I don’t mean that both sides of the image will be identical – this is rather difficult in natural environments. More that the dog is more or less in the middle, without the balance of the image being to one side of the other.

There are a few reasons you might choose to do it one way or the other. Symmetrical photos are great with balanced, even backgrounds (eg., there isn’t one side that is very dark and one side and one very light side.), where the dog is quite perpendicular to the camera, looking directly into the lens. 

These photos tend to be powerful but not very dynamic, and quite safe. They can make for dramatic, strongly-connected images. Some examples of symmetrical/centred photos:

Asymmetry

Asymmetry is when the image is “off-centre”. There are two instances when you can use asymmetry.

  • One, where the dog is looking to the side instead of straight forward. You should give him “space to look into”.
  • The other is a little more tricky. The dog may be perfectly situated for a centred, symmetrical photo, but you compose it so that he is off to one side. This is quirky, a bit interesting, and should suit the mood. For example, I would not necessarily use a quirky off-centre photo with a very dark and intense mood (but again, rules are made to be broken). These can make use of elements or frames in the image (eg., tree trunks) where it wouldn’t make sense to have the tree in the middle of the mage.

Here are some examples of off-centre asymmetry where the dog COULD have been centred.

Composition Rules and Guides

There are a few compositional rules or guidelines within photography. If you use Lightroom, when you’re in the crop tool, you can press “O” on your keyboard to cycle through a variety of different compositional options!

The most well known of these is the “Rule of Thirds”

Rule of Thirds

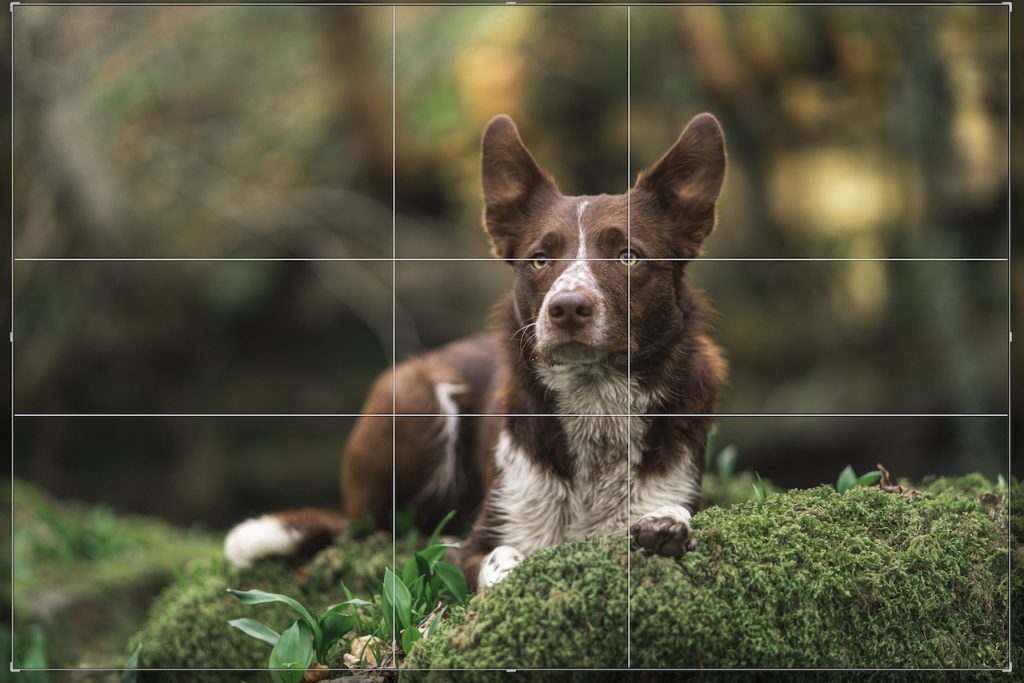
This divides your image up into equal thirds. The idea is that you should position important elements (such as the eyes) of the image either along the horizontal or vertical grid lines, or, even better, on an intersecting point. 

I’ve found this can be a little bit hit and miss with dog photography, given the perspective at which we shoot, the size and height of our subjects and so on. I would definitely advise against squashing your dog into the frame just to get their eye on an intersecting point. 

You can also use rule of thirds for more landscape based photos, where one third might be the sky, another third might contain your subject and the “scene” and the lower third could be foreground.

Rule of thirds is a nice place to begin really thinking about composition because it’s pretty safe and well known, it’s generally easy to line our subjects up on one or another of the grid lines, and many cameras even have a rule of thirds grid-line overlay in their display, so you can compose the photo with the rule of thirds already in mind. 

Here are some examples.

Other Options

There are actually other grid options you can play with! You may find yourself getting creative if you explore some of these other grids. I haven’t used these grids very much, but have recently begun to play with them a bit to see how they could help me create more interesting images.

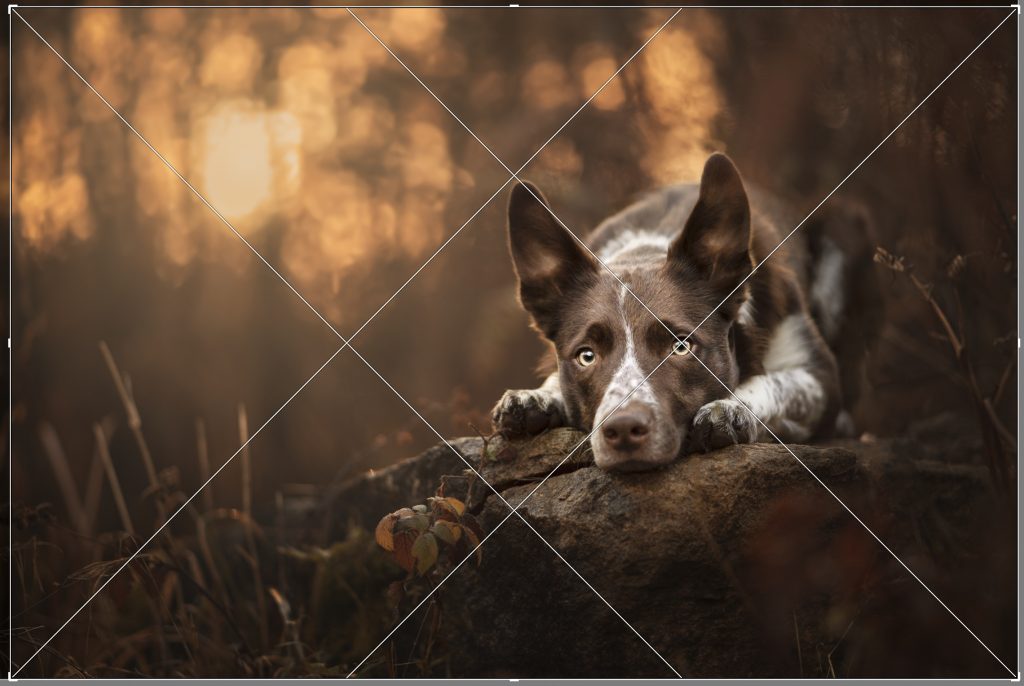
Diagonal

This grid is great when there are diagonal elements in the image. You can also use it along with the rule of thirds grid to see if there is some/any crossover (and if so, it should be a compositionally strong image!).

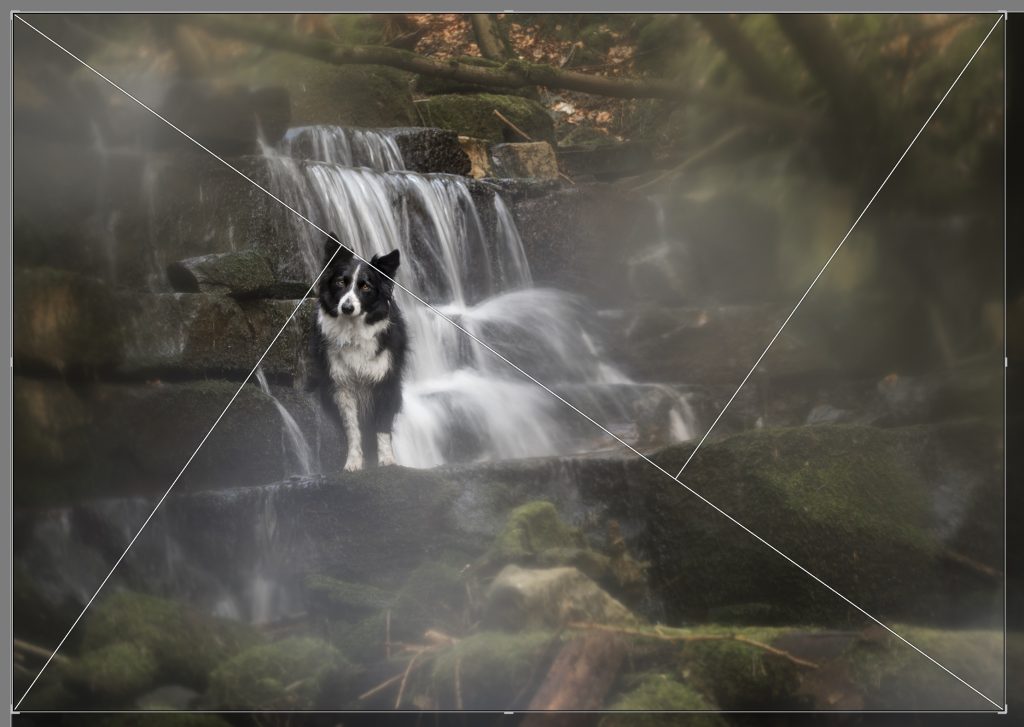
Triangle

This one seems like a fun and interesting option. The idea is to place points of interest within each of the triangles.

Press Shift + O on your keyboard to rotate the grid. 

Maybe something like this??

Golden Ratio

This is thought of as a more “advanced” version of the rule of thirds, but with more emphasis on the corners and less on the centre.

The idea is the same place interesting things on the grid lines or at intersecting points. It’s possible that when I’m breaking the rule of thirds rules, I’ve been accidentally using this grid. I’ll have to check that!

Golden Spiral

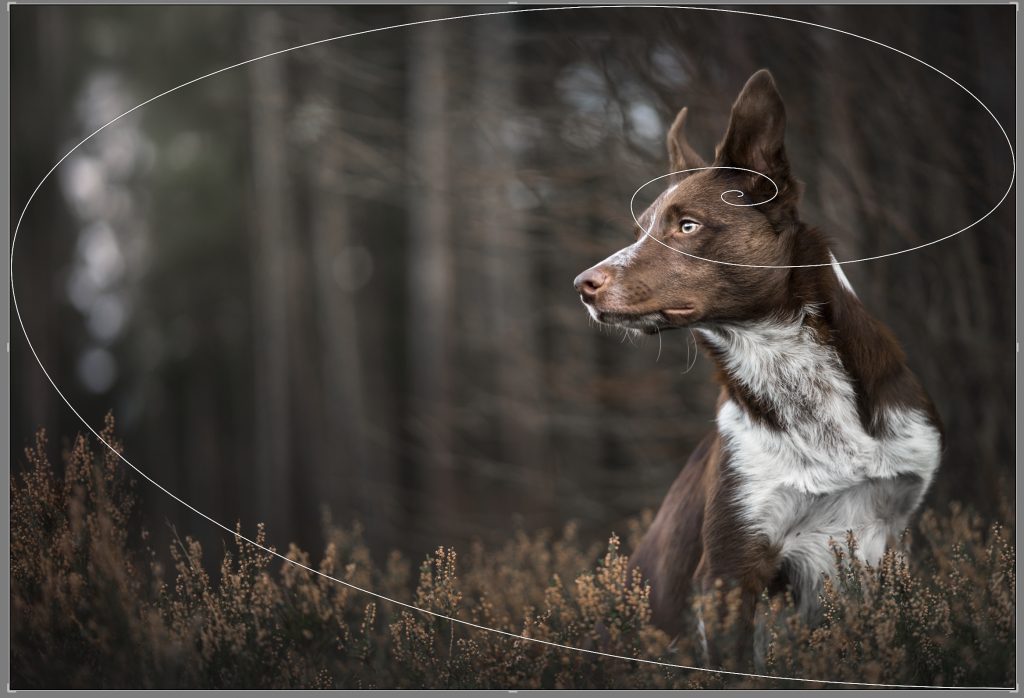
The golden spiral is a mathematical concept, created by making squares from Fibonacci numbers.

This doesn’t mean a lot for us. Suffice it to say that golden spirals and Fibonacci sequences are seen all throughout nature and classic art. 

For photography, the idea is that the most important or detailed parts of the image should be located at the smallest part of the coil, and the rest of the elements of the image should help lead the viewer toward that point. 

Since nature is made up of plenty of curves, we should be able to use this concept within our images. I would say many of us do, in the way that we (myself especially) darken areas and create the “flow” through the image. Remember back to the “Location and our photography goal” lesson, we looked at how a viewer might travel through our image? This is much the same! 

When I tried this overlay on many of my photos, the spiral ended up somewhere over their nose or face. I’m not sure how “perfect” you need to be with this, or if it should lead to the face in general, rather than the eyes specifically.

I like this example especially, as the bushes at the bottom of the frame perfectly follow the line, you reach the dark edge of the photo so travel back across, reading the dark edge behind Journey, so are brought back into his face again, exactly as I had wanted, but without realising the spiral fit within it like this.

Leading Lines

It can be fun to experiment with “leading lines”. These are lines within the photo which lead the viewer’s eye to your dog. 

The most obvious example is train tracks, but this has been done to death, is often illegal, can be very dangerous, and is clichéd now. Please don’t use train tracks for leading lines. See what other lines you can find out and about. Can a tree trunk, branch, tree roots or fern frond lead the viewer to your subject? How about using a path? Are there other lines within nature, or urban landscapes which can be used to lead toward your dog? 

Portrait or Landscape Orientation

One thing I noticed very early on after opening the Learning Community, was a high number of photos being taken in portrait orientation. Let’s have a look at what will be best for your photography, and when you might want to choose one over the other. 

Table of Contents

Portrait Orientation

There seems to be a growing trend toward using portrait orientation (or perhaps it’s always been there, and carried over from human photography?). The main reason people usually give me for shooting in portrait orientation is that they were told to do it, because it works better on Instagram.

The question I want to ask you though is:

Are we creating photos for Instagram? Or are we creating artful photographs that we/our clients love?

Of course we can do both! I would like to think that I do both! However, one look at my feed and you’ll realise pretty quickly that 98% of my photos are in landscape orientation (about 7:5 ratio). And yet, I get a high number of likes, have a reasonable number of followers (23k at the time of writing), a pretty engaged supporter base, and seem to be doing pretty well over there.

Why? Because I can create powerful, dynamic images better if they’re in landscape orientation. 

Which isn’t to say you should never take photos in portrait orientation. Here are some reasons you may want to consider it:

  • Your scene is tall. Imagine a dog standing in front of a sky-scraper, or tall tree, and you want to show the height and length of the thing
  • You are creating a portrait which shows the tall power of the dog. Imagine a malinois sitting square, facing directly at the camera. The photo is about his power and height. Even this, I would argue, could be better done in landscape orientation
  • Dog and owner photos CAN work better in portrait orientation
  • Looking down from above photos can work better in portrait orientation
  • Photos with the dog directly facing the camera, straight on, with something interesting above and/or below them, that needs the height to make an impact.
Have a look at the example gallery below and see what you notice about the images. 

There are about three there where I “broke the rules” by having the dog looking to the side. In Loki wearing a beanie, I wanted to show his height in beanie and scarf, there was no need for anything else to be in the scene. 

In Journey looking to the left, his gaze is directed upward, toward the sun. He is quite close to the edge of the frame, so still has plenty of negative space to the left. He was “something to look at” so his gaze doesn’t feel squashed in by the frame.

In the puppy with the sparkly magic, again, she is on the very edge of the frame, is looking up and to the side, and has “something to look at”. That photo made much LESS sense without the sparkly magic being added!

Landscape Orientation

It’s pretty clear that I prefer taking my photos in landscape orientation, and there are a few reasons why:

  • More context. We get more of a sense of the scene, the dog’s place within it, the background, the visual interest. It’s a complete scene.
  • More editing options. Because we have more context, we have more to work with in editing. We can make the light come in from the side, or from above. We can lighten some part of the scene, and darken some other part. In portrait orientation, we can work on the dogs, and then we’re pretty much done. Of course there are exceptions, but the options are more limited because we have less space to work with. 
  • More posing/storytelling options. Because we are limited to a narrow window in portrait orientation, we can really only have our dog posed in a straight line away from us. You can see that in the examples above.
    • We can’t really pose our dogs with a curve in their body, which is a way we can produce more dynamic, interesting and storytelling images. See the posing lesson for more on that! A curve in the body in portrait orientation either has the dog cramped in the frame, cuts off parts of them, or they have to be further away. 
  • It makes more sense. Dogs are 4 legged animals, who are naturally horizontal to the earth. Therefore, a horizontal photo makes more sense than a vertical one, in most cases. 
Some examples below, but you’ve seen plenty of landscape orientation photos all over this course. I tried to include a variety here, to show you can do pretty much anything and everything in landscape orientation:
Empty scenes, curves in the body, dogs straight on to the camera, looking to the side, frames and context in the scene, landscapes/scenery, headshots, group shots, action shots, even standing-up tall shots, and shaped light.

Final Thoughts

At the end of the day, you decide what orientation to take your photos in, what suits your purpose ad your style.

I would rather be making dynamic, beautiful images for me or my clients, which tell a story or make an impact, which I can edit creatively, than to loose those opportunities just because I’m going to post them on Instagram and I MIGHT get more likes by having them portrait orientation.

That being said, you look at any of the “big name” photographers out there, and I can almost guarantee you that the majority of their photos will be in landscape orientation.

If we remember our photography goal again: to captivate our audience and keep them within our photo, then in order to do that, we must surely include elements to keep them there – both the scene, the pose, the light and so on – everything we are discussing in this course! But when we try and reduce a 4-legged horizontal creature to a vertical space, what must we sacrifice in order for that to work?

What is the reason for taking photographs? Why are we choosing to take that photo?

For Instagram?
Or for us?

For likes?
Or for love?

I know which one I would choose, again and again, and again. Have I thought about how well a photo will do on the gram? Have I set up shoots/scenes specifically cos I know IG will enjoy it? Of course! Do I create FOR Instagram? No. Not at all.  After all, Instagram doesn’t pay me. Instagram doesn’t have any hold over what I do. The majority of my students come from Instagram, and the reason they came? Because my work is mine. It is authentic and powerful, it tells stories, it is creative or contemplative or joyful. It is mine. And I will always choose to take beautiful photos over what Instagram will “like” or not like.

Don’t create for Instagram, the way that will “look best” on a phone screen.

Create something beautiful, something wonderful, something with heart and story and purpose. The people who like it, will like it – not because it takes up space as they scroll past, but because it makes them stop a moment and wonder at what you have created.
Create for love. Not for likes.