Archivesdepth

Closed Locations

Table of Contents

Closed, or Layered images make use of natural (or man-made) elements to help create a 3D scene with more depth. There are several ways we can do this, ranging in complexity. “Visual interest” will be discussed further in the lesson.


Some ways we can include depth are:

  • Including layers in your image: a foreground element (not just DOF blur) and/or mid-ground, and background
  • Framing one or both sides of your image with something dark
  • Overhead frames and arches
  • Circular frames
  • Tunnels
  • Curve shapes

Using one of these “methods” (or finding a location that includes some of these elements) can be a great way to make them more engaging, to really place your dog within the scene, to give them depth. They also (sometimes) allow us a little more creative freedom in editing, as we can use different elements to edit the impression or feeling or light or shadows, suggesting that light is touching some areas and not others, also adding to the dynamic feeling of the image. 

One thing to note is that you do not always have to create your images in this way! As shown in the Open Locations topic, it’s perfectly fine not to, or to include one, several, or all elements of the scenes shown below. Don’t drive yourself crazy trying to find the “perfect” location!! Just try different places and see what works. If you see something interesting that could add some depth and interest, take some photos there! 

Below are a series of “diagrams” which attempt to show how you could construct some of these effects, as well as examples – when I have them. Some scenes will cross into one another so you may see the same example twice, or it may fit into more than one category! We can have a “layered” image with one frame! Or an image that makes use of a curved tree or bush that also has an overhead frame!

What I wanted to do in this lesson was deconstruct and demystify the elements that you COULD find for your scene, in order to give it more depth and interest.

Keep in mind though that the exact effects due to Depth of Field will vary based on your aperture settings and the lens length you use, etc. If you’re not sure, check out the DOF lesson. So there aren’t too many examples on one page, I will be breaking down these “closed” locations even further.


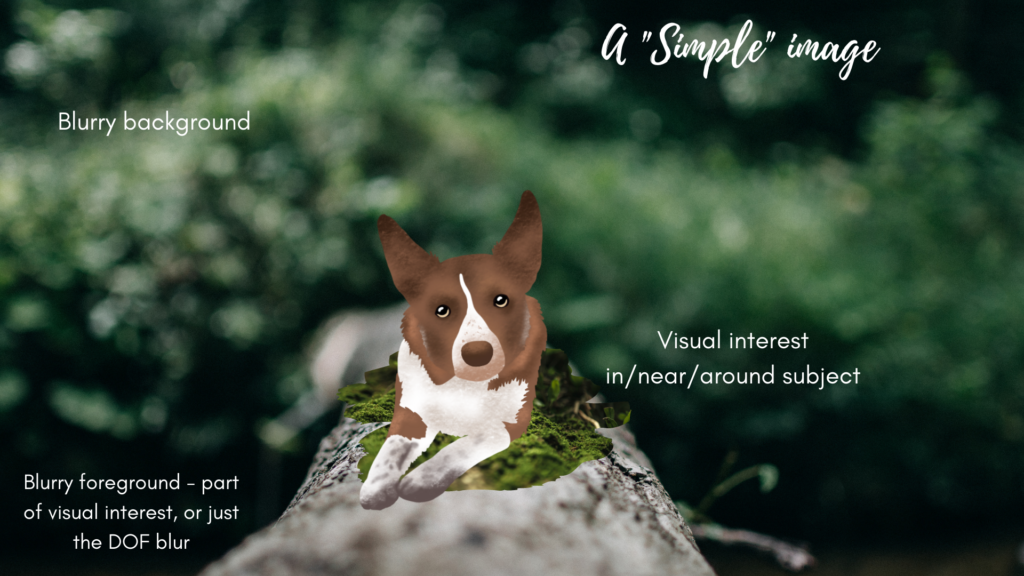
A Simple Layered Image

In these images, we have the dog posing on/amongst something fairly simple – for example, on a mossy log. We get depth from the foreground blur, which may also be linked to the “visual interest” of the scene. The dog is clearly part of the scene, and there is something “interesting” about where it is, although it doesn’t have to be complicated. The background is blurry.

These images are similar to our “open” images in some way, however we are now making use of some visual interest, and adding a bit more depth through a bit more thoughtful use of foreground or midground elements. There are more opportunities to “shape” light here, as we can – for example – give the impression of a log being touched by light, or being darkened by shadow, or by some surrounding foliage being hit by light or darkened. 

If you look at the images below and assume that in each, the dog was never this light, but instead the light has been manipulated to give the impression of being hit by light, you will see how light can be manipulated once we are adding even very simple (but interesting) elements to our images.

3 Layers in an Image

Now we have the “layered” image. This has some kind of blurry foreground element created by something close to the camera – it could be a rock, a bush, some flowers, a slightly higher area of snow, a wall, etc. There may also (but not always) be something “interesting” near the subject and slightly in focus – flowers, moss, bushes, rock texture, grasses, snow, and so on. Behind that, is the blurry background created with our shallow depth of field.

Head & Shoulder Photos

These images could easily fit into the “frames” topic too but I will include them here. Basically, our headshots are much more interesting when there is “context”. Something that connects the dog with the scene in some way.

These images work really well when the dog is surrounded by “things” (just make sure they aren’t TOO busy or detailed!!) and is looking forward. They can work when looking to one side, just make sure their “view” isn’t directly blocked – the object should probably then be a bit further in the background, rather than in the foreground or at the same level as the dog. Just consider whether his gaze is “blocked”

Headshots - Half Closed

With these images, we have given context to one side of the photo, so they work best when looking outward, rather than forward, as the image may feel unbalanced or too empty on one side, if they are looking forward.

Open vs “Closed” Locations

The more I have been teaching photography, the more I have found that there seem to be two types of locations:

Open – where there is some space around the dog, the light is falling evenly, there are no or very few “elements” in the foreground or mid-ground onto which light can fall. Everything is quite level and even. Fields, snow, the beach, a yard, urban locations, etc all are quite open.

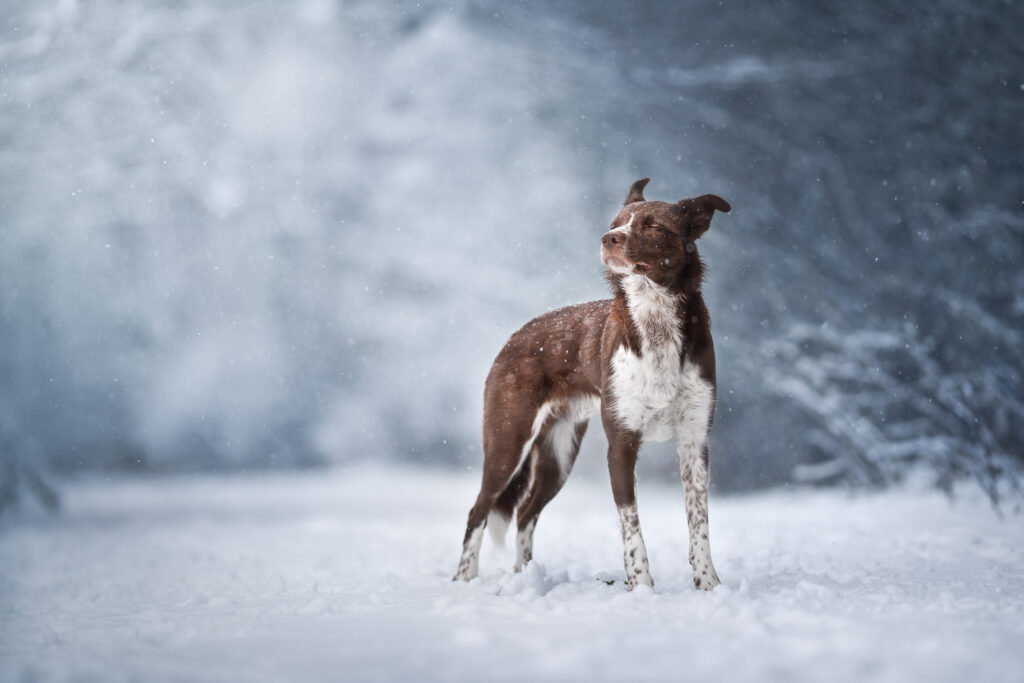
This is an example of an "open" location, and even here I was able to manipulate your perception of light because of the different tones in the background.

Then there are more “closed” locations – there there might be some kind of “environment” around the dog (could be man-made or natural), or some kind of foreground beyond the depth of field blur, or some element of visual interest near or around the dog. 

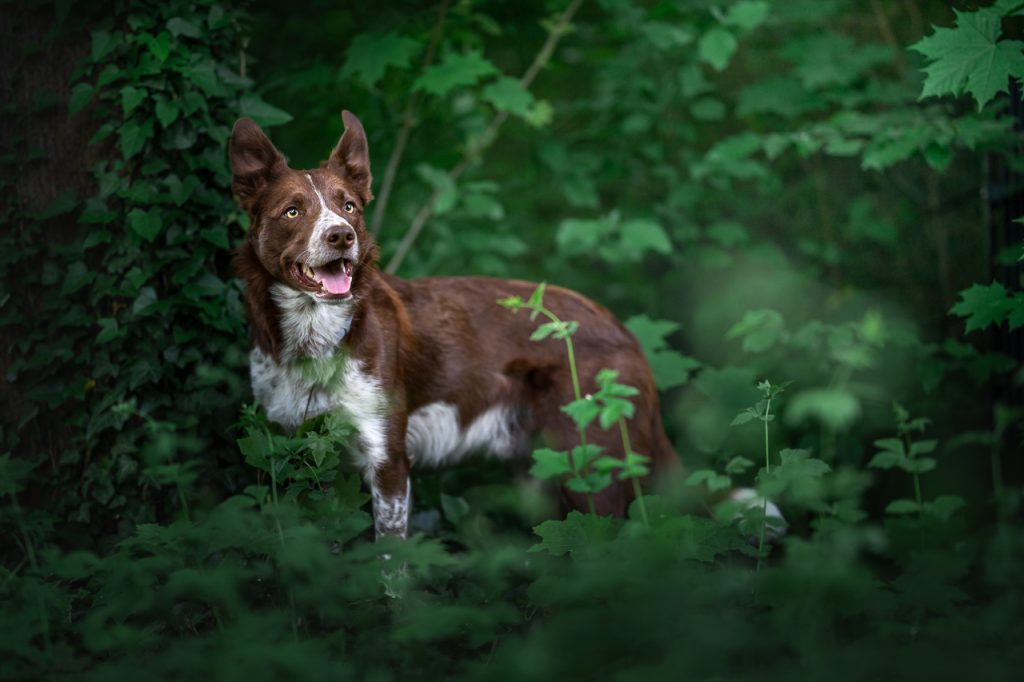
Example of a "closed" location. The whole left side of the image is closed in with the tree trunk, and the lower part of the image is closed in by depth from weeds and foliage, not just depth of field blur from the ground. This feels like the location is "closed", and that light could be coming in through a gap in the trees overhead, that there should be shadows and light, that we're making "peeking through" this foliage at the subject. It is also much more visually "busy" than the open location above.

 In general, an “open” location is simpler, great for action photos or group portraits, where we may want a simpler, cleaner, and less distracting environment. 

It will be simpler to edit, but those of us who are more advanced editors may find it strange that there is relatively little for us to do! If we try and do too much on these, the lighting often becomes strange very quickly, as there are no places which should be more shadowed or lit than others, due to the even fall of light. 

We also experience a lot of “open” locations when it’s been snowing as our foreground and mid-ground plants have been squashed down, and the background is shades of white and grey. “Open” photos of headshots tend to feel like they’re lacking something, are a bit empty, or just don’t “pop”. This may be because there’s no context, and nothing interesting in the image except the dog. 

Owners or clients often love “open” photos because the photo is 100% all about the dog. There’s nothing else going on. Nothing but dog. So as you make your way through the next lessons, remember, there is nothing wrong with open locations. They’re just probably not going to be as “interesting” as more closed locations/photos with context.

Personally, I prefer my photos having some kind of foreground beyond the simple depth of field created by being so low to the ground, and/or having some element of “visual interest” in/near/around the dog. For my photos, this grounds the dog within the scene, or provides context. It takes us from “simple portrait of a dog” to something more interesting. 


Below are 4 examples.

On the left: “Open locations”. On the right, “Closed locations”.

The photos were each taken about 2 meters from the other. So for the first open location, I took the photo, moved Loki and I about 2 meters to the right, and took another photo. The headshot example was the same, but a shorter distance, and we moved left.

In each case, both photos are totally fine. There’s nothing wrong with either of them. I’d say that the “open” locations are simple portraits of a dog. There he is, very cute, nice dog, living his dog life. The “closed” locations give us more to work with. We can play with light more, create a story, have him interact in/with/around the location. The closed headshot I especially love. The way his face seems so soft compared to the sharp thorns of the brambles, the curl of the bramble-leaf against his cheek, as if it were caressing him…

Let’s have a look at a couple more examples. These photos aren’t anything special – they’re only lightly edited, taken late in the afternoon on a foggy day. Again, they were taken literally one meter apart from each “version” (one version with Loki, one with Journey). I posed each dog on the road, then took maybe 3 steps to the side, and posed them again.

The only difference in each is the “visual interest”. I was working in a very bare forest in the middle of winter, but I wanted to show that you can still use natural (or man made!) elements, without needing moss, rocks, ferns, or anything else particularly fancy.

Please excuse the image quality! ISO 3200 and LOTS of brightening in editing. I’ll redo them when I have a moment but I do think they work well to show a not very exciting background and how simply adding a tree trunk can make the image more interesting!

Below are some more examples. Each of them will show an “open” photo on the left – there may be DOF blur in the foreground, then the dog, then the background. On the right, I have tried to compare it to a “similar” photo – eg., same colours/light/pose, as much as possible, but with some other foreground and/or mid-ground layer/visual interest.

Neither one is necessarily “better” than the other, this is just to begin to look at some of the ways we may elevate our photography through choice of location. Many pet photographers may actually prefer the more open, simple locations because there are less distractions. It’s 100% dog.