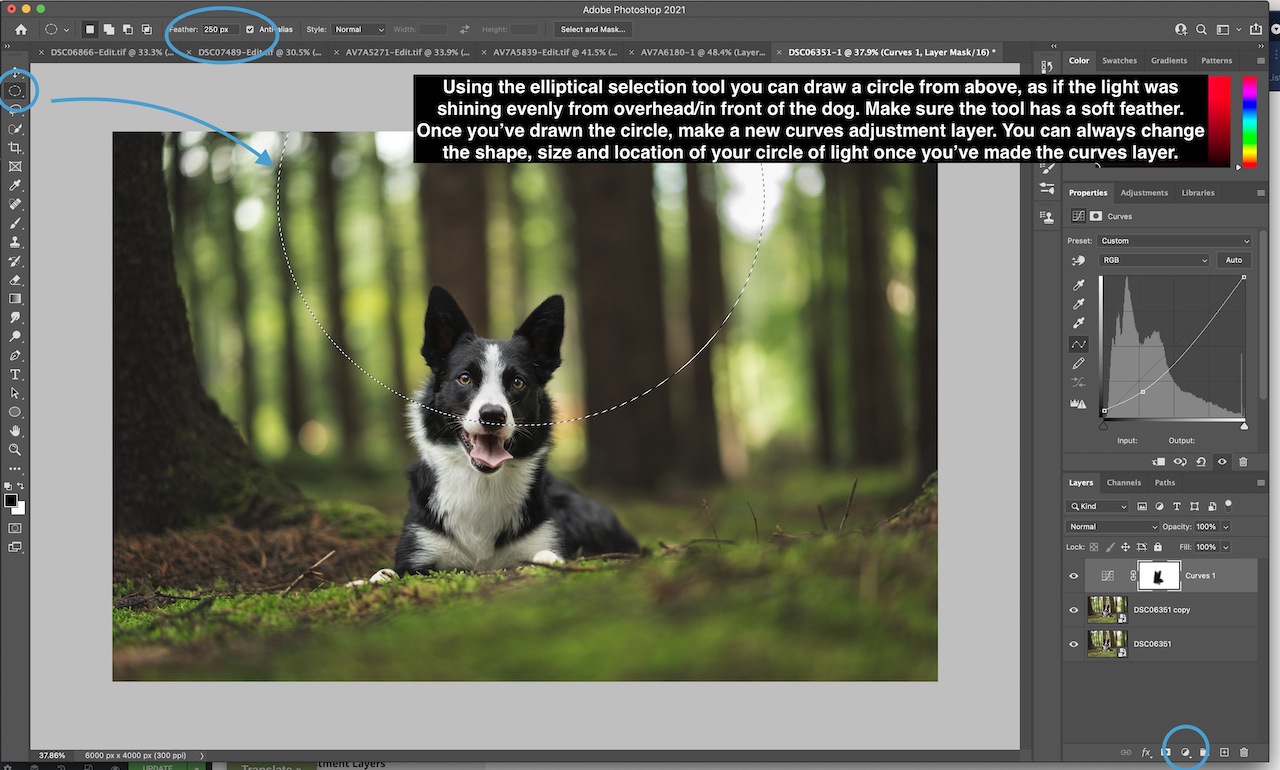
We can also use curves layers to alter the contrast of an image.
Remembering that contrast is the difference between the blacks and whites. When we have more blacks and whites (not in terms of colour, but in terms of light) then we have stronger contrast. When we have everything “in between” and probably feeling a bit flat, we have less contrast.
Playing with contrast can be an effective way to draw your viewer’s attention to different places of the image. Their eyes are more likely to be drawn to areas of higher contrast, rather than lower contrast. You can also help your dog to stand out more by playing with contrasts – a black dog will stand out in a scene with less true blacks, for example, as he will be the only source of contrast.
There are a few ways we can affect contrasts with the curve.
- Put a point somewhere along the curve and pull the blacks up. This gives us a “matte black” or “film look”. You can also play with moving the blacks point to the right a little, and pulling the whites down.
- Add contrast by making a gentle “S” shape in the curve – pulling the shadows down a little to make them stronger, pulling the highlights up a little to make them brighter.
- Removing contrast from somewhere that shouldn’t be contrasty, by doing a reverse S shape – pulling the shadows up to brighten them, and pulling the highlights down to darken them.
Don’t forget that you can lower the opacity to soften the effect if it’s a bit much.
A note on saturation
Using curves layers to add black/darkness can also add saturation to your image. If you find the colours are getting too much for you, or you just need the curves layer to darken your photo without affecting the colours, change the blend mode to “luminosity”. That will mean that the only thing which is changed is the light tones.