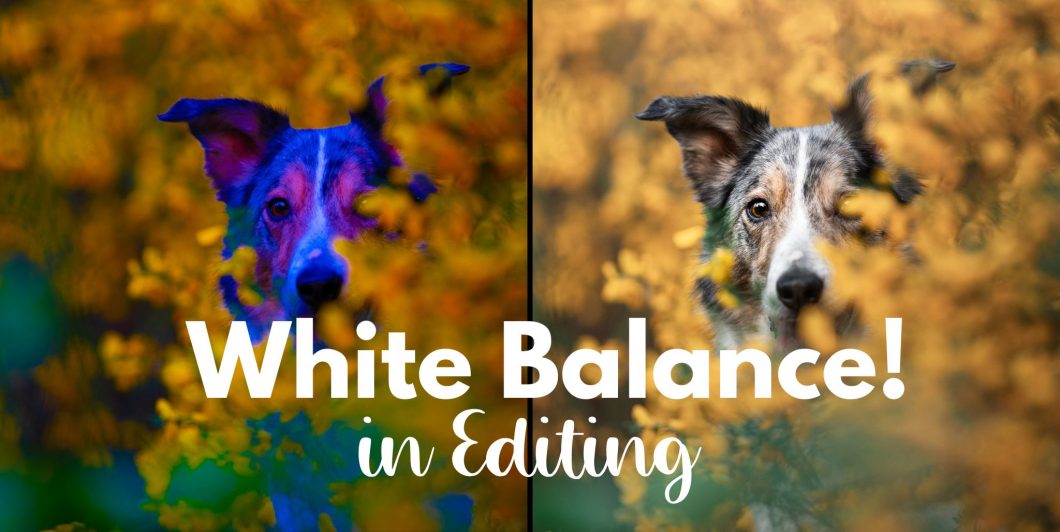
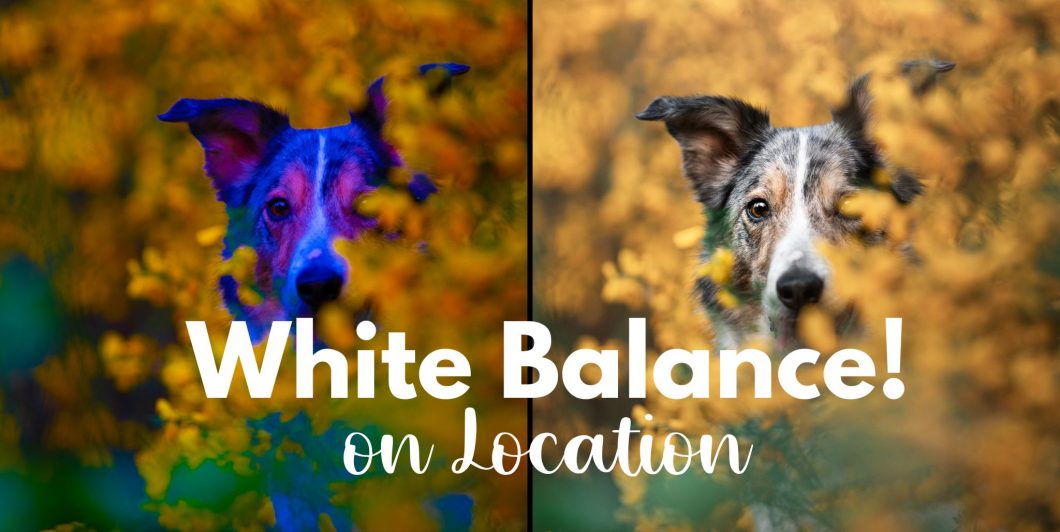
One thing to keep in mind is that colour casts can often “throw us off”, making us feel like the whole WB is wrong, when in fact it’s patches of colour bouncing around and confusing us.
Be expecting colour casts!
You will get colour casts any time light is bouncing off something coloured. Eg., green bouncing off the ground, yellows bouncing off flowers, blue bouncing off where there’s places exposed to the sky (eg., the tips of noses, between the ears and along the back).
Rather than try and edit for colour casts, find a “reference point” and try and get that correct. On a black/white/grey dog that is usually somewhere around the eyes for me. Sometimes I will use the skin of the eyes or nose if they are black, even if the dog is coloured.
Then, when you have the WB more or less correct, selectively edit the colour casts.
Eye-dropper tool
You’ll find some kind of automatic WB option in most editing programs.
There are even some “presets” built in, though they don’t usually account for green forests or interesting light.
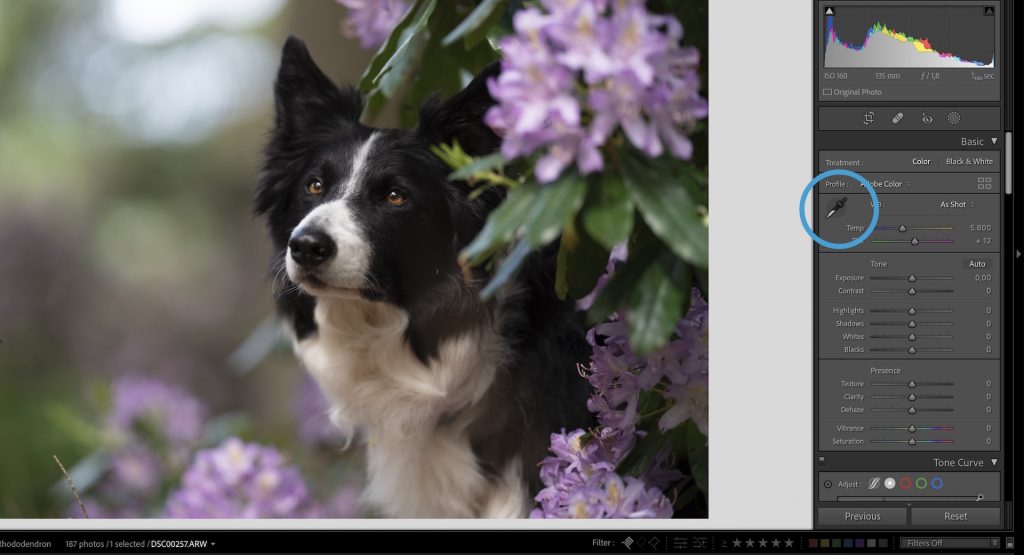
The “eye dropper tool” can be found at the top of the global adjustments panel in LR.
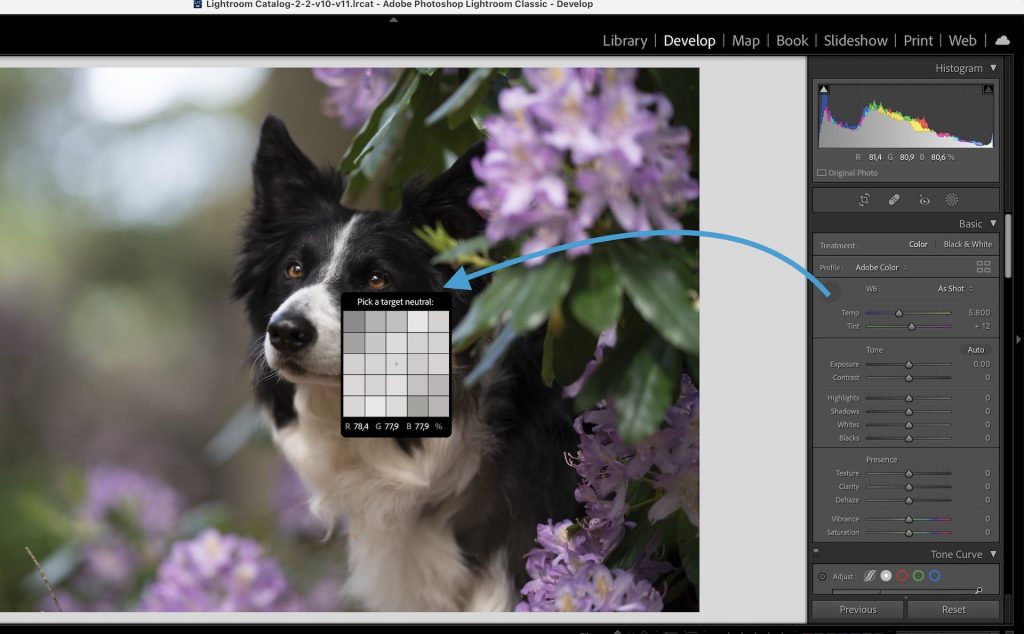
To use it, you select the tool, then click somewhere in your image that should be pure black, white, or grey. Basically the tool adjusts the WB of the image to make that small area you clicked correct.
Therefore, it won’t work on pink/white, blue/grey, or rust/black, for example, and it won’t work anywhere with strong colour-casts.
I usually use it between the eyes of a dog with a white stripe (like Loki), and never on Journey as his stripe is mottled with red.
You would also use this tool if you had a photo of a grey card.
Increase Saturation/Vibrance
This is a favourite trick of mine, and you can use any editing program to do it, but I will be showing it here with Lightroom.
It works best with grey/white/black dogs, but I do use it for coloured dogs, especially those with black noses and skin around their eyes.
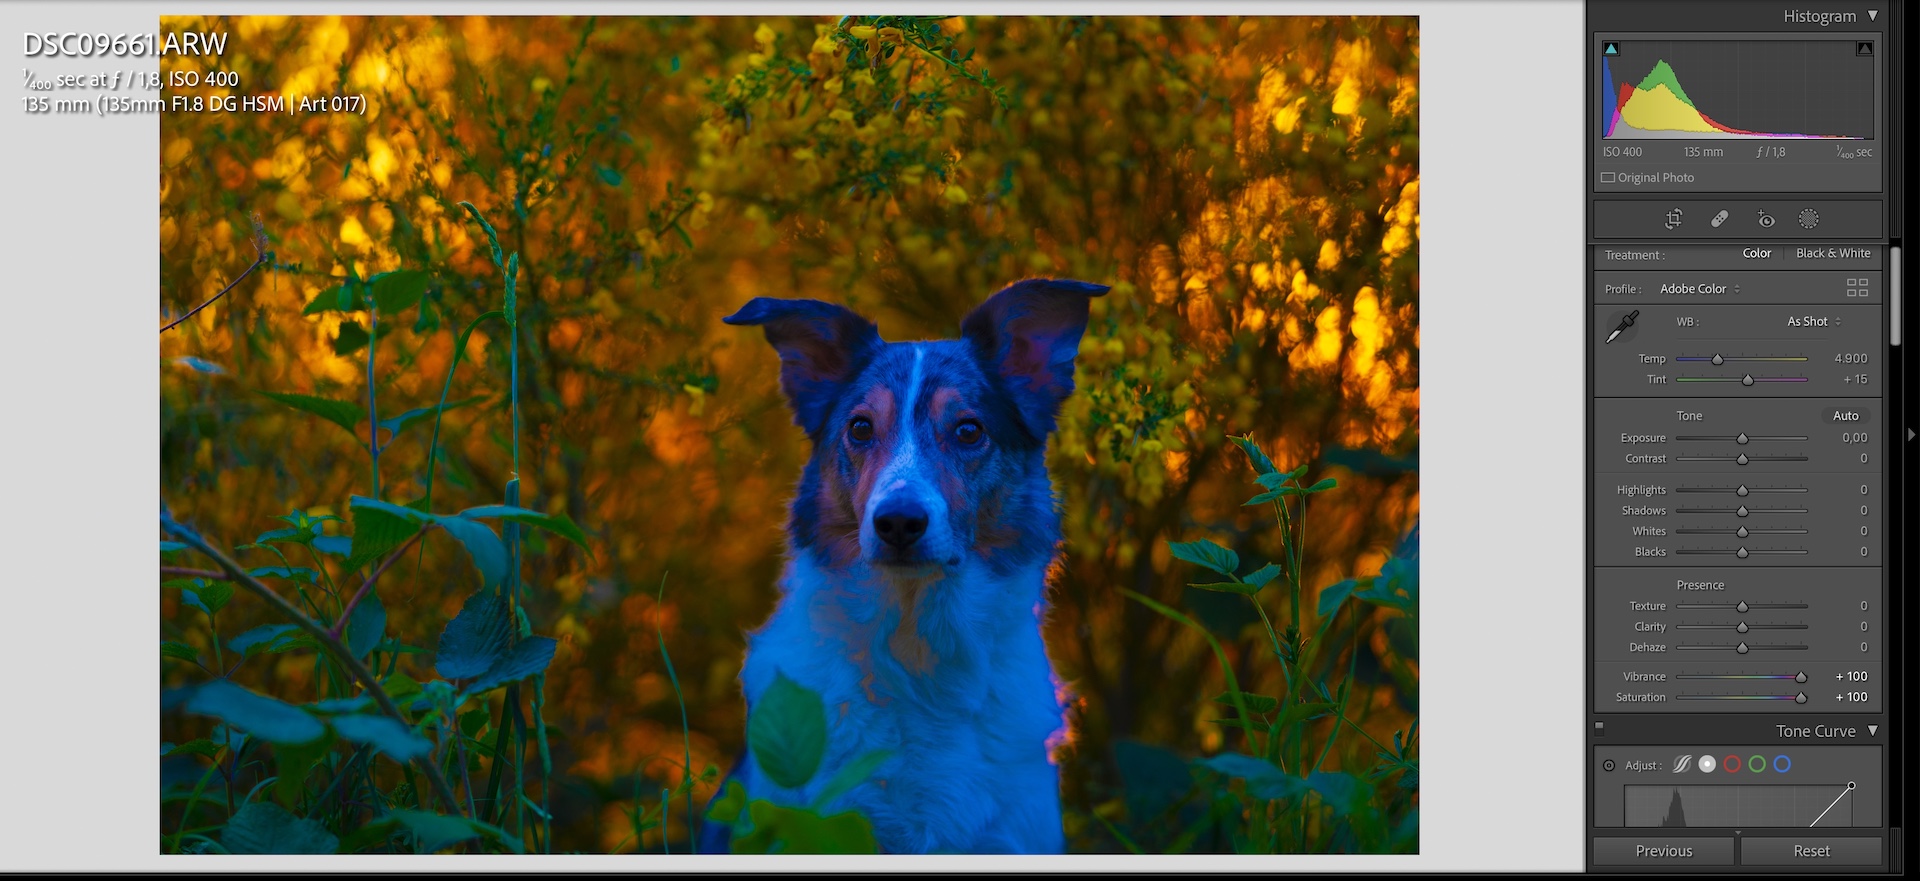
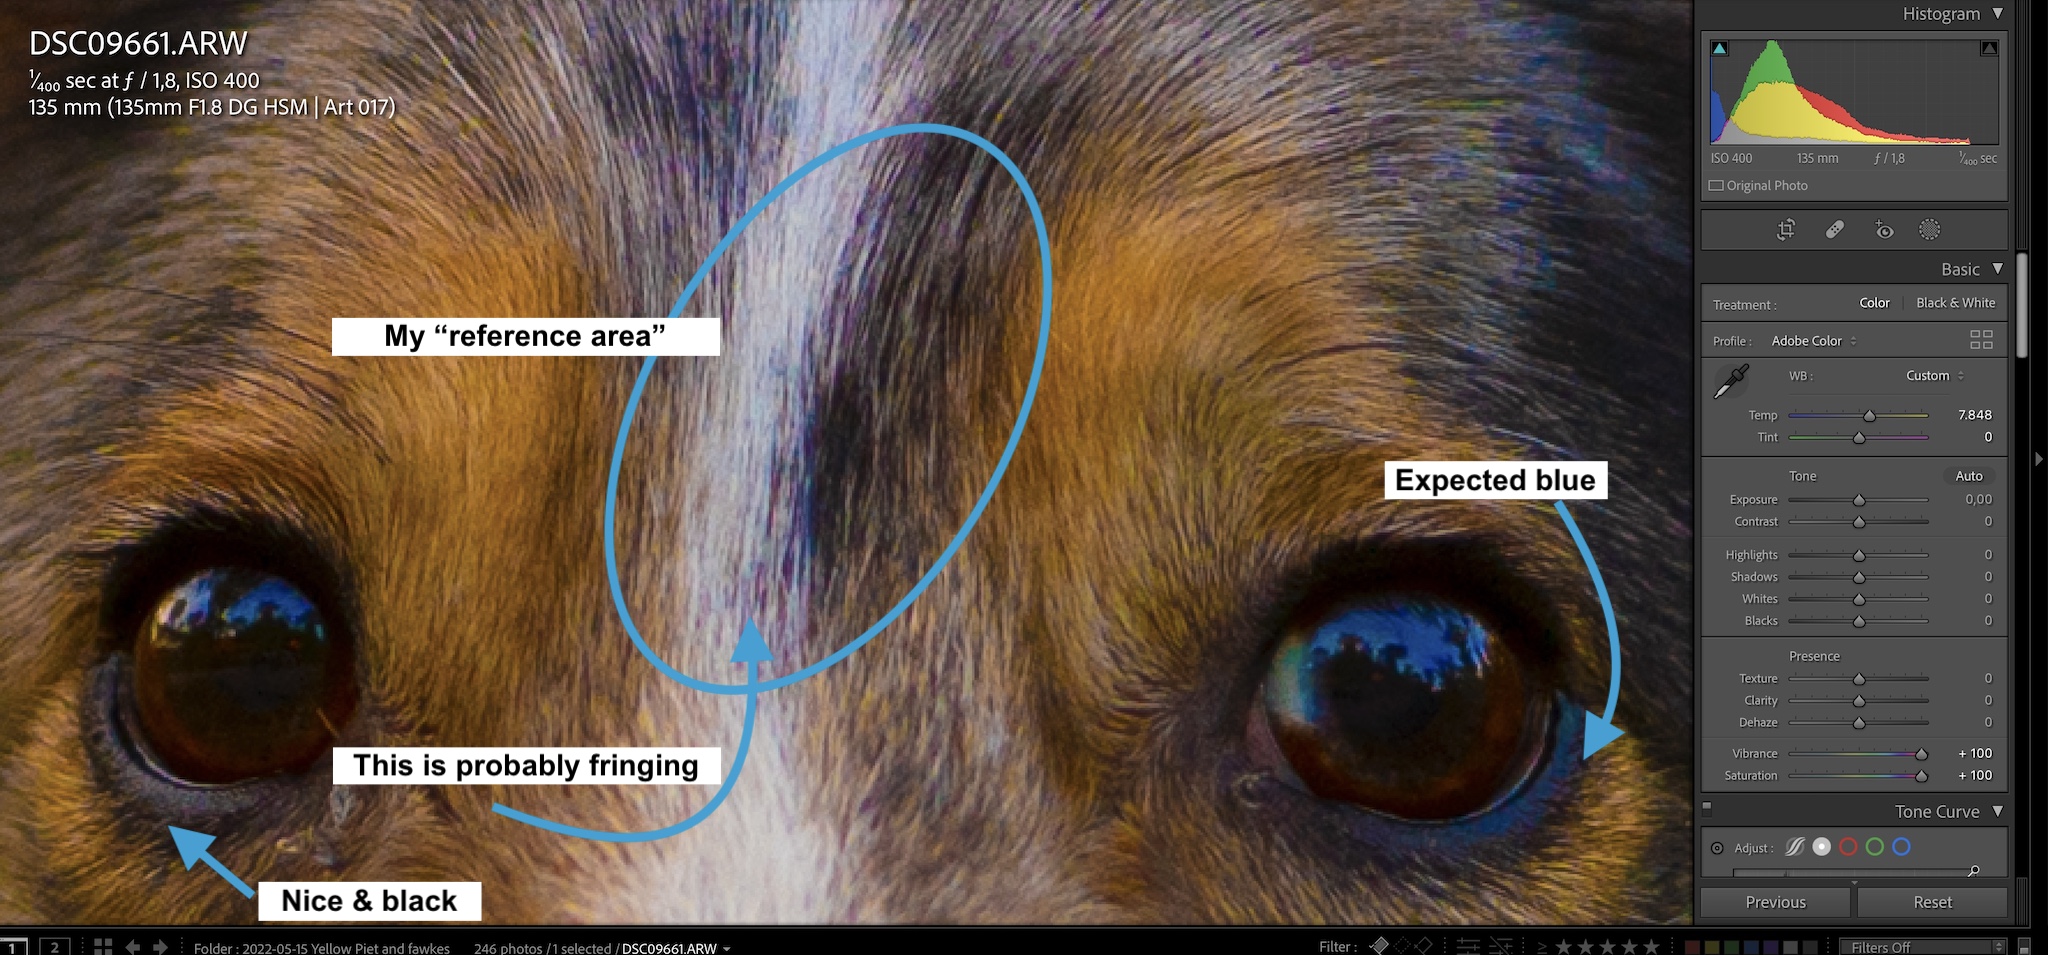
Turn the vibrance and saturation all the way up to 100 and notice the colours in the dog’s coat.
Now adjust the white balance sliders.
For grey/white/black dogs, I aim to get the colours in their coat to a point where no colour is dominating another one. Eg., there may be some areas of blue, some areas of yellow, some areas of purple… but there is not one single colour that is obvious everywhere.
Variations in colour is normal (colour casts, remember?). But when the entire dog is tinted blue, he’s probably too blue.
Again, I usually use a “reference point” so I’m not looking at the whole dog, but instead choose a part of their face, maybe near their eyes, to hone in on.
Be aware of fringing/chromatic aberration (you can search the site for more info on that!) which will show up with different lenses in areas of contrast. It will often be a shade of cyan green, or ultraviolet purple (though some lenses have pink or even blue). Don’t count this purple as “magenta” and use it for WB.
Once you think it’s looking okay, turn the vibrance & saturation back down to normal and double check.
You may still need to tweak the values. This is ok. At least you’re off to a start.
In the case of golden hour, you may choose to deliberately make the dog’s coat slightly warmer than neutral. Due to the golden light in the scene, this would not feel unnatural or incorrect necessarily especially since we can normally SEE these golden tones with our naked eye.
I will argue, however, that blue is so subtle that it is only due to our camera’s sensitivity that it gets picked up. I’ve NEVER looked at my dogs in the shade and seen them look blue. So although it’s natural that the light in the shade is cooler than white daylight, I would not choose to deliberately make my dog cooler because of it. Unlike with golden hour.
Of course there are RARE occasions where I’ve made the dog much much cooler (faking twilight/blue hour, when the light is visibly much more cool and does tend to affect the dog’s coat), but these are not the norm.

