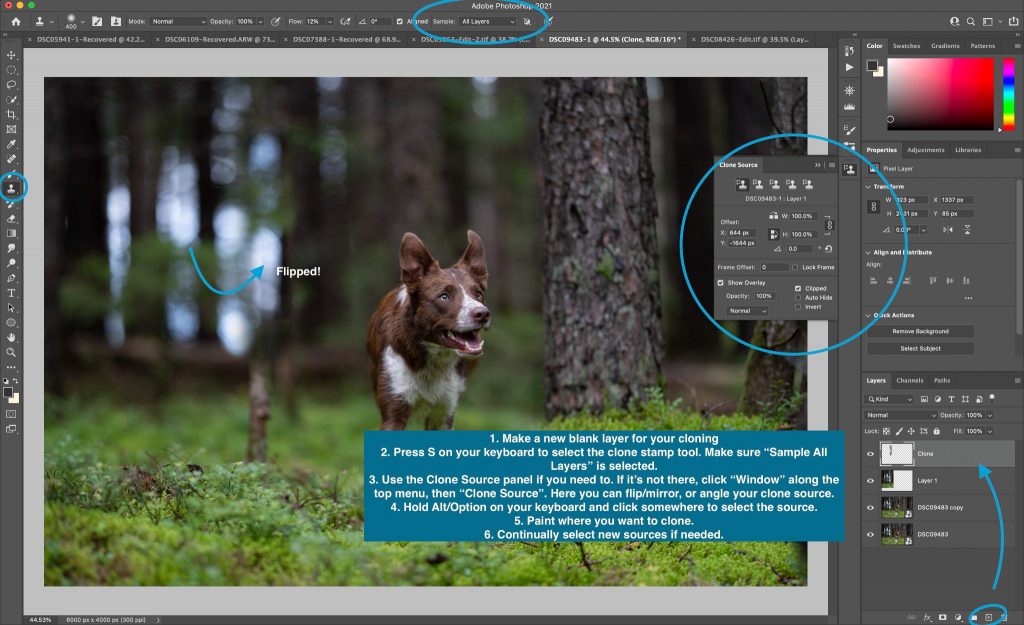
The Clone Stamp tool (Keyboard Shortcut: S) is a super versatile and useful tool for fixing parts of your image, removing, or changing things.
To use it, create a new blank layer. I recommend turning off any adjustment layers, and putting it below them.
Press S on your keyboard, and ensure that Sample: All Layers is selected, so it will take information from all layers, rather than just the blank layer.
Hold Option or Alt, then click to select a clone Source.
Colour/paint where you want that area to be copied.
Make the Most of It
To really use the clone stamp to its full potential, you will want to remember the Clone Source panel. You can access this via Window > Clone Source, then add it to your toolbar.
This has a heap of options to change how the source of your clone tool is used, but the most useful in my opinion are:
- Flip horizontal
- Flip vertical
- Change the angle.
This means, the clone source can be flipped/reversed, turned upside down, or angled as needed. This helps you to fill in areas of fur when collars are removed that aren’t the right angle… it also means if you’re cloning part of the background, you can flip the source or angle it slightly so it doesn’t look like an exact duplicate.
Avoiding repeating patterns where possible is really important, as repeating patterns don’t tend to occur in nature, and our eye will often pick up on them. But when you flip/angle the clone source, then maybe mask some or part of it out… it looks like something completely different rather than a direct copy.
How you use the tool really depends on:
- what you need to achieve
- your imagination
There are hundreds of ways you could use the clone stamp tool in your workflow.


