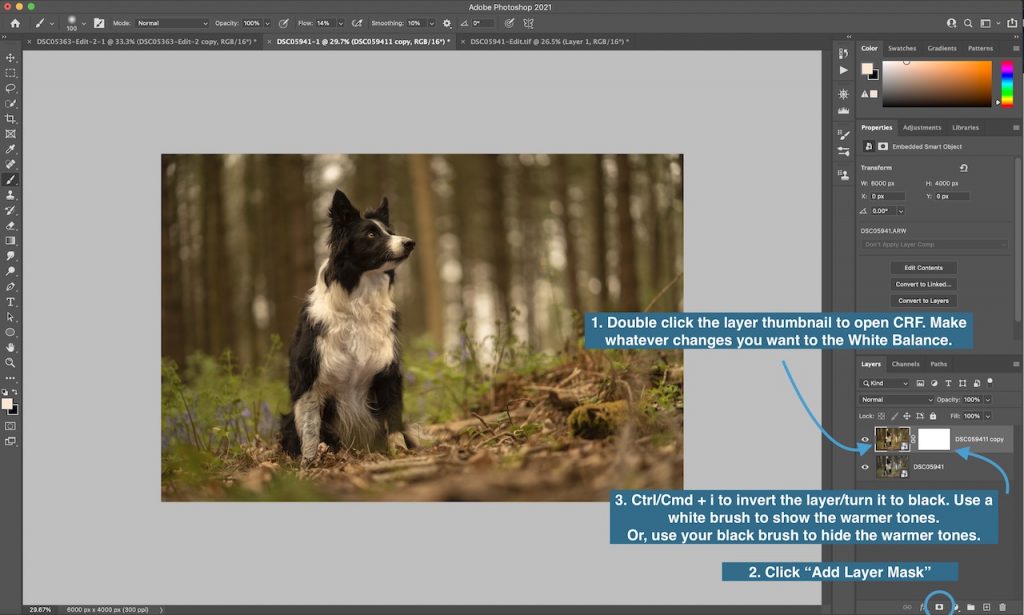
Smart Objects are a type of image layer in Photoshop. There will be a video lesson coming soon.
There are two types of Smart Object, depending on how you’re working.
- A Smart Object which is the raw file of your original image and is the first thing you open when you bring the image into Photoshop, and,
- A layer that you have converted into a Smart Object.
In both cases, it’s important to note that Smart Objects are image files that are protected. We can’t alter, delete, stretch, shrink, draw over or alter the pixels of that file at all – more or less.
You’ll know that you’re working on a Smart Object as it will have a little symbol in the corner of the thumbnail, as seen below. This symbol will not be present for normal rasterised layers.

The best thing in my opinion about Smart Objects is:
- when working with our RAW file as a Smart Object, we can access the edits we’ve made to the RAW file. That includes our base global edits from Lightroom or Camera Raw Filter, and selective edits we’ve done here too (like radial filters, etc). We’ll learn more about Camera Raw Filter in an upcoming lesson. But basically, it means we can access our RAW file and all its precious, precious data.
- when applying filters or other effects, we are able to alter or change them, as they aren’t applied directly to the image itself. My motto for working with Photoshop is to try and keep your workflow as flexible and editable as possible, and working with Smart Objects can be a way to accomplish this.
Some “cons” in regards to using Smart Objects (and how to get around them).
- We can’t use some tools directly on the layer (clone stamp, healing spot brush etc).
- This is easily solved by creating a new blank layer, and ensuring “sample all layers” is ticked. You’ll learn more about this in following lessons.
- We can’t use “Content Aware” tools on Smart Objects as they require is to change/add/alter the pixels.
- We can create rasterised layers that aren’t smart objects, if and when we need to use those tools. That does often mean we can’t necessarily go back to our RAW file as we’ll have a new image layer on top. But sometimes that’s the price we’ve got to pay.
Don’t worry if this all seems a bit much right now – it will get covered several times as we go through the course, and the information will be here waiting for you to refer back to.


