This is a great tool where Photoshop reads the surrounding photo (content aware) when we crop it, and attempts to fill in the new empty space with what it thinks “should” be there.
This obviously has varying degrees of success, and the more you ask it to do, the harder its job will be, so smaller areas usually work best.
Similarly, it will have an easier time figuring out how to fill in areas that don’t have a lot of detail (eg., soft blurry backgrounds) compared to detailed natural things like tree branches/leaves or natural bokeh.
It can also struggle with depth of field, not knowing what’s supposed to be blurry and what’s supposed to be in focus and where that is supposed to happen.
So, with that being said, it’s very important to check what Photoshop has filled in the empty space where you cropped, checking especially for
- repeating patterns
- incorrect depth of field
And then fixing these with another tool, such as clone stamp.
1. Get your image layer ready
Because we’re using a tool which reads and creates new pixels, we will not be able to use our smart object for this tool, because it is prohibited from altering/adding pixels.
Therefore, the first thing we need to do is create a layer that isn’t a smart object, where Photoshop can fill in the empty space when we extend the frame.
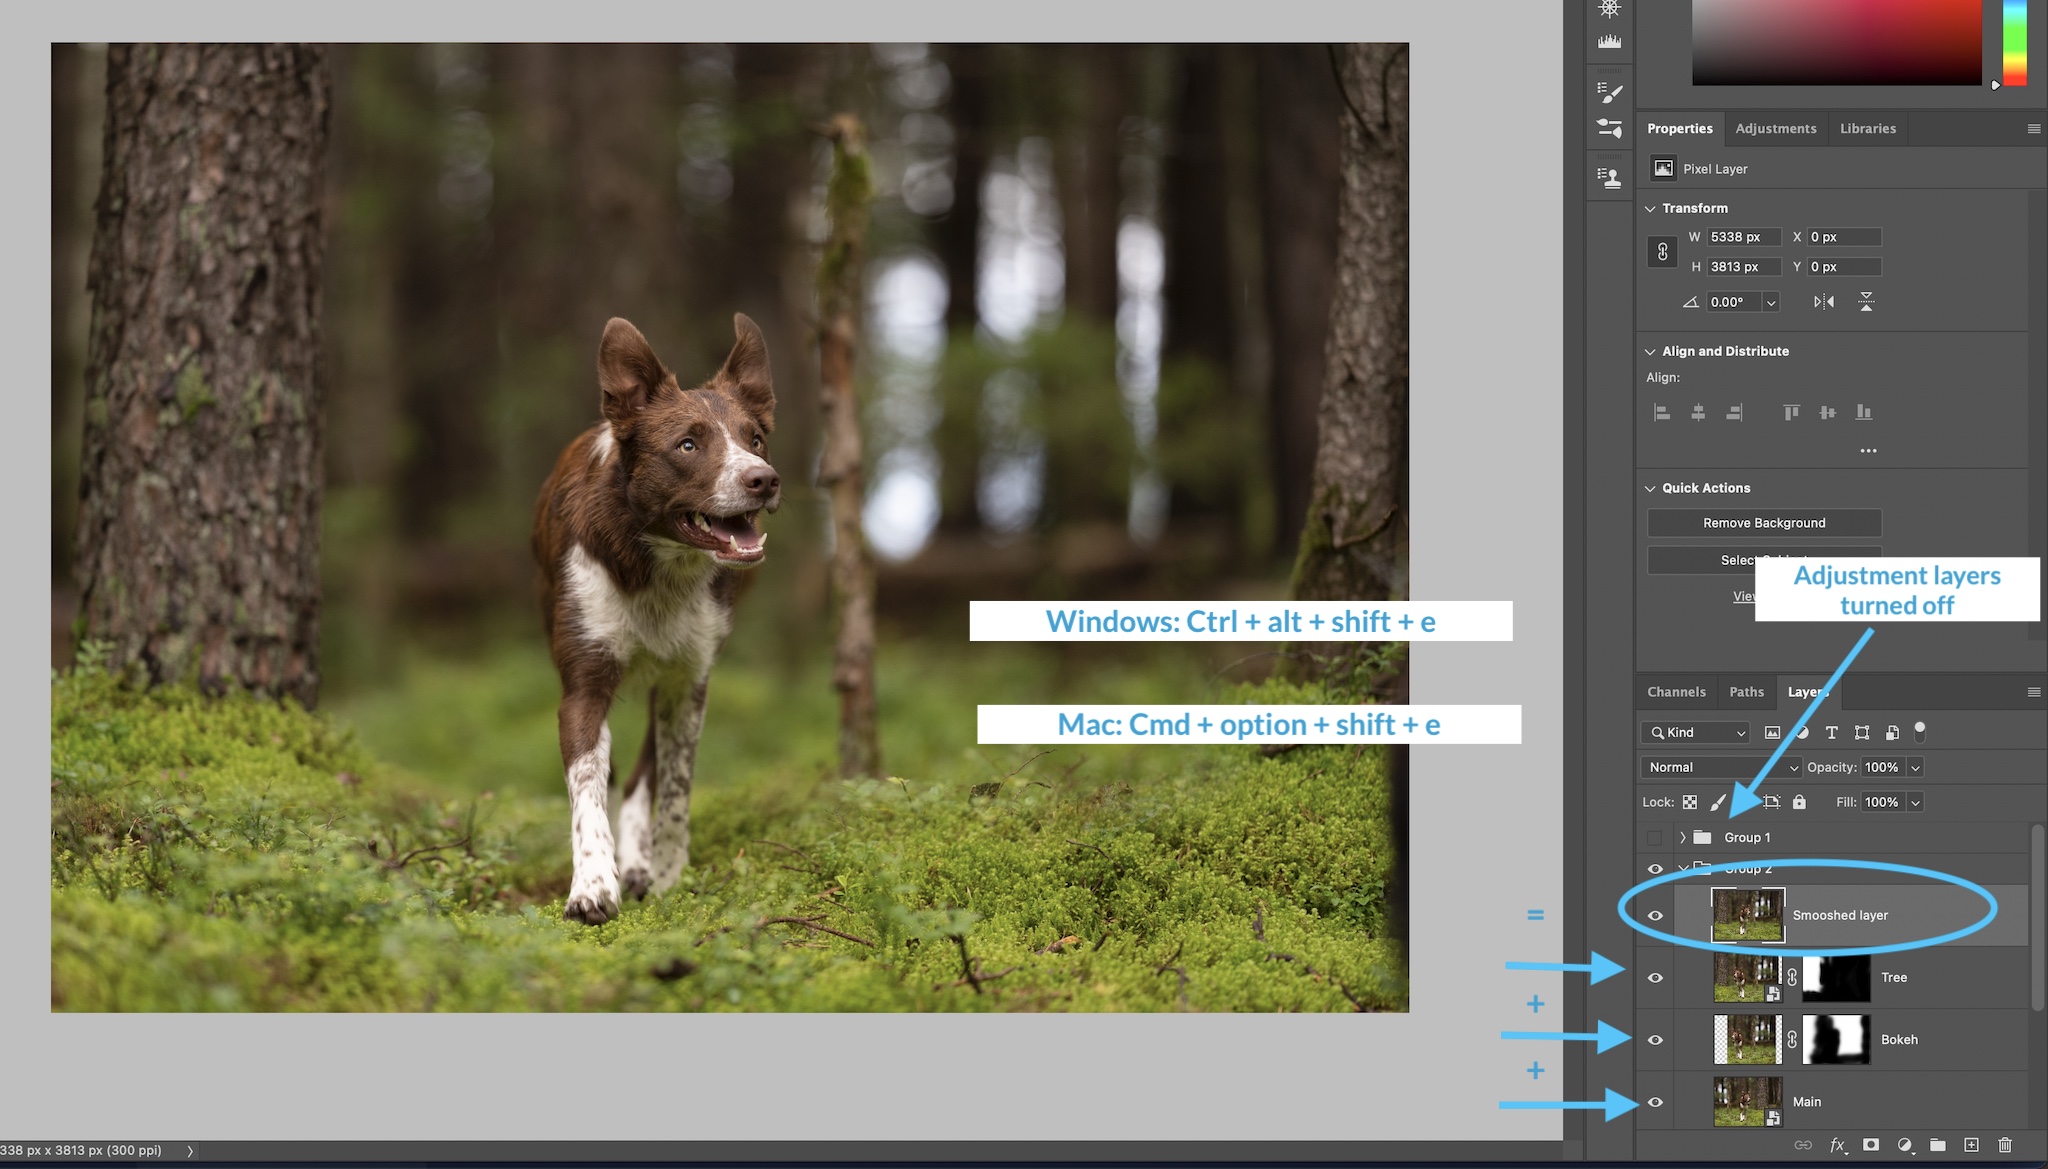
I highly recommend that if you have any adjustment layers already that you group them and click the eye icon to turn them off.
Then, you have two options.
- Simply create a duplicate layer of your smart object. Right click and select “Rasterise Layer.” Or even just click anywhere on the image with your brush tool. A warning box will pop up, asking if you want to rasterise the layer. Click “ok”
- If you have already done some other work on the background, eg., copy/paste & flip or something where you have significantly altered the background, you may want to make a flat (or “smooshed”) layer. This layer will make a copy of all your currently visible layers, wherever you created it. Use the keyboard “shortcut”: Crtl/cmd + option/alt + shift + e
2. Crop
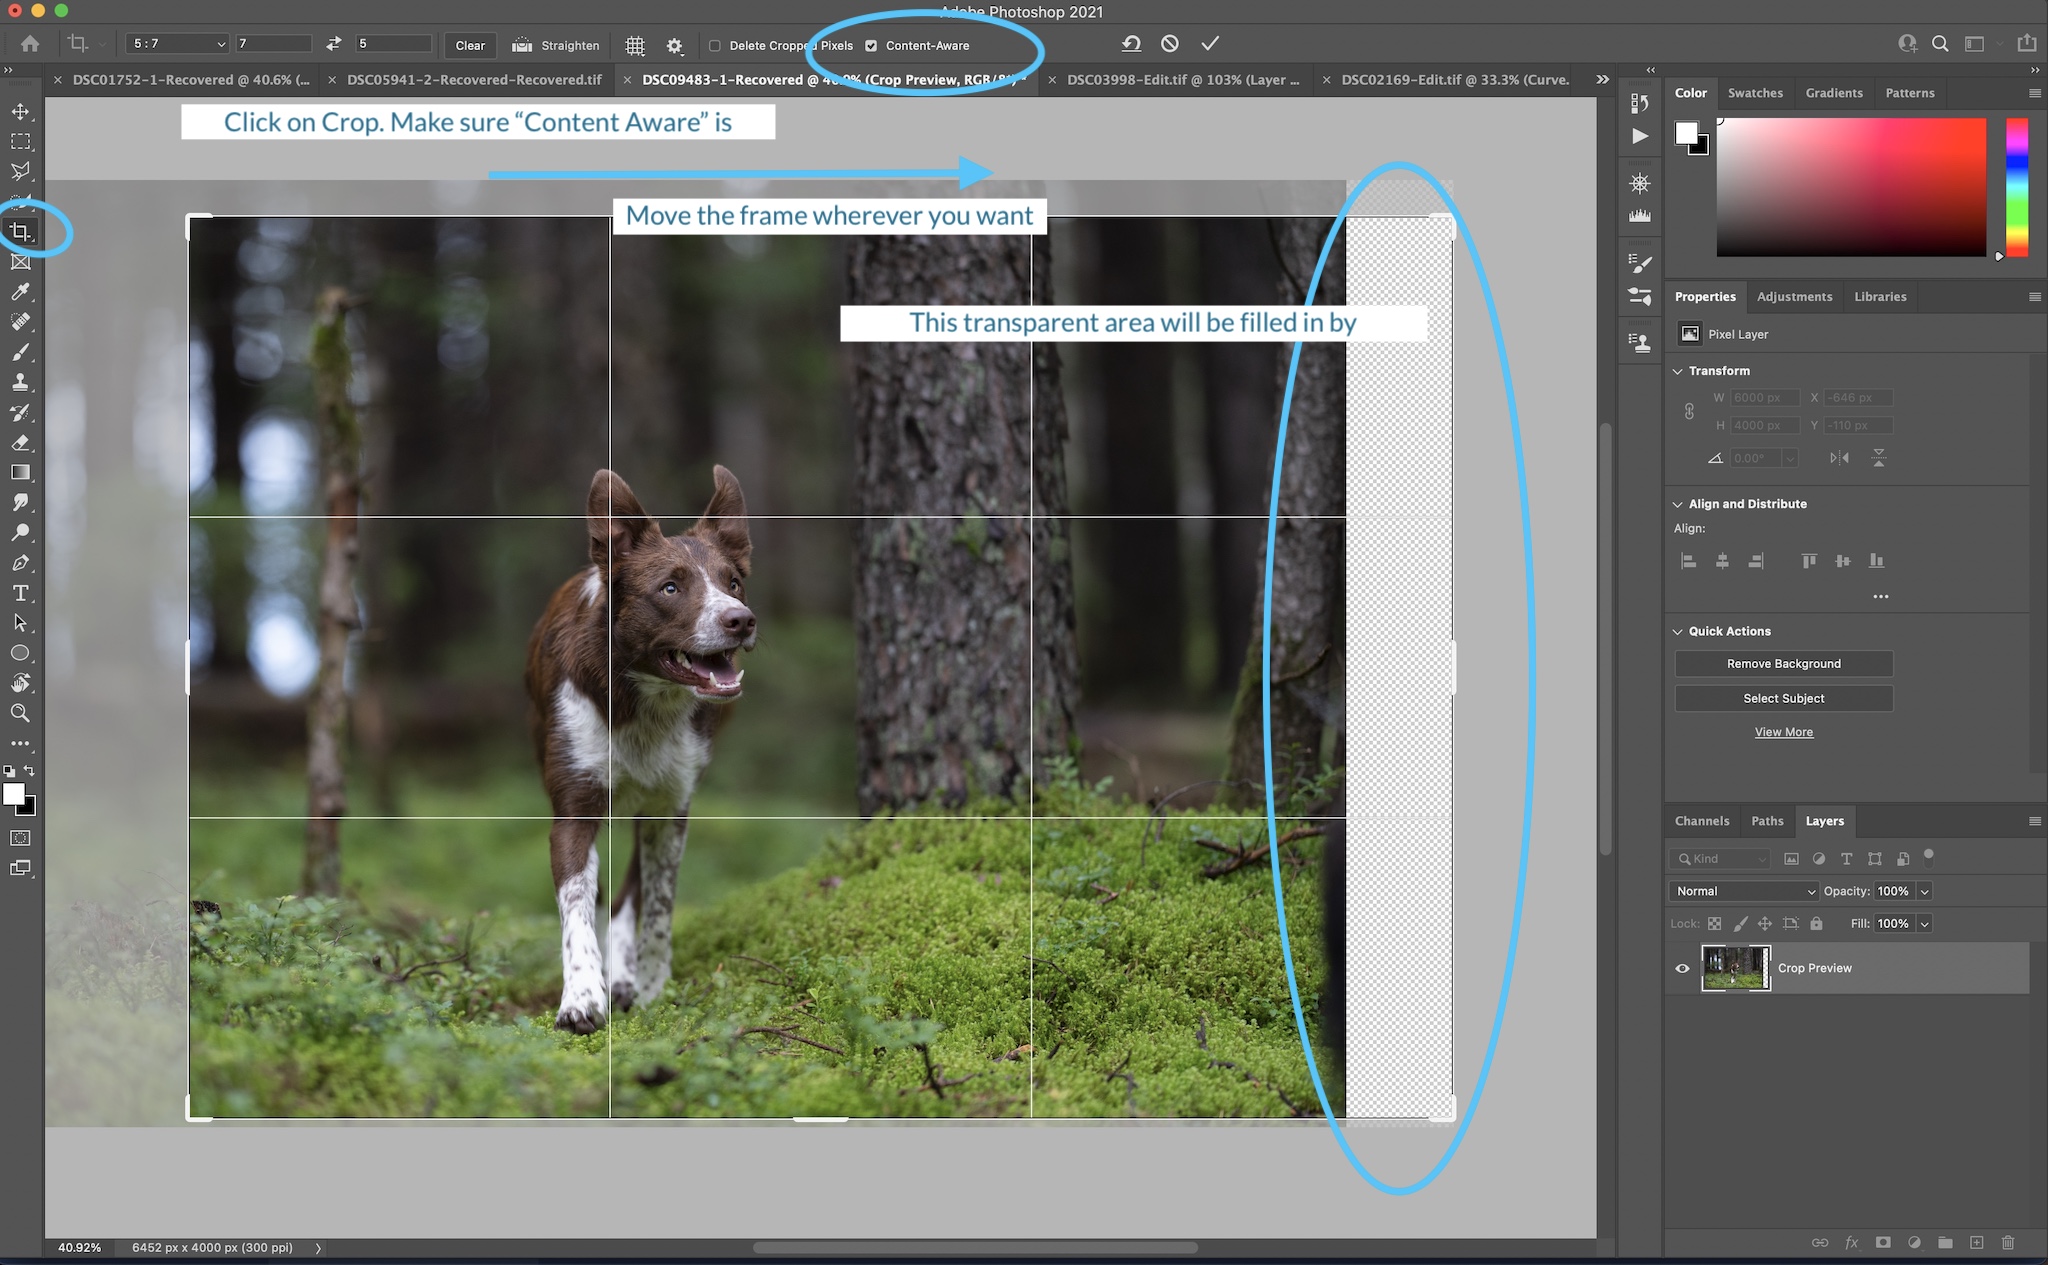
Click on the crop tool, or press C on your keyboard.
Make sure “content aware crop” is ticked.
Move the crop/frame to wherever you want it. Whatever is transparent will be filled in by Photoshop.
3. Check the Result
Make sure that whatever Photoshop did makes sense. Are there repeating patterns in leaves? Is the depth of field correct? Are there any “weird” bits?
Possibly, the whole thing will be a bit weird!
Don’t despair, we can fix it using other tools.
Another option, if it really doesn’t want to work, would be to try and use the Copy/Flip method to take part of your existing scene and move it where you want it.
Or, if it’s something like a tree trunk that’s causing all the problems (for example), consider covering it up with another part of the background first, then making a “smooshed layer”, then doing content aware crop.
If it really doesn’t want to work, there just might not be enough background margin for photoshop to read – for example if there are really busy/detailed areas, or the subject is really close to the edge where you want to crop.
Possibly, a combination/mix of Content Aware Fill, Content Aware Scale, Copy/Flip or Clone Stamp might work better for you.


