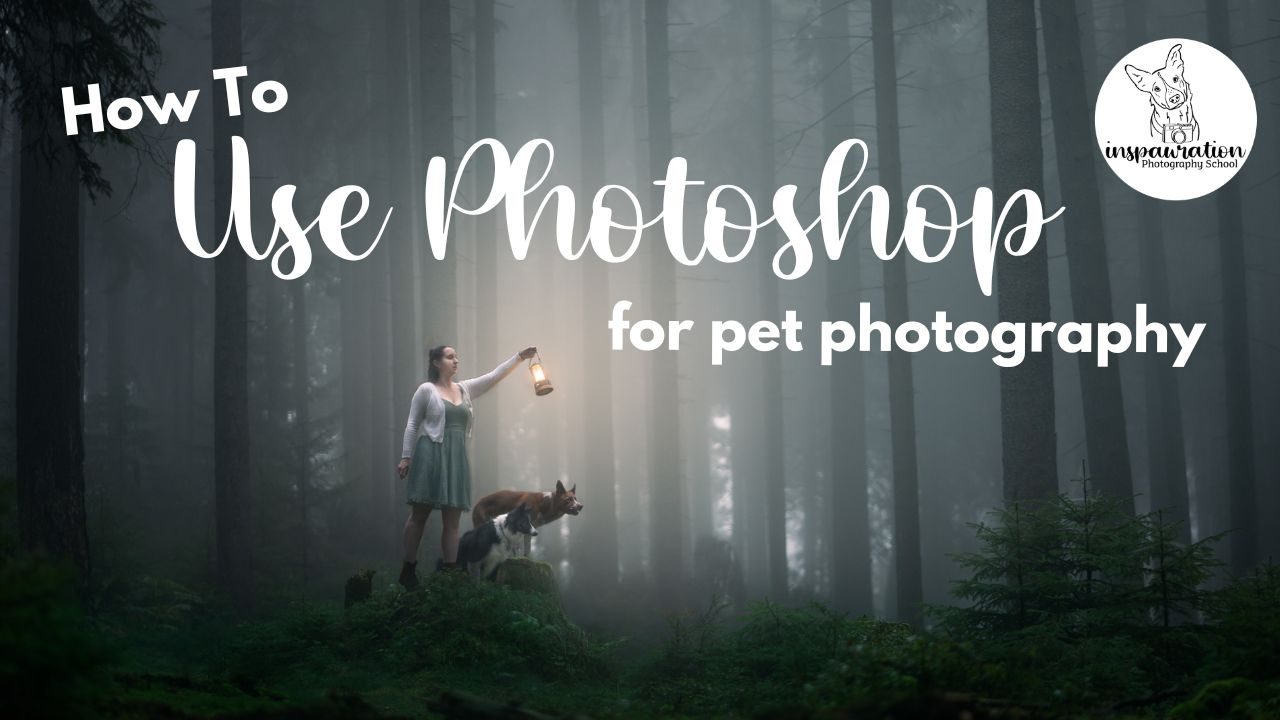
If you want to edit photos of dogs or pets, you’ve no doubt come across Adobe Photoshop. It’s a hugely powerful program that can allow you to change colours, move parts of your background around, remove handlers, leashes, collars, logs and more, and add a ton of special effects like leaves, snow, fake sunlight – basically anything you can think of, you can create in Photoshop!
Whether you’re brand new to Photoshop, have tried to use it and found it too overwhelming, or maybe have some “old school” methods, there’s actually only a couple of tools and techniques you need to work in a way that is nondestructive (meaning you can go back at any time to make changes to your photo – you’re not “stuck” with any edits) and extremely powerful.
If you don’t use Photoshop yet, you may be wondering whether it’s worth learning to use it – we’ll do a blog post on that in the future!
In this article, I want to help you get started in Photoshop. We will be touching on the benefits of my 3 favourite Photoshop tools:
1. Adobe Camera Raw
2. Masking Layers
3. Adjustment Layers
I actually LOVE teaching Photoshop. In fact, there’s already a number of Photoshop-specific workshops and toolboxes inside my Learning Journey membership because once you’ve mastered these three techniques, the sky is really the limit with Photoshop.
A little sneak peek of the lessons included in the Exploring Stage (third stage of the Journey) so far!
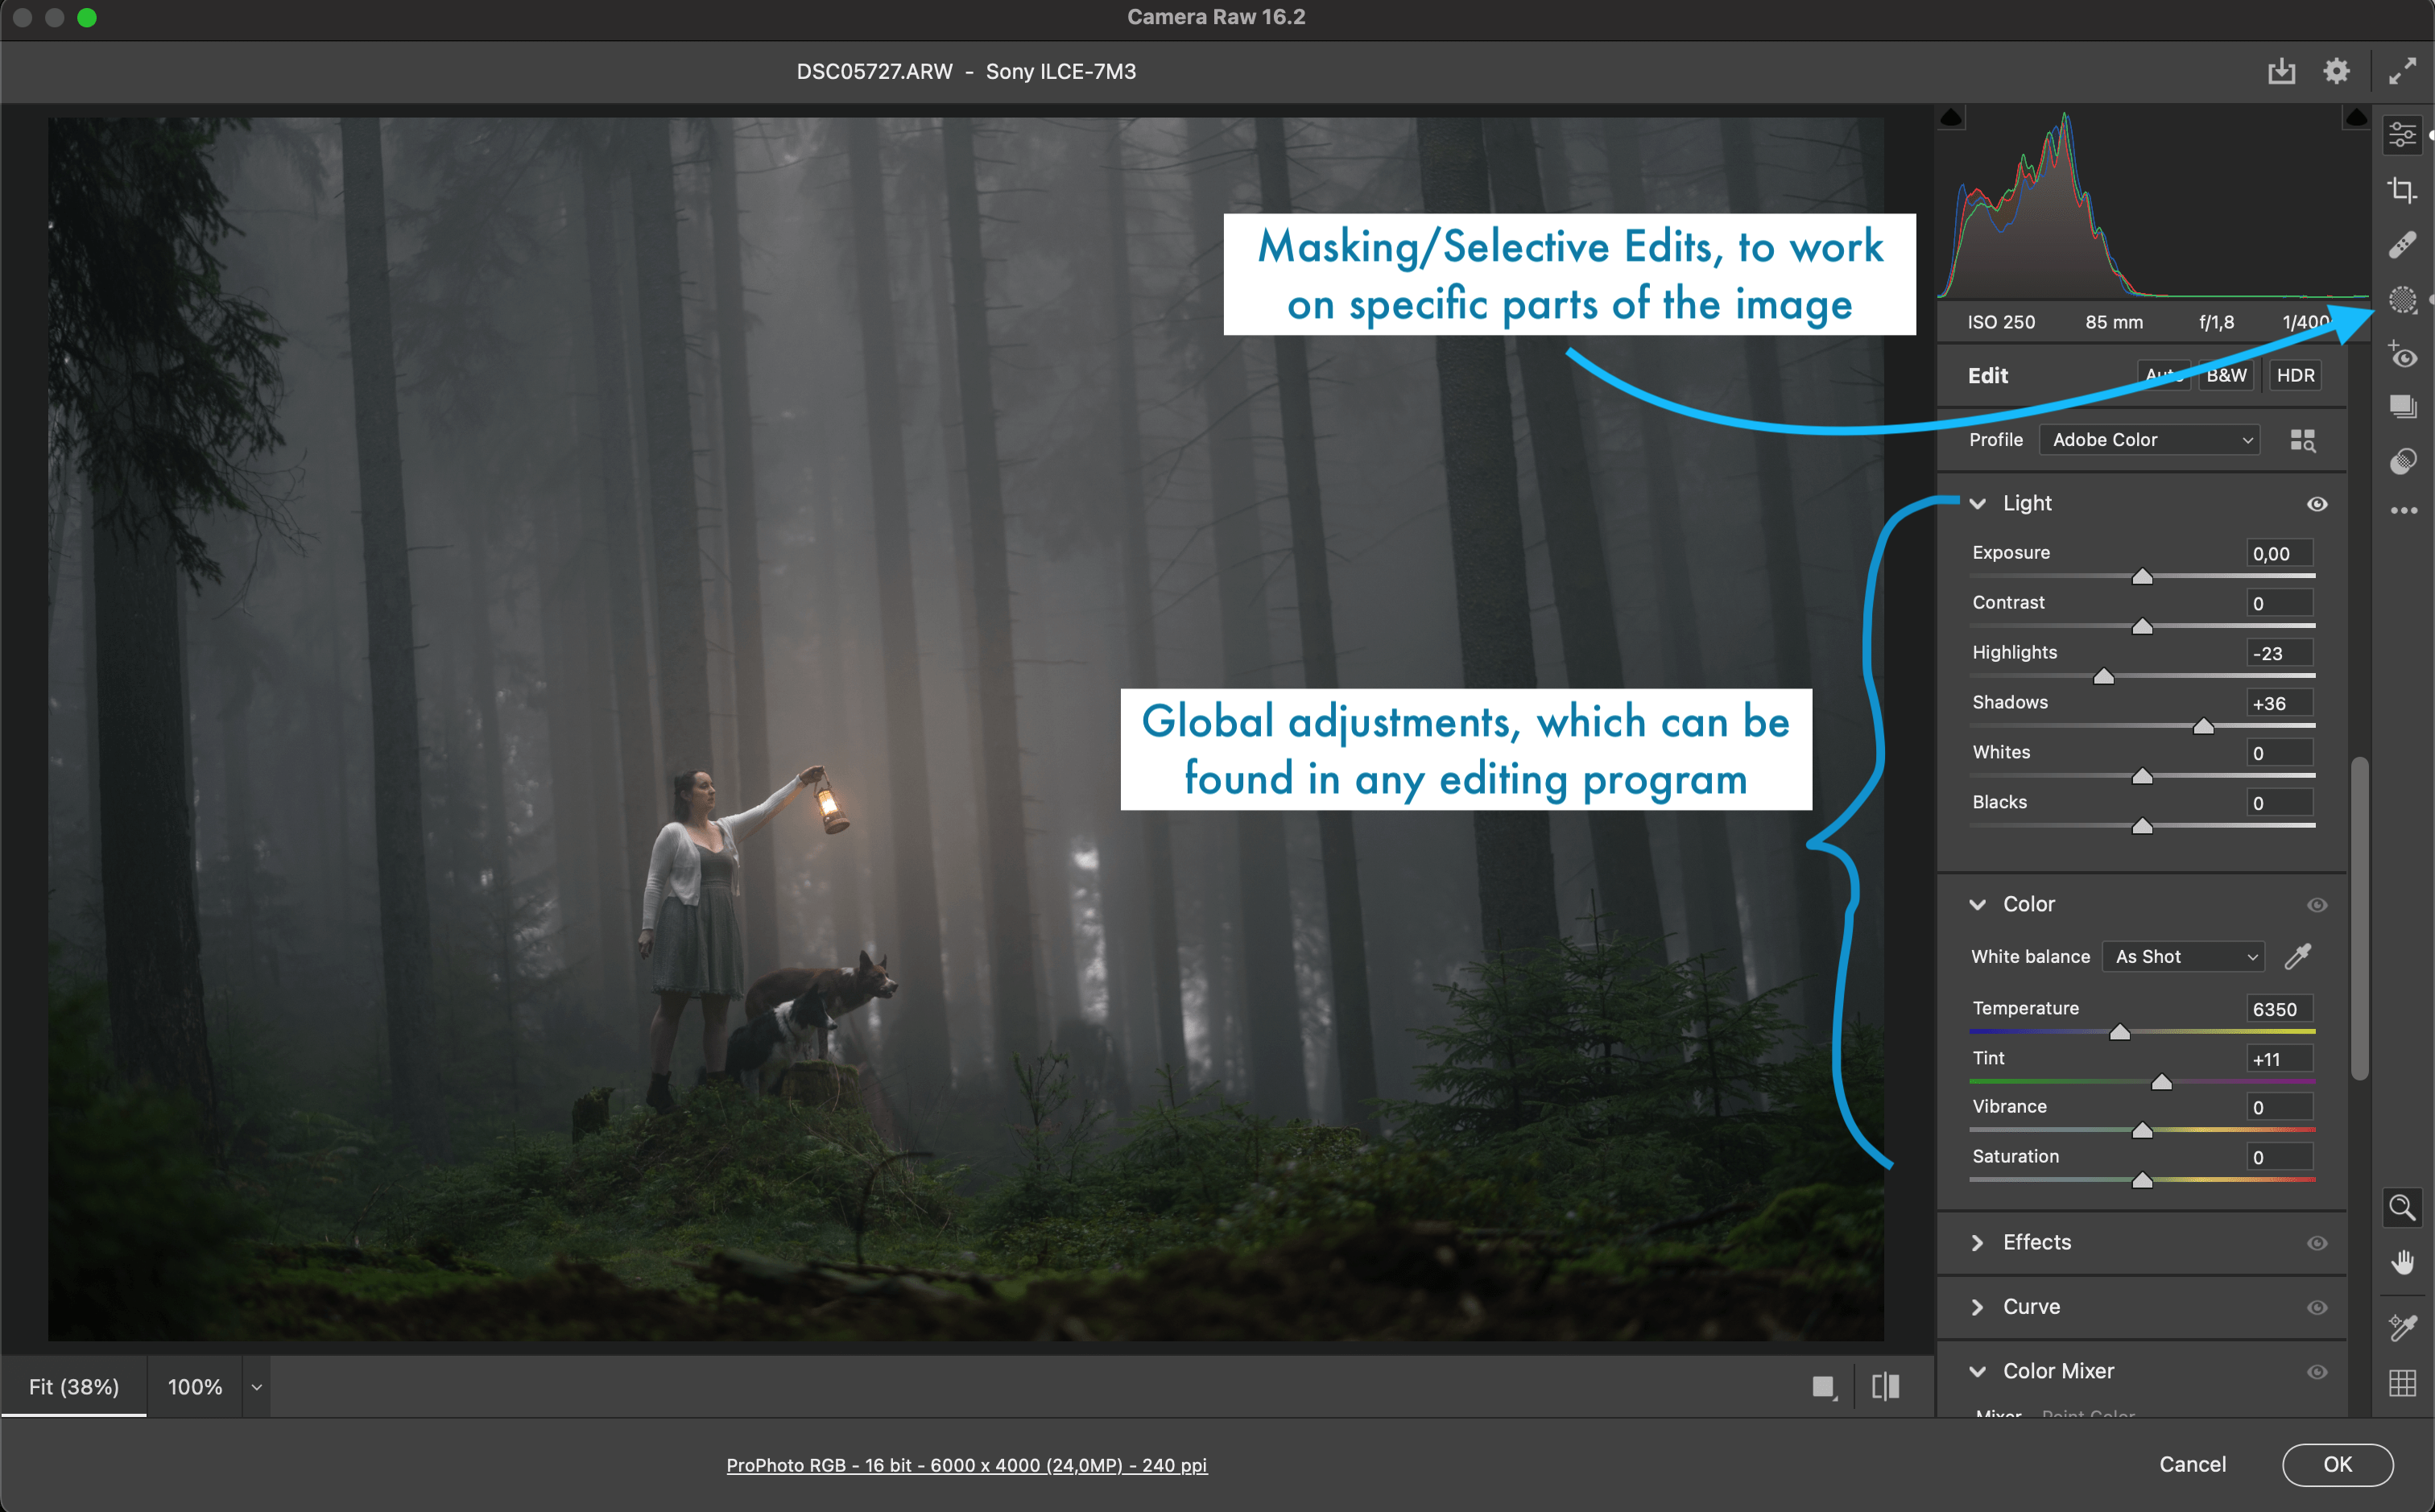
Adobe Camera Raw: Flexibility and Control
If you’ve been taking photos for a while, you may have come across the advice to (almost) always take photos in RAW format. This is the camera’s native format where it can collect the most amount of data – giving you the most flexibility over editing.
There’s a whole lesson on RAW vs JPEG formats inside the Learning Journey!
But… once you HAVE that image, you want to make use of all that delicious data your camera captured, right? Editing in Lightroom is one way to do this, but if you don’t use Lightroom, Camera Raw is an application attached to Photoshop, that works almost identically.
Classic beginner pet photography mistakes such as incorrect white balance or exposure can easily be rectified using Adobe Camera Raw, as well as doing selective edits like working on the face and eyes, fixing distractions, brightening the dog up and so on.
If you check out my YouTube video on using Lightroom, you could easily follow along in Camera Raw, even if the tools and buttons are in different positions.
Top Tip: Opening your image file as a “Smart Object” in Photoshop allows you a lot more peace of mind during the editing process, as you can return to Camera Raw and change any of your initial edits. Meaning? Nothing you’ve done is set in stone.
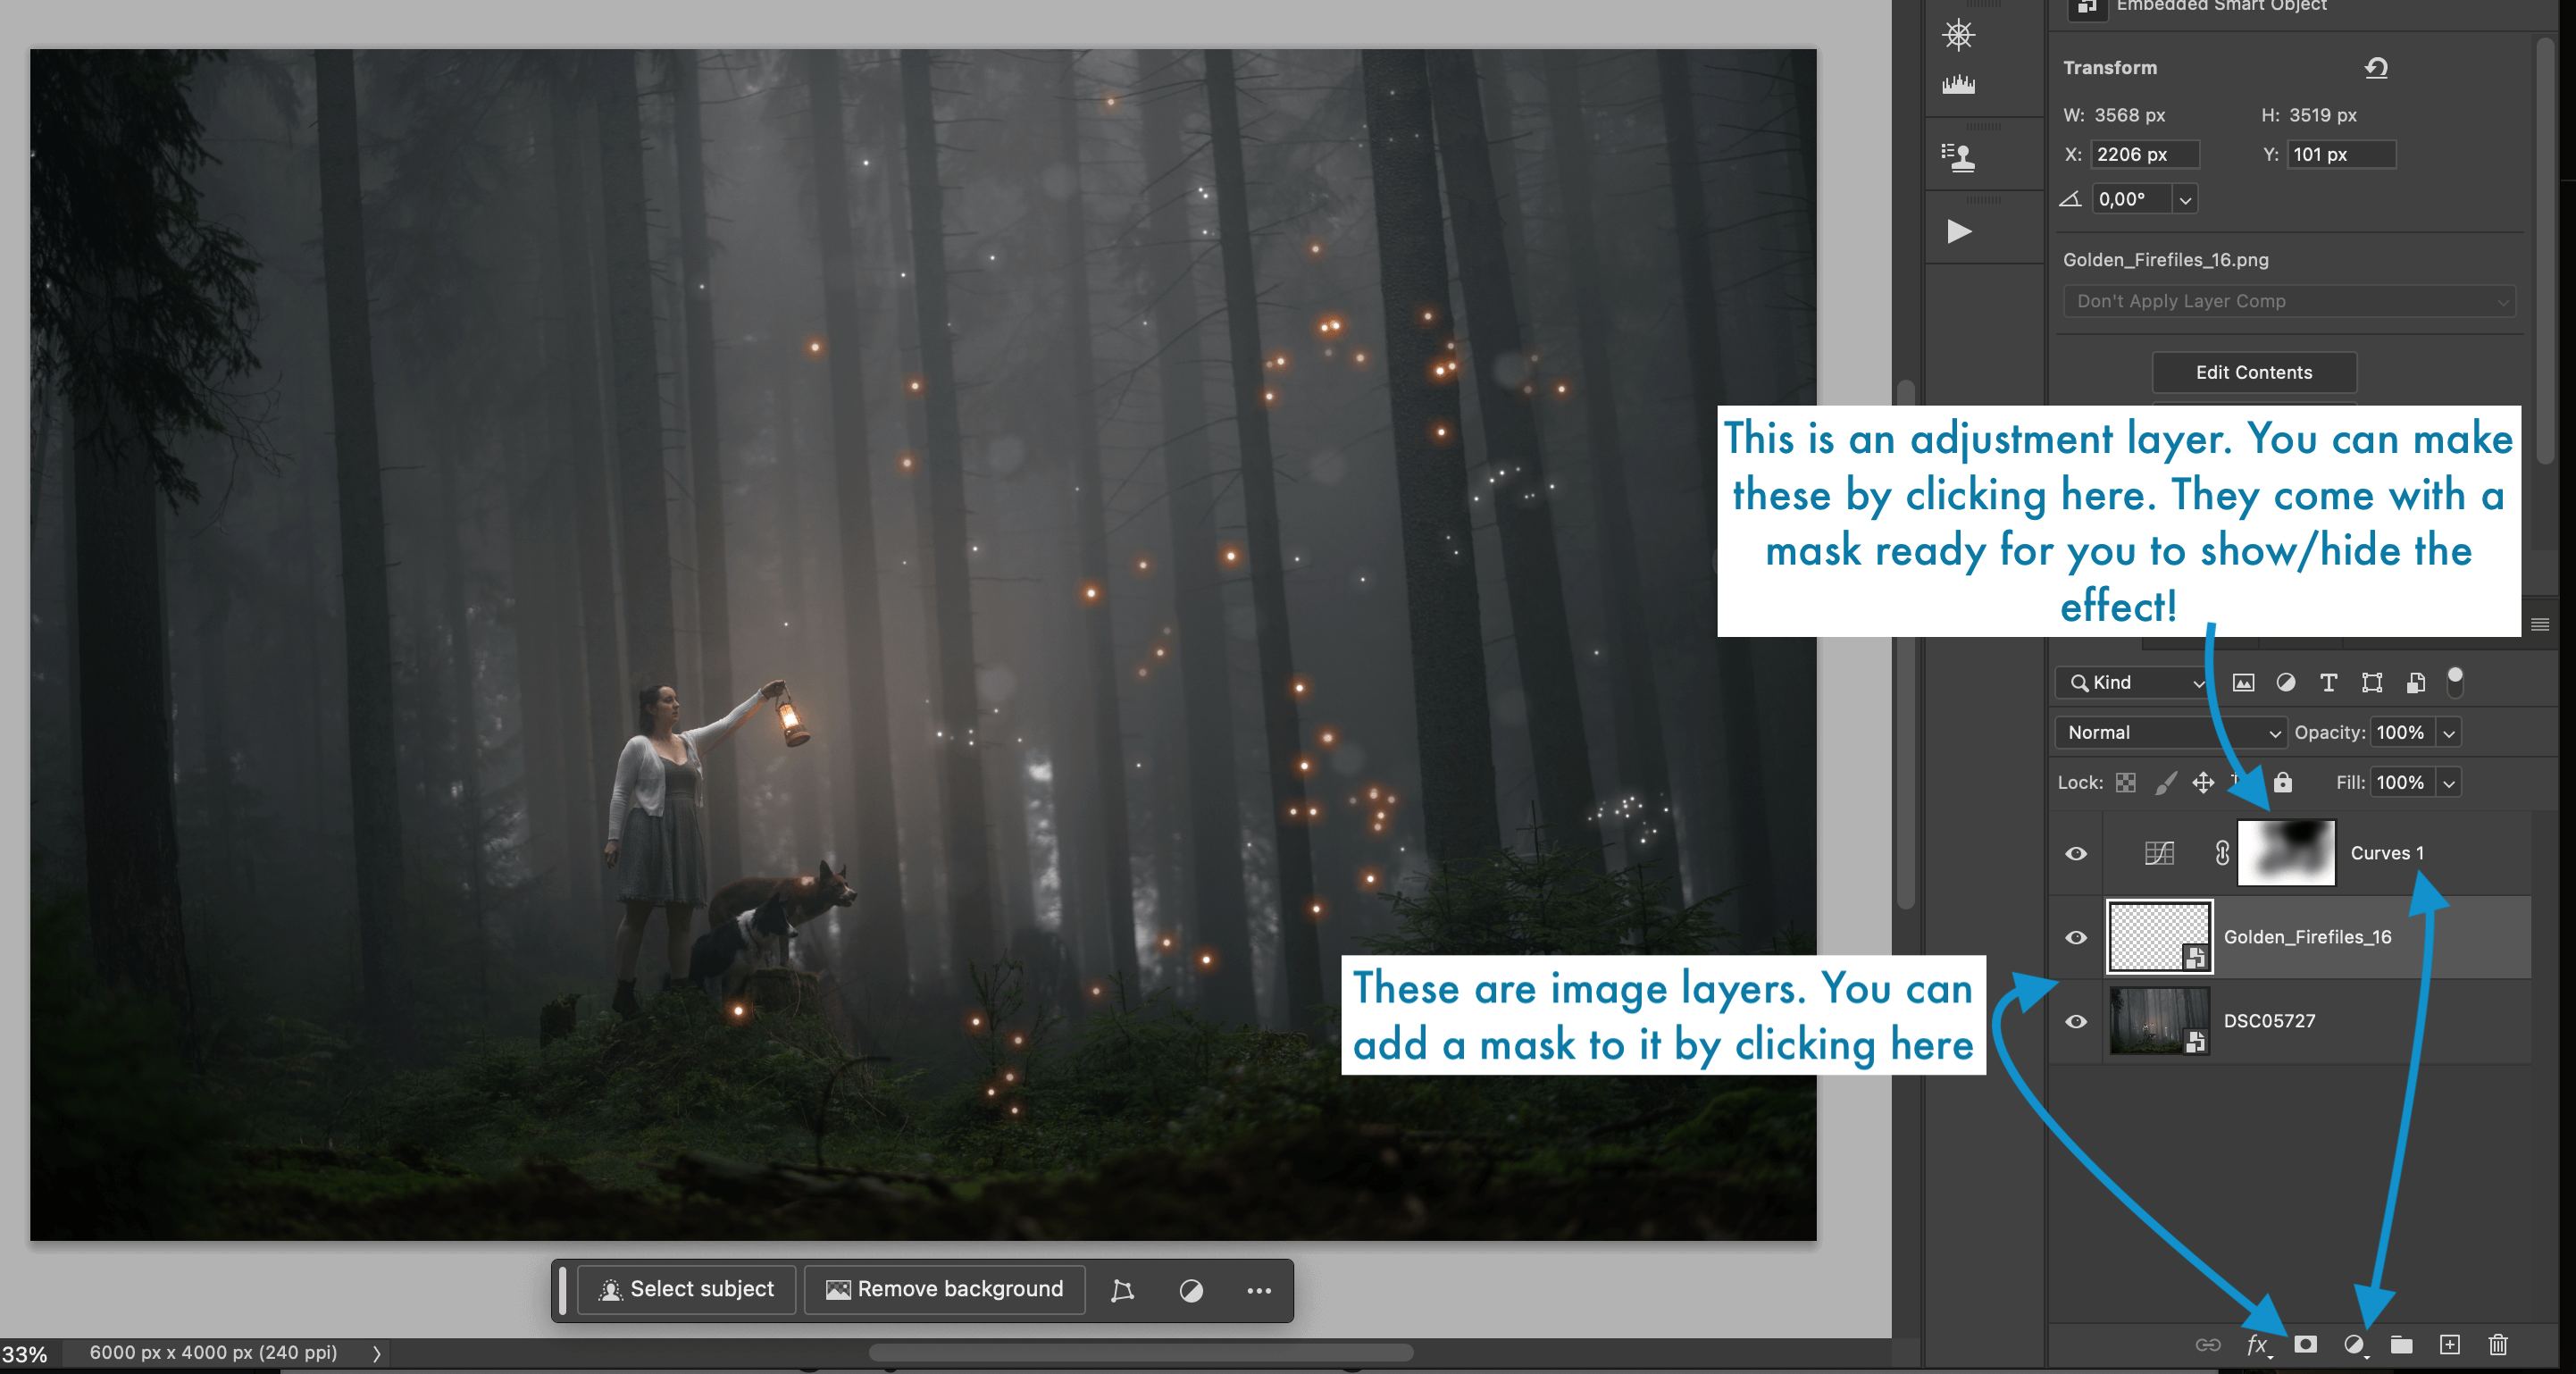
Masking: Simply Showing or Hiding
Masking is one of the most important concepts to understand when it comes to editing pet photos, and once you get this (actually very simple) editing technique down, it all becomes really straightforward. Unfortunately, a lot of people get overwhelmed by the concept and the terms.
Basically, with any layer, we can add a mask. Some layers – like adjustment layers – will already come with a mask attached. Others, like image layers, we’ll need to add a layer mask to.
Then, we use a normal brush to either SHOW parts of that layer with the brush on white… or we HIDE parts of that layer with the brush on black.
In the olden days (when I was learning Photoshop), if we wanted to add another image layer to our photo, to say… add some magic sparkles, or put a hat on our subject, or add in a seagull… we’d use the eraser to erase all the parts of the image we didn’t want. This worked… until we realised we’d messed up and needed those pixels back. Too bad, they’re gone now.
With masking, the rest of that image layer is just hidden, rather than erased.
My favourite analogy for this is walking into a dark room. All the lights are off (the mask is black). You can’t see the colour of the wallpaper, or what’s on the walls or floor.
If you turn on a light (use a white brush), you’ll illuminate (show) parts of the room!
This doesn’t mean the parts of your image get lighter. It’s more a way to think of showing or hiding things, using white or black. Once I understood that it was just the normal brush tool that allowed me to do this, my whole Photoshop world opened up.
Check out my YouTube video where I explain and demonstrate further!
Adjustment Layers: Light, Colour, Effects and More
Using adjustment layers was also another huge change in my process. I don’t even know how I changed the light or colour of photos before adjustment layers! Probably through…
Direct Editing
- This is where you change exposure, colours, saturation values etc directly onto the image file. Usually, people using this method do an edit, duplicate the layer, do another edit, duplicate again and so on, the effect building up layer by layer. The problem is… what if, 15 layers later, I realise I don’t like something I did back in layer 2? Deleting layer 2 won’t make any difference cos of alllll the other layers on top. Nope. I have to delete all the layers down to layer 2. Redo that edit… then… REDO ALL THE REST OF THE EDITS. It’s “destructive” editing and extremely inflexible.
Adjustment Layers
- This magical tool acts like a separate sheet of colored plastic that you lay over your image. Each independent plastic sheet represents an adjustment. Eg. brightness, exposure, saturation, colour grading. Each adjustment is completely independent of your original photo, making it much easier to change throughout the process. I can go back down to any of my layers at any point and change the settings, mask more in or out, or delete that effect entirely. It’s extremely flexible and non-destructive.
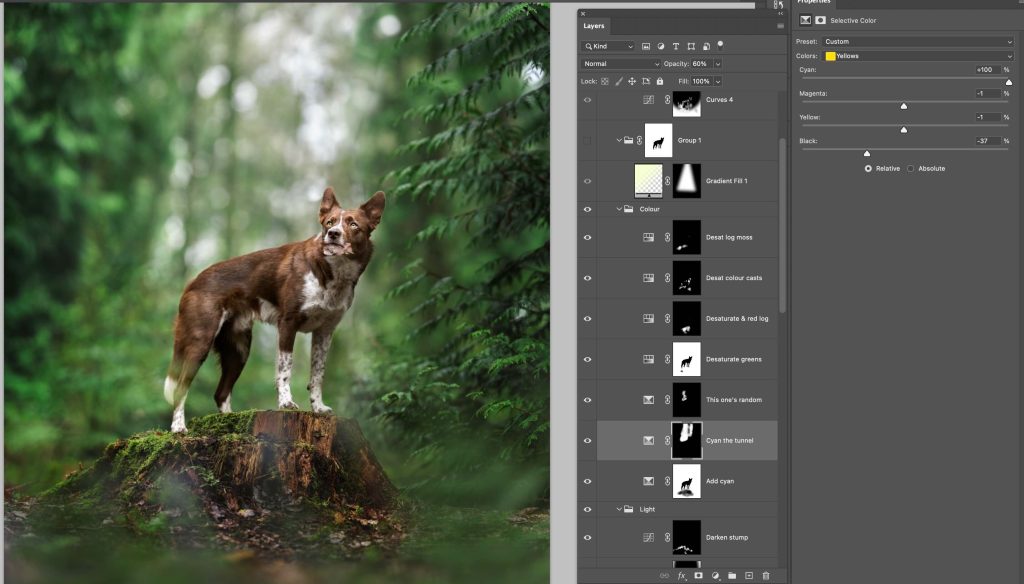
An example of a number of adjustment layers specifically working on colour, for this photo of Journey! This is part of a “Deep Green Editing Challenge” available in the Learning Journey, with step by step descriptions of how the edit came together, and RAW files for members to work on! (Not a member yet? Join here!)
If you want to adjust specific aspects within your dog’s photo, you can use adjustment layers… and mask the parts that you want to show or hide!
When you get good at using this tool, you can even start to stack multiple adjustment layers to achieve complex edits and combine their effects!
Photoshop offers a wide range of layers that you can experiment with. Just remember, sometimes less is more!
Sometimes, it’s better to see these things demonstrated, so on 31st March I will be doing an in-depth Photoshop Basics Webinar which will cover these 3 areas and A LOT more.
You can sign up for the webinar by clicking here, and is available in the Learning Journey for future and current members!
I hope this gives you some confidence to dive into Photoshop, otherwise, see you at the webinar!
~Emily, Loki & Journey.