
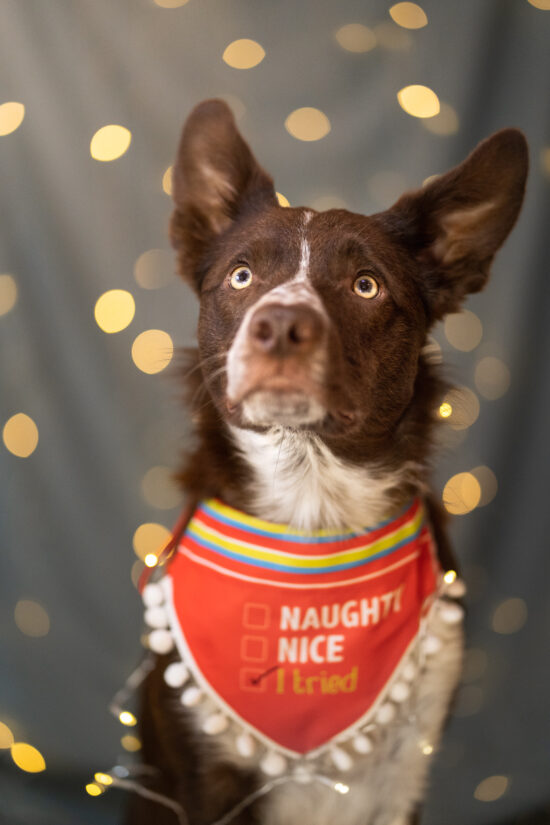
It’s that time of year. The time of year when the air turns nippy and chill, frost begins to creep over the windows, and all across Instagram, pet owners struggle with creating magical photos of their pets wrapped in fairy lights.
Well, alright. Probably most of you have done your Christmas photos for this year and you’re more organised than me. If that’s the case, make sure you save this link for next year, or just go and take some fairy-lights photos whenever because they’re fun… and challenging!
They’re tricky to get right for a few reasons:
- In order for the lights to glow, the ambient light needs to be fairly dim, which your camera is likely to be unhappy about. Shooting on manual mode will help you have control over your settings – I’ll talk more about settings below. Finding a balance between exposing your subject, and getting those glowing lights can be a challenge.
- Indoor light tends to throw around a lot of different colours, depending on the kind of lights you use, the colour of your walls, and so on. This is why a lot of dogs end up looking strangely yellow, or blue, or pink…
- You need to play with “depth of field” in order to blur the lights, but keep the dog’s eyes in focus. This means you may need a lens with a wide aperture (small f/ number, for example f/2.8, f/2, f/1.8 or smaller), and to experiment with the distance between you, the lights and your subject. Any lights close to the “focus area” (the dog’s face or eyes) will be sharply in focus. The further they are from that area, the softer and prettier they will be.
- If you’re using a camera and you’re indoors, you will likely need a fairly short lens, depending on the size of your space. I managed to just squeeze in photos with my 85mm lens, down my hallway and half falling off the couch!
So! A difficult task, but not an impossible one. I don’t want the list above to put you off, more just to give you some things to think about and consider before you get started. All of the advice in this post is open to your own personal style, and dependent on your equipment, size of your space, the lights you have available and so on. As with everything I do, experimenting and practising are the best ways to improve.
How to Create Christmas Bokeh
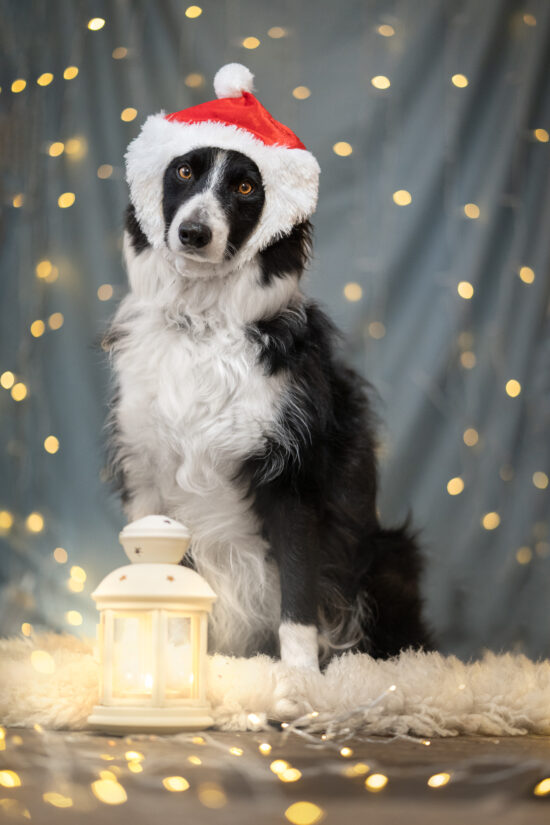
Bokeh are the sparkly lights in the background of an image, in this case, it might be from fairy lights, the Christmas lights on a tree, or even the Christmas lights in a street. If you look at basically any of my photos, you’ll see they all have soft backgrounds, and many with sparkly golden light. In that case, the light source is the sun coming through the trees. For this post, we’re going to use Christmas lights to get that effect. You can also achieve foreground bokeh by having some lights in front of your subject, and a shallow depth of field will blur them.
Lens and Aperture
As mentioned above, you’ll need a lens with a wide aperture.
Using a lens which has an f/ number of f/2.8 or wider (smaller number) will create a shallower depth of field, which creates bokeh. My photos this year were all taken at f/1.8, for maximum sparkle.
I recommend setting your camera settings to the widest aperture it can go, or trying portrait mode on your phone.
Having a wider aperture also allows more light into the camera, meaning you can keep your ISO a bit lower – so your images are less grainy.
Zoom lenses, when zoomed all the way in, can also create a shallow depth of field & more bokeh, depending on the length of the lens and how far or close you are from your subject. Which brings us to…
Depth of Field
Depth of field is how wide or narrow the area of focus is on your images. If you look at the images in my portfolio, you’ll see that close-up headshots usually have a blurry nose and slightly blurry ears. Full-body shots may have some or most of the body in focus. This is because the focal plane was narrower, or wider.
One way to affect the depth of field is not only through the aperture or by zooming in on the subject, but also by how close you are to your subject, and how far the subject is from the background (or the fairy lights). The closer you are to your subject, the narrower your depth of field will be (softer/blurrier background and foreground). The closer your background is to the subject (eg., the Christmas tree) the more in-focus it will be too.
Play with distances between you, your subject, and the lights. Depending on your lens length, this may mean you can only get super sparkly bokeh by being very close and having a headshot only.
In the gallery below are a selection of very average images, taken to demonstrate how the depth of field changes depending how close you are to the dog. The top row were all taken at 28mm, f/2.8. You can see that only by the close headshot is the background mostly blurry.
The second row were taken with a 135mm f/1.8 lens. Not only is the aperture wider, but the lens is longer. You can see that the full body shot has the same amount of background blur as the headshot of the 28mm f/2.8. Of course unless you have a huge house, taking photos with a 135mm indoors will be quite difficult!

28mm
I'm far from my subject, who is far from the background.

28mm
Closer to my subject. Background beginning to soften.

28mm
Very close to my subject now, so the DOF is narrower, blurring the background (somewhat).

135mm
Far from my subject, who is far from the background.

135mm
Closer to my subject, background very soft.

135mm
Very close to my subject, background super soft and "creamy|.

I know this all sounds like a lot to think about! But simply, if you remember to be close to your subject, with the background far away, then you’re on the right track!
Think About Lighting
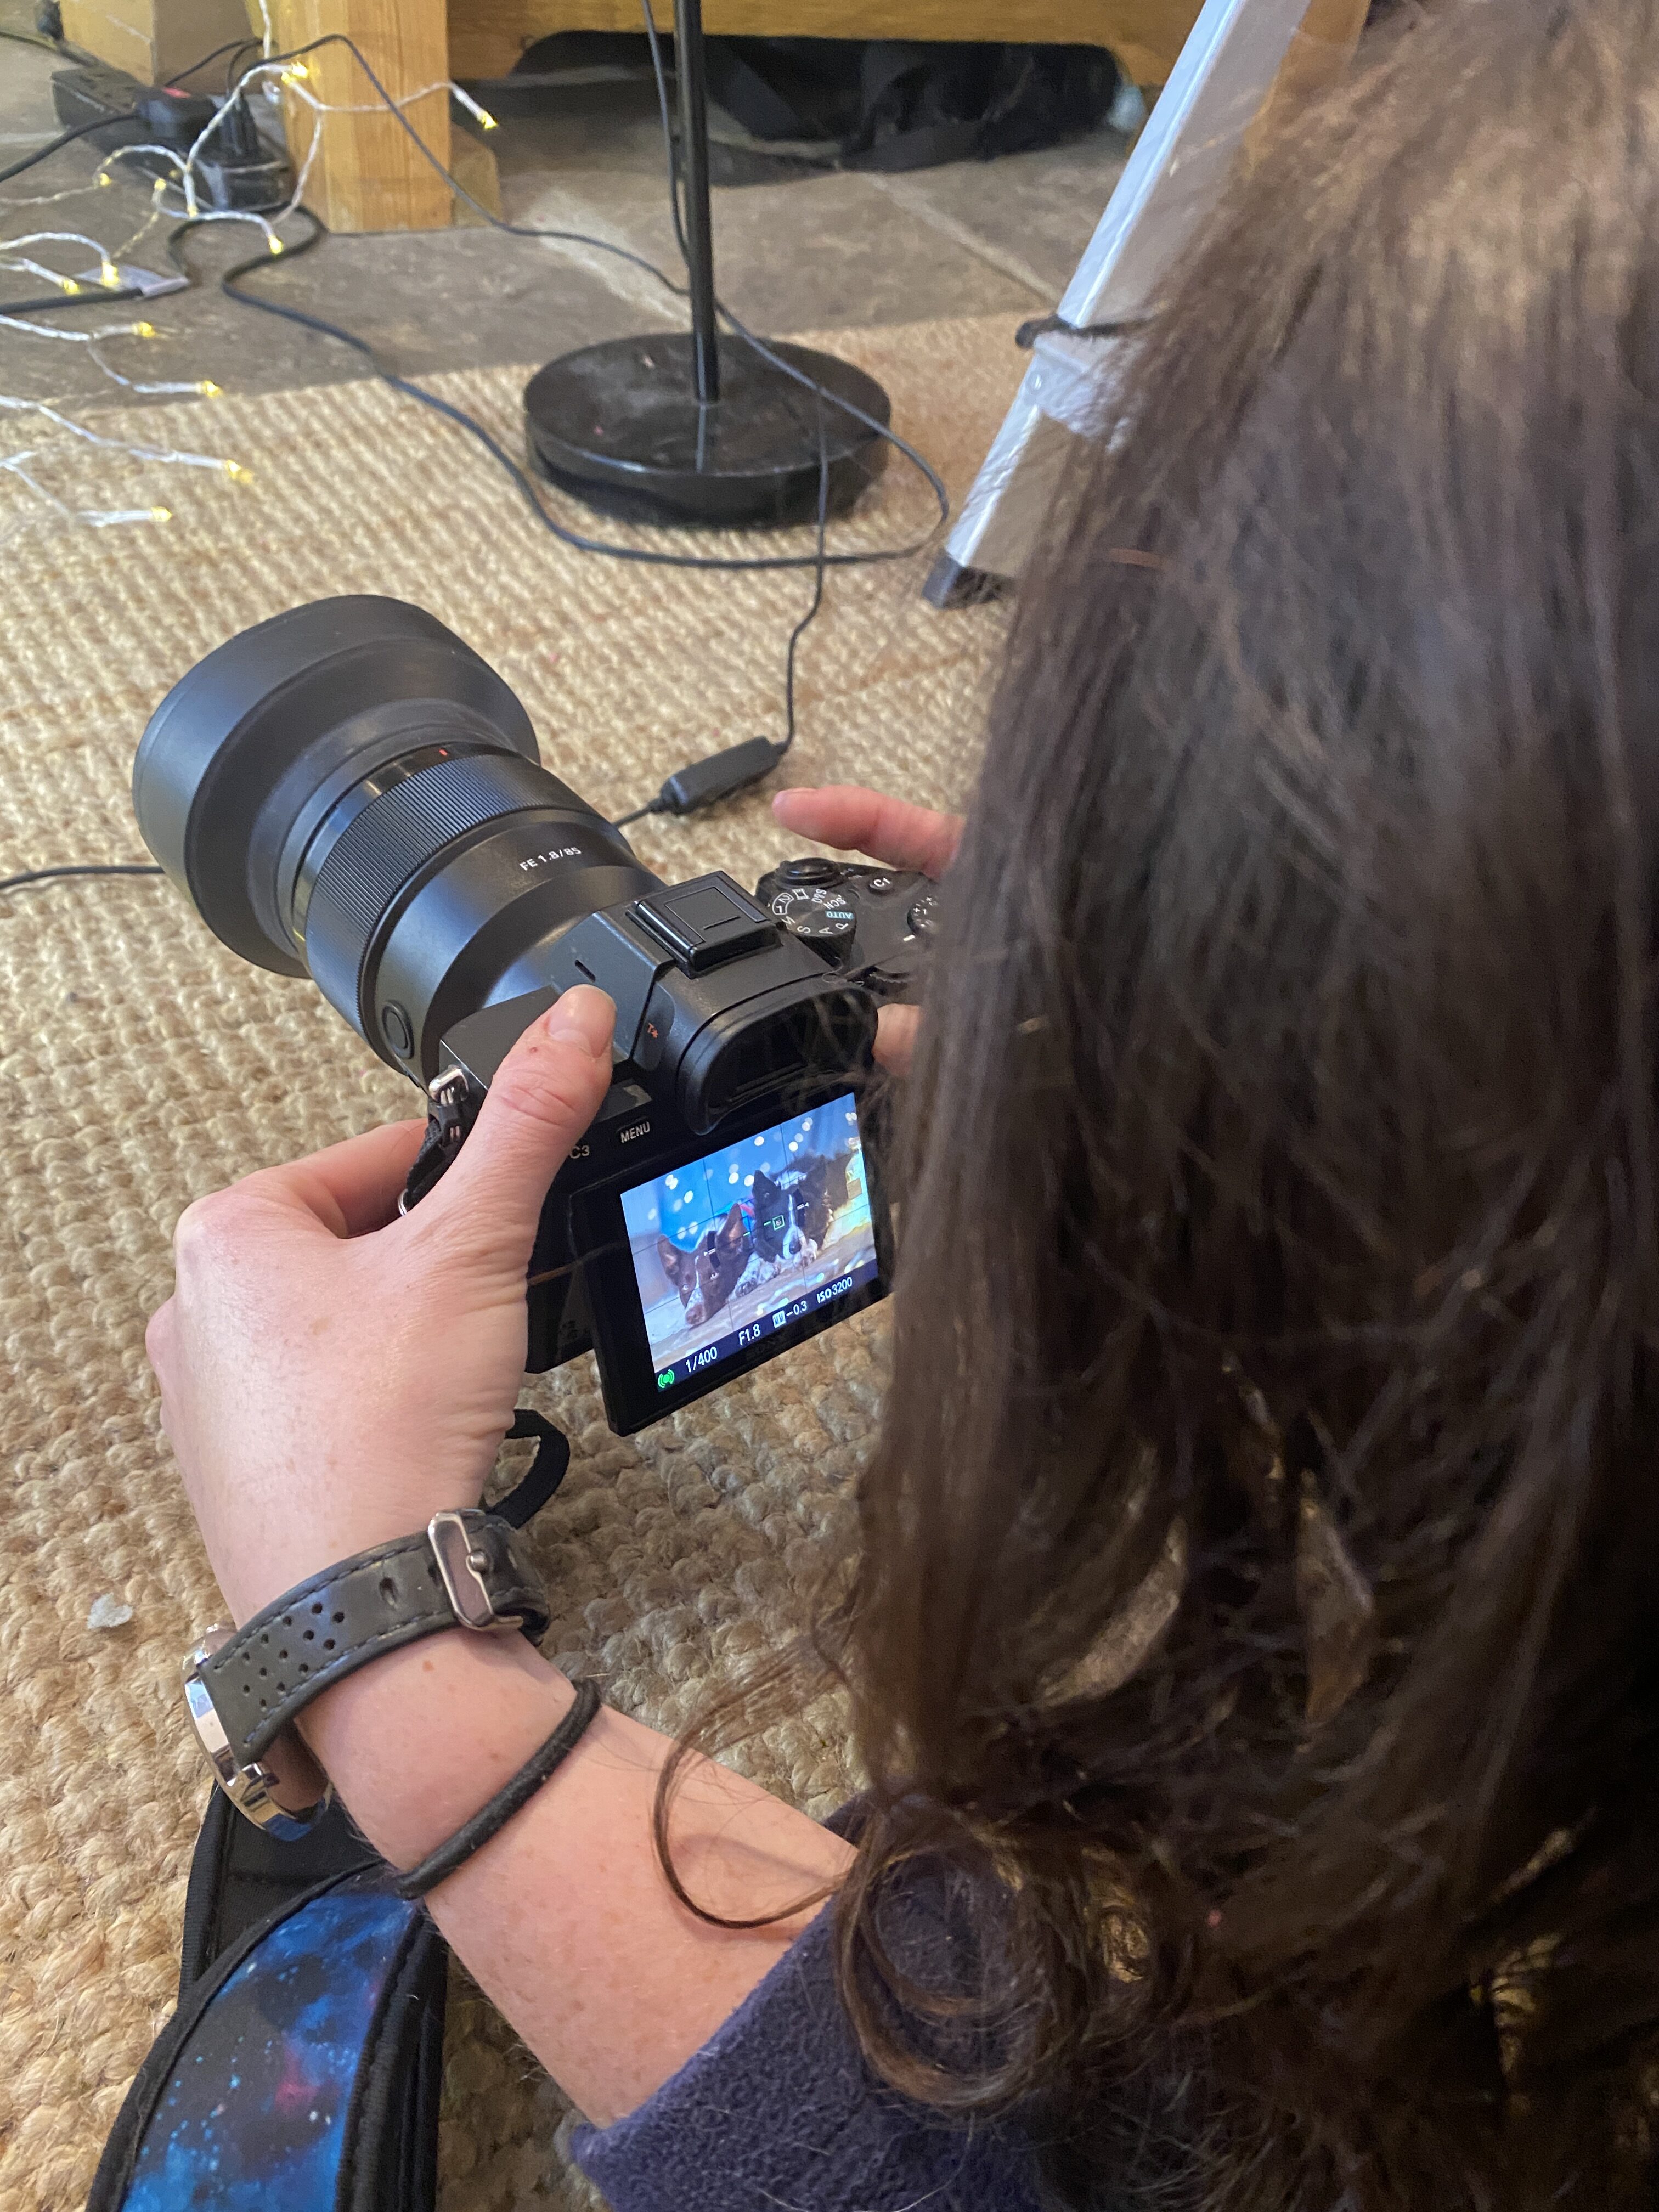
Below, you’ll see some Behind-the-Scenes photos from my Christmas shoot. I haven’t really prepared for Christmas at all this year, so it was really just a sheet hanging from my upstairs loft, a curtain of fairy lights, a fleecy rug, some more fairy lights in the foreground, and two lanterns near the dogs.
But beside all that, I also had a LOT of light – I used my ring-light, pointing directly at the dogs. I tired to bounce a very warm lamp off the back wall, rather than shining it directly on the dogs. I also had the pretty harsh LED lights on the ceiling turned on. Despite all this, my ISO was still 3200, so it can be quite a challenge to illuminate an indoor space properly, depending on what lights and windows you have available! Despite it appearing very bright to my eyes, the camera still read the scene as being quite dark – hence the ISO and slight amounts of grain or noise in the final pictures. Luckily I took them at a correct exposure, meaning I don’t have to lighten them up in editing and get more noise.
I found that even though the light appeared very bright, the fairy lights were still bright and glowing, so I didn’t have to try and make the surroundings dark for them to have a strong effect. Of course you could use professional lighting or an off-camera flash (avoid the on-camera flash, it’s RARELY flattering), but since I don’t have any of that equipment, you probably won’t either.
Editing Your Photos
Once I got the photos onto my computer and into Lightroom, I did some work with the white balance, trying to get it to “correct” (eg., both my dogs looked the correct fur colour) but also a bit warm and cosy. Then I used radial filters to selectively fix different parts of the image that were maybe too yellow or too blue, to try and create nice, soft, even light and colours. Even then, I found the colours were so different to what I’m used to working with (outside in nature) that I’m still not confident that they’re correct!
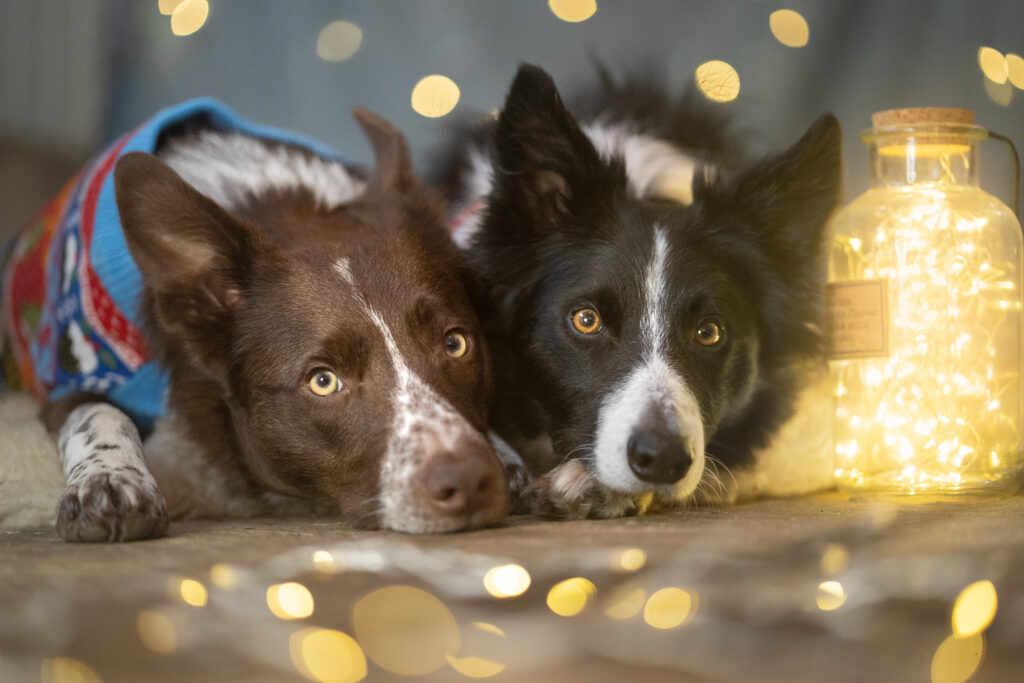
Most apps have the ability to selectively edit some parts of your image, so just have a look for any areas that may be strangely coloured from fairy lights, other christmas lights, or decorations, and see if you can adjust that area so it’s more natural. With the image above, I left some of the yellow glow on Loki’s cheek as it looked very unnatural with it completely desaturated. The fairy light jar was glowing, and was throwing yellow light, so I had to leave it a bit yellow!
Those are my top tips!
I’ll be sending my subscribers the link to a handy infographic that they can save and use for next time, and who doesn’t love an infographic. So, if you’re not subscribed, make sure you pop your email address in below to go on my mailing list and get photography and editing tips and information, exclusive offers and invitations to special events.
Of course you can unsubscribe at any time!


thank you for your tips. I will have to work on the lighting and especially the lights. but seeing your behind the scenes gave me new confidence to try this at home as well ?
So glad it was helpful! You definitely need a good few lights! It helps to have some in the front and some in the back for sure, but you could also use a christmas tree or whatever you have. I don’t even have a tree set up this year so my wall of lights is as good as it gets ??