
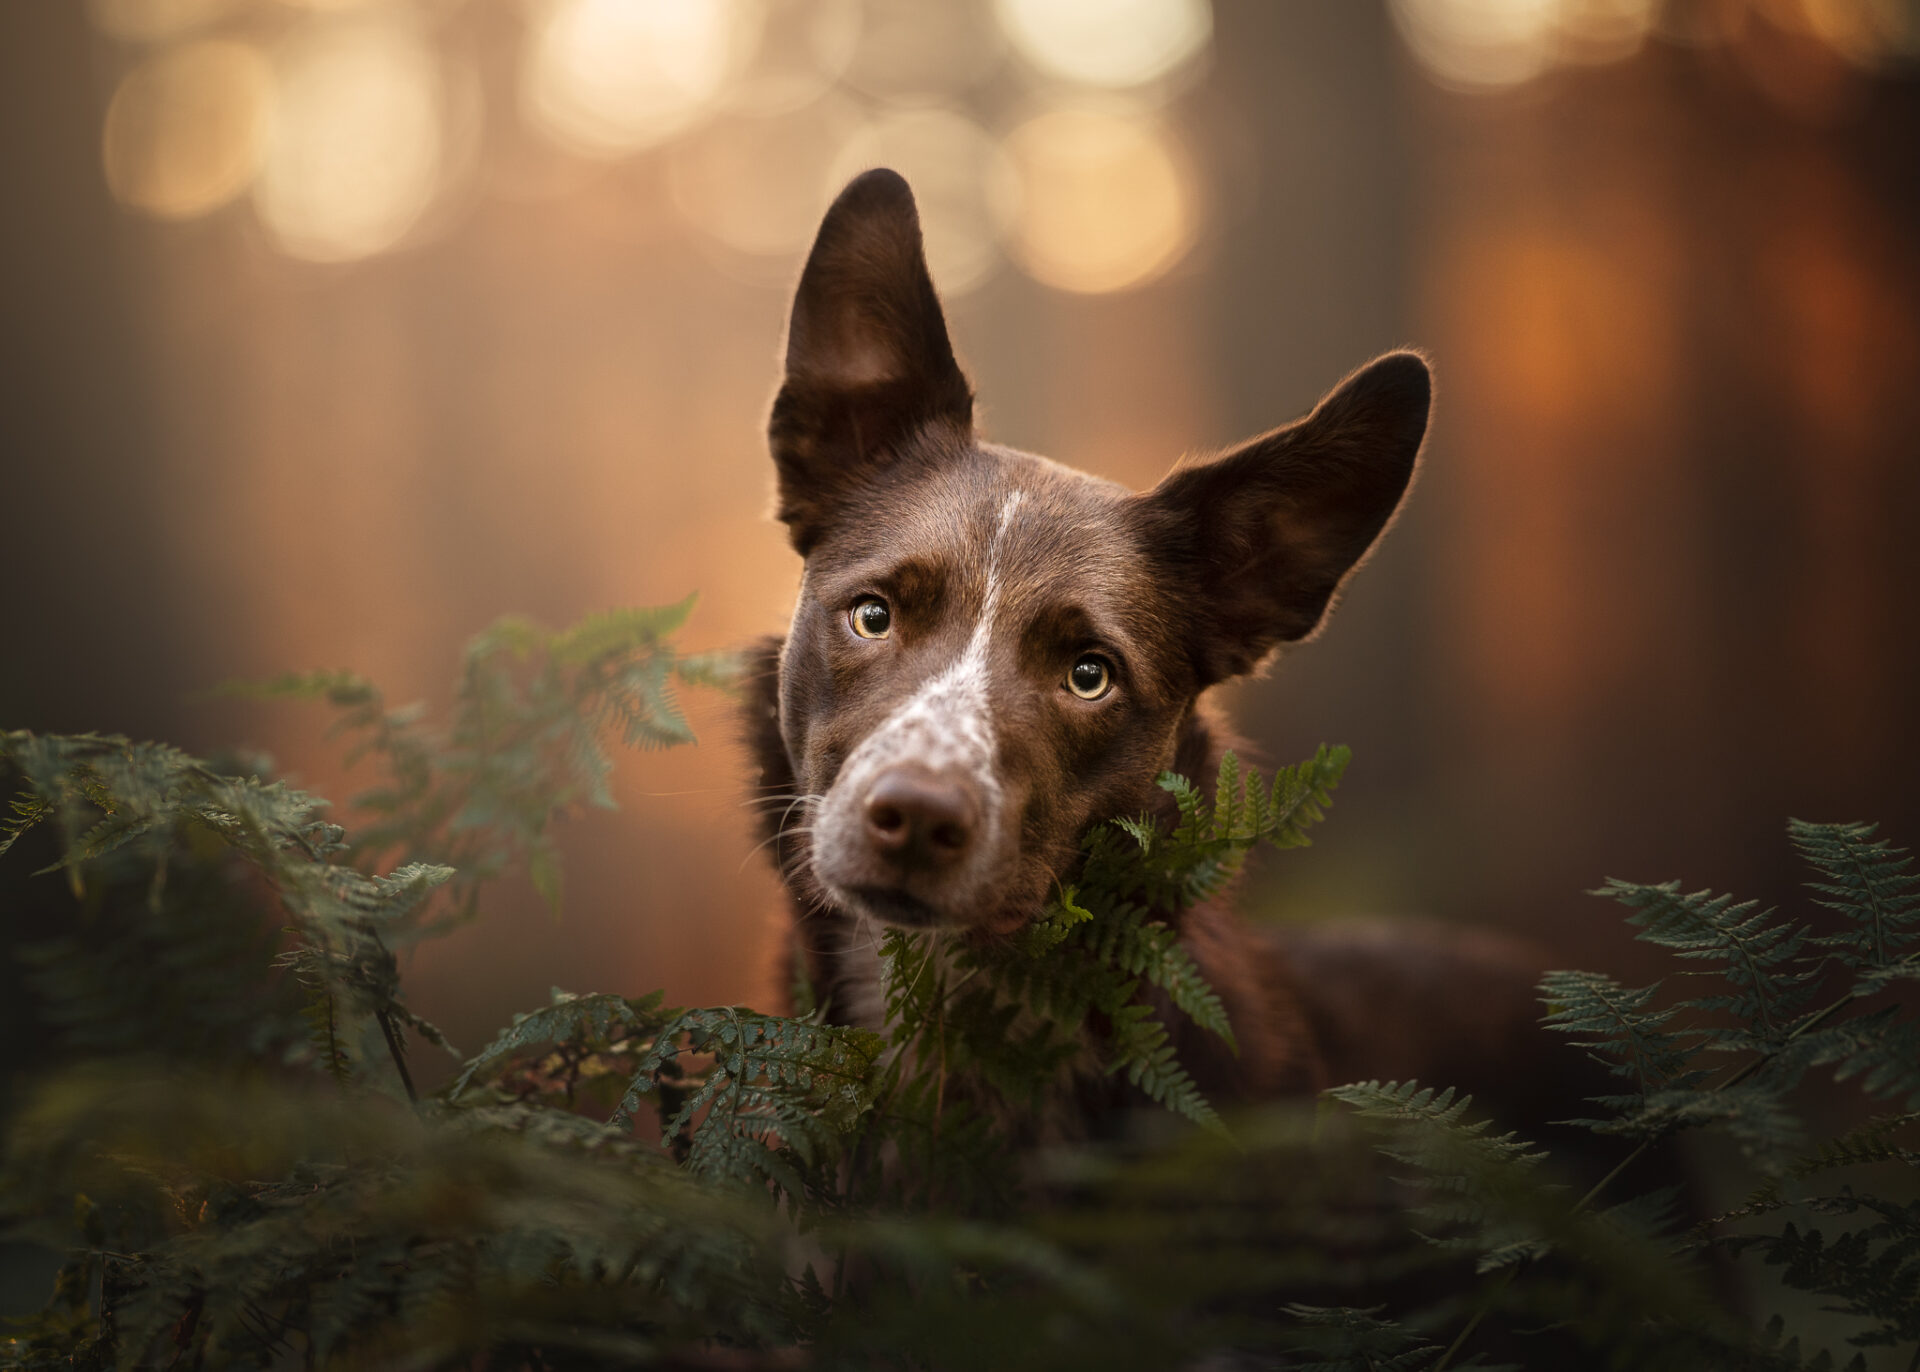

Image #1
Journey in the ferns. Really a simple photo. I love how delicate the fern is curling up under his chin, and of course the perfect backlight bokeh

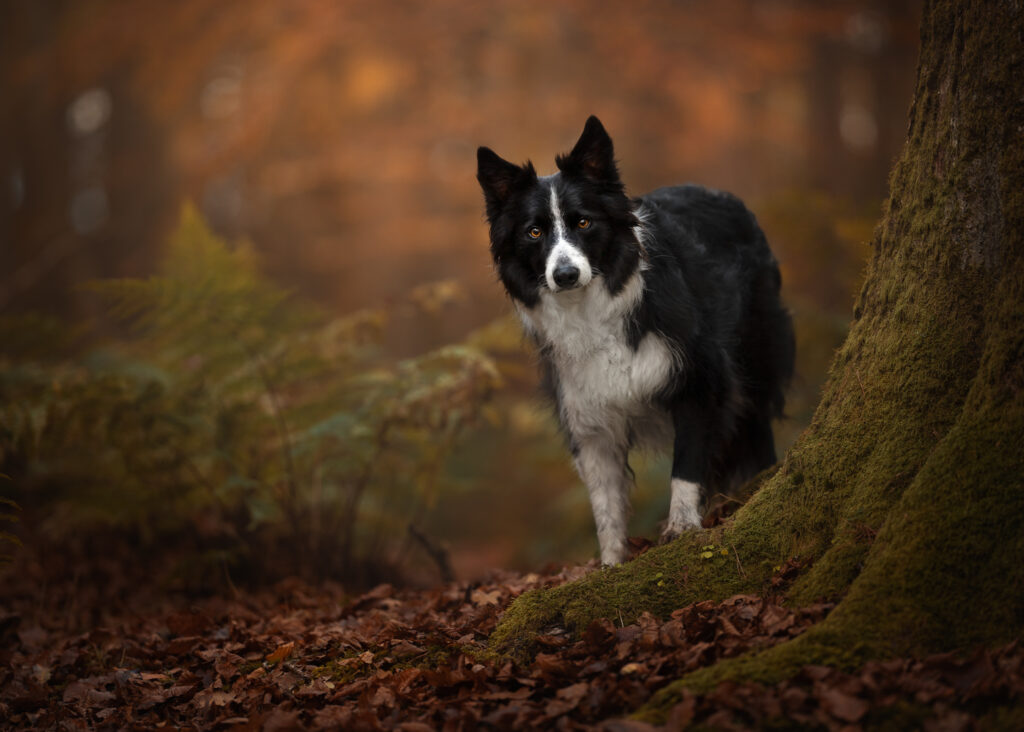
Image #2
Loki by the green tree. His face was toward the light this time. I love using a tree as part of the images frame. Although he's looking straight forward here, I like how it's off-centre as well

Image #3
This was at the base of the tree Loki was standing beside, but on the opposite side, lower down, and having the light behind Journey, instead of in front of him. And of course my leafy boi is holding a leaf. Cute little ferns curl over him to embrace him within the photo, and again, the tree as a side frame.

Image #4
This one made a lot of use of backlight, with Loki being the leafy boi this time, playing on golden tons, and using the hanging branch as a frame.

Image #5
This was the one where Journey was lying by the black stump. I ended up cutting out most of the stump and adding some extra negative space for him to look into. One of the more "plain" images of the series.
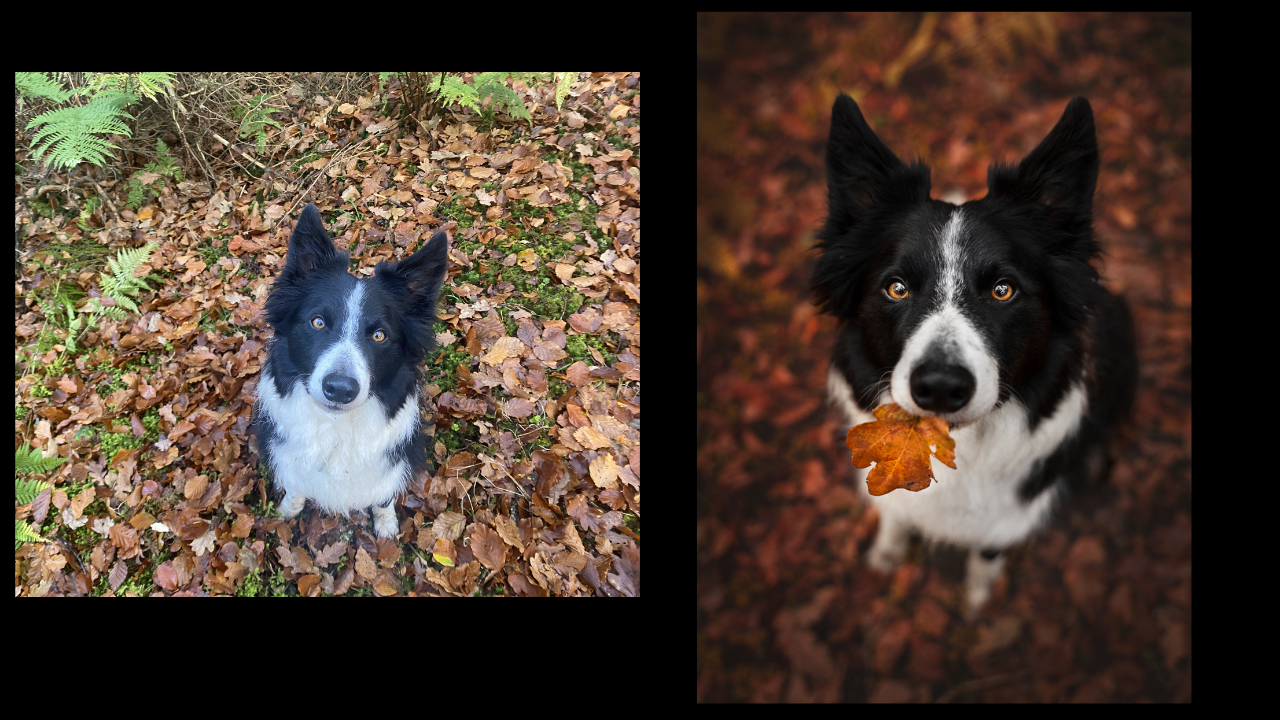
Image #6
A simple puppy-dog eyes/looking down photo of Loki getting into the autumn feeling. I actually did some work to shift the green moss tones toward brown/red for a really monochrome look here.

This image was taken with me basically falling in the creek. Another with the tree as a side frame, a little visual interest from the surrounding ferns, and pretty backlight.

Loki peeking around the tree. This was taken with the light on Loki's face as well, but at a different angle around the tree. Once again using the tree as a frame (are you sensing a theme yet?) with the added visual interest of the moss texture.

Loki on the log. This was a close up image of a pretty plain log. I took some further away as well, but I know instagram likes the super closeups so here we are. Backlight bokeh and a monochrome colour palette to finish the image off.

This one isn't my favourite of the series butt hat's fine. This was taken near the large mossy tree, so it's still making a frame with an interesting texture. Journey just looks a little bit intense, but he's so cute with his leaf. Orange/red autumn tones are tricky with him as he tends to blend in too much.

Journey standing on the log. A bit of a further away shot, making use of the little mossy stump, the fern detail, and of course the gorgeous backlight.

Pingback:November Challenge Feedback & The Cutest December Challenge Ever (Hint: Puppies!) – Emily Abrahams Photography