If you want to improve your pet photography, you have to learn how to critique photos. Yours, other people’s… So many people ask me: “Why can’t I create photos like I see on social media?”… And part of the answer is you aren’t thinking about what you’re actually seeing. Most people get so caught up in how xyz photographer has edited, that they’re blind to everything else that’s gone into the photo.
Over the past five years, I’ve run monthly critiques inside the Learning Journey. Literally hundreds of hours looking at dogs in forests, snow, beaches, mountains. Critiques talking about composition, pose, light, gazing direction, expression, camera settings, perspective, and yes… editing.
And somewhere along the way, I realised something surprising:
My biggest personal breakthroughs in understanding the more abstract concepts of pet photography didn’t happen while editing.
They happened while staring at an image and asking, “What’s bugging me about this?”
If you’ve ever looked at one of your own photos and felt that quiet frustration: “It’s fine… but it’s not right” … this might be the skill you’re missing.
Let’s talk about what to actually look for when you critique your own (or other people’s) photography.
1. Where Does Your Eye Go? What's Bothering Me?
This is always my first question.
When you look at your image, where does your eye land, and where does it drift?
If your eye jumps to a bright patch of sky before it finds the dog, that’s information. If it keeps wandering to a sharp tree trunk or a blown highlight, that’s information too.
Our eyes are naturally drawn to brightness, contrast, sharpness, and colour ( talk about this a LOT in the “Make Your Dog Pop” Masterclass). So when something feels “off,” it’s often because those elements are pulling attention away from the subject.
Instead of immediately reaching for Photoshop, try asking:
What could I quiet down?
Sometimes improving your pet photography isn’t about making the dog more dramatic. It’s about softening everything else.
2. Does the Dog Look Comfortable and Well-Placed?
This one sounds simple… but it’s where I see the most issues in critiques.
Look closely at the dog.
Do they have breathing room? If they’re looking to one side, is there space to look into, or does the crop or a large dark object block their gaze? Are they positioned in a way that feels natural and strong? Or, are their legs cut off so they look “stumpy”?
And beyond composition, check their expression. Are the ears relaxed? Are the eyes soft? Or is there tension around the mouth, a hint of whale-eye, or a stiffness in the pose?
You can have perfect exposure and beautiful editing… but if the dog feels uncomfortable, the whole image feels slightly wrong.
Also consider your shooting angle. Were you standing up? If so, how much of the frame is just ground? Shooting lower almost always creates more connection, depth, and presence.
Sometimes the fix isn’t in editing at all. It’s in perspective and that’s something for when you’re on-location with camera in hand.
3. Is the Light Helping or Harming?
Light begins on location, and ends in editing.
Behind the camera, consider light quality. Is the light soft and flattering? Or harsh and unwelcoming? Soft light tends to feel calm, pretty, and gentle. Harsh light from full, strong sunshine can create heavy shadows, bright patches, and tension.
Light also affects detail. If you don’t have enough light on the face (particularly with black dogs) you simply won’t have detail to work with, OR the face will feel flat and “off”.
In editing, remember, our eyes are naturally drawn to brightness. If the brightest area in your image is behind the dog’s head, that’s where the viewer will look first, and the eye may get “trapped” in that dead space, rather than moving freely where the dog’s gaze directs us, or in the space around the dog.
When you critique your own photo, ask:
Where is the brightest part of this image?
Is that where I want attention to land?
Almost always, we want light on the face and especially in the eyes, not glowing tree trunks behind the ears. Of course, with a black dog we can’t brighten him to be brighter than the background – but this is a whole different topic! Here’s where we use light strategically to direct attention to our dark subject.
Before adjusting sliders or adding another fake sun-flare, ask yourself whether the light itself was working for you, or against you.
4. Does the Mood Feel Cohesive?
Now zoom out. (Literally and figuratively)
Does the mood of the image match the dog in front of you?
A fluffy, joyful, smiling dog can feel strangely disconnected in a dark, dramatic forest edit. A serious, intense stare might feel out of place in a bright, pastel, airy treatment.
When something feels “off,” it’s often because the subject, the light, and the edit aren’t aligned.
Mood comes from:
Use of light/dark
Colour choices
Contrast
Depth
Environment
Photography isn’t just about making something look good. It’s about making it feel cohesive.
The dog, the setting, and the edit should all be telling the same story.
5. What Are You Actually Trying to Show?
This might be the most important question of all.
What is the point of this photo?
Is it the dog’s expression?
The scale of the mountains?
The atmosphere of the forest?
The relationship between you and your dog?
Those cool rocks in the background?
The flakes of snow on his snoot?
If it’s about scale or something cool in the location, are you showing enough of the environment? If it’s about intimacy, have you included too much empty space that doesn’t add anything?
Sometimes we include blank, blurry areas out of habit (everyone loves a dreamy, creamy background, am I right?). Other times we crop so tightly that we remove context that would have strengthened the story.
Clarity of intention makes composition easier.
If you’re unsure what the photo is about, your viewer will be too.
Why This Skill Builds Confidence (And Reduces Imposter Syndrome)
Many photographers hesitate to give feedback, or even critique their own work, because they think they’re “not experienced enough.”
One of our Learning Journey members recently shared that when she joined, she barely felt confident shooting in manual mode. She didn’t think she had anything valuable to offer in critiques.
But what she discovered is this: giving feedback trained her brain to see light and composition more clearly.
You don’t become confident and then start analysing photos.
You analyse photos, learn, develop your eye, and confidence grows from that.
Learning to critique your own photography, and even the photos you see on social media, is one of the fastest ways to improve because it turns every image into a lesson.
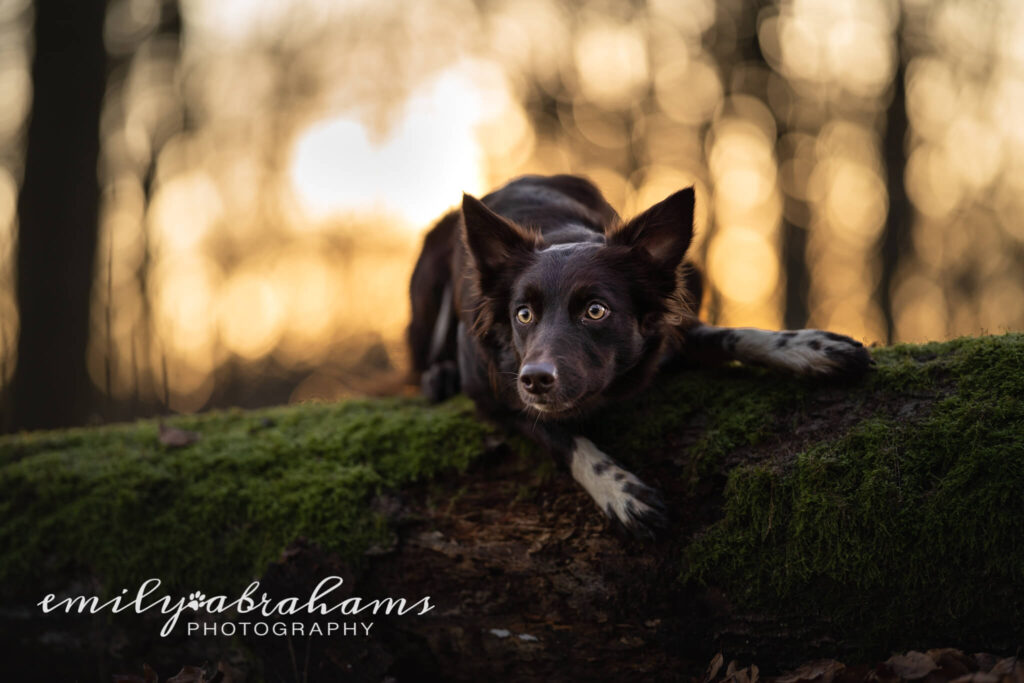
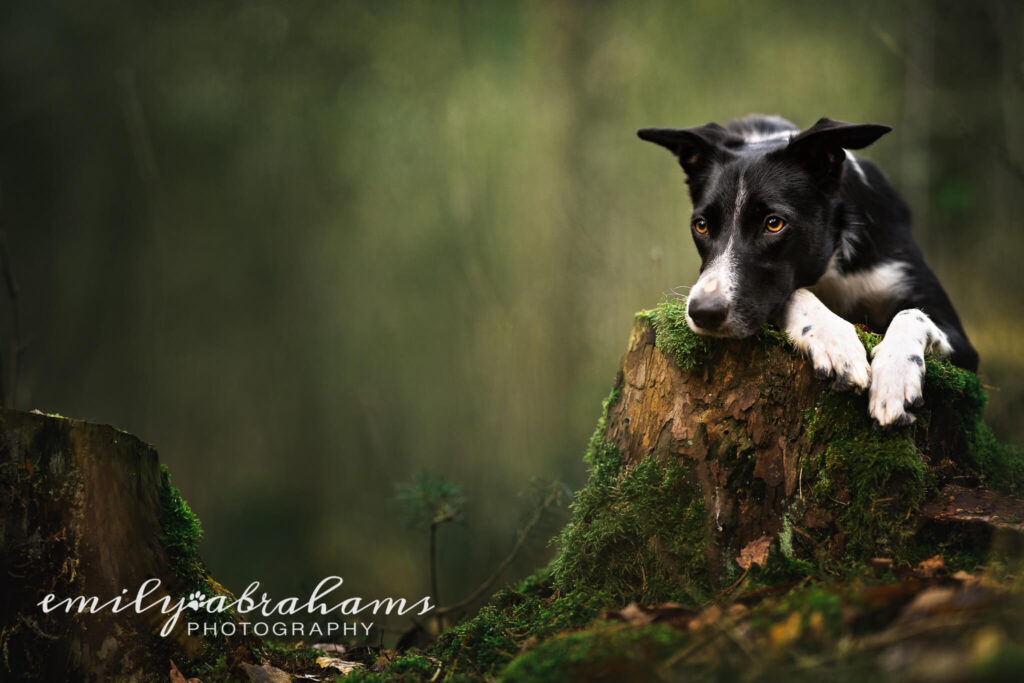
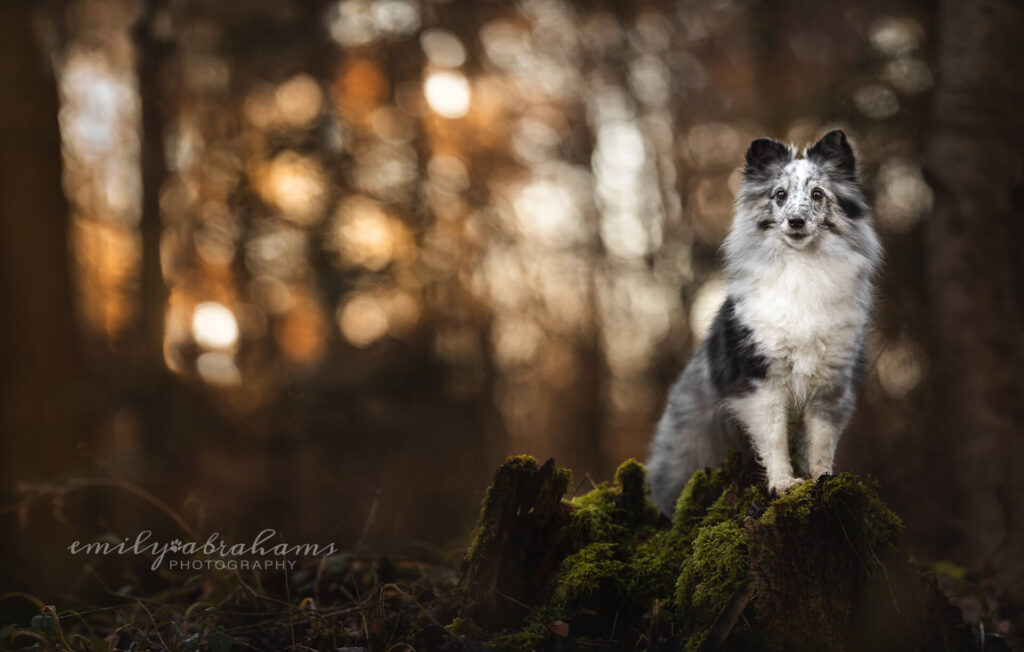
Want to have a go? Here’s one of my old photos! Based on the tips above, what could I have done better? What works, what doesn’t work?
Want a Simple Way to Practise This on Your Own Photos?
If you’d like something structured to guide you, I’ve created a Pet Photography Self-Critique Checklist.
It walks you through:
Composition basics (like not chopping the dog and getting down low)
Light direction and exposure
Background distractions and colour casts
Storytelling and shaping light in editing
It’s simple. Practical. And designed to help you focus on what actually matters next — instead of trying to fix everything at once.
You can download it by signing up below!
By signing up, you’ll receive helpful photography emails from me, plus the occasional update about the Learning Journey. No spam, ever. You can unsubscribe at any time. See the Privacy Policy for details.
If You Want Feedback Beyond Self-Critique
There’s only so far you can go on your own.
Inside the Learning Journey, we practise this kind of structured critique all the time in our Community, in a safe, thoughtful, kind environment. Members learn to articulate what’s working, what isn’t, and why.
It’s not about tearing images apart. It’s about training your eye. And… if you aren’t ready to start giving critique, receiving critique on your photos is one of THE BEST ways to improve.
If you’re ready to stop guessing and start improving intentionally, you can learn more about the Learning Journey here
Until next time!
Emily, Loki & Journey