
One of the most common complaints I hear from dog photographers is that their forest photos just aren’t working. The location looks beautiful. But the dog looks flat, the eyes look dark, and no amount of editing seems to fix it.
The reason is almost always overhead. Literally. And it’s something that took me an embarrassingly long time to figure out.
When I arrive somewhere to shoot now, before I think about where to position the dog, before I think about the background or the composition, I look up. I’m looking at the canopy above me, asking where the sky is, where the gaps are, where the light can actually get through. And that one habit has changed how I shoot in natural locations more than almost anything else.
Here’s why.
The light on your dog comes from above
I know, I know. The title is a bit of a “well DUH, Em” moment. But hear me out.
When you’re shooting in a forest, a park, or anywhere with trees overhead, the light reaching your dog isn’t bouncing dramatically off something at ground level (hopefully), and if you’re a natural light photographer like me, it’s not coming from an artificial source like a flash.
It’s coming from above. From open sky, from gaps in the canopy, from the areas where the trees thin out enough for light to actually reach you. It’s hopefully NOT coming from the sun itself, but that’s a different topic entirely!
This means the quality of light on your dog’s face is almost entirely determined by what’s happening overhead. Not by how beautiful the trees look in the background, not by the mossy path you’ve found, not by the gorgeous autumn colours surrounding you.
When I look up, I’m asking: where is the sky? Where are the gaps? Where is the canopy dense and where does it open up? And how does that translate to where I should position the dog?
In an open evergreen-type forest like I have around me here, this is often a quick check. Pine/fir trees tend to let in a lot of light (not always! My deep green mossy forest was DENSE), and you can usually see patches of sky relatively easily. But in a deciduous forest in summer, or anywhere with a heavy, dense canopy, this becomes one of the most important decisions of the whole shoot.
The difference between dark and dramatic
There’s a version of forest dog photography that looks moody, atmospheric, and deeply beautiful (my deep green photos – hopefully). And there’s a version that just looks dark and flat. The difference between them is almost always the amount of light reaching the dog’s face (ok… sometimes the editing, or choices to underexpose but again… a different topic entirely!)
I learned this the hard way in Slovenia back in 2020. I was shooting in a fairly dense forest, trying to use backlight. The light was already limited, and I was underexposing further to manage the backlight. I genuinely thought I could make it work through persistence. Through trying enough angles, enough positions, enough shots.
I could not. 😅
That was somewhere in the first seven months of Journey’s life, and I made a version of that mistake a lot in that time. Dense forest plus backlight plus “I’ll just make it work somehow” equals a lot of flat, muddy images and a lot of frustration. What I was missing was understanding that you can’t outshoot bad ambient light. At some point, you have to just go find better light.
The shift for me was realising that “dramatic and dark” as an aesthetic still requires enough light to work. You’re not aiming for darkness. You’re aiming for mood. And that mood can easily be created at the EDGE of the forest, a road, or in a clearing… when you then CREATE the impression of it being deep, deep wtihin the dark woods.
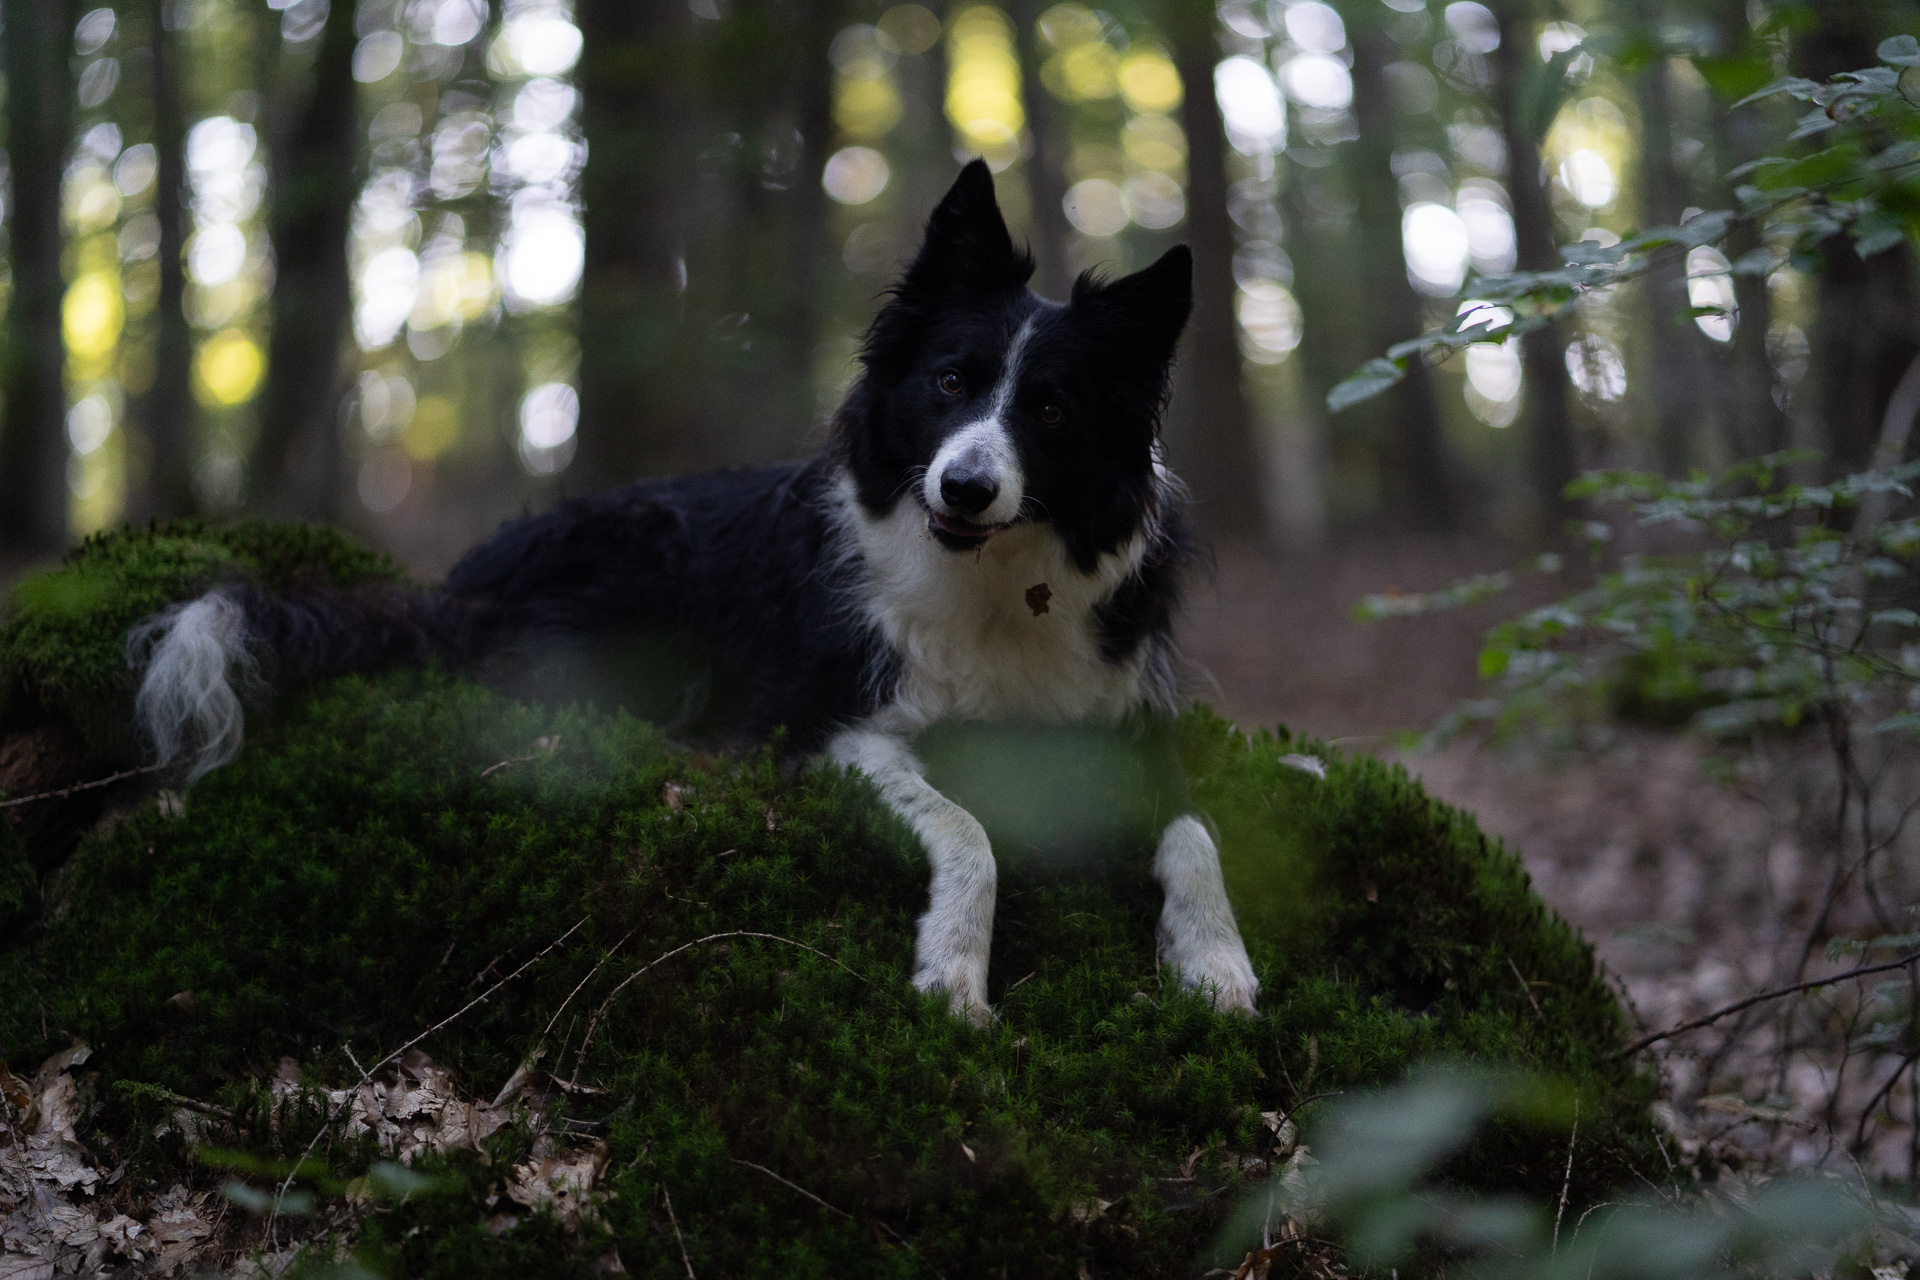
Below is a photo of BABY JOURNEY in some very dense woods, with the sun coming through trees behind him. Look how flat his face is and how dark his eye is. I edited it… but it would have been much easier and prettier if I’d just had more light in the first place.

What "enough light" actually means
The first thing I check when determining if a location is too dark, is the ISO. If I’m pushing above 2000, that’s usually a signal that the location is working against me. High ISO doesn’t just introduce noise into a photo. In a dark location, it means the dog’s face isn’t getting the light it needs, and while I can edit it, because I have the skills to do so AND my camera is great in low light conditions… the results aren’t always spectacular. I would have far better results in a location with more light.
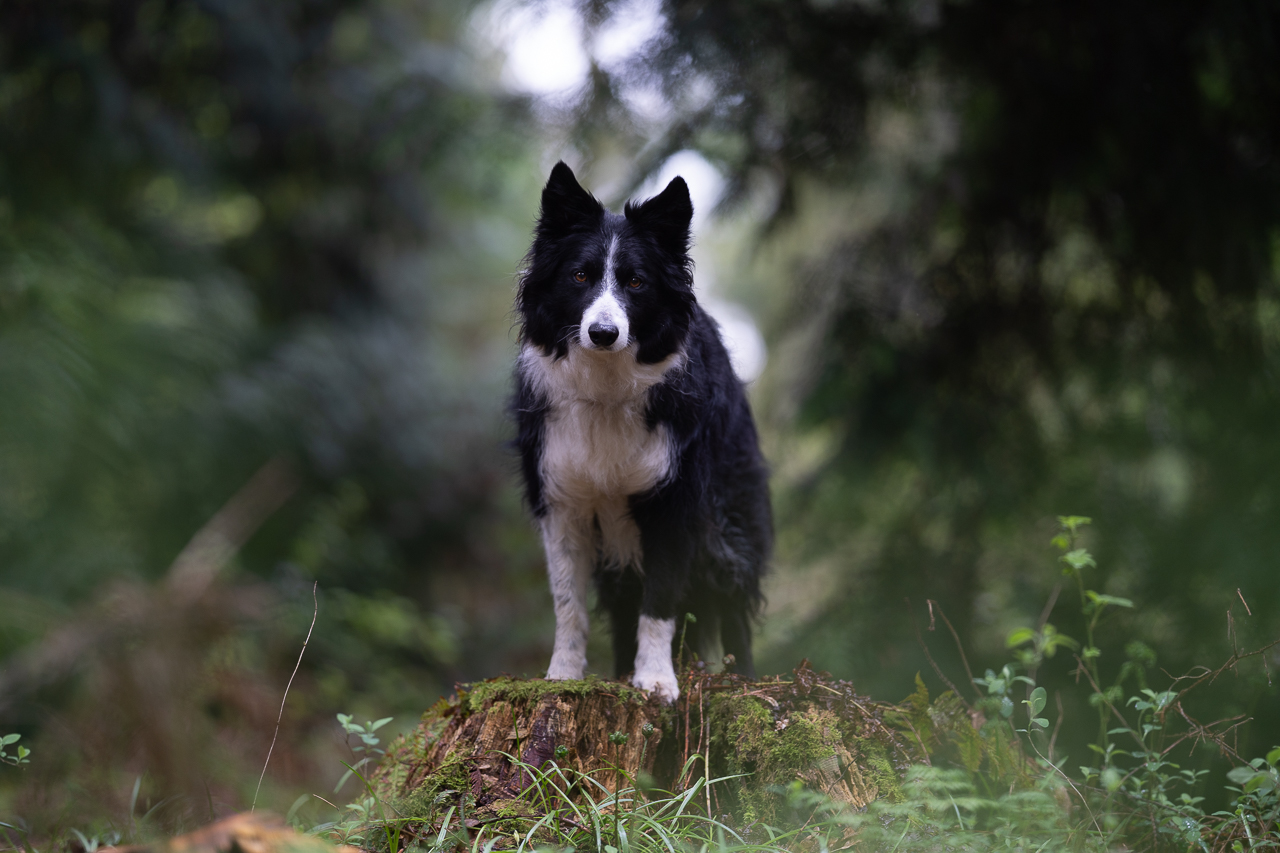
The second thing, and honestly the one that matters most to me, is catchlights. Those small reflections of sky in the dog’s eyes.
When there’s good overhead light, the catchlights are bright and prominent. They draw you into the dog’s eyes and make the image feel alive. When you’re under a really dense canopy with only tiny pinpricks of sky visible between leaves, the catchlights shrink or disappear almost entirely. The eyes go flat. The dog looks less present, less expressive, more sleepy and dull, even if technically everything else about the image is fine.
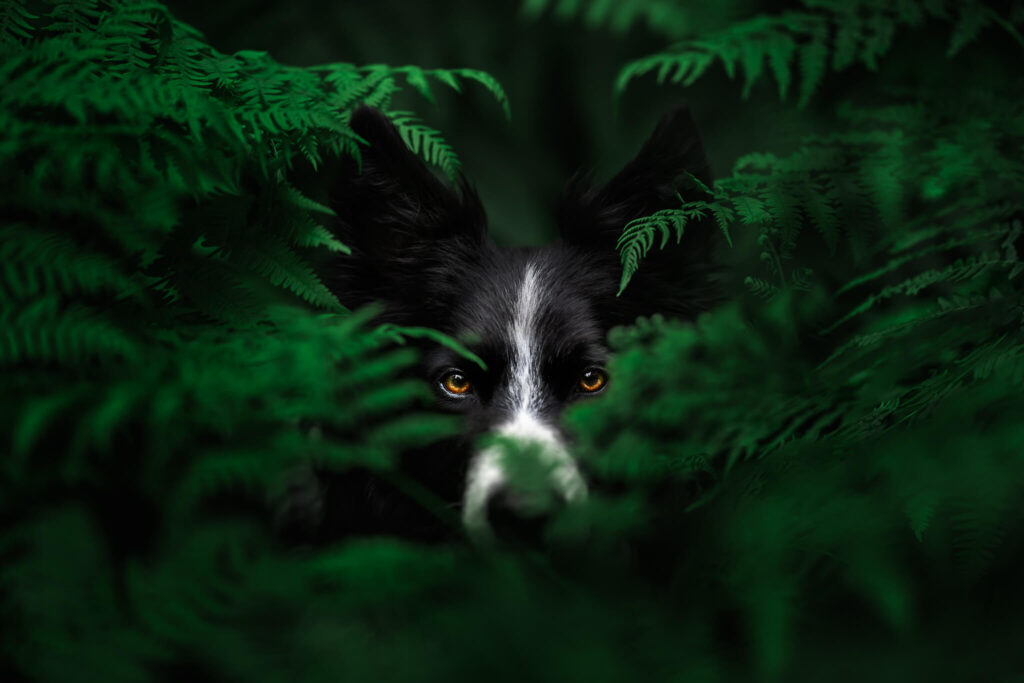
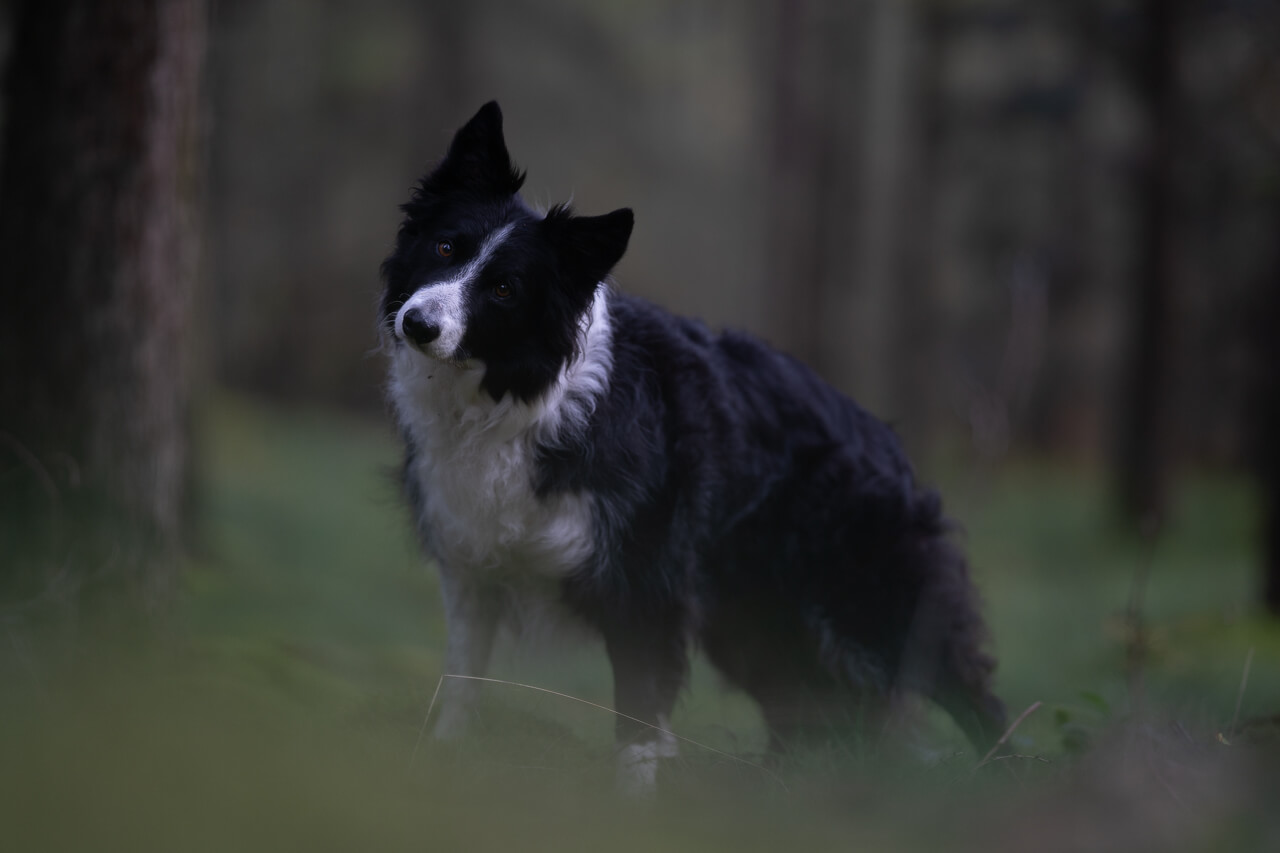
For a dog like Loki, who’s black and white, light matters enormously. In low light, the blacks on his face lose their detail and highlights, the face flattens out. I’m lucky that his eyes are bright and amber so even in low light, they still sparkle… but if you have a dog with more sunken, or darker eyes? Low light is your worst enemy. In good overhead light, the same dog looks completely different. Dimensional, warm, alive.
So when I look up, I’m partly asking: is there enough open sky here to give me the catchlights I love?
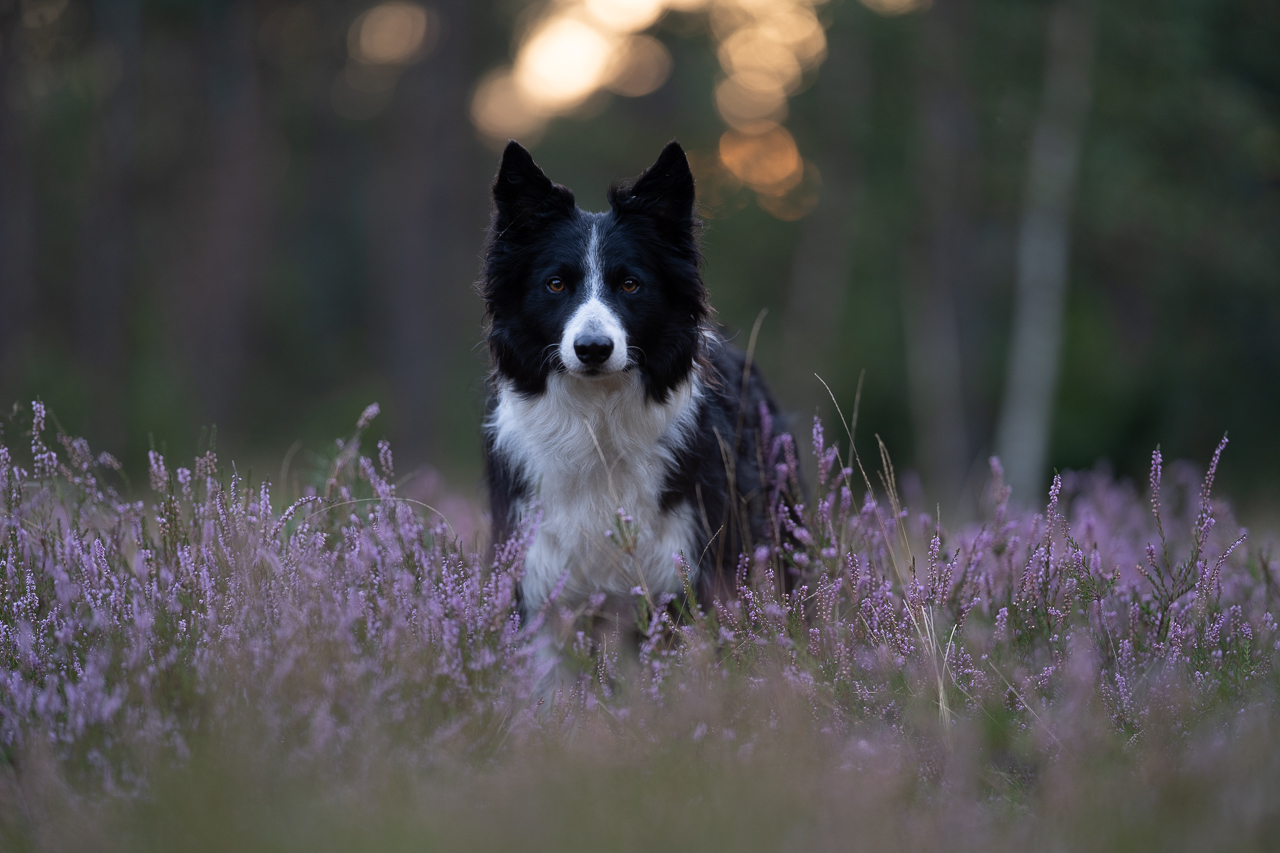
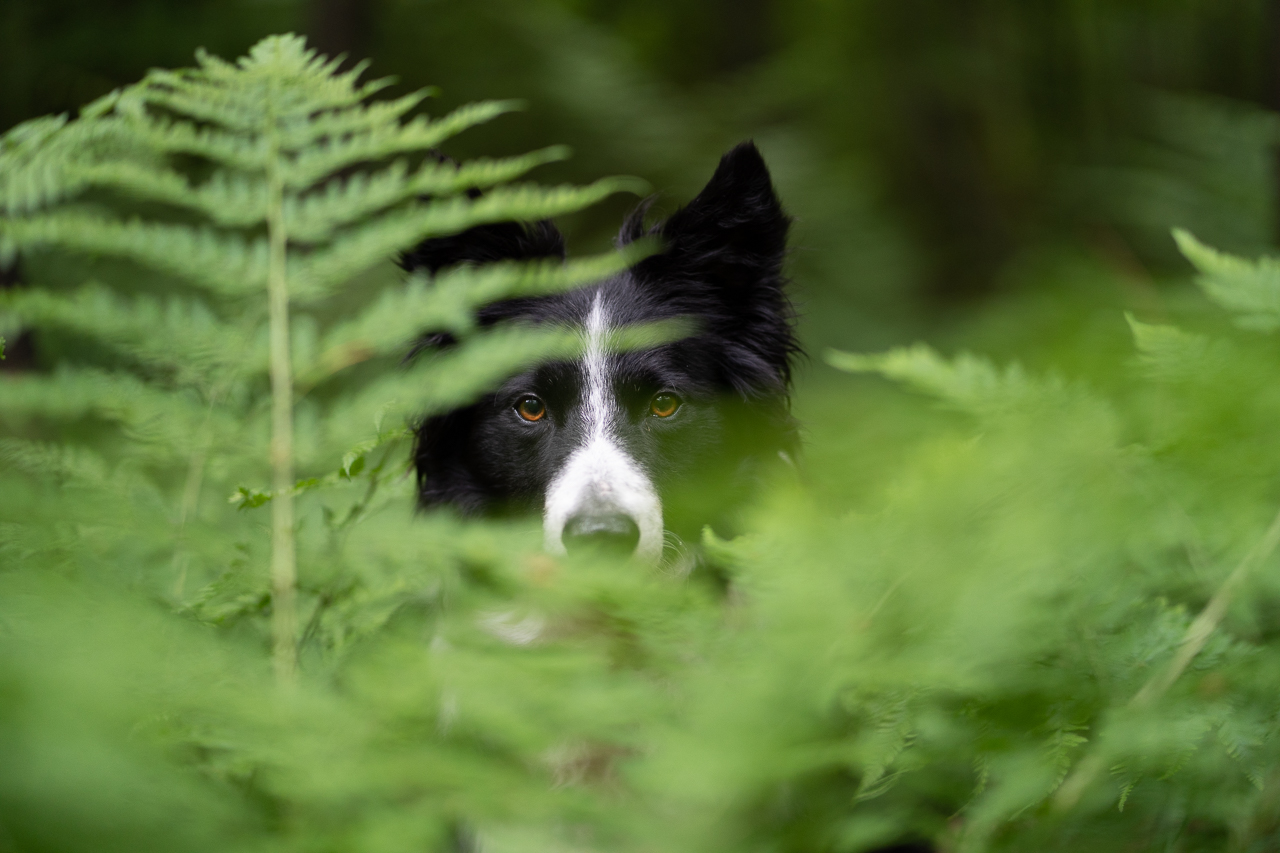
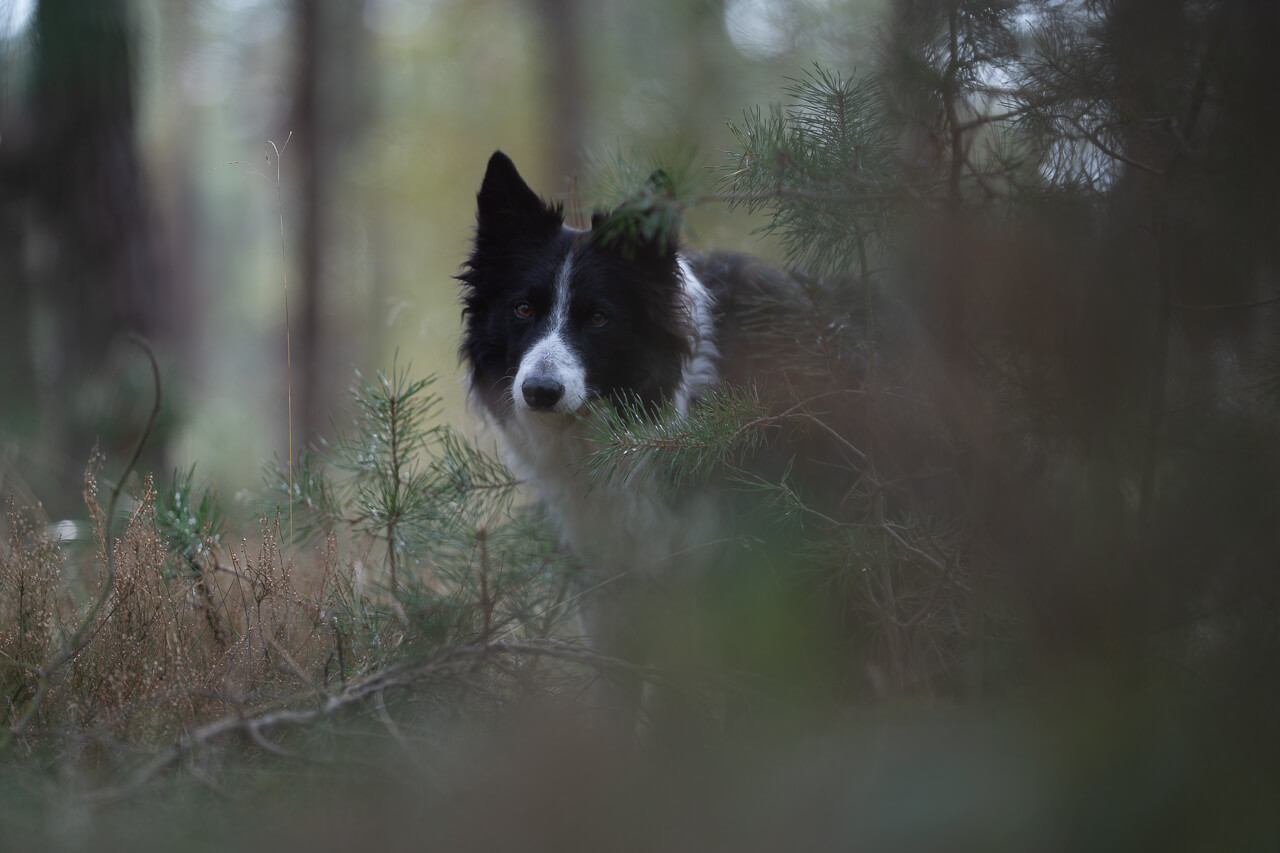
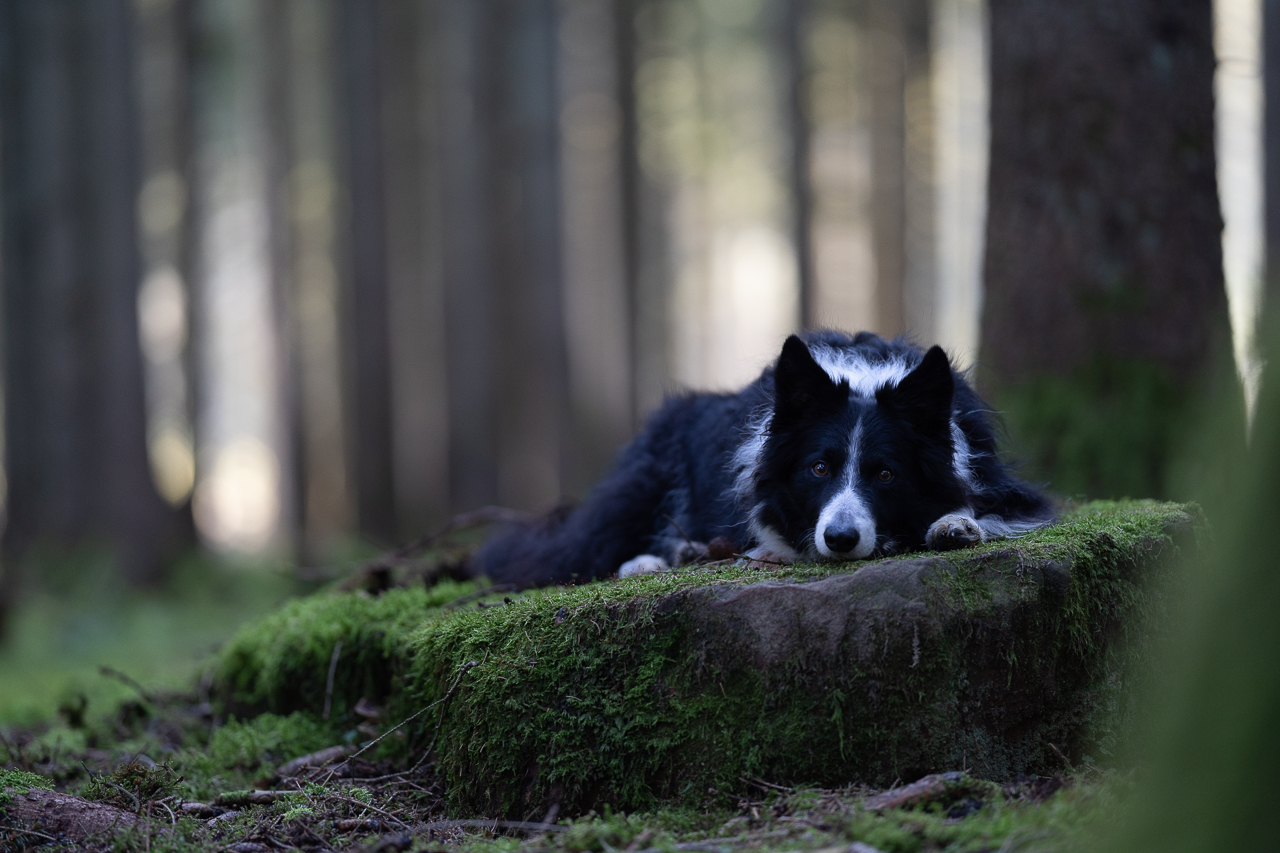
Below is a selection of completely unedited photos of Loki. Check out his face, and the catchlights in particular. What assumptions can you draw about how dense the canopy overhead was, based on what you can see?
The canopy question people get wrong
Something I’ve started noticing is that photographers sometimes avoid locations they’d actually love, because there are trees. The trees exist, therefore it will be dark, therefore it won’t work. This isn’t always true, and it comes down to what kind of canopy you’re dealing with.
A typical evergreen or pine forest – unless it’s the dense, dark, mossy type – lets in significantly more light than it might look like from a distance. The branches tend to sit higher, the foliage is thinner in structure, and you can usually see patches of sky relatively easily when you look up. You’re working with filtered light, not blocked light.
A dense summer deciduous canopy is a different situation entirely. Full leaves in every direction, very little sky visible when you look up, pinpricks of light rather than patches. That’s where you get genuinely challenging conditions.
The test I use is simple: look up and ask how much sky you can actually see. If there are real openings, not just tiny gaps between leaves, you’re probably going to be fine. The more sky, the brighter the ambient light, the more natural detail and contrast you’ll have on the dog’s face, and the better the catchlights will be. If you look up and see mostly canopy, that’s the moment to start looking for a better position. A clearing nearby, a path that opens up, a spot where the overhead coverage is more even.
How this changes where I shoot
Once I started looking up first, I stopped being surprised by the light I got. I started being able to predict it.
If I can see a clearing ahead, a gap in the trees, a path that opens up, I know the light will be better there and I position the dog with that in mind. If the canopy is denser behind me and more open in front, I know which direction to face the dog. If I’m looking for soft, even, ambient light with no harsh patches, I look for the area where the overhead sky coverage is most consistent.
None of this requires a perfect location. It requires looking at what’s actually available and making intentional decisions based on that, rather than hoping the light will cooperate if you just find a nice-looking spot.
And that’s really what this habit is about. It’s not a rule. It’s a question you ask before you start shooting: where is the light coming from, and how do I position myself and the dog to use it?
If you start asking that question before you think about composition, before you check your settings, before you even call the dog over, it will change how you shoot in natural light locations.
Light is one of three things I’ll be covering in my free live webinar, 3 Simple Steps to Better Pet Photos, on March 27 at 20:00 CET. If you’d like to join us and see some of these ideas in practice with real examples, you can sign up below. It’s free, it’s live, and the recording will be available if you can’t make it.
And if you want to go deeper, the Learning Journey has an entire course dedicated to light inside the membership. Doors open in April.
Photos That "Click": Composition, Clarity, Critiques.
A Free 2-Part Live Workshop for Pet Photographers
Why your photos don’t quite look the way you imagined, and how to finally fix them.
If you’ve ever taken a photo that felt magical in the moment…
but somehow fell flat on your screen…
Or you’re wondering why you just can’t get your photos to look like those you see on social media…
These free live workshops will show you exactly what’s missing.
🔎3 Steps to Better Pet Photos: March 27 at 20:00 German Time.
🎨Style & Live Image Critiques: March 29 at 20:00 German Time Check your timezone here!
 Live on Zoom (recording available)
Grab Your Webinar Spot!
Please note, by signing up, you will be joining our mailing list where we will send you pet photography tips, advice and information, special event invites, and the occasional promotional material. Of course you can unsubscribe easily at any time.
