Archivesnext level

Overcast

Table of Contents

A lot of people fear overcast days for photography, when in fact, they are probably one of the easiest, safest, and most flattering weather conditions we could hope for. 

Overcast days give us a lot of flexibility not only in the shoot, but in editing too.

Quick Profile


  • Soft, even, flattering light
  • Neutral or blue tones
  • Large catchlights if in an area with view of the sky
  • Possibly dull, flat, boring grey skies without texture or interest
  • Possibly dramatic clouds, light beams, rainbows and other interesting weather events
  • Forests can be too dark
  • Shoot any time of the day, but be much more careful of early morning or evening due to lack of light
  •  Possibility to do sky replacements to swap out boring grey skies

Benefits

  • Even, balanced light with no crazy contrasts, giving nice detail to the dog.
  • Flattering light.
  • More possibilities to “manipulate” light in editing depending on how heavy the cloud-cover is and the location.
  • Can get some visual interest from certain cloud types, or really create some drama and epic landscapes
  • Nice bright catchlights in the eyes

Challenges

  • Blue tones, especially on black dogs, which need to be fixed by adjusting the White Balance in editing
  • Sky can look flat and dull.
  • Much less light in shaded areas, so photos in the woods will be difficult! Shoot in the middle of the day, at the edge of the shade if you have to.
  • Depending on the cloud, if it’s coming and going, you’ll need to continually keep an eye on your camera settings & the direction you’re facing your dog.
How to Work with Overcast Days

Overcast days can range from very bright, but without the sun really being out, to rather dark, end-of-the-day kind of lighting conditions. You will need to be aware of the conditions and whether they are changing, either becoming brighter and lighter, or darker, and adjust your settings, the direction you’re shooting in and so on, as appropriate. 

A rule of thumb when considering which direction to shoot in:

Is your subject (or are you) casting a shadow?

If so, you need to make sure you are using the direction of the light appropriately. Make sure you’re working through the Light Direction lessons as well. This means:

  • direct light (having the sun behind the clouds behind you) is probably safest
  • side light is difficult but can be dramatic – be especially careful of strong side light when the other side of the subjects is facing an area of deep shadows
  • back-light could be a possibility depending on the height of the sun, whether it’s being filtered, what effect you’re going for, and so on. Just be aware of your highlights, as with all backlight. You may be able to get some interesting white/neutral rim-light depending on where the sun is.

The opposite of course is true on particularly dark cloudy days.

  • Watch your ISO, especially if you are in the forest/around the edge of the forest and may be losing too much light. Do not lower your shutter speed to compensate for a high ISO or you will likely end up with blurry images.
  • Try using a reflector. You can play with the angles to find one that helps add just a bit more brightness to the face, especially if you have a helper
  • You can shoot from any angle around the dog, at least in terms of the sky, as the whole sky is your light source and is omni-directional. Of course if you are at the edge of the forest, having the woods behind you and the open sky behind the dog is not a good idea. 

Examples

Capturing Dramatic Clouds

The key to capturing dramatic clouds is thinking about our depth of field. If we think back to the DOF lesson, we want to consider the effect that a longer lens length might have (more compression) as well as:

  • Needing to expose for the sky
  • Using a slightly wider depth of field for more detail
Exactly how you want to set up these shots is up to you. Maybe you want blurrier, softer, less detailed clouds – in which case a longer lens length and/or narrower depth of field might be what you’re after. Maybe you want to be able to capture the exact cloud formations and sun-rays bursting through, in which case a wider depth of field and/or wider angle lens might do the trick. It depends on the look you’re going for!

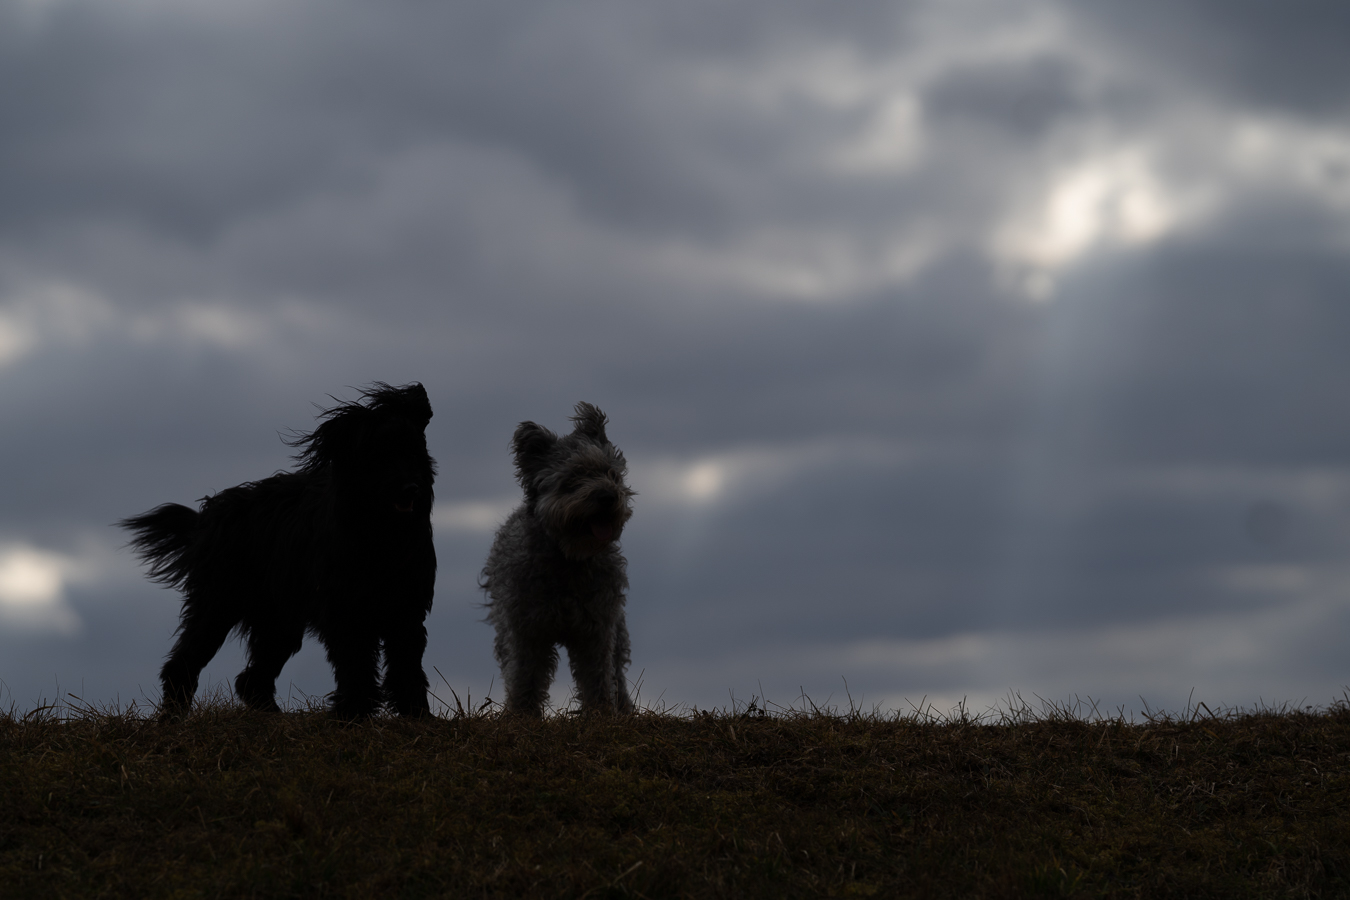
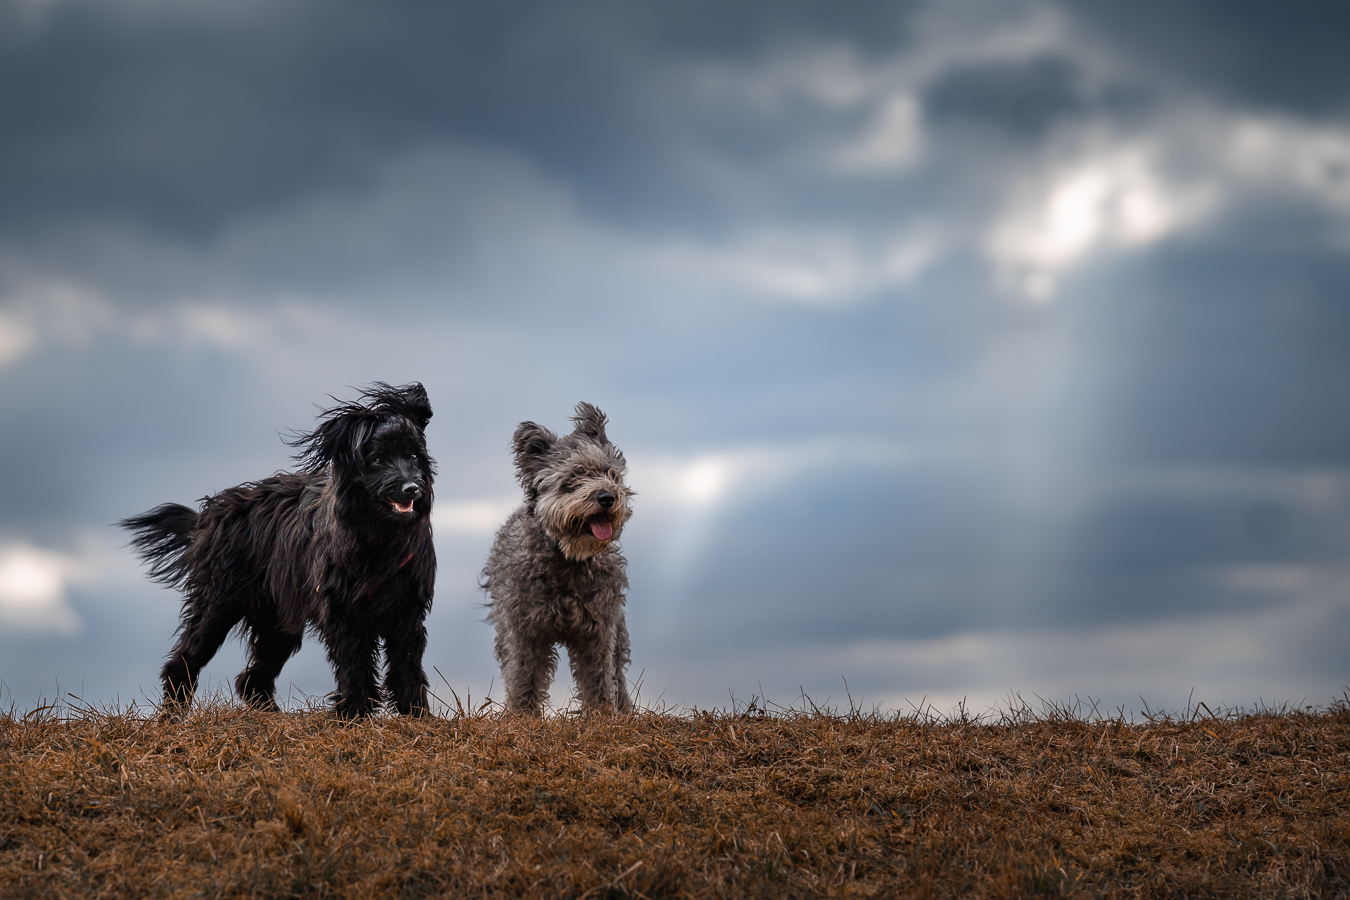
Two examples here. These are totally natural clouds, enhanced a bit through editing (of course) but the light rays were real. The one on the left was taken with my 85mm at f/5.6. The one on the right was at 44mm, f/4.5
DSC06818-2 DSC06818

Here is an example of needing to expose for highlights.  I was originally going to do this image as a silhouette, hence the ridiculous under-exposing of Diliys. But you can see in the before image that I was pretty close to blowing out the sky where the sun was shining through. Whether your camera can handle this is another matter. Having someone hold a reflector to bounce some of the sky’s light onto the dog’s faces here would be a very good idea. 

Also, note how soft and blurry and undefined these clouds are. These were taken with my 135mm at f/3.2.

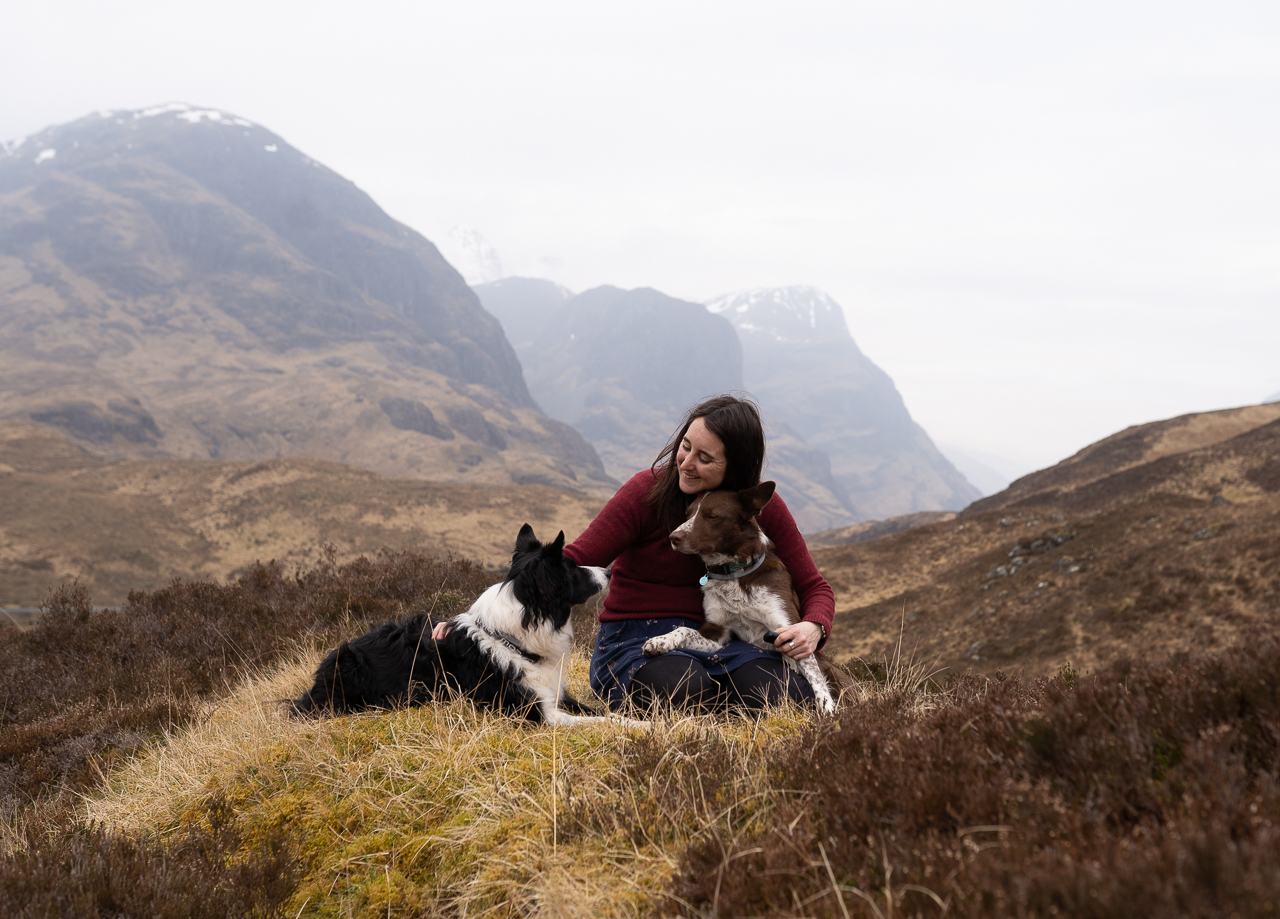
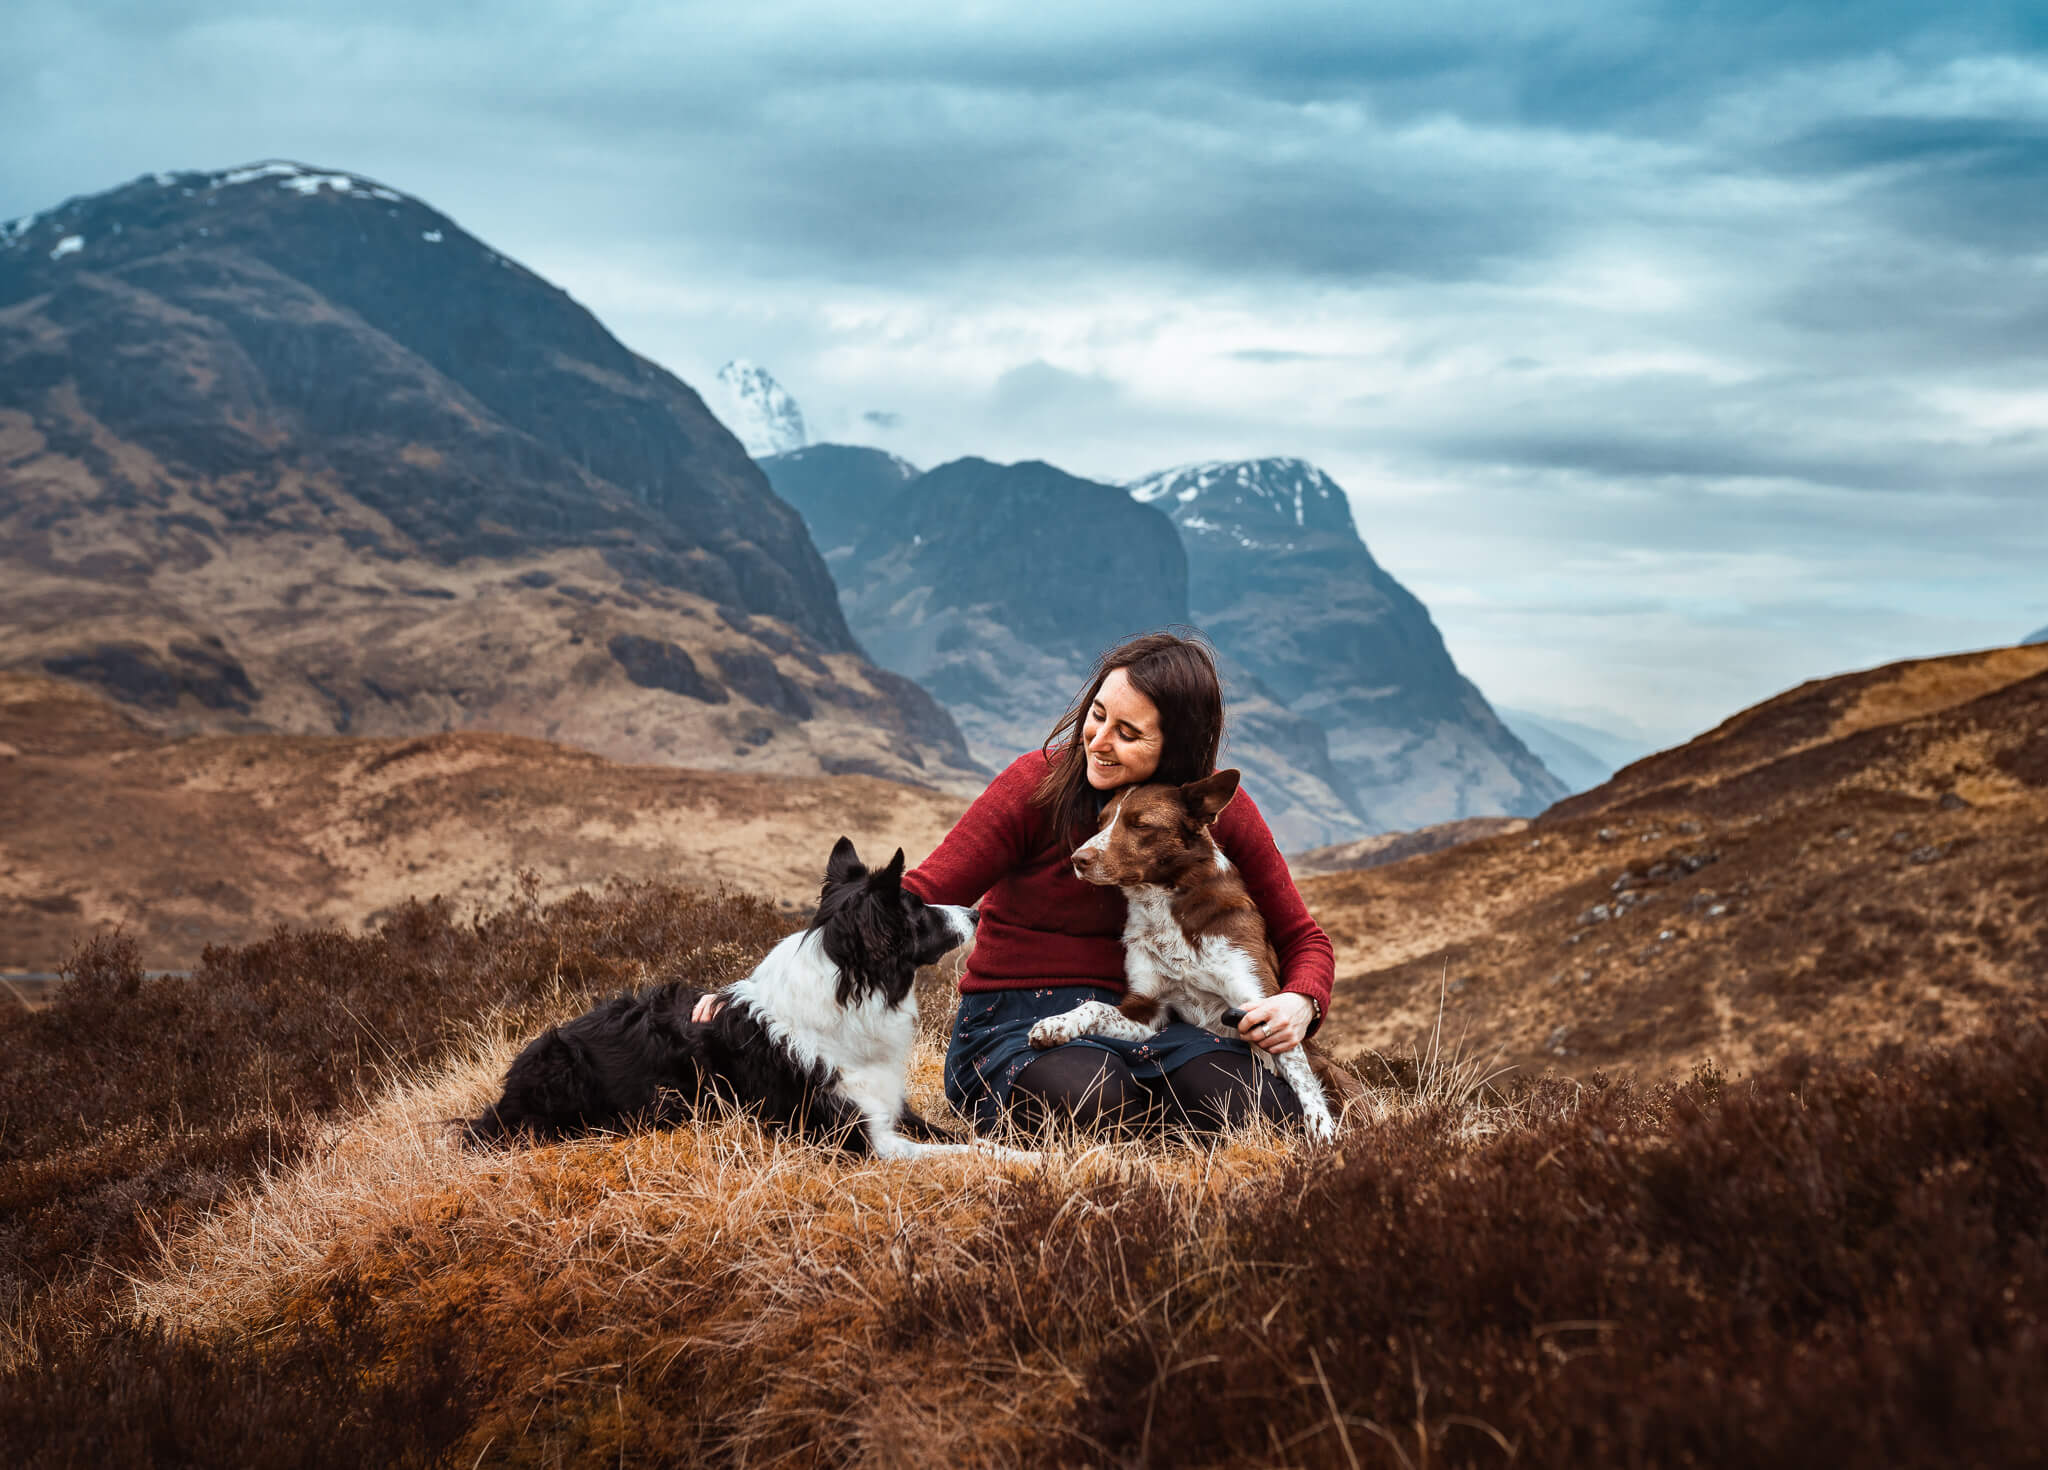
Below are a couple more examples of bringing back details in the clouds (when there were details in the first place!)
DSC04402 DSC04402-Edit
DSC05359 DSC05359-Edit

Sky Replacements

When the sky is a flat, dull grey-white, it does make it pretty easy for any editing software to figure out what’s sky and what isn’t, allowing us to replace the sky with something more exciting.

A word of warning, however. If you decide to replace the sky of an overcast day, I strongly advise replacing it with a slightly more dramatic overcast/cloudy day.

Don’t do this:
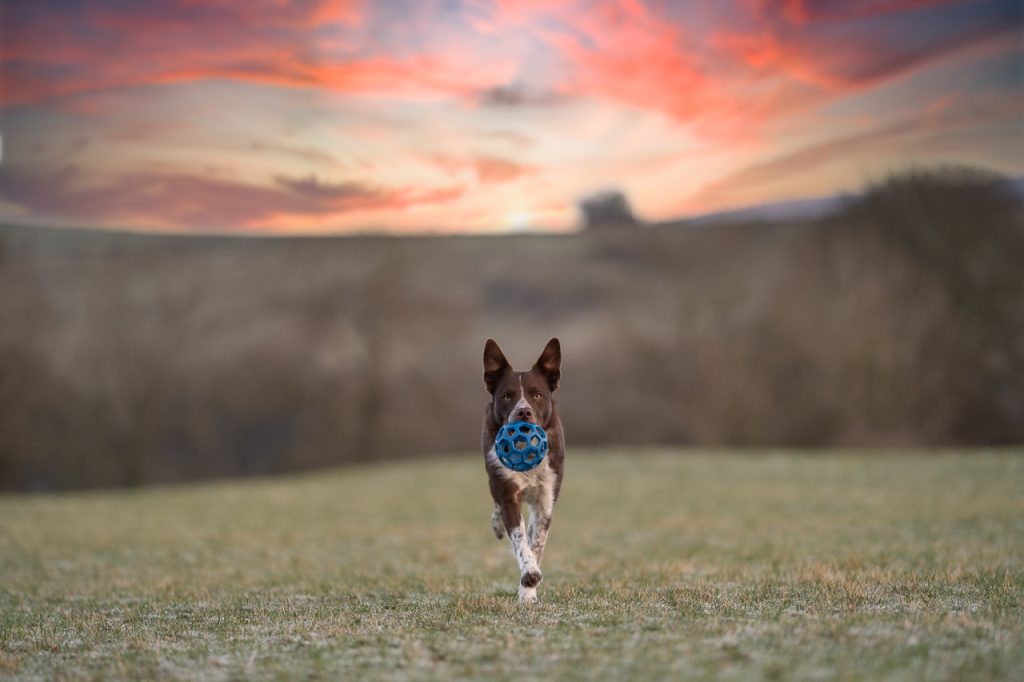
Unless you are pretty confident you can fake ALL the ambient lighting conditions that would go along with such a scenario, eg., what temperature would the grass/dog be? How underexposed should the dog have been to get such a sky and therefore how should he look now that he’s brightened? What temperature should he be? Should there be rimlight? The hill in the background should be in shadow, since the sun is behind it, but how much? And so on. 

Also, blur your sky to the same degree as the horizon. This background is much too in-focus to be believable.

This:
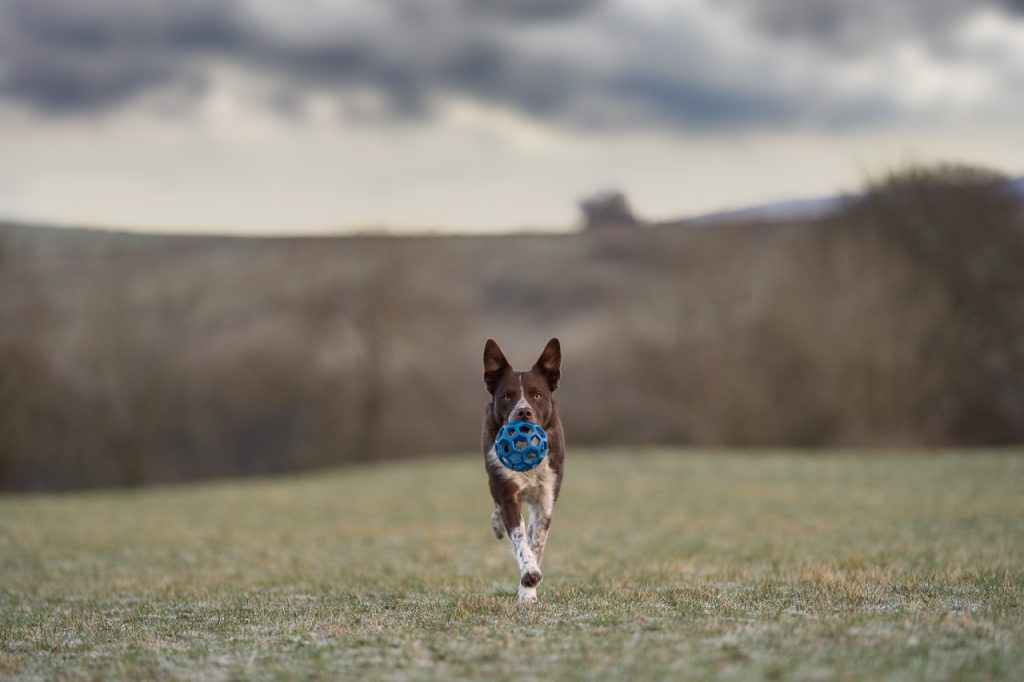
Is reasonably better, considering it was a 5 second job on an unedited image. Here is the original:
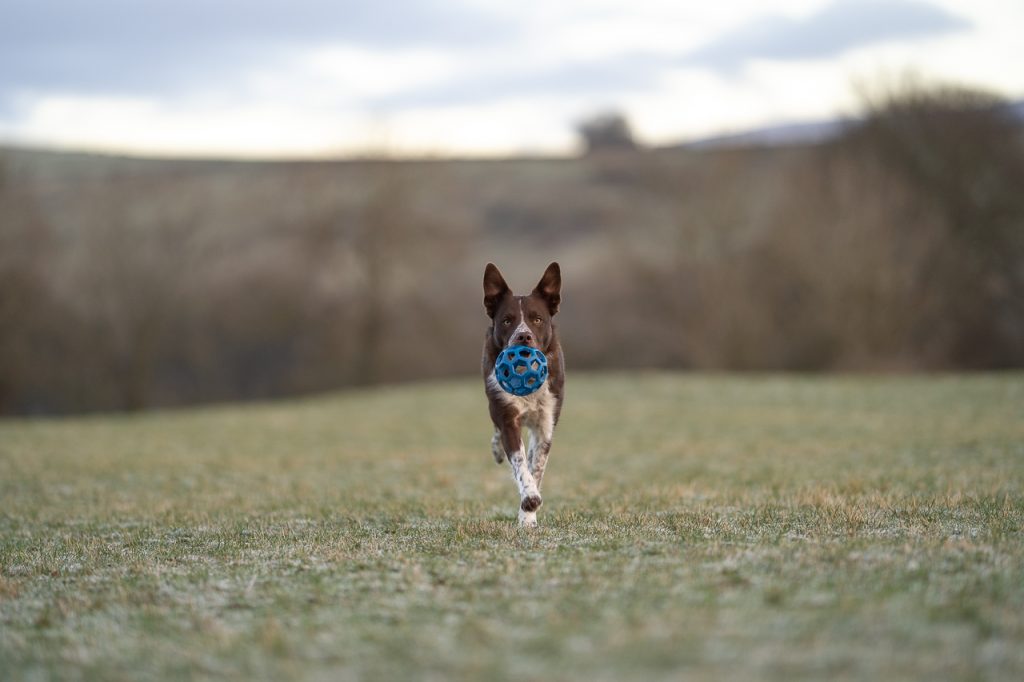
I don’t always recommend sky replacements, and maybe that’s because most of my photography isn’t done with areas of open sky (unless it’s twilight or dawn), so I really don’t have a need to replace them. If you live in an area where you are often shooting with wide open grey skies (or even empty blue skies – then you could replace it with a blue sky that at least has a few clouds in it) then this could be something for you to consider.

Just please keep it natural, unless you’re pretty confident that the sky matches the ambient lighting and so on. 
DSC00615 DSC00615-Edit-Edit
DSC00467 DSC00467-Edit
DSC02222-2 DSC02222-Edit-2

Some images with replaced skies. And actually I’m not sure I’ve ever shared these anywhere (the beach ones anyway) because I’m too self-conscious about being called out for replacing the sky!

In the Loki image, the replacement is quite dramatic, as I’ve completely changed the lighting and temperature. For the image of Journey running, I’ve replaced a flat, empty sky, with another overcast sky, but one where the clouds have substance. And for the last image, it was actually twilight. The sun had just set. The replacement I chose was not that dissimilar to the actual sky at the time.

Old Video

This video is a bit old now buy may contain some interesting or useful information, so watch it if you’d like, but it’s mostly here as a bonus!


Full Sun

Table of Contents

Most of us, when we first start taking photos, are under the impression that more light = better photos.

In some ways, this is true. We need light, and a good amount of it, to take photos.

What doesn’t usually work for us, especially in pet photography, is full, harsh sunlight.

Quick Profile

The sun as a source of light can be both our best friend, and worst enemy in our photos. 

  • Sunlight can be neutral white (most of the day) or warm (~1-2 hours of the day, and end of the day). 
  • In harsh sunlight, there is plenty of contrast (lights are light, darks are usually very dark) and dogs are very shiny (very shiny. Too shiny)
  • There is plenty of light for super fast shutter-speeds so sun + action photography go together very well.
  • Sun can be used for direct light (shining onto the face of the dog) or backlight (behind the dog) but you should be very careful with side-light and sun.
  • Sun in the middle of the day is harsh, and rarely flattering as it’s coming from overhead. 
  •  Take photos when the sun is lower in the sky. If it’s not golden hour, then direct light shining on the front/face of the dog is probably going to work best.
For most of this lesson, I will be focusing on full sun, during any part of the day except golden hour (as we have a separate lesson for that!). 
This photo is side lit - the sun is off to the left. But since we can't see Journey's face, and it's shining on the inside of his body creating some rim light and lighting up his face, it works. If he had been facing toward me...
Crazy contrast from the side-light. Not pretty or flattering at all!

How to Use It

First of all, I recommend that you avoid taking photos when the sun is harsh. If the sun is out, these are your options. Please note, I don’t have any kind of “magic” solution to deal with sun. It is what it is, and you have to make decisions about what you want to do.

Many of my students ask me: “But what if I have a client and we HAVE to do the shoot at midday in the sun?”. Personally, I let my clients know that if they’re booking me, it’s because they want my style of photos, and those photos require very specific lighting conditions. If they absolutely cannot book any alternative time or day in the foreseeable future, then you’ll either need to use some of the advice below, or find a photographer who is happy to take this kind of photo.

Personally, I know that harsh sun is incredibly unflattering, difficult to edit, and never truly represents my work. 

If I absolutely had to take photos on a day when the sun was forecast to be out, my options would be:

  • Taking photos earlier or later in the day, either as direct light or backlight. The light will be warm, soft, and can be blocked by trees, the dog or a diffuser, etc because it’s much lower in the sky. If you can’t wait for golden hour, wait till or start when light is not directly overhead.
  • Turning the dog’s face directly into the sun, with it over one of your shoulders, to avoid harsh shadows. Getting that light evenly on the face is paramount.
  • Finding some shade, either open shade, or in the woods, being careful of patchy shade. Check the Shade lesson for more.
  • Use an off-camera lighting source like a flash or strobe, to counteract the sun. There are a few photographers who do this very well and it’s their style. Big skies, sun-star in a corner, they are using harsh sunlight but overpowering it with flash. 
  • Wait for another day when it’s less sunny. 
 
Full sun can be great for action photos, so if you want to get photos of the dog running around, now’s your chance! 
That being said, directionality is still SUPER important. Get that light shining DIRECTLY on the dog. Avoid light from overhead (eg., at midday) or from the side. 

Benefits

I’m not going to lie, I don’t see many benefits to shooting in full midday sun. 

If you’re shooting later in the day when it’s coming directly onto the dog rather than from overhead, then some benefits can be:

  • More light, allowing you faster shutter speeds for action
  • More contrasts, making action photography easier.

Challenges

You’ve probably already guessed that there’s a lot of challenges to be had here!

  • Crazy contrasts and areas of deep, black, sharp shadows, compared to bright, overpowering highlights
  • Limited direction flexibility. If you’re at a beautiful landmark or landscape, and the sun is coming from the wrong direction, you have very limited options to get the photos at that time, if you want the sun to be directly lighting the dog
  • Golden hour sun can do crazy things to white balance if shining on the dog directly
  • Small catchlights (the sun is far away) and squinting dogs
  • Black dogs can look silver/grey due to their fur reflecting and shining so much light.
  • White dogs can get blown out

Examples

Difficult Sun

Some better examples

Keeping in mind I don’t take photos in these conditions any more unless travelling!

DSC03535

Very late afternoon sun, in the last 20 minutes of sunlight.

DSC09818-Pano

I don't think I edited this one at all as I wanted to leave in the bright highlights and dark shadows. It's an example of "side light", where the light is coming in from the side, rather than behind me (for direct light) or behind the dog (for backlight, which we'll cover in another lesson)

DSC00422

A plain photo with my old camera, basically edited.

DSC01827-Edit

"Side light" - with a beam of sunlight cutting between the trees, and lighting Norman from the side (this is a VERY difficult effect to do right, and without quite some editing)

DSC09630-Edit

HOURS of work went into fixing the crazy highlights of this image, which was taken at about 10am. Another example of "side light" with the light coming in from the side, rather than behind me, or behind the dog.

DSC07137-Pano

Very late afternoon, standing in a shaft of direct sunlight. Image was SUPER warm.

AV7A5312

Facing direct into afternoon sun.

AV7A4892

Lucky for me she turned her face toward the light!

pexels-mareks-steins-1560666

From pexels.com - I'm not sure about this one. The face is actually surprisingly evenly lit without really harsh shadows, but the catchlights in the eyes are a bit strange and the top of the head looks like it's been blown out (too bright)

pexels-joan-montaner-1626219

From pexels.com - face evenly lit... there was possibly some flash involved here though

Sun-flares, Sun-Stars & Aperture

One thing to note is how the aperture you choose can affect the kind of effect you can create with the sun. 

A wide aperture will give you a hazy sun – a glowing ball or blob, as seen in most of my photos where the sun is present.

A narrower aperture will give you a “sun star” if you capture the sun itself in the photo.

This is as close as I’ve come to a sun star at f/5.6. Given that I never shoot at such a narrow aperture it’s a wonder I have anything close! The photo on the right is from pixabay.com and was taken at f/22.

Keep in mind that in order to shoot into the sun, you need to expose the photo appropriately.  This is likely to be quite difficult without an artificial light source as underexposing for the bright sky and sun will make your subject pure black. 

Using the Sun for Drama

I do think there is potential for dramatic, interesting shots which make use of stronger sunlight and even don’t worry so much about blown out highlights, depending on what you’re trying to achieve. Sometimes a dramatic shot that tells a story or makes an impact can be more important than some other aspects (depending on the purpose for the photo. Obviously not if you’re going to be entering it in a competition).

Therefore, as I’ve been saying all along, if you want to use the sun in a purposeful, intentional way, then do that. By making purposeful, intentional choices about the direction of the sun and how that will illuminate (or not!) our dog, what kind of story that tells, how it can isolate just the shape of the dog (as shown below) or how it can turn structures in nature or in urban settings into interesting shade patterns, we can create interesting photos that may set us on the way to finding our style.

Old Video

This video has been replaced by the one above, but there could be some other interesting bits and pieces in here.

Side Light

Table of Contents

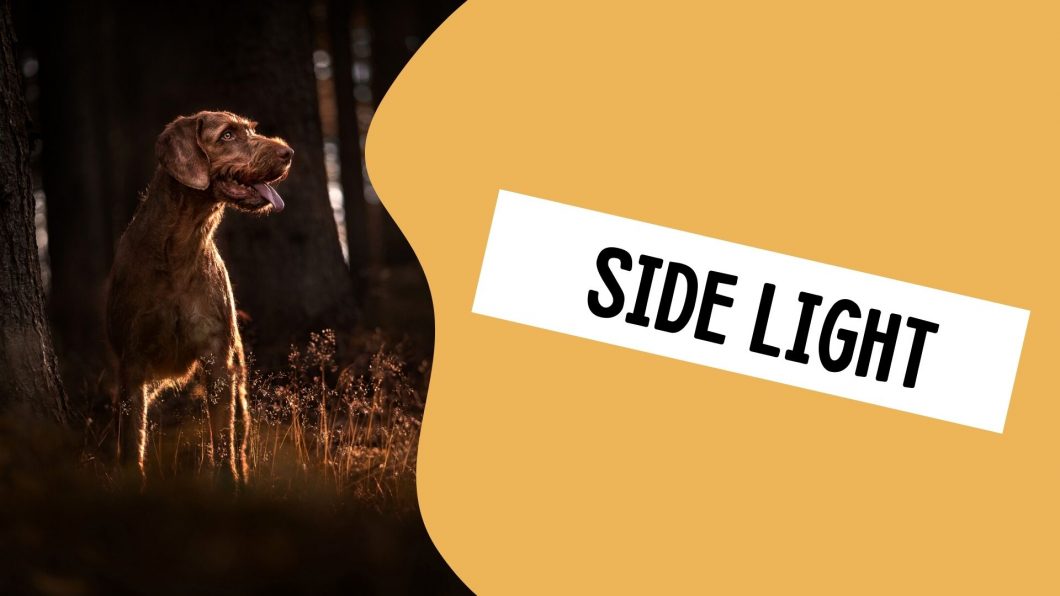
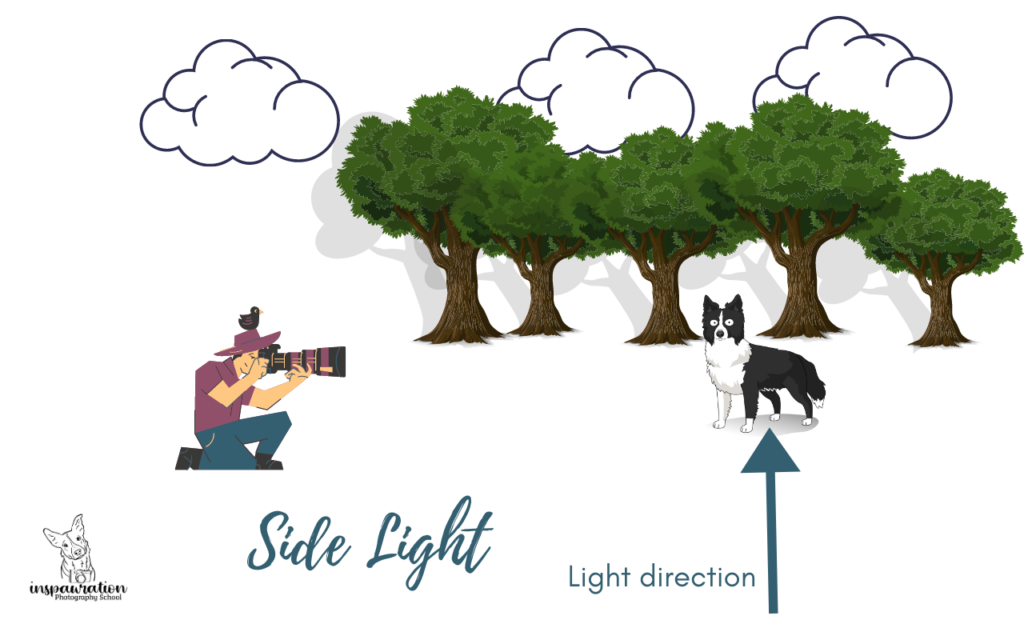
Side light is any situation where the main lighting source is hitting the dog from the side, or at least, is off to one side, rather than falling directly on the dog from behind you, or coming from behind the dog.

This is a challenging lighting direction, but can product interesting effects. 

Side light does not just come from the sun shining onto the side of the dog. It can be as simple as having the dog face you, with a forest on one side of them, and an idea of open sky on the other side of them, so don’t fall into the trap of thinking that side light is JUST about the sun/obvious light coming from the side! It can occur due to the ABSENCE of light as well! 

We must be especially aware of this, as it can be a nightmare in editing, especially if there is some strength to the light.

How to Work With It

I will be up front and say side lighting is probably my least favourite lighting direction in many cases. In the case of stronger lighting, like above, you often have a very shadowed side of the face, which needs to be lightened up just enough to look natural and to see the details. There are of course some ways to work with this lighting direction to product some interesting effects.

  • Have the dog’s face turned into the light. You will often get some kind of rim light then if the light is strong (like Norman’s photo above) which works especially well with side profiles. Turning their face toward the light also makes sure their face is still well illuminated and they have catchlights in their eyes
  •  You could really play with contrasts, emphasising the light side and dark side of the dog’s face, with stronger light and stronger shadow, even in black and white. 
  • Side light works really well for the “standing in a beam of light” photos like Norman’s above.
  • Try using a reflector on the dark side of the face to brighten/lift the shadows. Even a small LED light panel or “light stick” could help just bring a bit of light to the shadows. I’ve done this particularly for photos of the dogs lying on their sides, where the side of their face closest to the ground is very dark. I’ve even used my phone before with the light on! Not ideal, but in this case the ISO was already quite high and I knew that trying to raise the shadows on the dark side would potentially be a disaster. Below are two sets of photos. The first with and without reflector, and the other with and without iPhone light. All are unedited.
    • The key when using a secondary light source/reflector etc, is to gently lighten the darker side of the face, without completely overpowering the shadows so they it look unnatural. Our brains know when something should be darker.
  • Play with the angle of the face. You may find that a very subtle shift one way or another may result in just enough of the face being illuminated.
  • Side light works really well if we want to create a “spotlight effect” on the dog in editing, as the back shoulder and behind the dog will naturally be darker than the front being hit by light. The trick is to make the light on the face work for you.
This photo was technically side light, since Bobbin's body is pointing outward toward a large area of open sky. You can see the shadows on her cheek, which I emphasised in some ways, to help give the appearance of her being hit by a spotlight.

Unintentional Side-Light

Some side light is easy. You’re standing there, the sun is hitting the dog from the side, and you’re asking yourself: why am I taking photos in the sun? and also, how can I make half my dog’s face less shadowed?

Now, not all side light is bad. In fact it can make some really interesting effects if used properly, or if you’re aware of it and making sure to point the dog’s face toward the light… but one of the trickiest things is when you’re unaware that the light direction is side light. 

You can see some examples of this below, where the ambient light was very soft – not strong enough to even cast a shadow – but because of where the dog was positioned, there was no light at all on one side of them.

Here are two photos with the dog looking in a slightly different direction. I have edited them very slightly in Lightroom, not favouring one or the other.

While both have a “dark side of the face” there is one where the light falloff is quite pretty, as it brushes the top of the face and the eye, before the fall-off, where are the other one has the whole half side completely in shadow. 

One of these photos would be significantly easier to edit, because you could use the natural shape, direction and light that already exists, to “shape the light” further and really give a spotlight impression. The other would require a lot of work to “even up” the light on the face in order for it to feel balanced and make sense.

Try Playing with Angles of the Face

As mentioned above, changing the angle of the face and gazing direction can produce different effects. Try taking a few photos, then positioning yourself slightly differently, or getting the dog to look slightly more to one side or more toward you. Depending on the type of light, you could end up with some really interesting effects, particularly if you’re combining backlight – theoretically you could have the sun going down behind and slightly to the side of the dog, making him glow with rimlight.

Behind the scenes

Side Light Examples (good & bad!)

Direct Light

Table of Contents

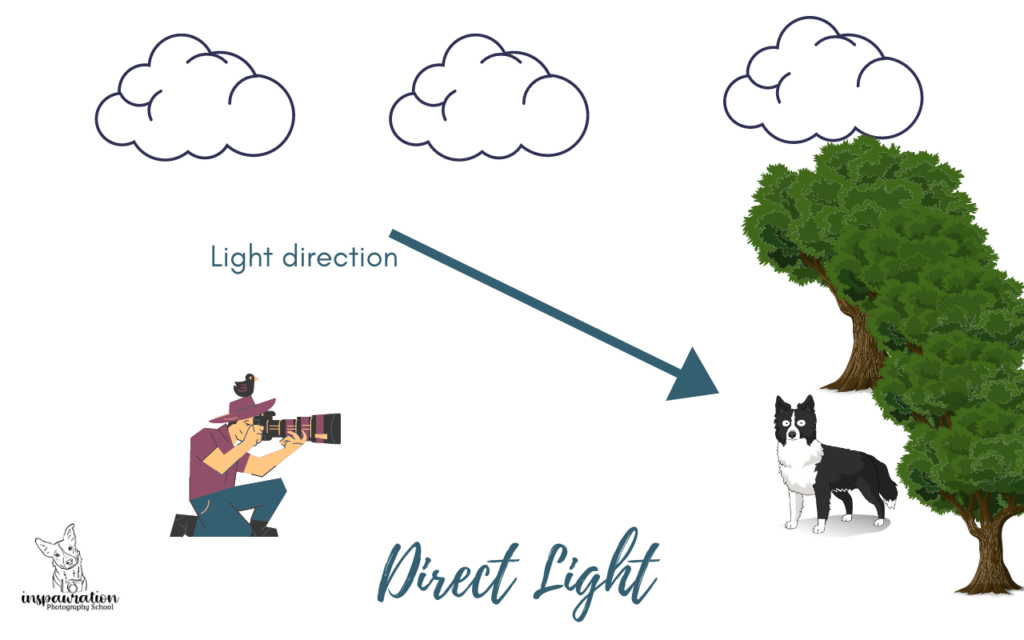
Direct light is when there is some kind of light source shining directly onto the of the dog from behind the photographer (at least, for the purposes of this lesson). 

It can be soft, or harsh, depending on the light source, and is very important in backlight or low light situations.

Using Direct Light

It is advisable to almost always have your dog facing some kind of direct light (with the exception of side-light photos). 

With our photography we want:

  • The dog’s face well exposed, with detail in the fur (especially important for black dogs who may lose data in the darkest areas if not careful)
  • Bright catchlights which will draw our attention to the eyes.
  • To be able to see the dog (eg., they aren’t completely black and simply fading into the background).

Therefore, there needs to be some kind of light falling on the dog. This can be from the sun, or simply by positioning your dog in an area of open sky such as a field, a clearing, a road/track, or at the edge of the woods. 

Examples

The examples below have either direct light as a primary or secondary lightsource (as in the case of backlit photos). 

Remember that the “light source” could simply be the sky. Just because you can’t see a shadow or evidence of the sun, doesn’t mean there wasn’t a light direction – that being said, light direction is much much more flexible if the light is soft, like on overcast days. When there are no shadows being cast, the entire sky is my light-source, enabling me to position the dog pretty much anywhere.

In the case of being in the woods, I am generally always finding locations where there is some open sky overhead/behind me, to act as the light source on the dog. In this case, the light IS going to be very directional, as it’s going to come from the small area of open sky through the trees. 

But if my dog is getting hit by light, how can I create a deep dark mood?

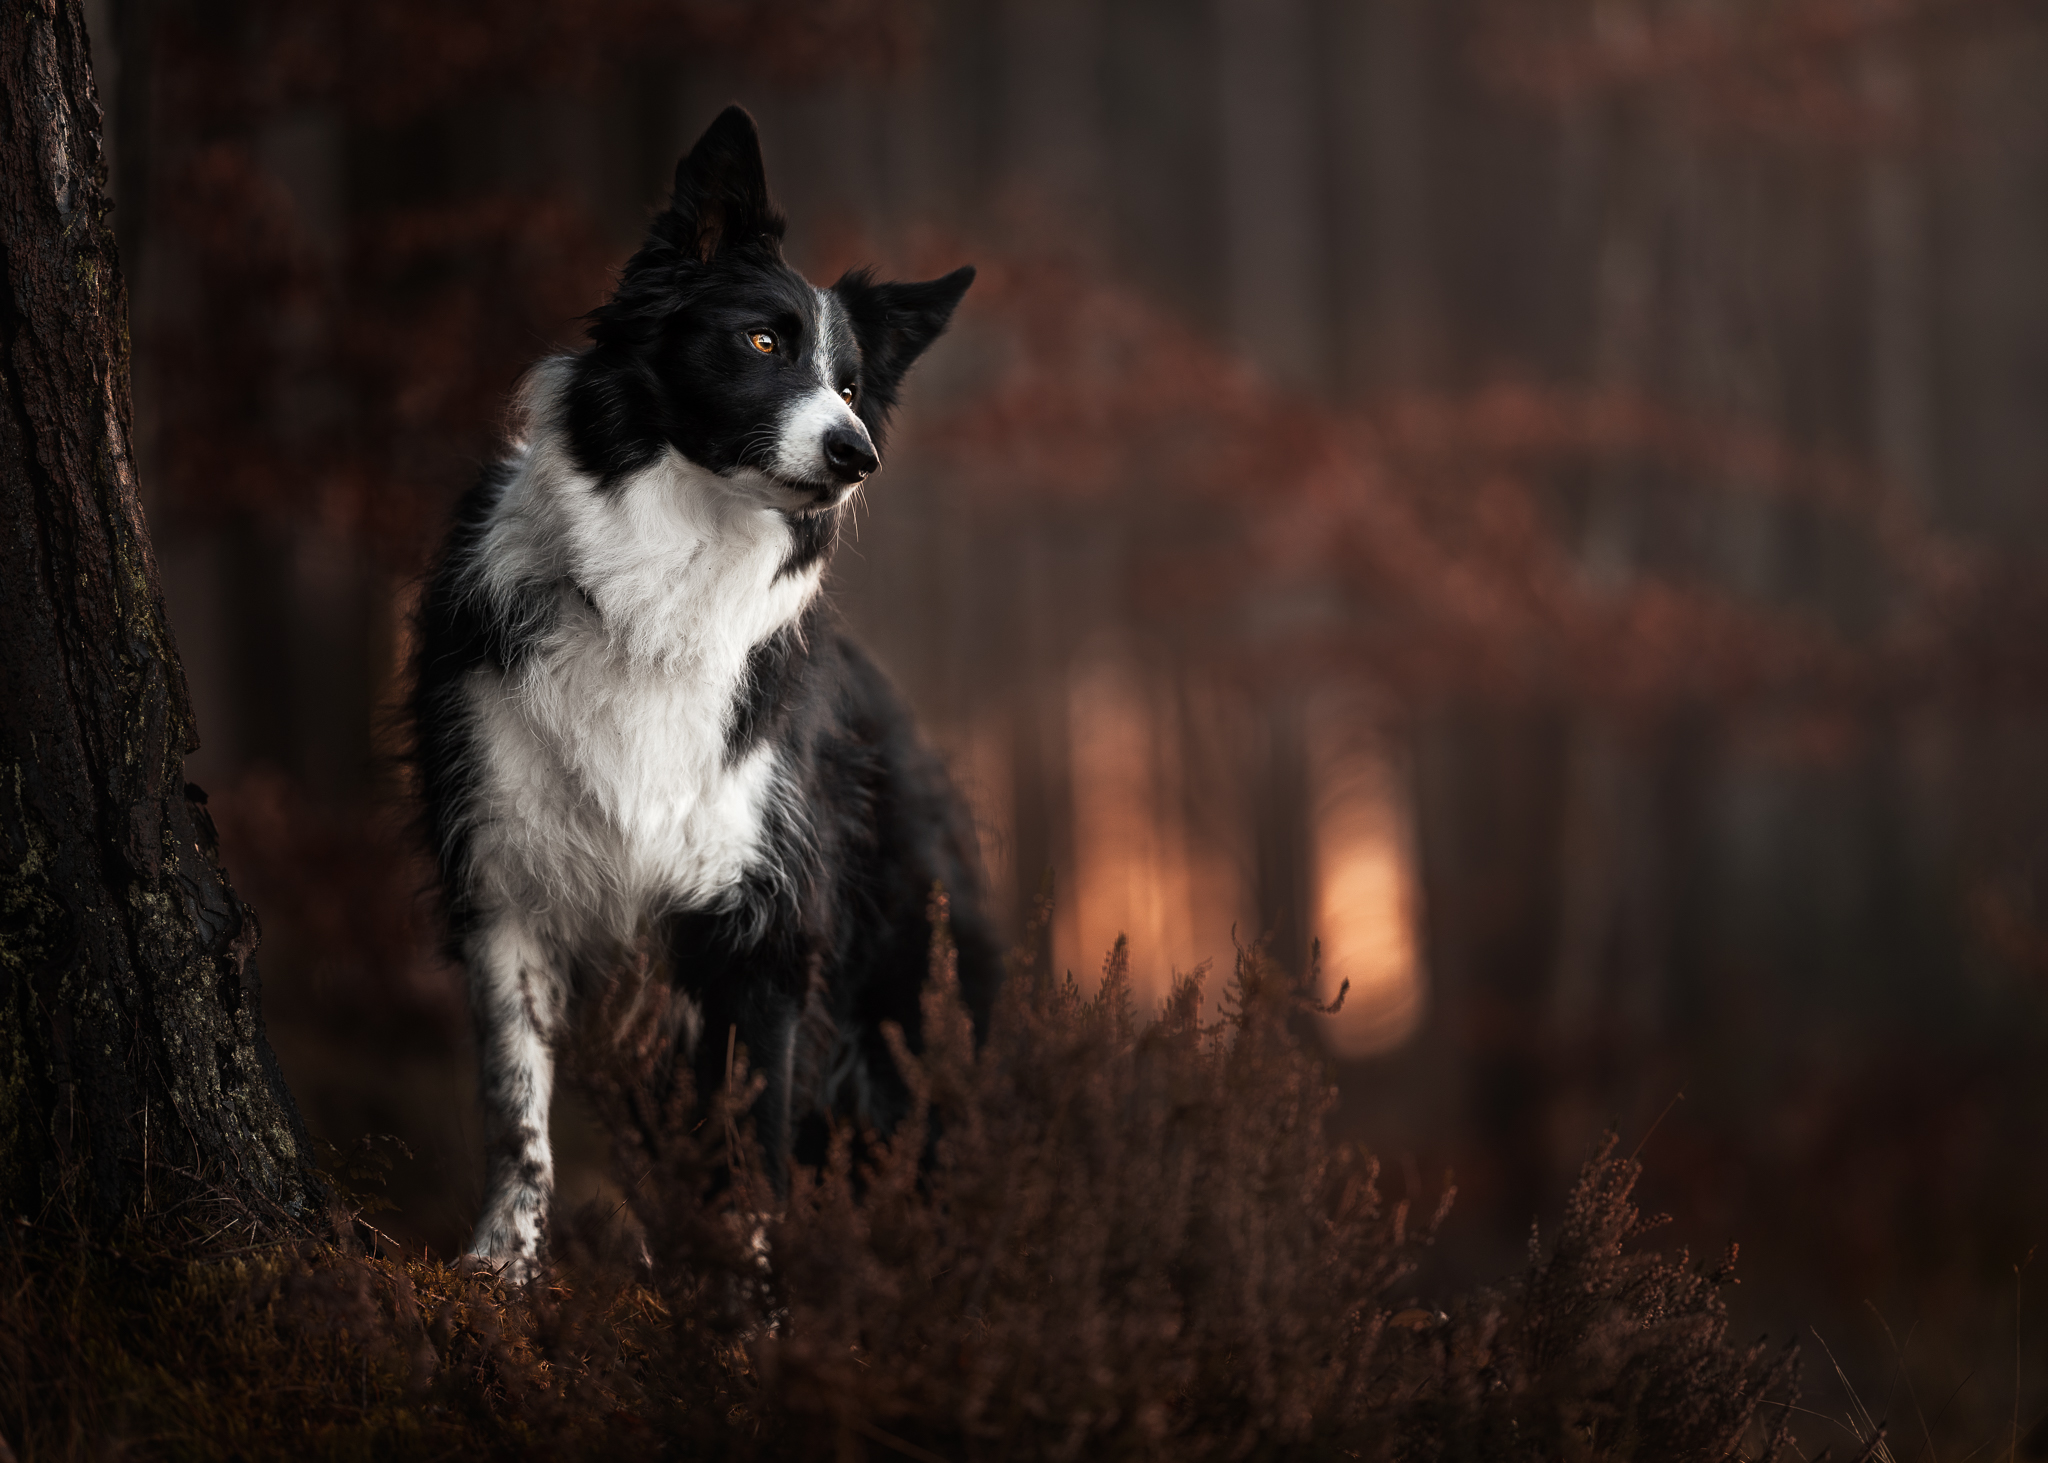
Each one of these photos was created either: at the edge of a track/road, at the edge of a tree/bush, or in a clearing.

A deep dark mood is not about how dark your dog is when you’re taking the photo. It’s about the absence of light around the dog. In these cases above, the images would have been pretty much perfectly exposed or slightly under-exposed for highlights. Images like these are likely to be much more “correct” than backlight

If photographing in stronger light (basically, any time you are casting a shadow on the ground) be watching out for shadows on the dog’s face if it turns its face at an angle so the sun is no longer hitting it directly.

Next time you’re out for a walk, or scouting a location, begin to notice two things:

  • Very subtle shifts from light to dark throughout the forest. This will begin to train your eyes to see brighter areas like small clearings in the tree coverage overhead
  • The tops of the trees. Don’t always be looking down at the location/potential photo spot. Look up! Is there enough sky in front of the dog for the lighting conditions? Especially cloudy days may need larger areas of open sky to get enough light in.

Using direct light and looking for open skies does not mean you have to be in the middle of a wide open field for every photo. I’m clearly not in the middle of a field – ever. Having a field behind you, however, can ensure a lot of light on the face. The main thing is to be looking for areas that will give your dog a good amount of light – especially soft, flattering, even light – on the face.

Using a Reflector

One thing you can consider in darker forest areas is using a reflector disk. This is usually easiest with another person who can hold it. 

There are a number of ways you can use a reflector. Most of them come with five different options – silver, gold, white, black and a diffuser. Some have other options like silver-gold. 

You can use the silver side to help fill some shadows on the dog’s face. I’ve found this especially useful with certain poses where one side of the face is in quite deep shadow, or if I want the dog positioned in a certain spot, but this means there is more side lighting due to the forest being on the other side of the dog, for example. 

By holding a reflector on the darker side of the dog, it will bounce light from the open sky onto the dark side of the face! 

It may take some playing around to get the perfect angle for your helper AND the angle to hold the reflector at. The main problems I’ve had using one have been: inability for it to stay put when I’m by myself (I suggest not getting a circular one if you’re usually by yourself. The rectangular-type ones can probably be leant against a camera bag or tree and they won’t roll away) and weird shaped catchlights at the bottom of the dog’s eyes, if trying to fill shadows from below.

Example with/without reflector

Here are two images taken in a little clearing within a very dark woods. There was not a lot of open sky overhead, but enough for some photos… I had an idea of one of my dogs (I wanted Journey but he’d decided the reflector was evil) to be lying here in this little forest glade. Very relaxed and whimsical. 

But I noticed that when their face was toward the ground, it was SO dark. There was no catchlights in the eyes, no light on the face at all. Having done this kind of photo before I knew that trying to lighten this dark side of their face often looked fake, if it worked at all. 

So I grabbed the reflector and angled it so it would bounce light up onto the underside of their face. Even just with a very grey sky and a small opening in the trees, the light was really bright. With a helper, I could have brought it even closer to make it stronger, and make sure it was angled perfectly where I needed it.

But I think you can see from the photos below the difference it can make. The settings are the same, everything is SOOC, but how much better can you see Loki’s eye in the 2nd photo? Plus, there’s much less of a chance that I’ve lost data in the very black parts of his face. 

Obviously a reflector won’t work when we’re far away from our dogs and getting more of the scene in the photo, as the reflector will start to be in the frame too.

But it can be a handy thing to have for getting double the use out of direct light in these low-light situations. 

Backlight

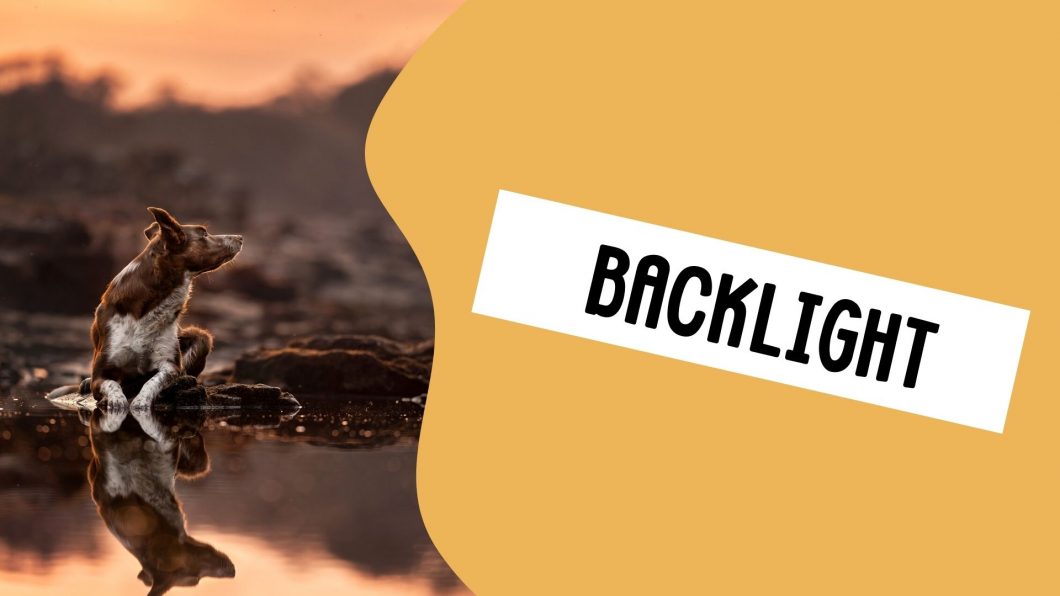
Backlight is any time the main light source (eg., sun) is somewhere behind the dog. 

While this is my favourite effect when it comes to lighting, it can be challenging to get right, and there are a number of factors to consider when setting out to capture backlit images.

Table of Contents

What is backlight?

Backlight is achieved when there is a reasonably strong light-source somewhere behind the dog. I suspect there are some camps who argue that “backlight” is only when the dog is surrounded by rimlight (eg., the rays of the sun are directly shining through the dog’s coat). However personally I like to think of it as any time the main light source (eg., the sun) is or was somewhere behind the dog – although not necessarily directly behind. 

You could therefore also have backlight if the dog was standing in a cave and you were capturing him silhouetted against the cave mouth. The main source of light (sky) is behind the dog. 

This is an obscure example, but I think it’s important to differentiate between backlight photos, and photos where there is some sky bokeh in the background. For example:

One of these is backlit, and one has hints of the sky in the background. I want to point out here that I don’t generally fake the warm tones of my actual backlight. If my background bokeh is warm, that’s because it was late in the day and the sun was somewhere in the background with a warm temperature. 

For me, backlight involves:

  • warm bokeh spots in the background.
    • The sun may have actually set, or be really hidden behind some trees, but its warmth is still coming through gaps in branches and leaves
  • some rim-light
  • highlights which aren’t blown out
  • soft even light on the dog’s face which I often manipulate to come from a “natural” direction, based on the photo

How to Do It


First, remember you are working with two lighting sources:

  • the sun or stronger light BEHIND the dog. For this lesson, I’m going to assume you’re working with golden hour sunshine.
  • the softer ambient light of the sky. 
 
The Sun behind the dog is going to be:
  • warm in temperature
  • harsh and extremely strong if not filtered in some way (by using trees, bushes, etc), not by using filters on your lens
  • directional: low and behind the subject

The ambient light that you’re HOPEFULLY getting on the dog’s face will come from the sky. It will be:

  • much less directional, but could still result in side-light if one side of the dog is blocked by the forest, a tree trunk, bush, etc.
  • very soft, very flattering and not very strong. You will need quite a lot of it to really counteract the sun
  • cool or white temperature
The important thing to note is that these light sources must be balanced. Which means one isn’t overpowering the image so much that it’s unusable. Unusable for me in this case (generally) means either:
  • the highlights are completely blown out, the background is a mess of white blobs with no data…. AND/OR….
  • the dog is so crazily underexposed that brightening him up is going to result in a weird low-contrast, low-data, noisy, flat appearance.

This is the challenge! One of the main ways we can solve it? 

Choice of location!


Location in Backlight

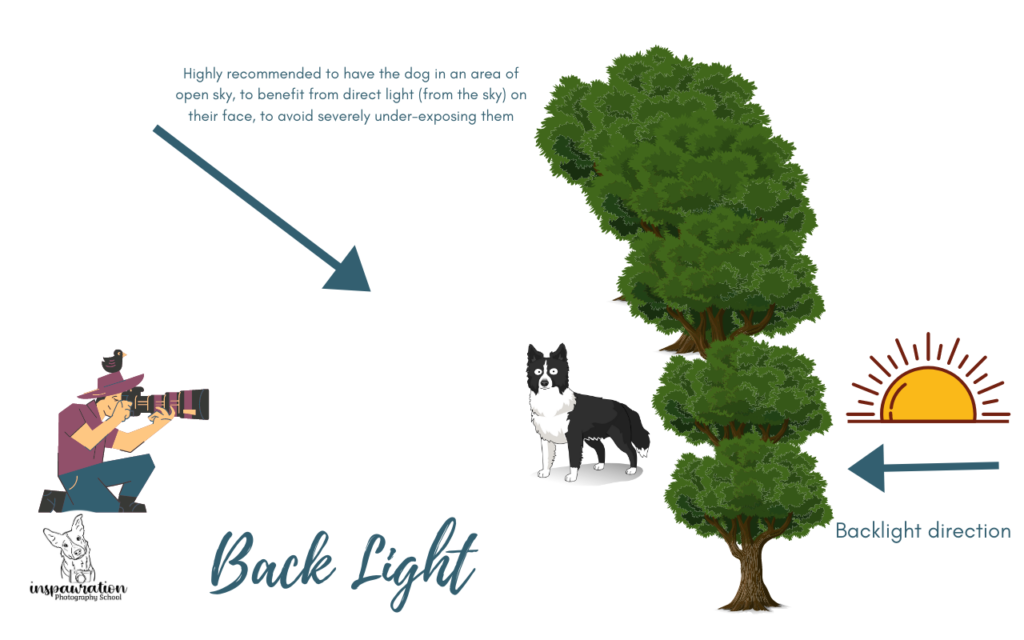
Obviously this is somewhat more of a challenge when you’re shooting backlight, as there is a very STRONG light source behind the dog, and a much weaker light source (the sky) in front of the dog. 

This means that in order to expose for highlights, we may need to lower our exposure quite a lot. In order to do that and not have a completely underexposed, black dog, who is going to be nothing but noise and grain when you attempt to edit him (especially depending on your camera), you need a good amount of light on the dog’s face.

You will need to be strategic about your locations. Ideally:

  • Good tree/bush/leaf coverage behind the dog, to filter the sun through so it’s not too strong
  • Open sky overhead or behind you, to give enough light to brighten the dog’s face.
    • Try finding a place on the edge of the woods, at the edge of a clearing, at the edge of a track or path… even just a clump of bushes in an open area will work! The important thing is filtering behind, sky in front.
You will try and fight me on this. You’ll think you can get away with doing backlight in the deep dark woods. And while you and your camera MIGHT be able to handle it, what I’ve found through a LOT of experimenting and taking and editing photos is:
  • Without enough ambient light on the dog, you’ll quickly lose a lot of detail
  • You won’t get nice catchlights in the eyes
  • The quality of the image suffers pretty quickly if they’re severely underexposed.
  • It takes a lot of skill, time, and effort to edit a severely underexposed photo and to make it look natural.
  • Be prepared for noise if you’re severely underexposing
  • It takes a lot of time, skill and effort to fix blown highlights if you decide not to severely underexpose.

Take it from me and my hours and hours and hours spent trying to “cheat the system” and take photos in locations with very little ambient light and a lot of backlight…

it’s rarely worth it.

Choose locations where the sun is filtered… and there is a good amount of ambient light on the dog.

As I say in the video… the stronger the light behind, the more open sky you need. The more strongly the light is filtered…. the LESS open sky above/behind is needed… but you can’t really have too much!

These examples show the power of filtering light.

The photo on the beach on the left had the sun in the frame. It was late in the evening, nearly set, but completely unfiltered. Even with a TOTALLY open sky behind me and all the ambient light of that bright sky, I still blew out the highlights even with underexposing the dog so much that she was pure black.

The photo on the right, on the other hand, had the light very strongly filtered through trees and leaves in the background. This meant I didn’t have to underexpose Journey too much at all, even though we were in the woods and I think there was just a clearing overhead. Nowhere NEAR as much ambient light as on the beach. 

Some examples of too-dark locations or too strong light

Most are SOOC except the ones that obviously aren’t. Which shows that they CAN be edited, but I feel that they’re always lacking detail and contrast, and it’s really hard to get the light looking super natural when it was so dark. 

You can see many of them were when Journey was younger, before I’d learnt my lesson about these difficult locations!
Example Video

Location of the Sun in your Photo

How and where you position the sun and your dog in your photo will give you different effects, and will create different challenges, and different looks in your photos.

Sitting your dog in a shaft of sunlight will give him beautiful, strong rim-light.

Letting some light leak into the lens will give you lens flare or haze, which may or may not be desirable.  

It’s very common in human portraiture (weddings and so on) to take photos with the open sky and sun behind, and to just blow out the highlights in favour or exposing the person correctly. 

This does create a very bright and airy mood, but it doesn’t seem that common amongst pet photographers, where it’s very taboo to blow out highlights. It’s definitely not something I do, as I often avoid open skies altogether, as they’re white, bright, empty, and can overwhelm our subjects.

Open Background

Make sure you click to enlarge 😊 Feel free to right click + save to keep these somewhere safe.

Good & Bad examples

Large Gaps Between Trees

Sun Just Out of the Frame & Filtered

Sun Directly Behind & Filtered

A few of these use the dog to block the sun

Sun to the Side (but in the frame) & Filtered

Sun is very filtered

The sun is really fighting through dense foliage, or it set, so it’s the left over light creating the bokeh rather than the sun itself. This starts getting into “twilight” territory. Given how many examples I have for this particular situation, this might be my favourite way of shooting backlight!
Avoiding Light Haze/Too Much Backlight

While it’s nice to have the sun in the background, it can cause us trouble when it’s simply too strong (It’s a bit difficult to underexpose for the entire sun), or it’s leaking into the lens and making everything hazy and lose detail.

 It is extremely, extremely difficult to bring back detail on contrast in photos that have become “washed out” due to extreme light leakage onto the lens.

We need to be especially careful of this if we are doing self-portraits and the sun moves lower, and begins to creep into the lens.

Notice on the photo of Peach and Sophie especially, how much contrast and detail is lost in the first photo, compared to the second one. 

Can you see the lens flare begin to creep in the corner of the 1st image? It’s causing issues with my shutter & sensor and even though it’s only a SMALL amount of haze, it’s starting to wash the subject out a bit. If the light was more extreme, it would be even worse. 

Luckily there are a few things we can do to minimise the strength of the sun in the background, to make it easier for us to expose the image as we need to, avoid blown out highlights, and not have extremely bright areas of the sun in the background.

  • Use your lens hood!!! This is literally what it’s for.
  • Change your angle slightly so the sun is a bit more out of the frame
  • Find thicker trees/bushes to better filter the light
  • Change the angle of the lens so there’s less light leaking in
  • Block the sun with a tree-trunk (it may creep around the edges but that isn’t so bad)
  • Block the light with a person (obviously this only works if you have a helper, and if you can position them to block the sun without being a giant blob in the background of the photo)
  • Block the light with the dog! This takes some clever angles, and sometimes even then the background around the dog will be too blown out

A Note on Light Haze

One thing to note is that it’s very trendy to add haze and fake light haze to images at the moment. Personally, it’s not my favourite thing in the world. I will add a very small amount of fake haze to an image in order to add a little more separation from a subject from the background.

For example:

The first image is the (basically) finished version… 2nd image I added the sun behind the dog (note where your eyes get drawn) and in the 3rd image I created some crazy warm backlit glow… that doesn’t match the rest of the lighting in the scene, the dog’s fur, or anything else.

The main problems I have with adding a lot of haze or fake backlight (and this is a stylistic decision, so you need to make your own choices) are:

  • I’ve seen it done very badly, from places where the sun/light source clearly wasn’t, with glowing balls of light coming from the middle of a bush?
  • It often looks unnatural, as that much haze should spill onto the dog (see the hazy examples below) but the dog doesn’t even have any rim light?
  • It’s a trend, and I’m not such a fan of trends 😉
  • To me, it can be very distracting when there is nothing but bright haze, or glowing balls of light in the background.
    • if the glowing ball is somewhere BEHIND the dog’s head, it really lead’s the audience’s eye behind the dog, and gives us no way to get back to the front of the dog and to their eyes again. You can’t “flow” through the photo.
  • They can wash out rich colours

As I said, it’s up to you whether/how much you use these effects.

Certainly they are popular on social media – it seems as though the more fake light you use, the more people like your work. So, we come back to considering our photography style and what goes into a style. Namely rationale (what is the rationale here behind adding fake flares/haze? Is it to get more likes? If so, that’s perfectly valid, and you should go for it), and aesthetic choices (do you find it pretty and it doesn’t conflict with your rationale. Eg., if your rationale is to draw attention to the dog, does this have the opposite effect?).

Here are some examples of fake haze not done very well (in my opinion!). The first image is the original/my edit (which does have a tiny bit of haze behind the dog!)

And while these examples might seem extreme, I’ve seen all of them, more than once. The last one of Journey in the green makes me laugh though, but I’ve seen it so often. Somehow these big bushes are producing their own sun. Amazing.

A Note on Underexposing vs. Blowing Out Highlights

I have been experimenting with very slightly blown out highlights recently, as I noticed with some pet photographers that they will blow out, then quite strongly blur, the bokeh – therefore exposing the dog the correct amount.

Is it a good idea to do this? Should we ignore the advice about exposing for highlights?

I would say yes, and no.

Here are two images where I blew out the highlights in order to better expose the dog. It’s more obvious in the edited version of the first image than the second one. 

In my opinion, whether you blow out the highlights in this situation depends on:

  • Can you edit well enough to hide/fix/cover up the blown highlights? (I’ve taken parts of the background and duplicated it over the sun before, Like in Loki’s picture above, for example, where the softer bokeh was copied & placed over the sun spot).
  • On the flip side, are you not experienced enough at editing yet to brighten a severely underexposed dog, and therefore your image would be better to be brighter originally, than for you to struggle to edit it and end up with the dog still very dark and underexposed? (This is totally valid by the way)
  • Is there a reason to blow out the highlights? (eg., if you don’t, the dog will be too underexposed to save, or your camera is really bad at saving data when you lighten in editing, so it’s better to get the dog correct in editing)
  • Can you just not be bothered dealing with brightening the image a lot in editing and would rather just not care about blown out highlights?
Whatever the case, there are some perfectly reasonable reasons that you might want/need to blow out the highlights. Just know why, and be making those decisions consciously. 

Remember

This is one of the biggest and most important things you can remember. Many of you will ignore it and try and do your own thing later (I know I did, when I was learning). It is so, so difficult to take backlight photos in the middle of the woods.

I won’t say impossible.

But make your lives easier and your photos better quality and find a clearing, a road, the edge of the woods. 

Get as much light on the face of the dog from the sky as you can.

I repeat.

Get as much light from the sky on the face of the dog as you can.

This does not mean you need to be taking photos out on a field, to make use of the wide open area of sky. However, as someone who tried to “prove the lesson wrong” be continually attempting to take photos in the middle of the woods with strong backlight, and dealing with weird noise issues, loss of detail from having to severely underexpose then brighten in editing, let me recommend that you avoid all that heartache and just stick to areas with open skies behind you/lighting the dog’s face. Many (mannnyyyy) of my photos of baby Journey have a lot of noise/grain issues due to being determined to take photos in the middle of the woods, with backlight.

Just don’t do it.

Get as much light from the sky on the face of the dog as you can!

Panoramas & Fixing Composition

Table of Contents

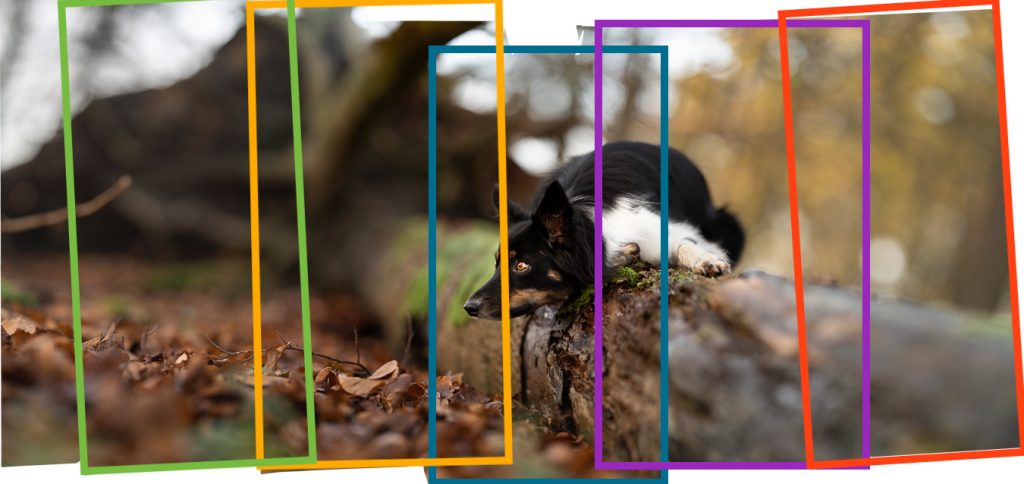
While it’s best to focus on getting your composition correct in-camera, there are times where we may need additional parts of the scene that we didn’t capture (for example, during candid shots, if the dog held a majestic pose facing an unexpected direction, and we didn’t give them enough space to look into!).

The steps below will also help you if you were photographing a dog and he moved off, and you realise (before you refocus or move from that spot) that you didn’t give him enough room above or below him.

 Learning to recognise and be able to take steps to fix these situations will save you a lot of heartache later in Photoshop!

Panoramas

When I talk about panoramas here, I’m not discussing the type you might be imagining; long narrow photos with broad horizons, showcasing a landscape. 

Instead, panoramas can be an interesting way for us to get a much higher-resolution, higher-detail portrait of our subject as we can be much closer to the subject, but still create an entire photo with context, gazing direction and so on. This isn’t a technique I advise you to use all the time as the files end up VERY large, and you have to do more work to stitch them together properly – Lightroom isn’t always the most reliable tool. 

However, they work particularly well if you are in some kind of smaller space, eg., if you were to go any further backwards you would fall off a cliff/into some prickles/be stopped by a rock wall (all of these things have happened to me), or if you know your client wants one specific photograph and will be ordering a large-sized print of it.

I have also used panoramas in the past before Journey had a solid stay and wanted to do a photo with him and Loki. I only had my 135mm lens then, but I had to be very close to the dogs as Journey would break his stay. So, for a photo like this:


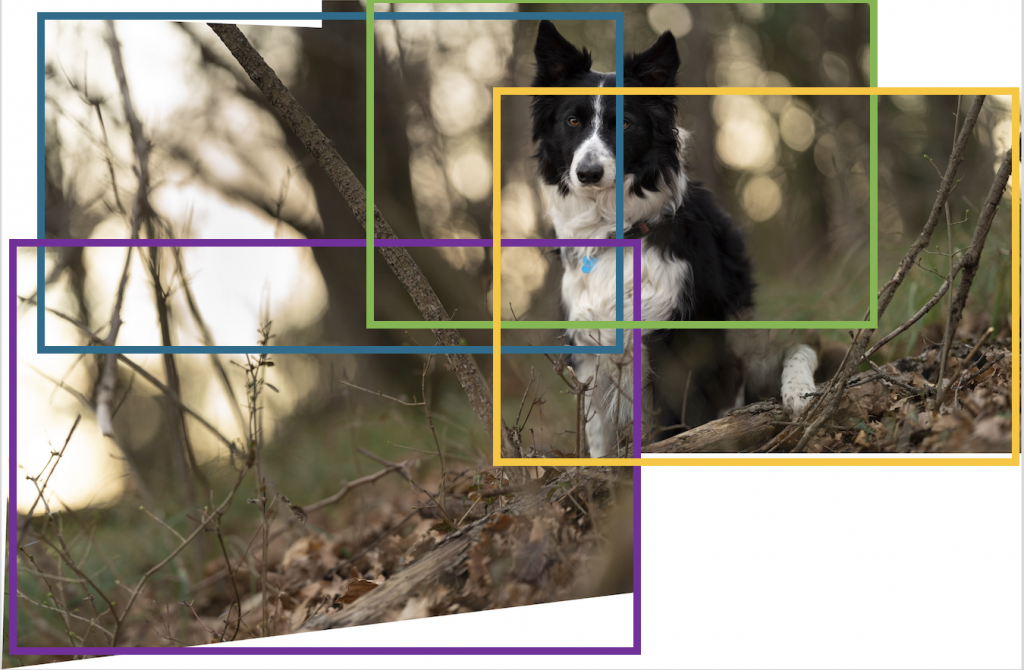
It was made up of several individual parts:

Journey is missing from this version, as this was the Panorama that Lightroom automatically created. I masked him in once I had edited both this photos and the one below which shows Journey to have the same WB, global adjustments, etc, and brought the photo into PS.

Keep in mind that this photo is a bit old now, and I wouldn’t take quite so many additional photos especially to the left of the frame, but for me this was a new technique at the time, so I was still getting the hang of it!

If you look at the third photo in the gallery above, you’ll notice that Loki was sitting on his own by then. Journey had wandered off, but because I HAD a photo of the two of them together (even though Loki’s face is out of focus in that photo), I could merge the two easily in Photoshop later. 

Also, you’ll notice that Loki had to be cut into three parts – upper, lower and his foot/log. He just wouldn’t fit in the frame with his pointy ears when I had to be so close for Journey! By taking a panorama I was able to fit all of him in!

How it works

I recommend being as close to the dog as you can so that the entire dog is in frame. Once you’re skilled at this you can take the dog in pieces (eg., head in one frame, lower body front, lower body back, upper body back, and then the surroundings) but I don’t think this would be necessary unless you really needed a HUGE resolution image. 

How you structure your panorama will depend a bit on whether you need “gazing direction” or just some additional space around the dog. 

For additional space: 

  • First fit your dog in the frame, or as much as you can
  • Then, without refocusing or changing your position (so this may only work when you are using back-button focus. DO NOT press the focus button again! Just leave it where it was focused on the dog) take a series of photos (it doesn’t matter if the dog is in or out of the frame at this point:
    • one above the dog
    • one below the dog
    • one to the left
    • one to the right.
  • Make sure that each photo overlaps. This is really important not only so Lightroom can join the pieces together (if this is how you choose to stitch the parts) or so that you can easily mask the parts in over the top of one another. 

Building an image with gazing room

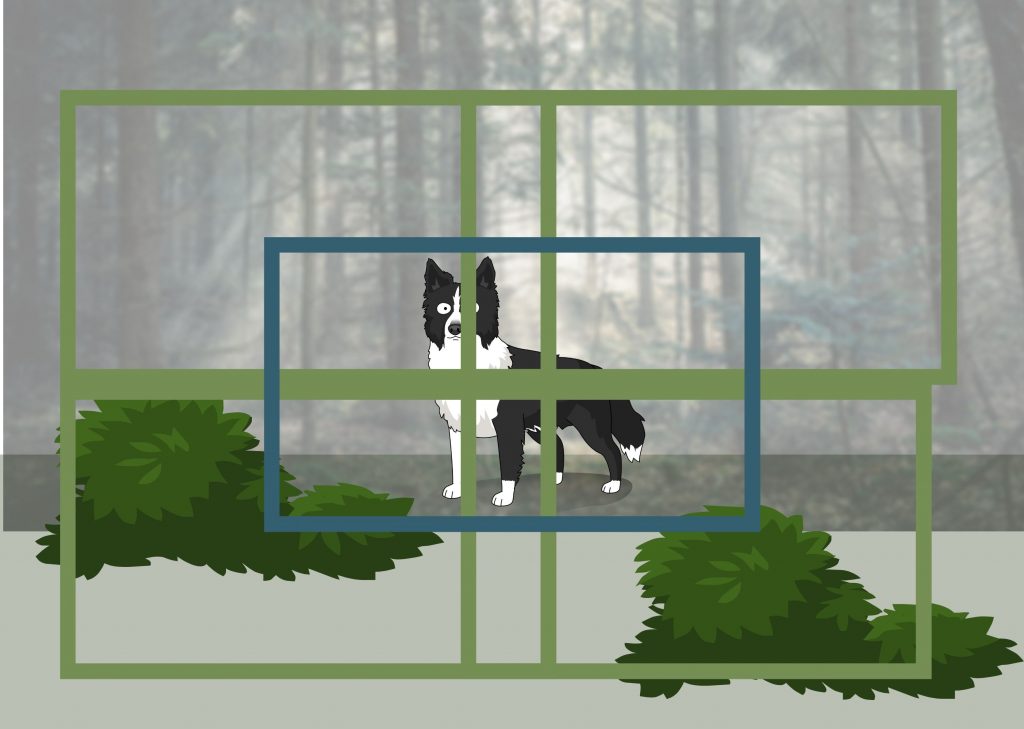
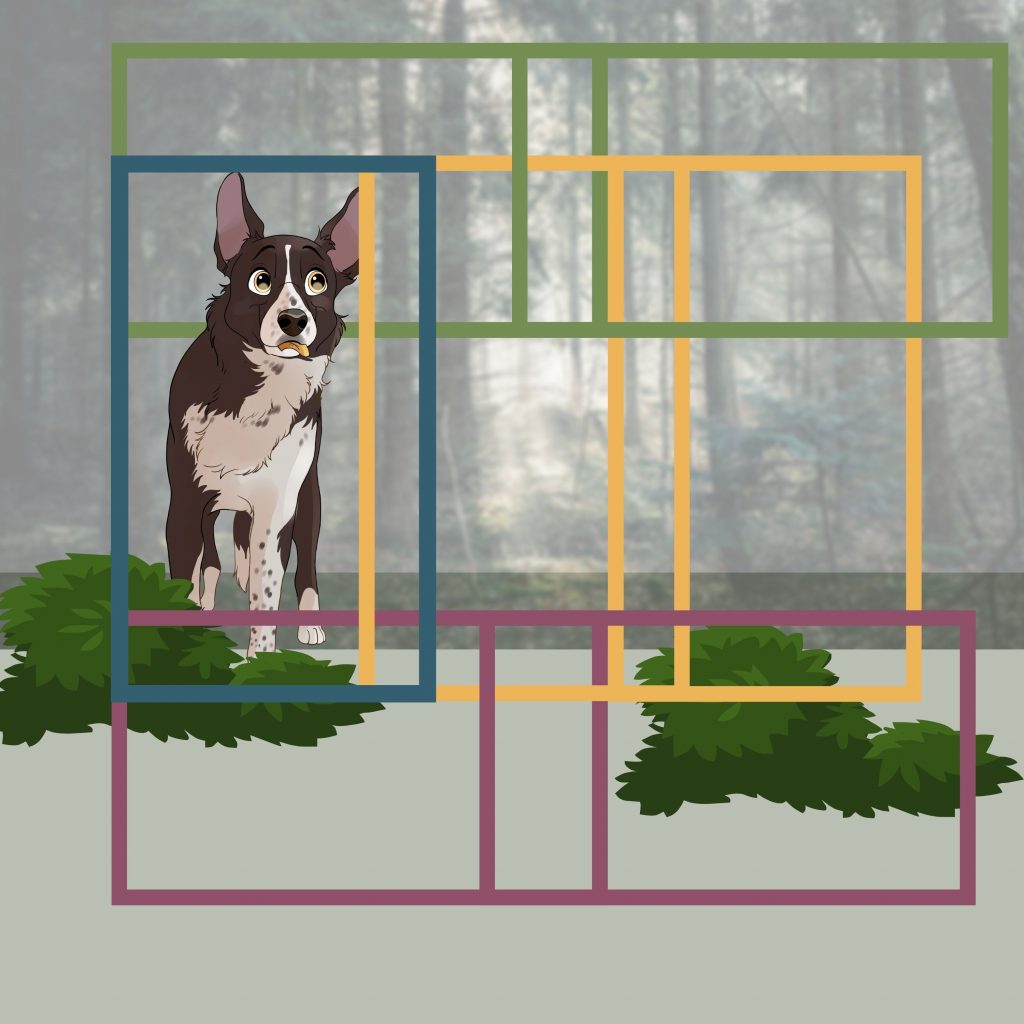
Another way you can use this technique is if the dog is looking to the side! You can also take the photo in portrait orientation, and then build the frames out in the direction the dog is looking. Keep in mind with any of the diagrams below, you may need less photos (or more?) depending on how it’s composed – how close you are or need to be, why you’re filling in additional photos and so on. So only take as many as you need to ensure you will have good composition when you stitch them together.

Here is an example of how you could fill the frame with the dog, being able to be much much closer to the dog than you would if you wanted to take this same photo in landscape orientation! Depending on how much space you have given the dog above and below, you may need extra frames above and below, too.

Here is another pretty “extreme” example with probably too much space (I was operating on the concept of “better safe than sorry!”) but you can see how you can use portrait-orientation photos to create a landscape-orientation image. Because of this, I had incredible detail in the dog, as I could be much closer to her.

The Finished Image

This was a veeeerrrryyyy fast re-edit of an older photo, but just to show you that I would crop it right down, but so you can get a sense of the kind of photo you could end up with.

Adding a Bit of Extra Space

In much the same way, we can correct accidents or compositional mistakes as long as we notice at the time that we might have a problem!

Here is an example I took the other day which made me think that I needed to include this lesson in the course! I will update with a better photo in the future. This is NOT a photo that I would keep or edit, but for our purposes today, it will demonstrate what I’m talking about.

Journey was sitting on the log, looking to the left, watching some birds. I had been photographing him giving him negative space in that direction. Then suddenly he looked to the RIGHT, giving him a curve in his pose. I snapped the photo, and he looked back at me. I had that ONE opportunity to get the photo. In this case, as I said, it isn’t one that I would choose, but this has happened to me plenty of times, where they change their looking direction – especially for candid photos! – and suddenly your composition no longer works, and you may have that single second to get the expression you want, at the cost of good composition!!

Here’s the photo. Very quickly corrected in Lightroom. 

So if I loved this photo, what to do to save the composition!? I could, in Photoshop, take the left side of the photo and move it across to the right-hand side, but because of the tall log, and because of the bump in the log, it might not match up very well with the other side of the photo! The depth of field on the log, perspective of the log, etc would be all a bit strange! 

I could use content-aware crop, or content-aware fill in PS, but this doesn’t always work! It really depends on the background, bokeh is especially hard for these automated system, and I suspect it would struggle with the perspective of the log.

So what I did, knowing that I wouldn’t have gotten the composition right, is that I didn’t refocus (though I could have refocused on Journey), I moved my camera over to the right, and took one photo.

With this photo, I had exactly the same perspective on the log, the lighting and background was exactly the same, and I had as much of the frame to the right as I could need. I very easily masked them together in Photoshop, needing only a small slice of this second image, but it was enough to make the composition make sense!

You can use this technique as often as you need! Obviously, it’s great to get the composition right in camera, but if you don’t, taking one extra photo above, below, or to the side of the subject, can really save you when it comes to editing. You’re using the exact background and scene, you’re not flipping the background or having Photoshop build it for you, it’s the actual scene. 

Other Options

Head & Shoulders

While this isn’t posing, as much as it is composition, head and shoulders photos, and photos looking down from above are lovely options.

I find that head and shoulder photos do particularly well on social media (as well as “puppy dog eyes” photos. It seems like “the simpler the better” and “the more of the dog’s face we can see, the better”. I like to mix up doing head/shoulders photos, and doing full body shots. Particularly for clients, but also for myself. 

I will be more likely to do a head/shoulder photo when I’ve found something particularly interesting in terms of texture/visual interest which will be best emphasised around/near/close to the dog. Something which the dog can really be amongst, but which doesn’t make sense for you to see their whole body. 

Maybe the bushes around their legs are too busy, or too sparse, or the ground is ugly mud, or you just want to really show the texture, or colour, or shape of something close to the dog’s face or eyes. 

You’ll notice therefore that the majority of my head/shoulders photos include some kind of context. A bush, some moss, a branch, some leaves. Something so that the dog isn’t just a head floating in space. 

Again, on social media, simpler, empty photos probably do better, but for me they aren’t that interesting. Why bother going outside if you just want a soft blurry background? You might as well set up some textured background in your studio. And, what information do we get about a dog who is simply a head against a background, looking at the camera? Not much. 

Headshots are also a really fun way to play with rim-light, when the light is behind the dog. Side-profiles give a unique perspective, especially when outlined in glowing, golden light.

As with all our other photos, having the dog look at the camera creates a strong sense of connection, but we can also make them whimsical and looking to the side. Here, we want to be especially aware of the light and the space they’re looking into, as it can seem very random for them to be looking to one side if there’s “nothing there”. This is why I try to make sure that the corner of the photo where they’re looking is light. Imagine them “looking into the light”

Posing Our Dog on a Thing

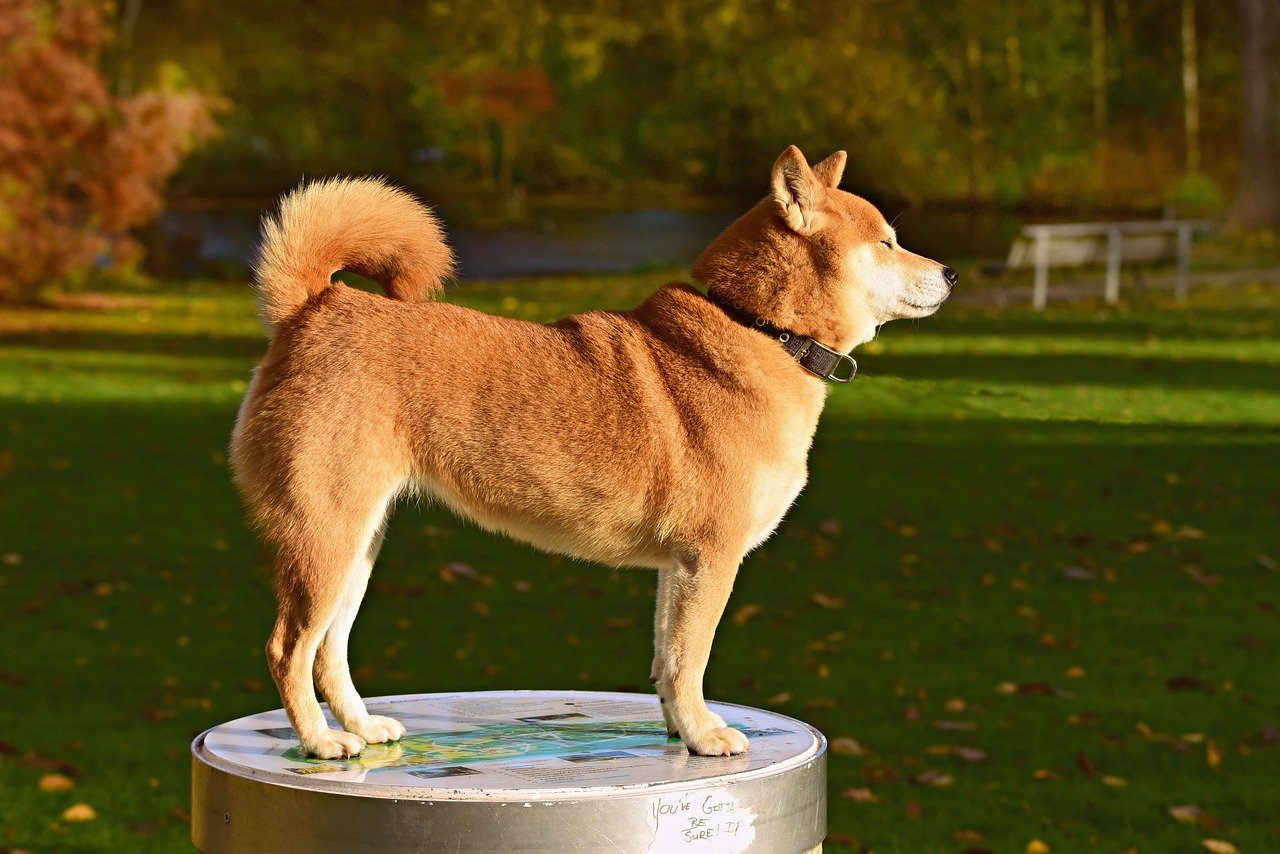
You will notice above that apart from a couple of exceptions, I  don’t often have my dog standing on a rock/stump/object. When I was in the beginning stages of my journey I often did, as this was a convenient way to pose them dynamically, to have them standing majestically with front feet up. I have recently begun relying more on the slight rise of the ground next to a tree trunk, or simply using the shape of the bushes or trees to add more depth to my image. It’s totally up to you how often you want to pose your dog on something. Just ask yourself how natural it looks and whether it suits the mood/story/effect you’re creating.

Have a look at these photos. How do they “feel”?

Here are three photos.

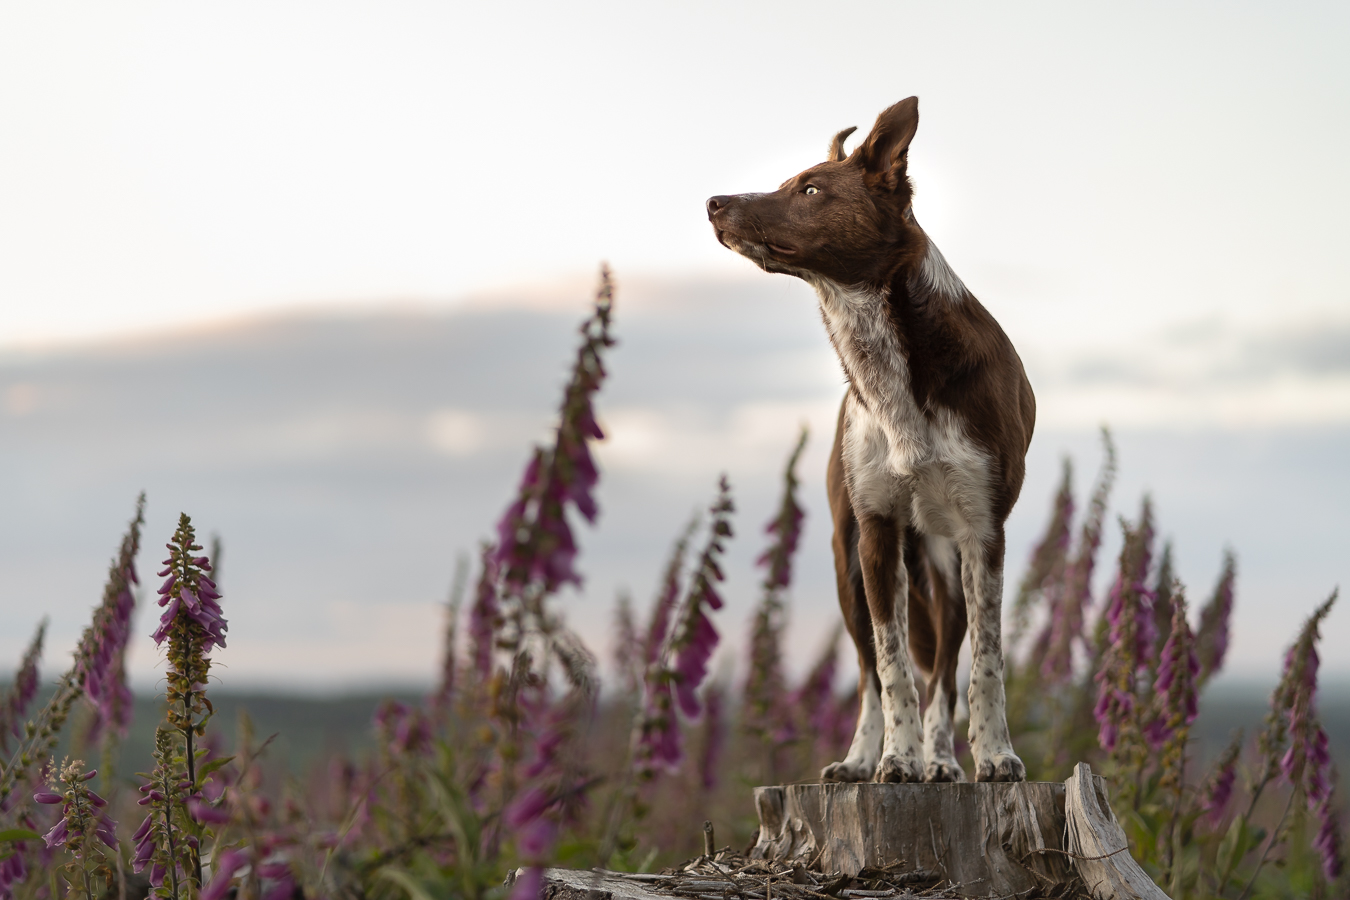
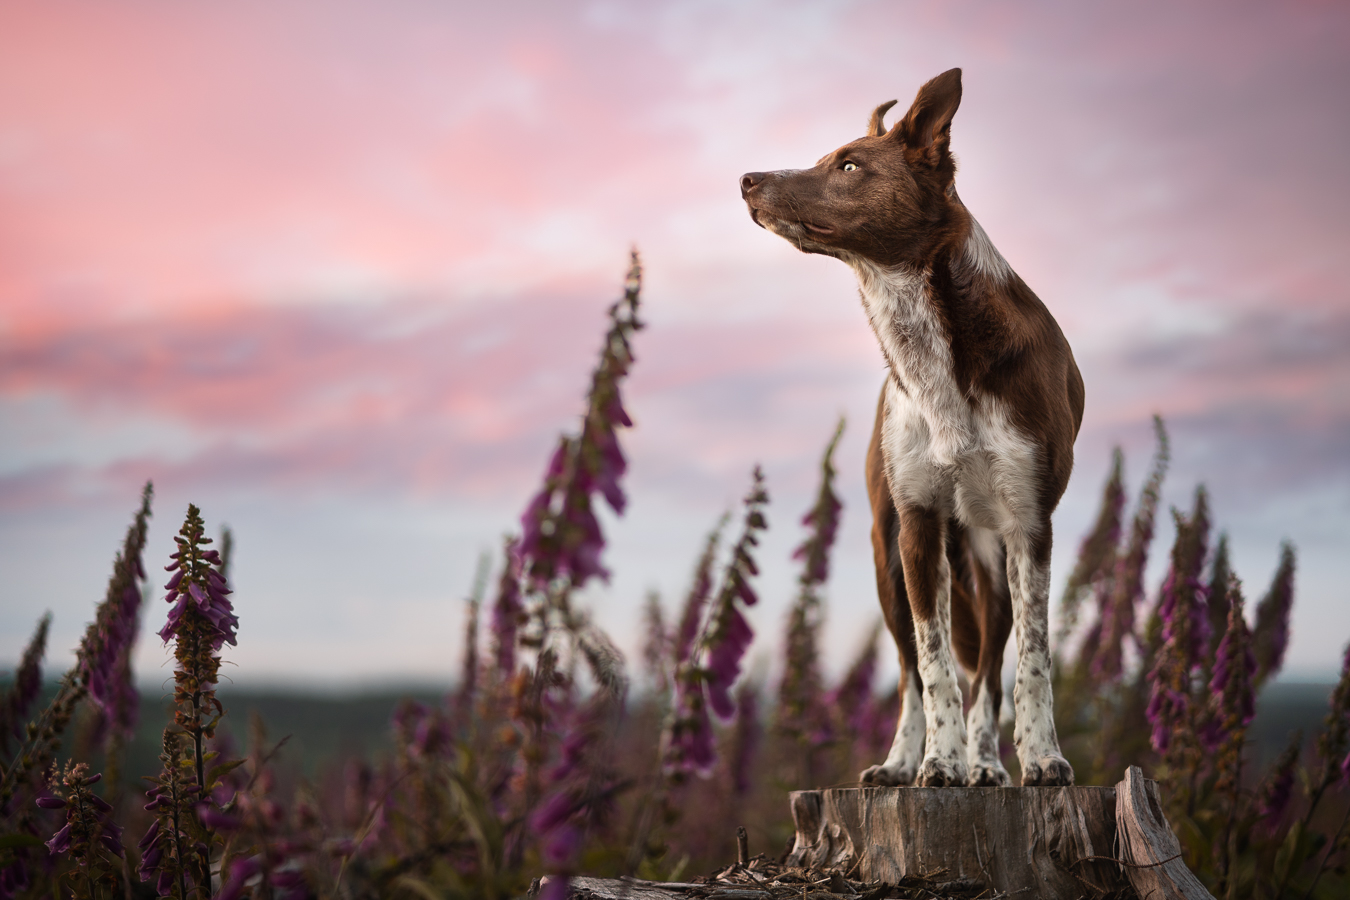
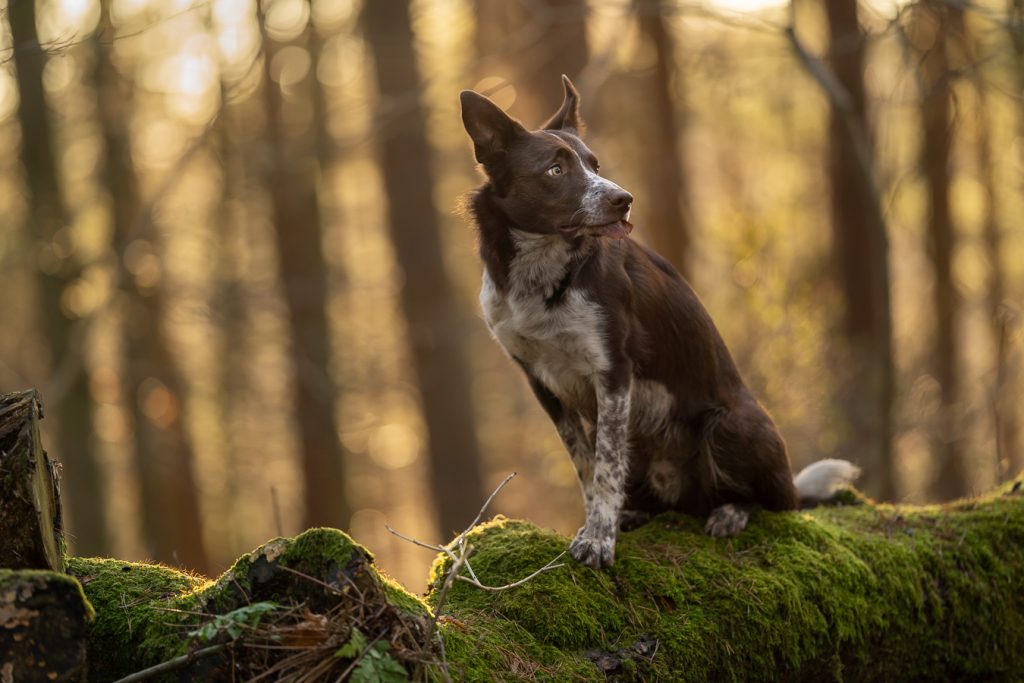
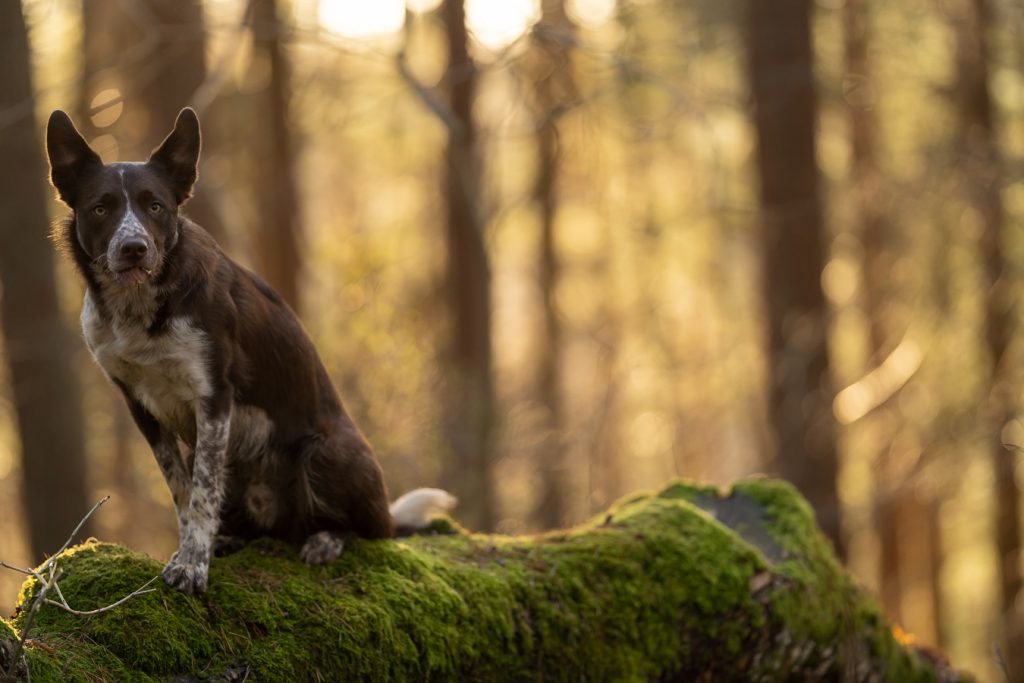
The first I would say feels much more unnatural. Why is the dog there? Why is he posing like that? No dog would naturally get on that stump then look backward. Although we have a lovely dynamic curve and shape to him, I love the curl of his tail, there is something “off” about this image. It may have made more sense for him to look straight forward, but then we lose our dynamic curve.

In the 2nd image, the pose here is very similar – less height beneath his paws, and the difference is both the angle of Journey’s body (slight more to the back of the rock), his gazing direction (slightly more forward), even the direction of the front paws (slightly more forward rather than sideways), as well as being tall and majestic in a wide, vast landscape that may require a dog to stand on a rock to get a good view. 

In the 3rd image, the dog has the same sloping angle to the body, but isn’t standing on an obvious rock/stump. This dog could have been wandering around the forest, when she came to a stop and looked over at something which caught her attention. Journey OFTEN poses like this while on our walks just to stop and look at the world, so it feels much more natural to me. He has never done it with his paws up on a big log, though!

Get Creative!

The best advice I have really is to use what is out on location. See an interesting log? Use it. See an interesting bush? Use it.

Think of ways your dog can interact in/on/under/beside the interesting thing, and keep your story in mind, or the look you’re going for. If you want to portray a magical little forest creature, ask if them posing with their paws up on the fallen tree trunk and looking at the camera is going to give you that feeling. Try a number of options at each location, and when you get home, trust your gut. If one “feels” wrong, there’s probably something about it that’s clashing!

You will probably quite quickly pick a few “favourite” go to poses, or cycle through a selection of sitting, standing, lying down & head-shots… and then pepper in whatever extra creative options happen to pop up during the shoot!

And of course, it depends on what the dog is capable of too! Be guided by them, make use of special behaviours or tricks they might know as this too shows a side of their personality!

Let them be a bit candid, too. See what they naturally do and let them do it. If you don’t manage to capture the moment, see if you can set up the situation so they’ll repeat it. The most natural poses are going to be the ones the dog does himself.

Lying Down

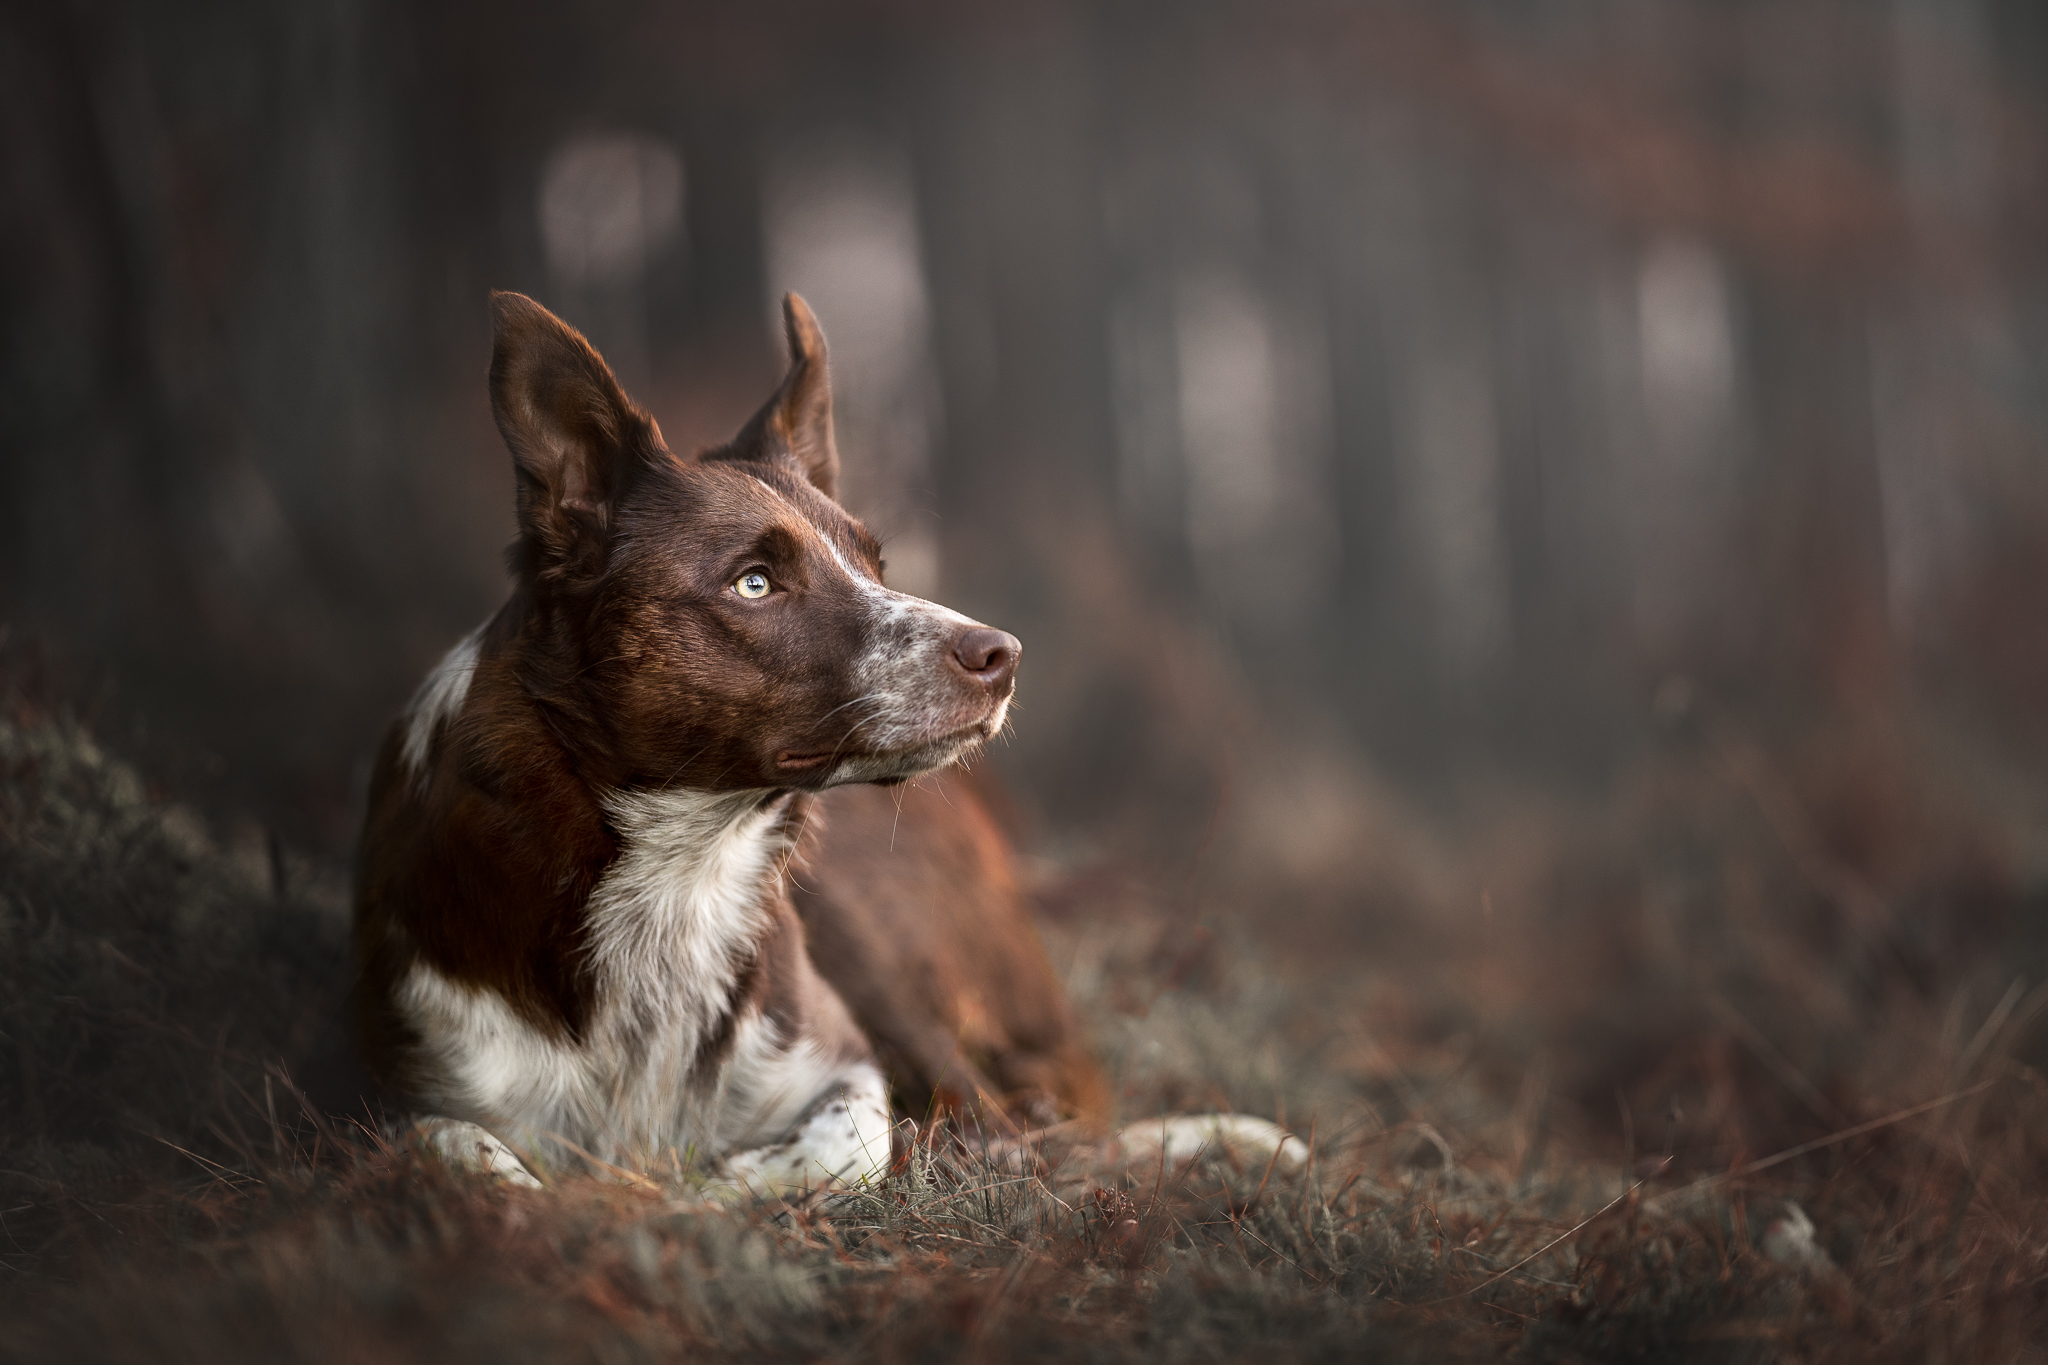
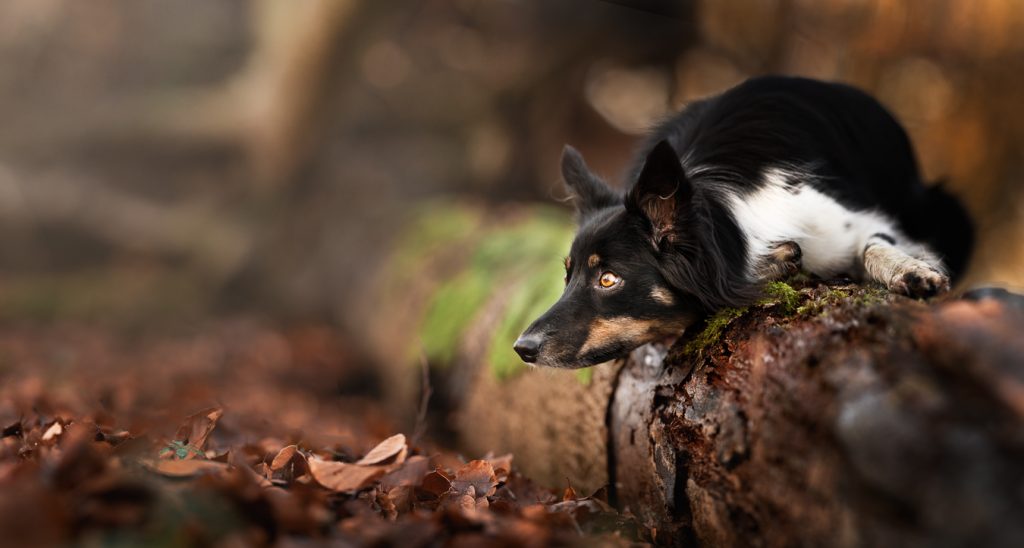
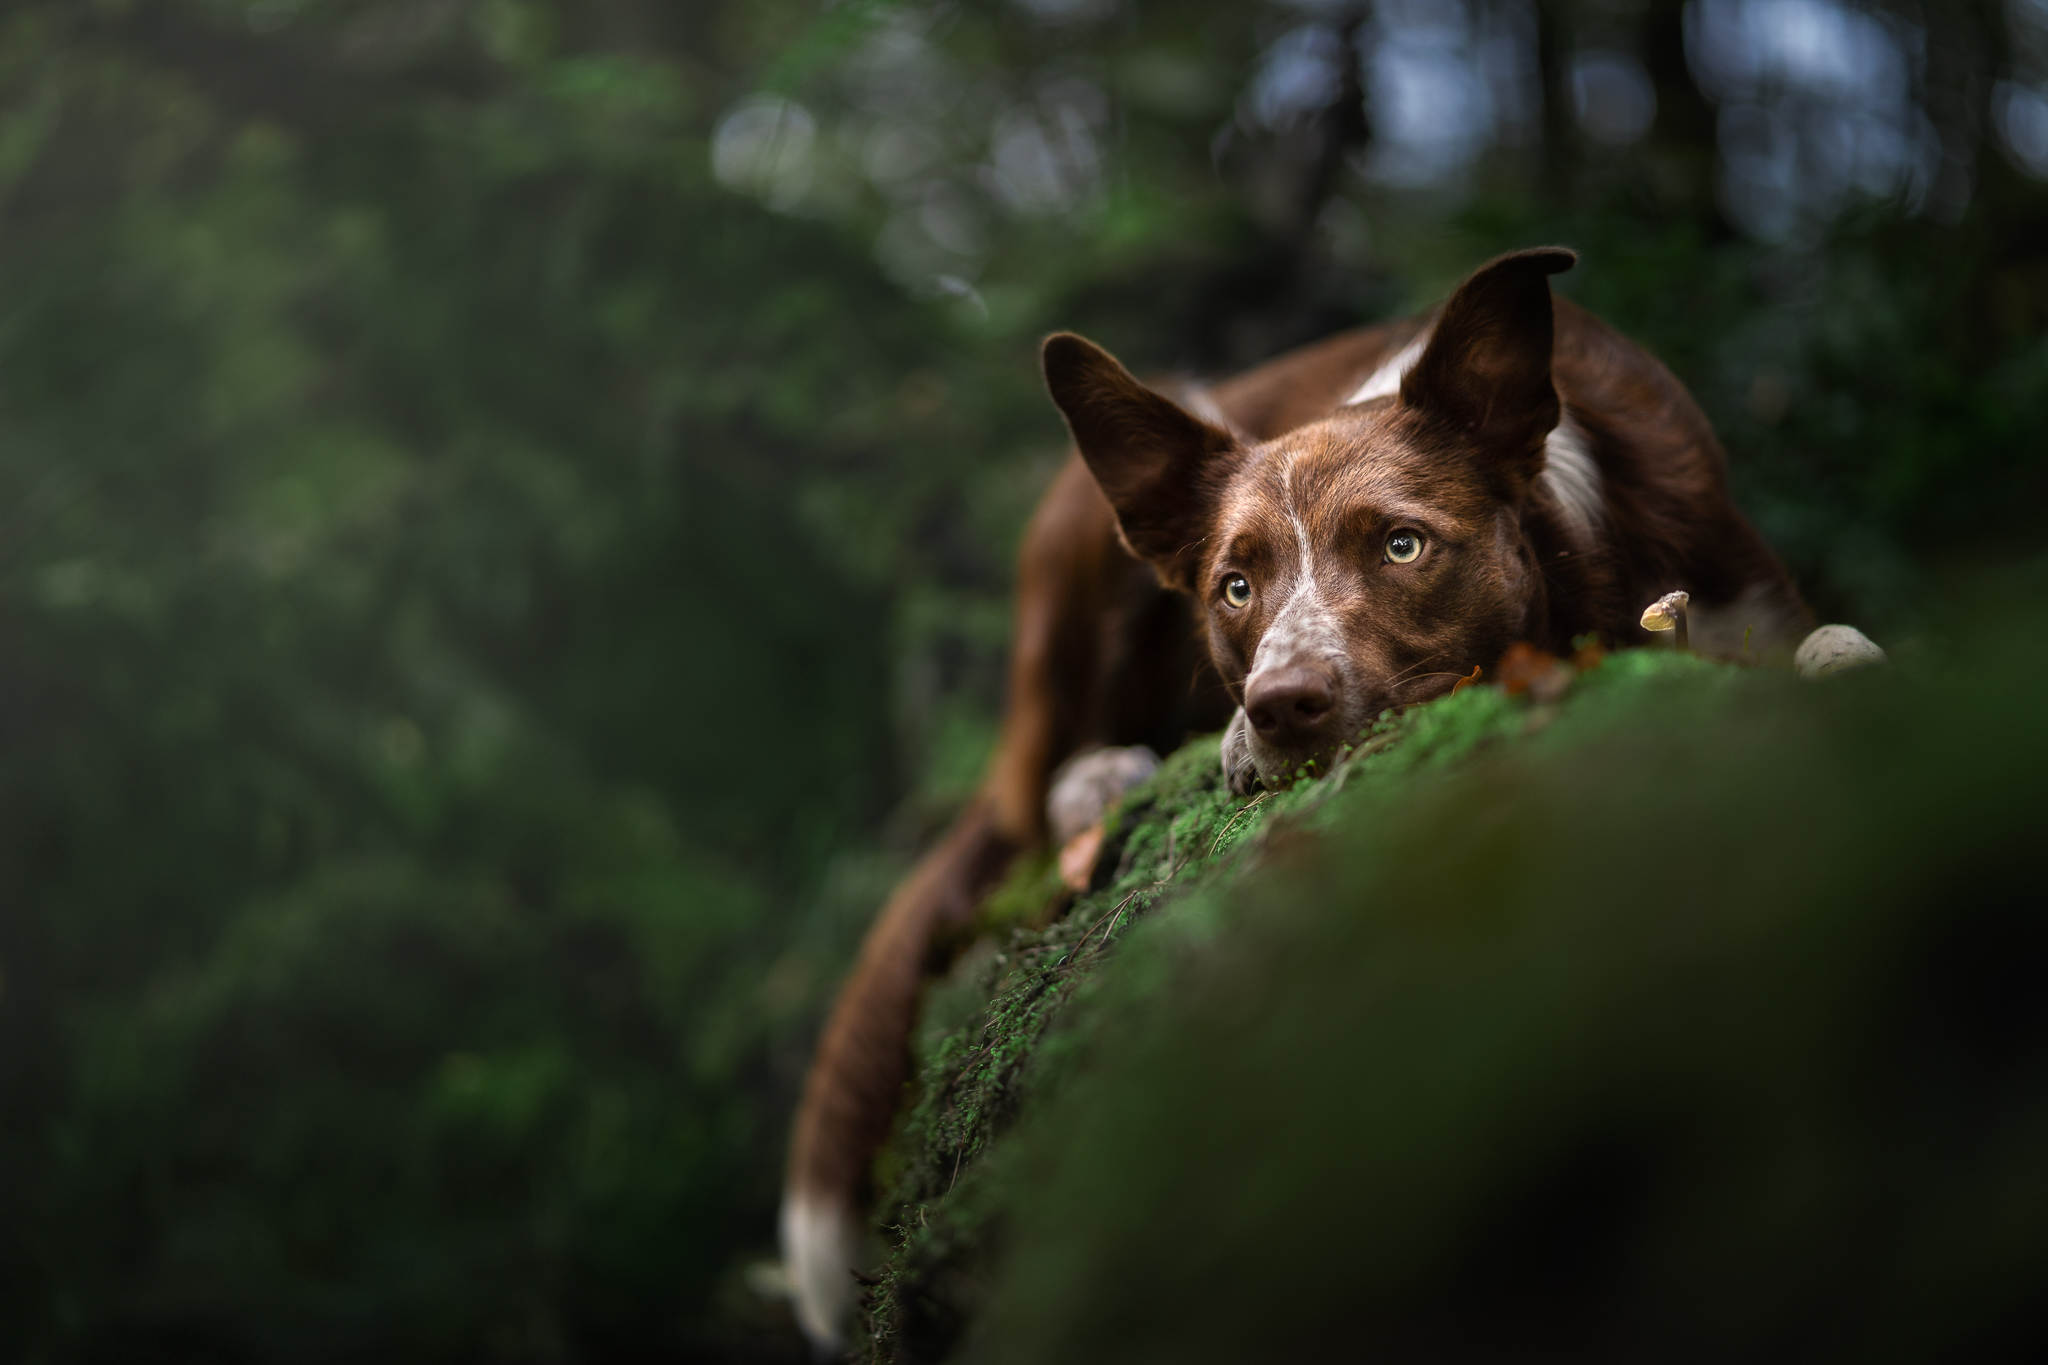
Lying down gives us more of a chance to see the foreground and any visual interest of the ground – think of moss. If a dog is standing, we are rarely going to follow the line of his legs down to see that he is standing on moss. But lying down, especially with the chin down, we suddenly see all that beautiful soft green moss texture.

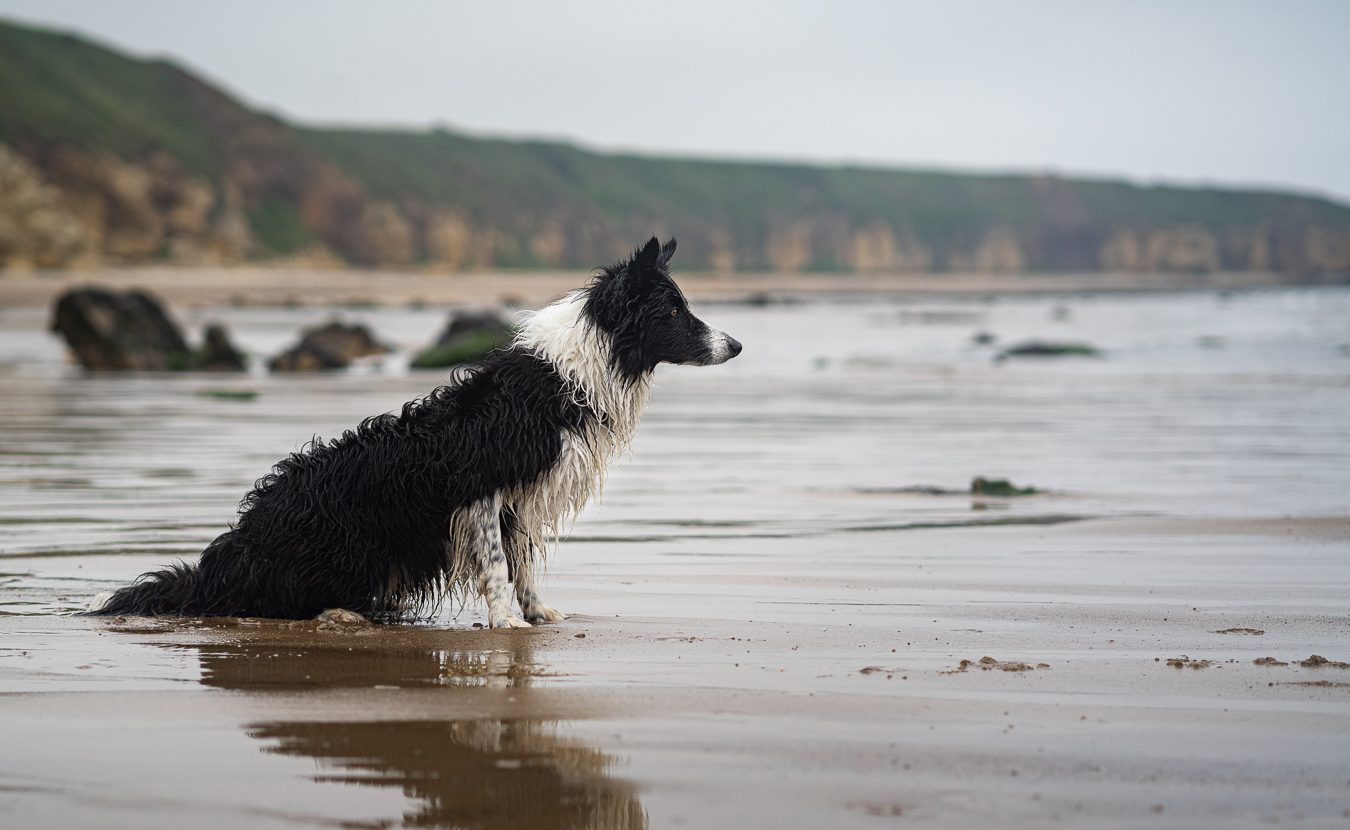
Think about as well where it would be natural to see a dog lie down. In a mossy glade in the forest? There is the suggestion of a story. On the beach? I suspect this would feel a bit strange. What self-respecting dog lies down while romping around on the beach? Except maybe a border collie, his eye on his friends, ready to herd them into submission!

As always, considering the pose in location is more than just: “Is there a tree growing out of the head here” but also about “What would it make sense for my dog to be doing here?” A dog lying down at the beach might make more sense if his back is to the camera and he is looking into the distance. As if he’s just taking a break from all that romping around. 

I think this is one reason why I am not often taking photos in a sit. Because most dogs would not naturally just sit squarely in the middle of the woods. Loki would be more likely to do that naturally, and so I have more photos of Loki sitting! Journey, however, is either running, standing, or in a typical collie down.  Loki is naturally much less likely to lie down of his own accord, and so I have far fewer photos of him in this position.

How to Do It

As always, there are a few ways to use the lying down pose to create different effects. Lying down, in terms of straight vs curved, is much like standing. 

In general, you probably want to avoid a dog lying straight at the camera, but turning his head to the side (though, you’ll see this in a few examples above), because he’s going to take up a very small amount of visual weight, but is going to need all that space to look into.

  • Straight and parallel to the camera. This can convey tension, intensity, connection. It works pretty well with border collies as this is a very natural pose for them before they race off to chase something.
  • Kick a hip out/roll onto one hip. This is MUCH more relaxed and will give you a curve in the dog’s body. This is how a dog would lie down when it isn’t being posed.
    • Not every dog will do this in a photoshoot. I can almost guarantee you that Loki won’t. Journey will, but he loves to lie down and he has this “roll onto one hip” pretty much trained as a trick by now. 
    • You can get them to lie down, see if they are balanced more on one particular side of their body and use a treat to lure their head to the inside, putting more weight and balance on the outside hip, until they shift their weight over onto it.
    • Depending on the dog, you might also be able to gently push on their inside hip, to encourage them to roll their weight onto the outside hip. Some dogs will be VERY resistant to this, especially if it’s not your own dog. Them lying in this position makes them more vulnerable (they can’t get up as quickly) so they may not do it at all in the presence of strangers, distractions, or unfamiliar environments. 
  • Chin down. This can be either really relaxed, very pensive, a bit whimsical, intense and watching, or make your dog look like a slug. How the mood comes out depends on the rest of the pose, the light, and where the dog is looking while in the pose.
    • This requires some prior training, and there are a few methods to get it. For some dogs, just waiting a really, really long time, can get the “chin down” pose as they get bored and tired. Just be ready exactly how and where you need to, as any movement from you could cause them to pop their head back up.
  • Lying on their side. These are super relaxed photos. Picture bathing in sunlight, or just taking a nap on some beautiful soft moss. Lots of potential for story here.
    • Another very difficult one to achieve with unfamiliar dogs or dogs who aren’t used to doing this as a trick, unless they’re naturally very relaxed and are happy to just roll onto their side and chill while nothing is happening.
    • Again, this is a trick you can teach easily at home by luring from a down, rewarding in position, and coupling it with a stay. 
    • Be really careful of the side of their face closest to the ground. Use a reflector to make sure the blacks/shadows don’t get clipped, and so they have catchlights. Because the face is close to the ground there’s absolutely no light from the sky hitting it, so you will want to be thinking about that as editing it can be a nightmare. 
    • You may need to play with your perspective here, as getting down extremely low may just hide their face in the foreground.
  • Try having them lying “on a thing” (log, rock, stump etc) just make sure they don’t look awkward because it’s slippery or too narrow for them. Then you can experiment with paw placement (paws hanging off the edge of a stump is quite cute), head placement if they will do “chin down” while on an object, and even tail placement (for example, Journey lying on the green fallen tree in the gallery above, we can see his tail. We so rarely get to see his tail so it’s a bit of a fun feature in the image). 

Standing

As with our other poses, standing can be square or  curved. Square poses tend to have straight lines in the dog’s body. There can be tension or stillness when posed like this, without a sense of movement. The pose can still tell a story, depending on all the other elements in the photo, but it is easy to have static standing poses (or any poses that are static) feel a little “rigid”, if the angle of the body and composition aren’t working together, or if there isn’t a story or something else interesting in the image. 

Square poses can be harder to help our audience move around the photo. With a photo of a dog standing straight at the camera, we can’t easily move around the photo. With a dog side-on to the camera, we will likely find his eyes, move all the way along his body and then…? It’s very hard to get back to his eyes and the “front” of the photo.

These side-on photos also need a LOT of space for the dog’s body, toward the “closed” side of the photo, which can make it very difficult to give them space to look into.


This is an old photo so composition isn’t that great anyway, with the big tree trunk blocking his view… but even if it wasn’t there, he’s right in the middle of the photo – but more space would feel… difficult. Having the darker trees and bushes behind his butt helps stop your eye drifting out the back though.

To be clear, there’s nothing wrong with “Square” poses. They are great for portraits, if taken straight on, and can tell different stories, if taken from the side. 

Square poses angled directly at the camera can enhance symmetry, or the height of the surroundings. Side-on poses allow us to create something expansive, especially if the dog is looking up.

Be careful!

A dog standing straight facing the camera, but with his head to the side will probably feel a bit awkward. 

Why?

Because visually, he takes up very little real-estate, but needs the space to look into. It feels like there’s a huuuuge area of empty space, with very little dog.

That’s why you’ll notice in most of my photos, if the dog is looking to the side, he’ll probably have a curved pose, and you’ll see a lot of his body.

See below for an example of straight at the camera but looking to the side. Notice how little space Loki takes up, compared to the curved poses in the section below.

Curved Poses

Curved standing poses have a curve to the body. These are GREAT for coupling with natural curves in the environment, so the dog’s body shape mimics the curve of a tree-trunk or some bushes for example.

Curved standing poses tell stories. As if the dog has just wandered up to a place, and is looking in a direction. To be creative, you can have the dog standing and looking away from you at a distant landscape, for example. In this case, a curve to the body would show us more of the dog than just his butt, if we were to simply point him away from us.

In the examples below there are also some examples of curved standing poses with the dog looking at the camera. These poses are powerful and interesting and I would say are my favourite. I find so much flexibility and interest in standing poses.

How much of the body you see, or how much goes out away from the camera. How much the dog is turning their head – maybe so their body is at a sharp curve, or maybe so they’re just slightly looking over your shoulder. There is even a difference between whether their head is raised and their neck long, or they have ducked their head low. Whether they have feet up on an object or bump, are up close against a tree trunk like wild forest creatures, or are standing watching birds on the beach.


I think I prefer standing poses not only because of the flexibility but because of how we can:

  • Show the dog and his form, maybe even muscles if he is kept fit and has a short coat
  • Have the dog interact with, or is placed solidly within the environment
  • See that it makes sense for the dog to be in that place (usually. Some awkward front-feet on log photos don’t make so much sense if we are trying to give the sense of having happened upon the “dog in the wild”). But dogs would naturally be standing and moving about in most environments – woods, beach, snow, etc, pausing to sniff, look around a tree trunk, check out some deer on the horizon.

Standing poses can be difficult for some dogs if they aren’t trained to stand and hold their position. In this case, you may need to either tie them to a tree if you’re by yourself, or keep them on a leash with it held out or up, away from the dog, and edited in Photoshop.

Some dogs, who aren’t used to holding a stand can look a little awkward. If their back legs get tucked underneath them, or a little wide, it can look like they’re pooping, so try and reposition them so they’re more comfortable. 

Puppies may not have a stand-stay for a long time, but may just stand around if tied up. Older dogs may find standing for a long time tiring or uncomfortable. Just remember not to ask for more than a dog is capable of giving.

Examples of how even the position of the head can create a very different mood, even if the post itself is fundamentally the same.

Not my favourite photo of Bobbin because of the way her hind legs are a bit spread out, making her look a little bit awkward. It's not a big deal, but once you see it, you can't unsee it!

How to Do It

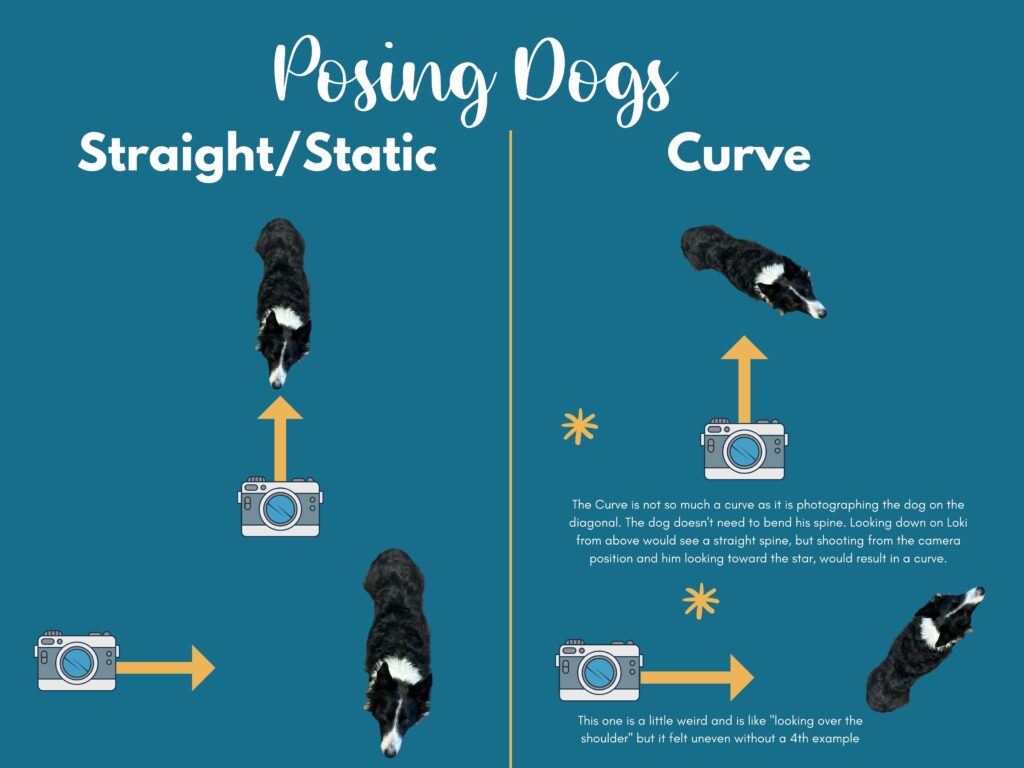
The * in the curves examples is there the dog should look, in order to create the curve.

You have quite a few options with standing poses, as mentioned above. Play with the different angles and seeing how much of the body & back legs you want to capture. Use your location! Is there symmetry? Then a looking at the camera photo may be best. Is there light? Maybe curve the dog and have him look into the light.

  • Completely parallel to the camera, so forward and back away from the camera. Front feet square toward you, and only a glimpse of the back feet. Classic Loki pose
  • Dynamic pose: you don’t actually need to bend the body. Better is to stand the dog diagonal to you and shoot toward its shoulder. If you’ve lined him up diagonally to your right, he’ll look left.
  • Perpendicular to camera: You see one whole side of the dog. Try to position them or be angled in such a way that they have 4 legs, not two. 
  • Avoid having the dog angled down a hill or they look awkward. They are much more majestic when going up a hill.
Below, I’ve tried to order the photos like this:
Square poses – something in between (usually curved body but looking at the camera) – curve – what I /wouldn’t/ do now with a straight body but looking to the side.
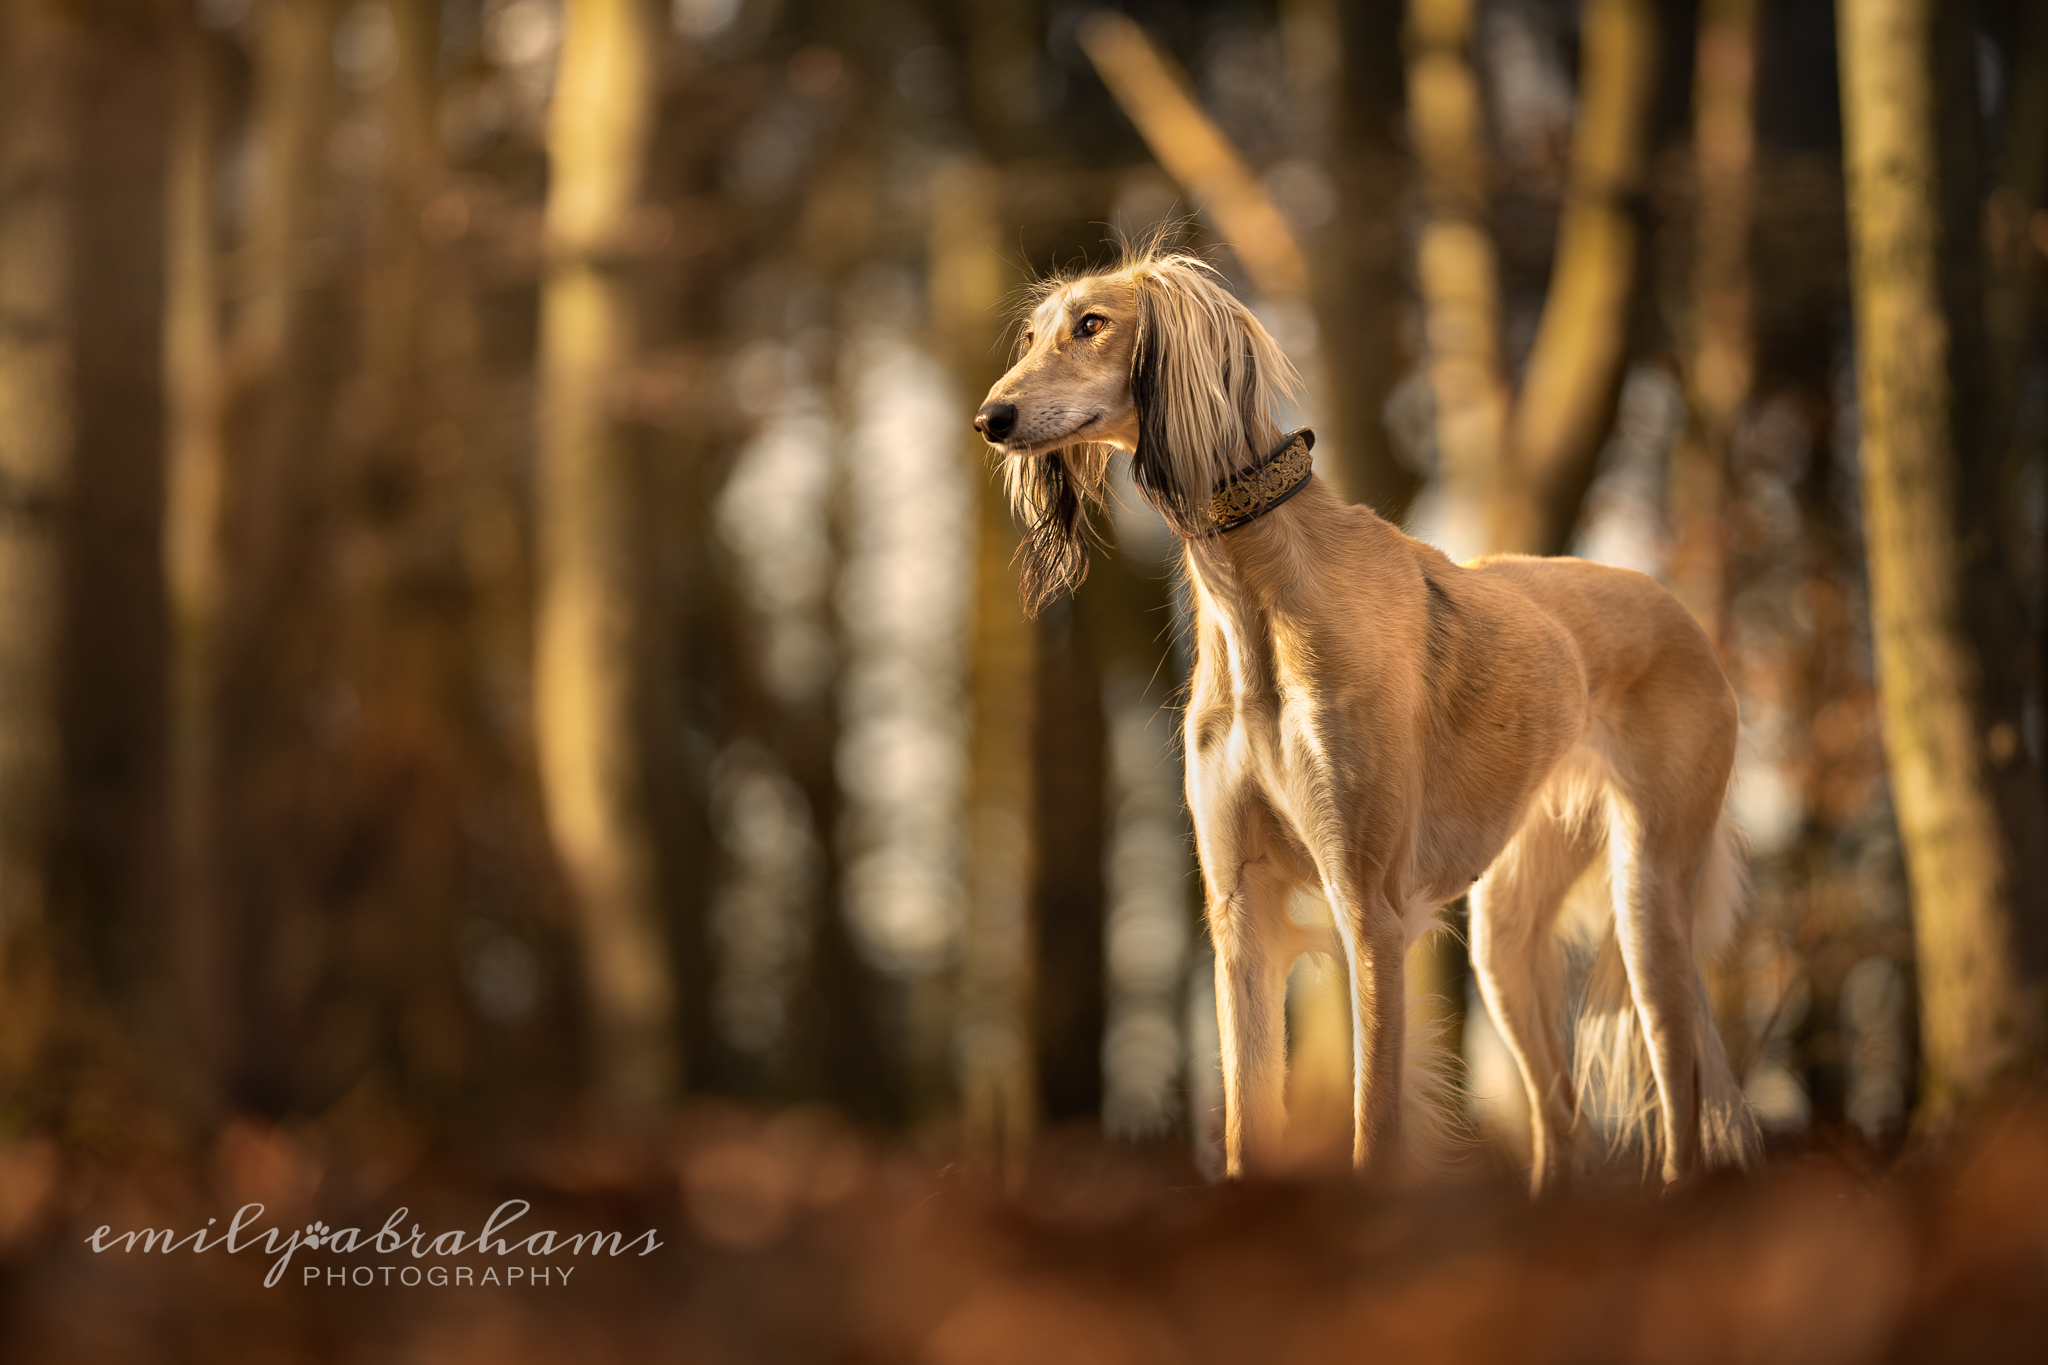
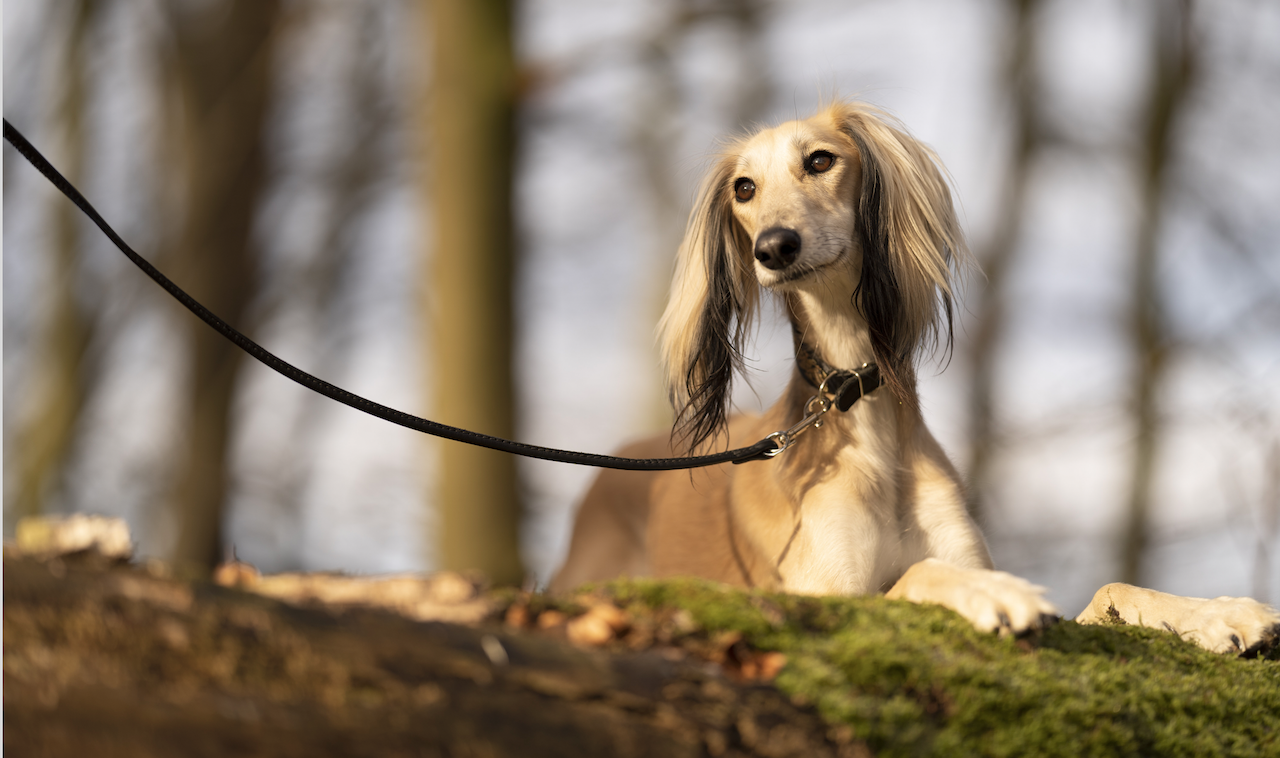
 Keep in mind that many of the square poses where the dog is kind of on a diagonal angle (like the sheltie in the dark woods and the saluki) would make BEAUTIFUL curves, if the dog had looked in the opposite direction.

Posing Our Dog on a Thing

You will notice above that apart from a couple of exceptions, I rarely have my dog standing on a rock/stump/object in the photos above. Can you think of why that may be the case?

I cover it in the “Other Options” topic as I think it applies to all poses, not just standing, but before you get there, have a think about these photo, and why I might not pose dogs on stumps (as much) any more.