Archivesnext level

Histogram

We’ve talked briefly about looking at the histogram in the lesson on underexposing, but let’s dive into it a bit more in detail.

If it looks like math and you’re not good with math (like me), don’t panic! It’s not as complicated as it looks.

The histogram is a graph that visually shows the range of light in an image, from blacks on the left, through to shadows, midtones, highlights and whites.
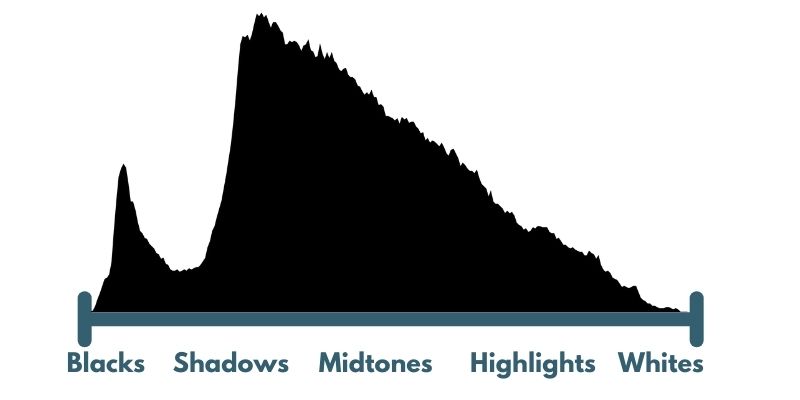
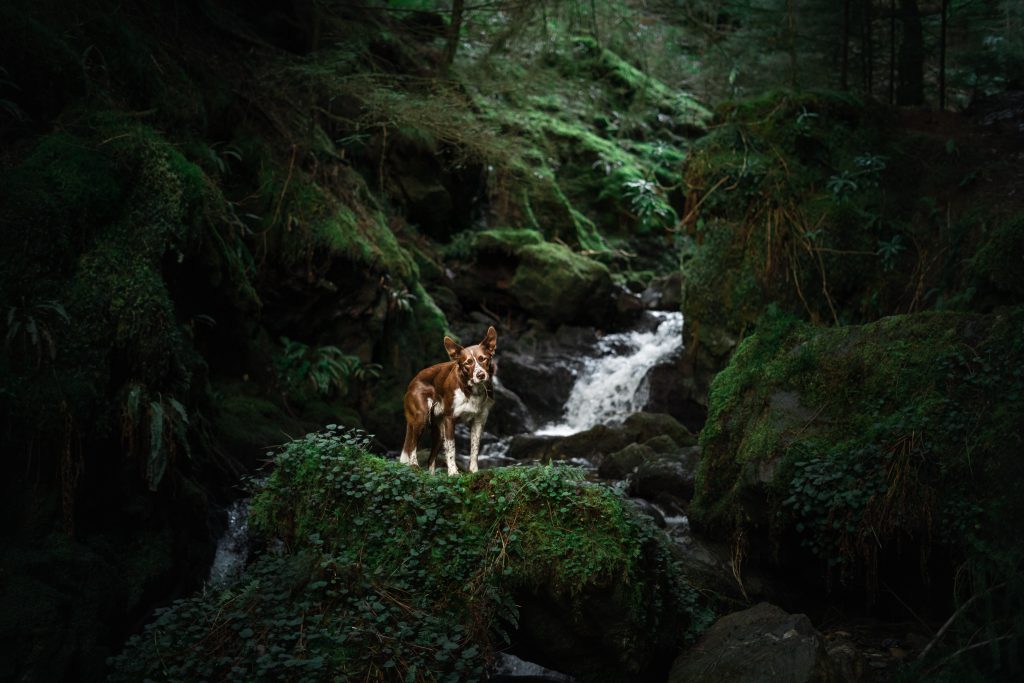
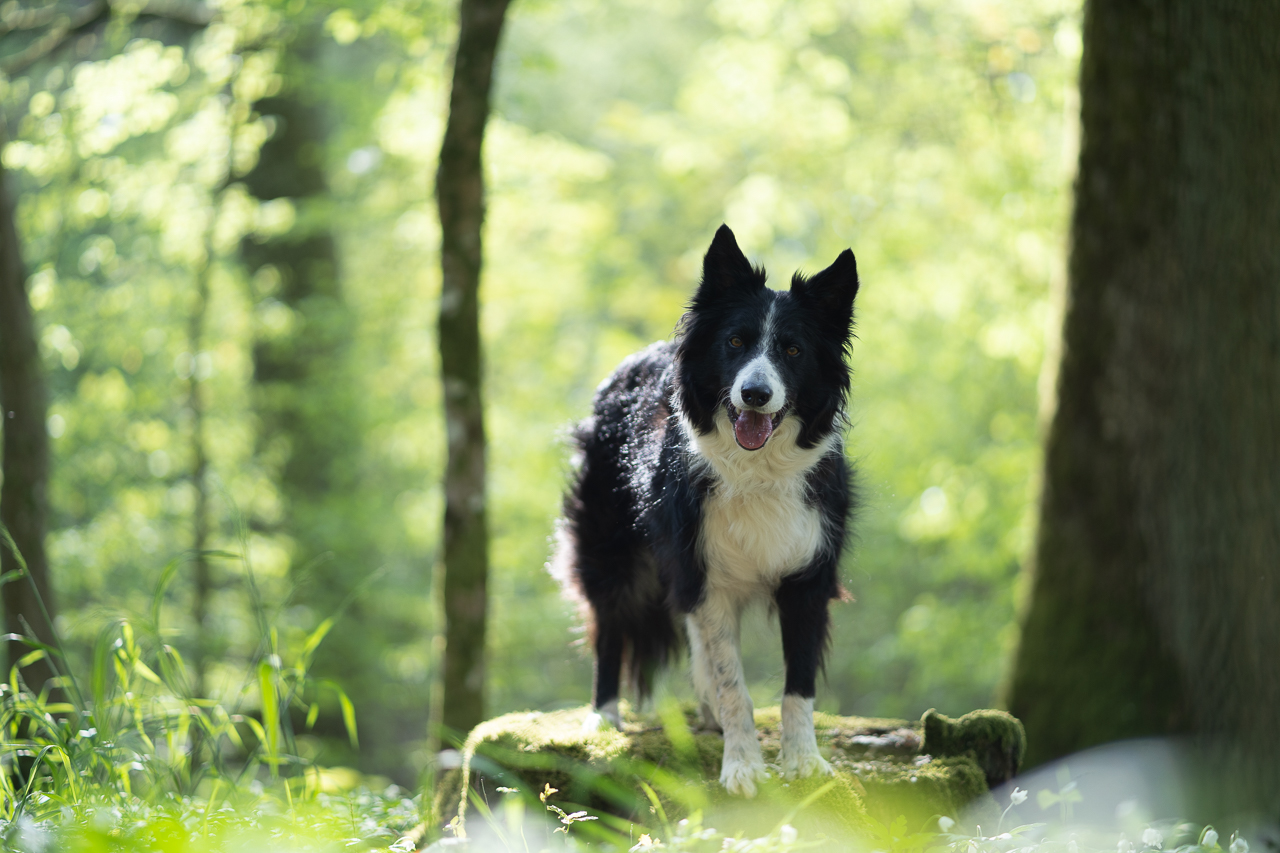
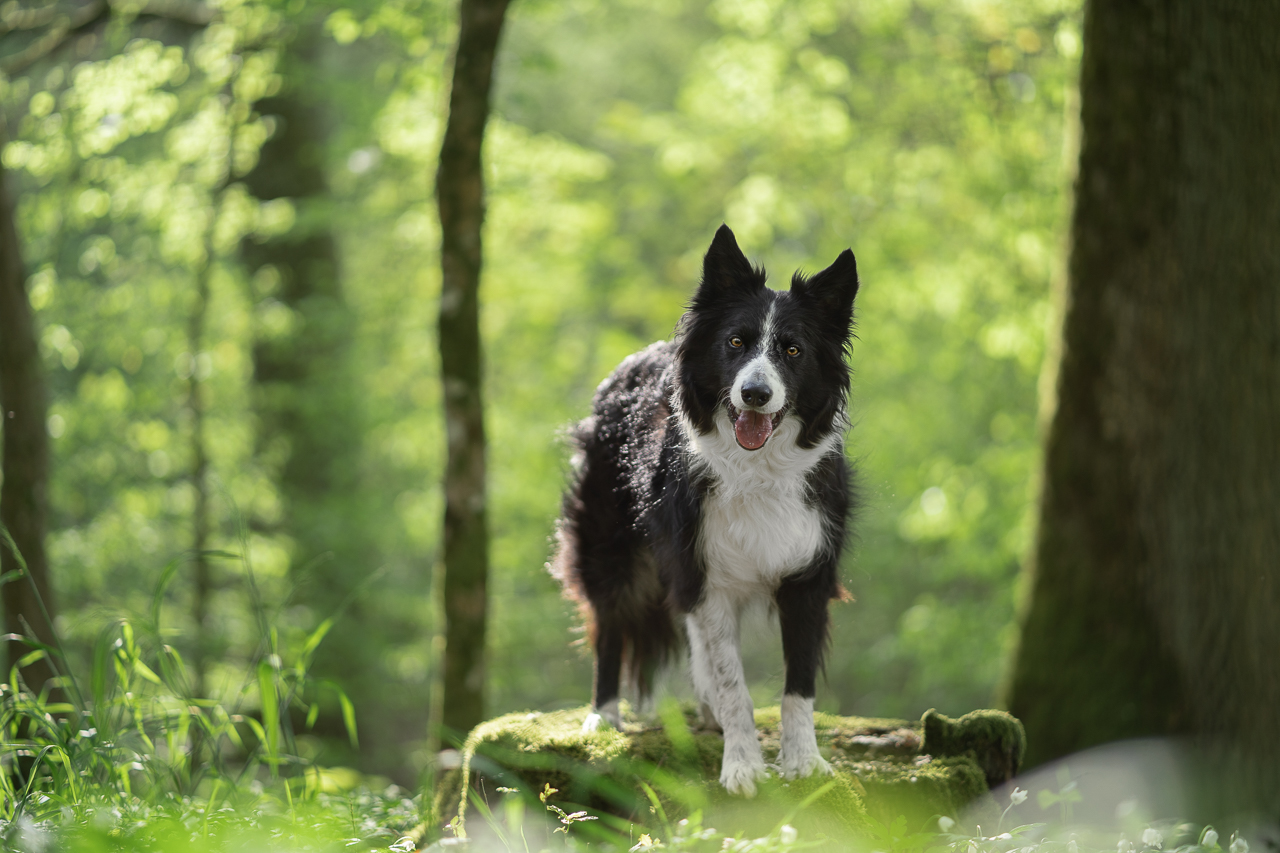
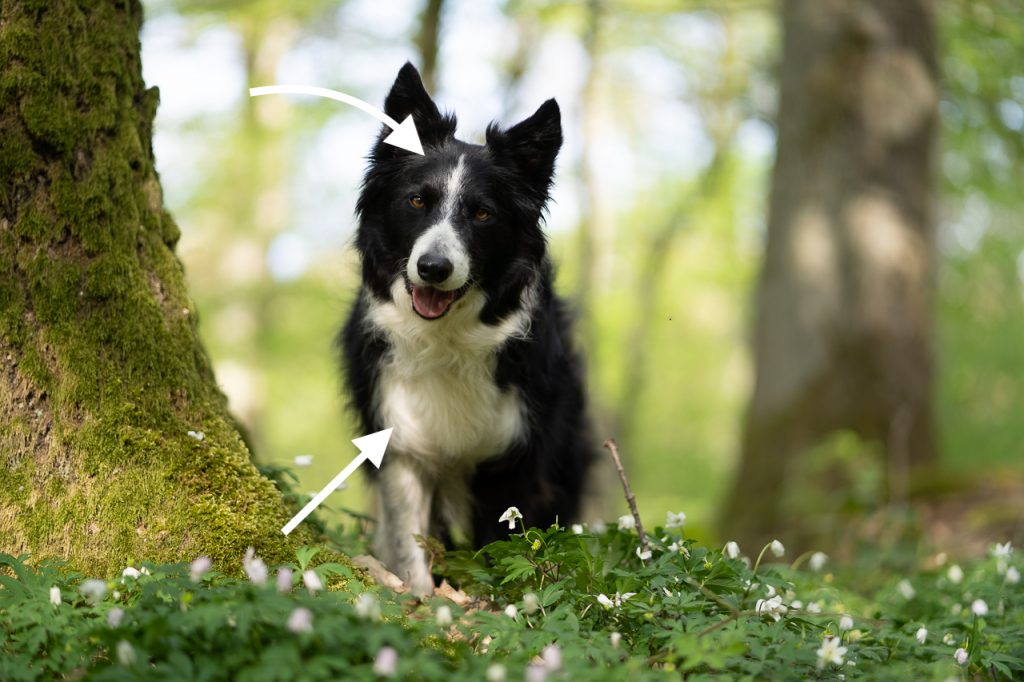
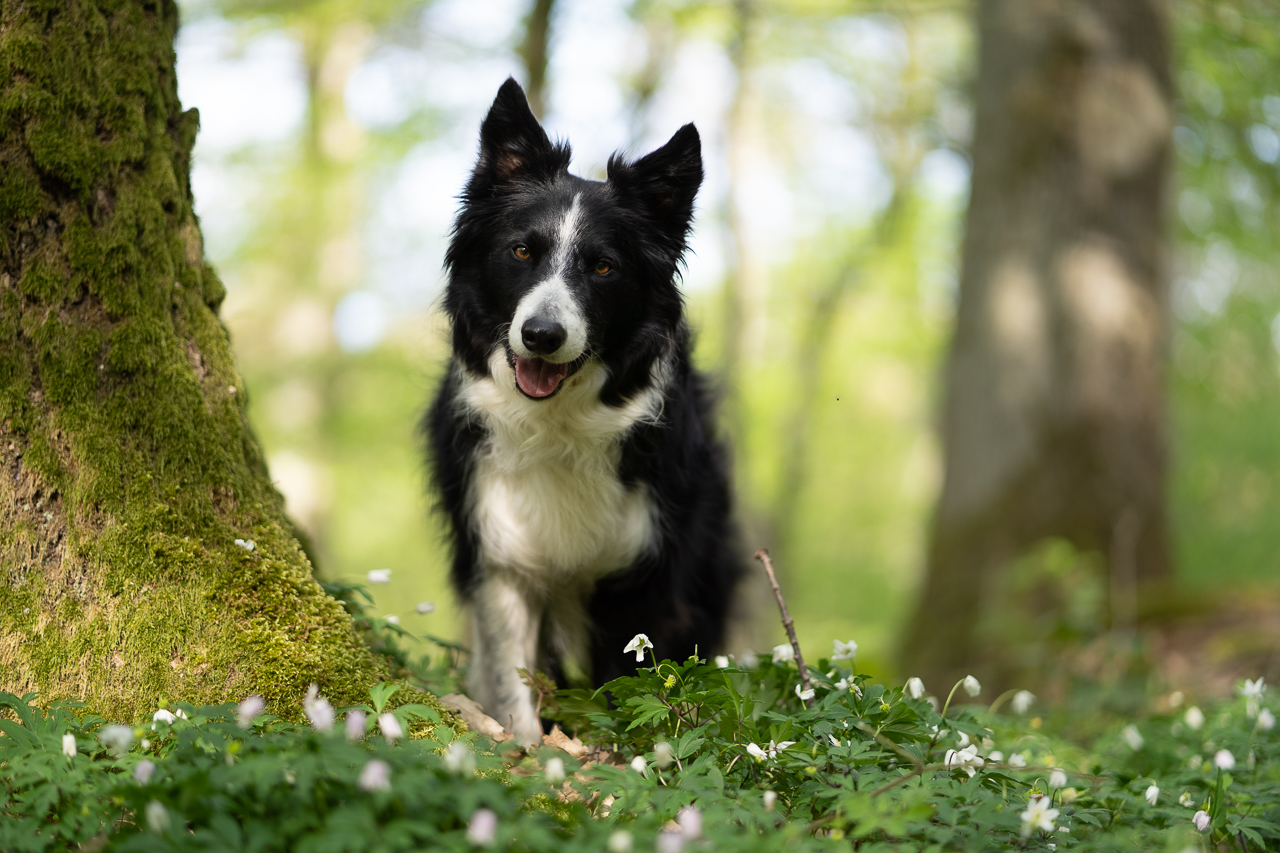
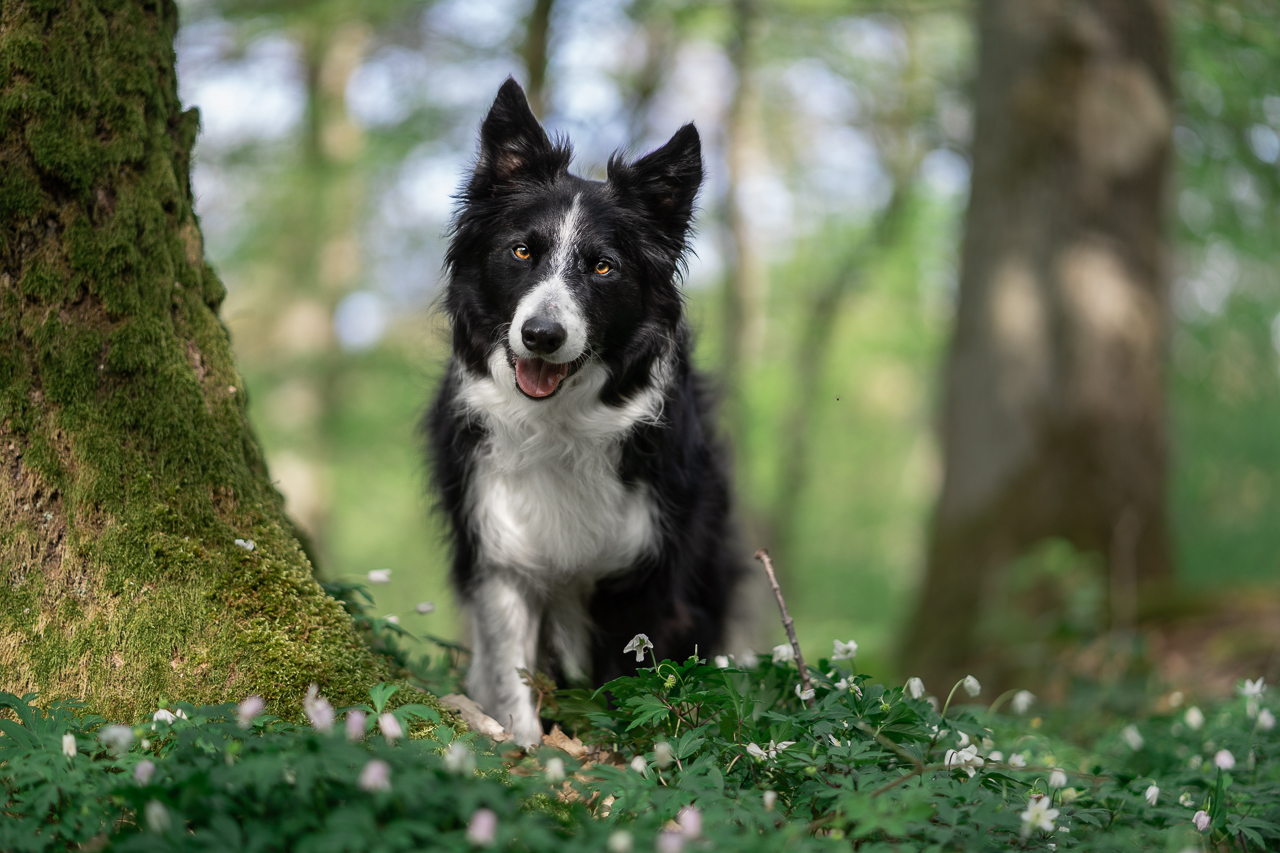
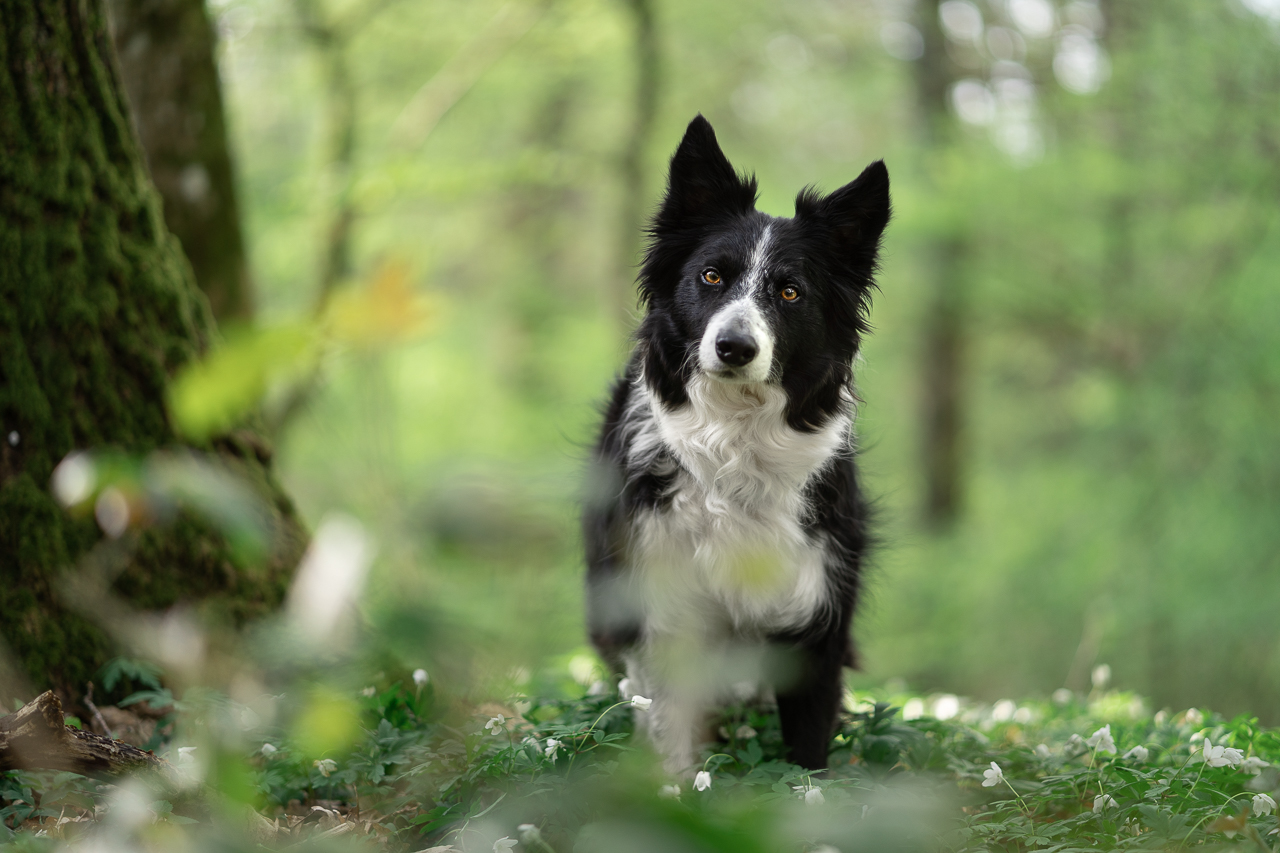
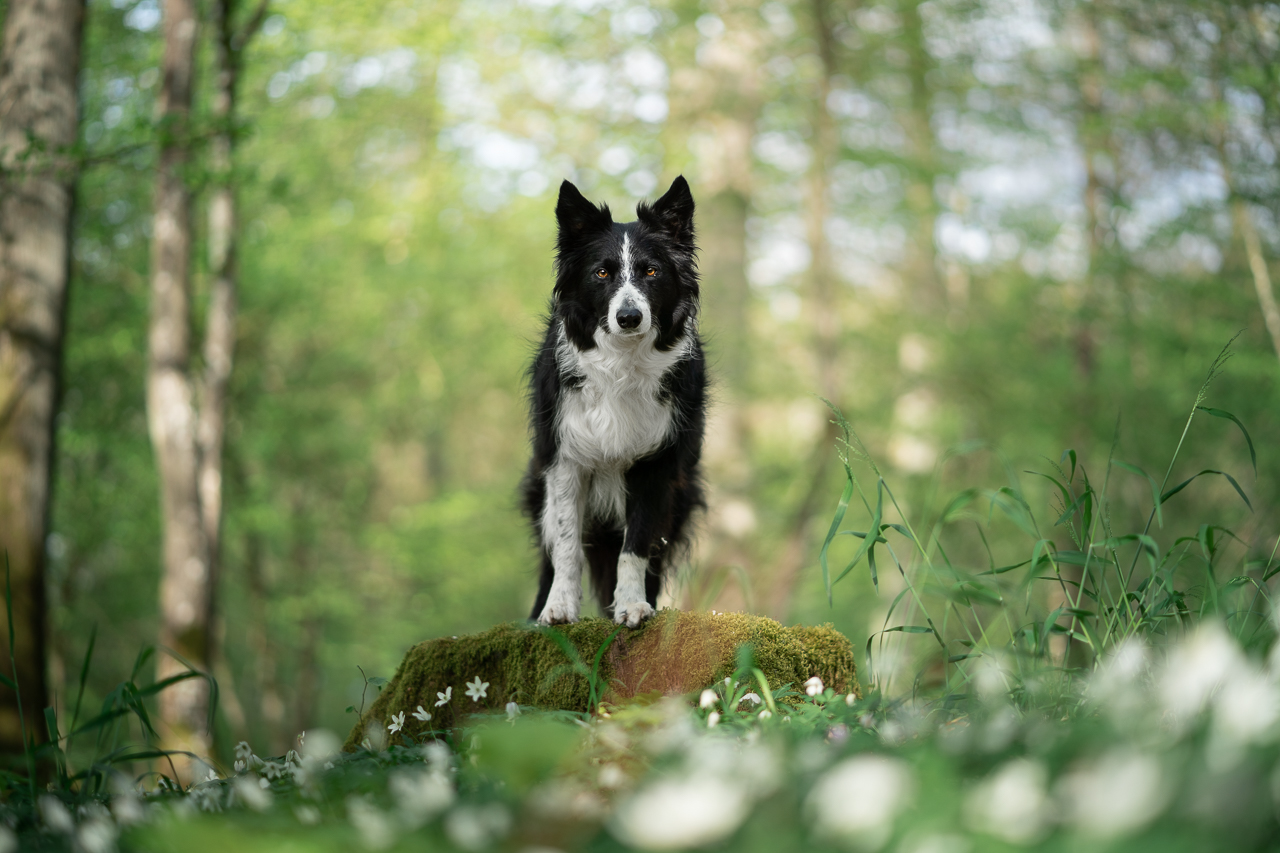
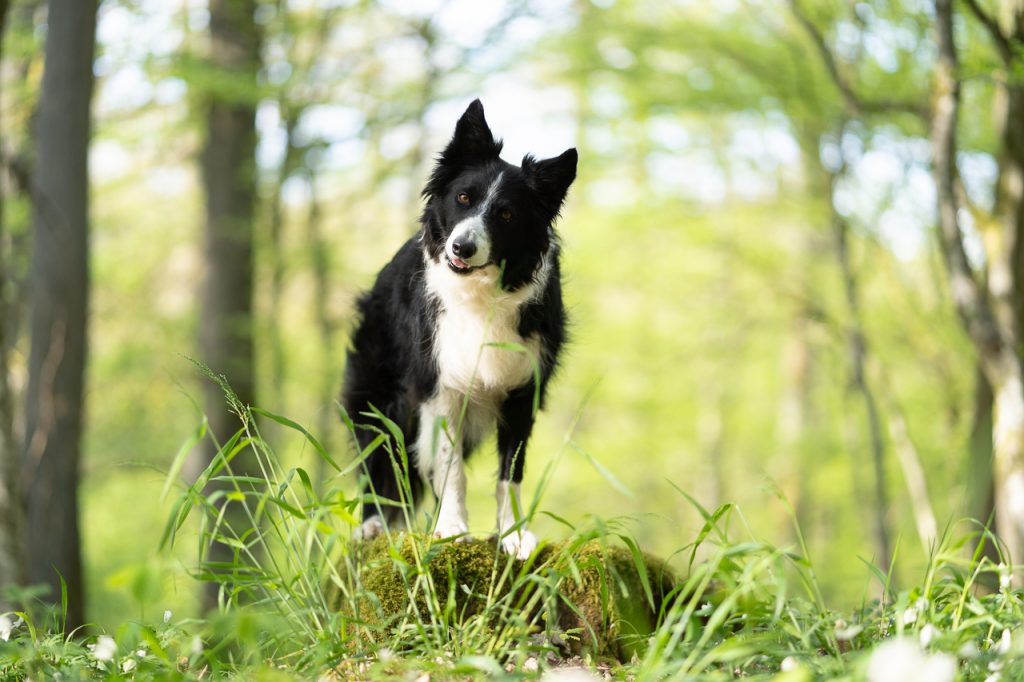
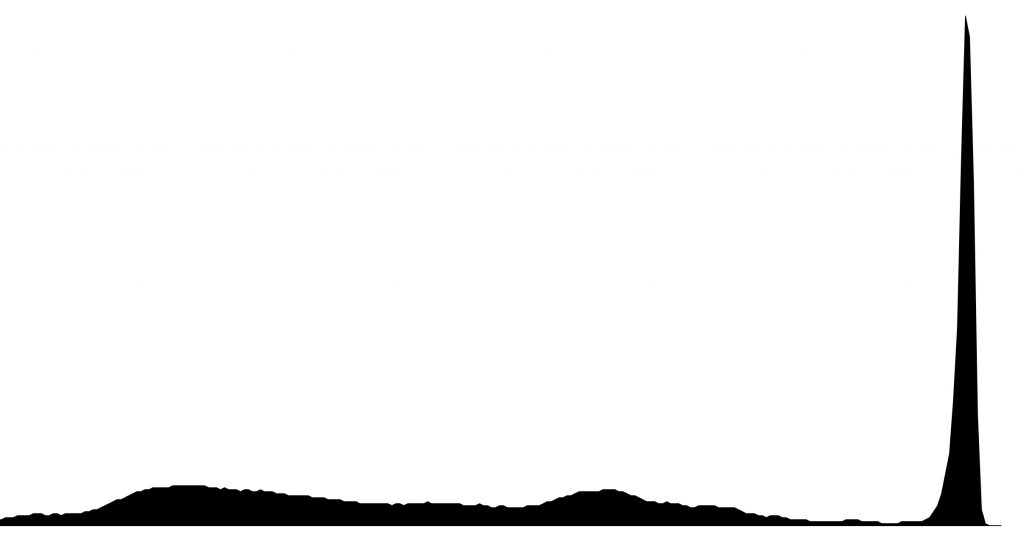
What might this photo look like? We can imagine there’s a dark/black spike: something not too big. A dog? A tree trunk? The rest of the photo is reasonably well exposed with a lot of midtones and some highlights. No crazy bright areas though and certainly nothing blown out like backlit bokeh in the background. Probably unlikely an open sky either, as this would show up on the highlights/whites side as well. Something in the forest then? But not a deep dark forest, and not underexposed like many of my photos. Just something well lit, with one chunk of black.

Are you surprised? Does it match up with the description above?

Let’s have a look at some more. Have a look at the histograms below, then click the drop-down to see the photo they’re from.

All photos are straight out of camera.

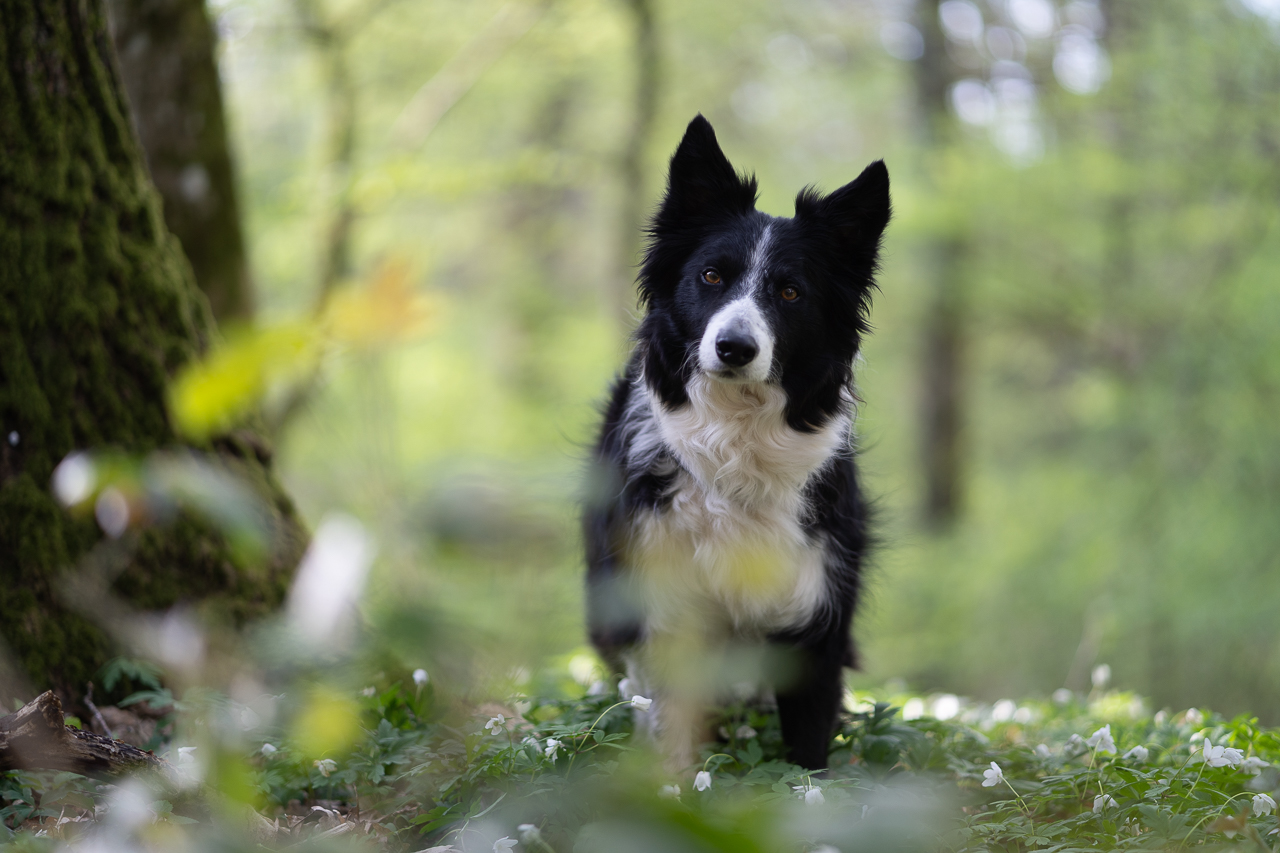
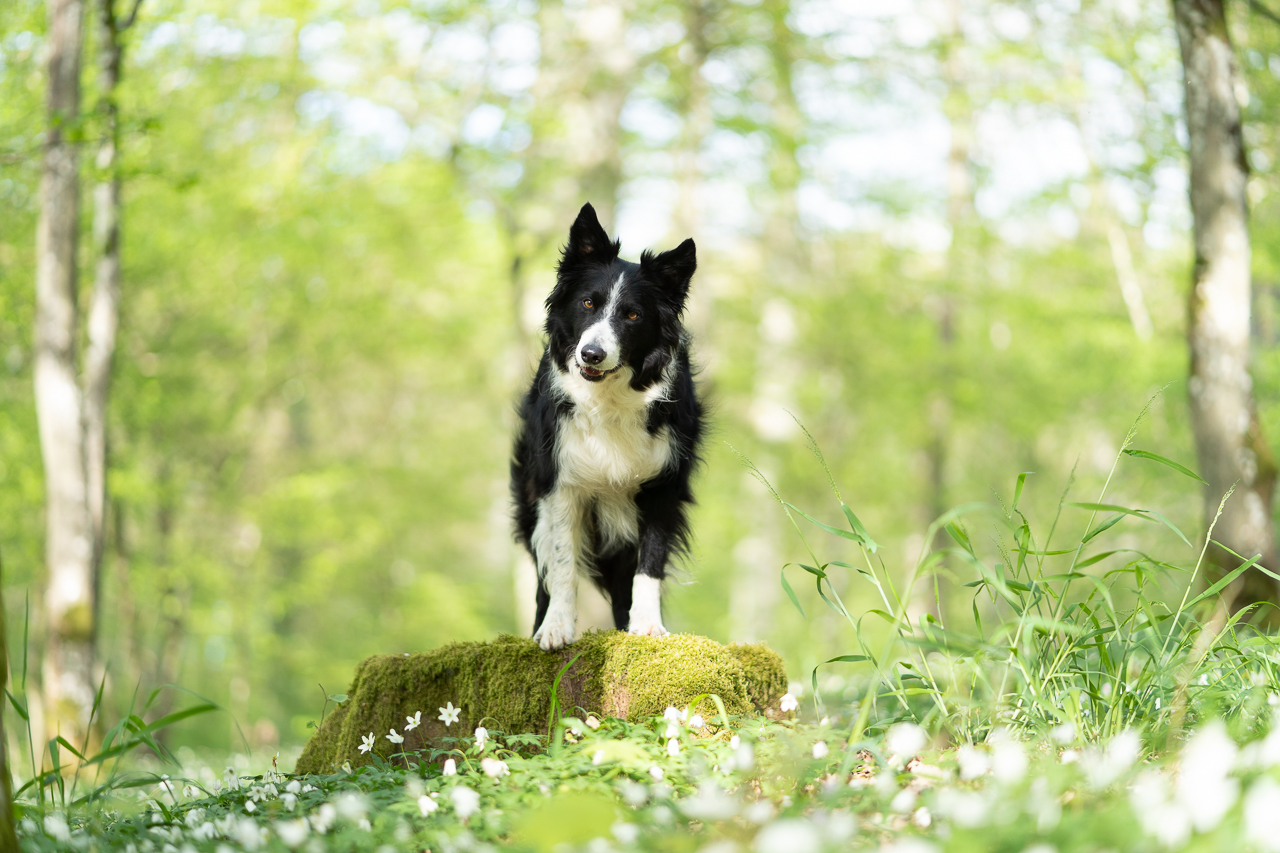
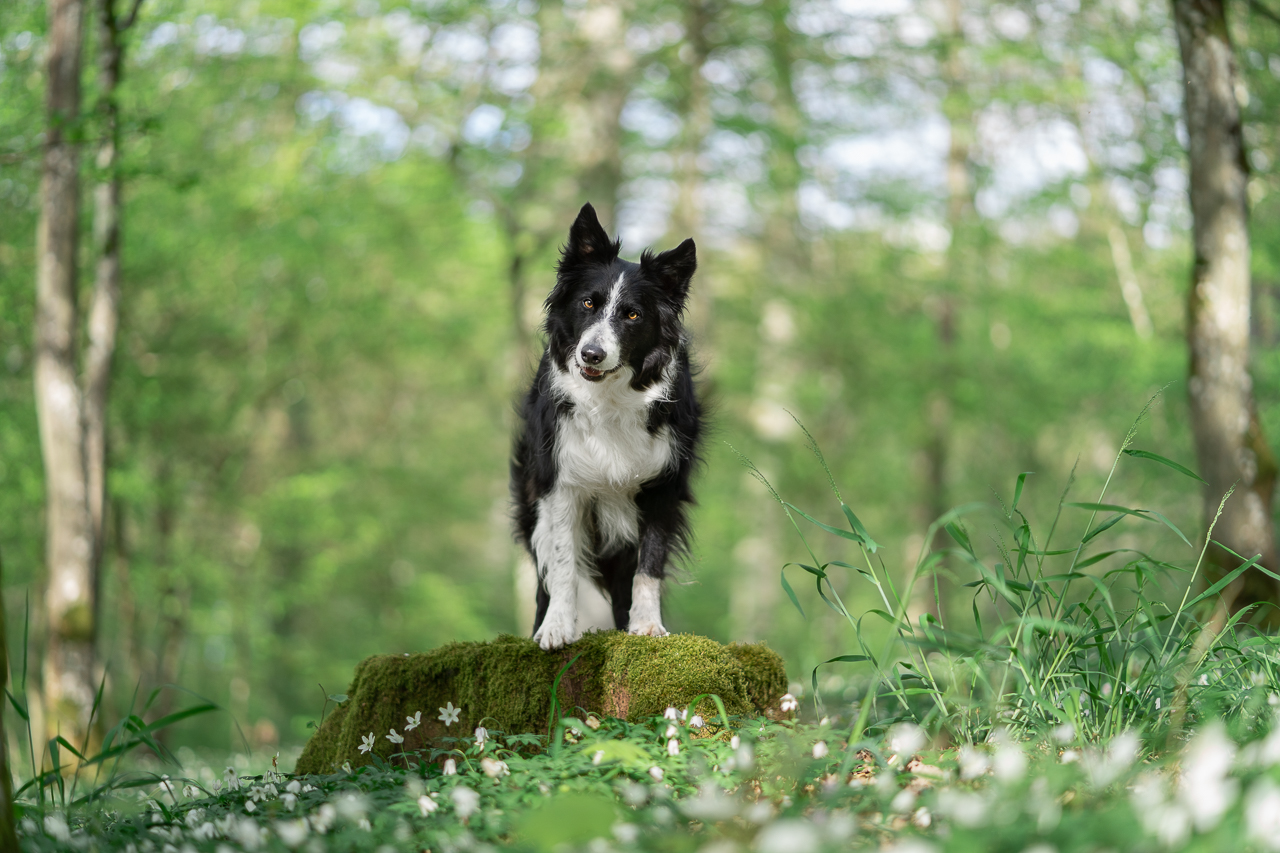
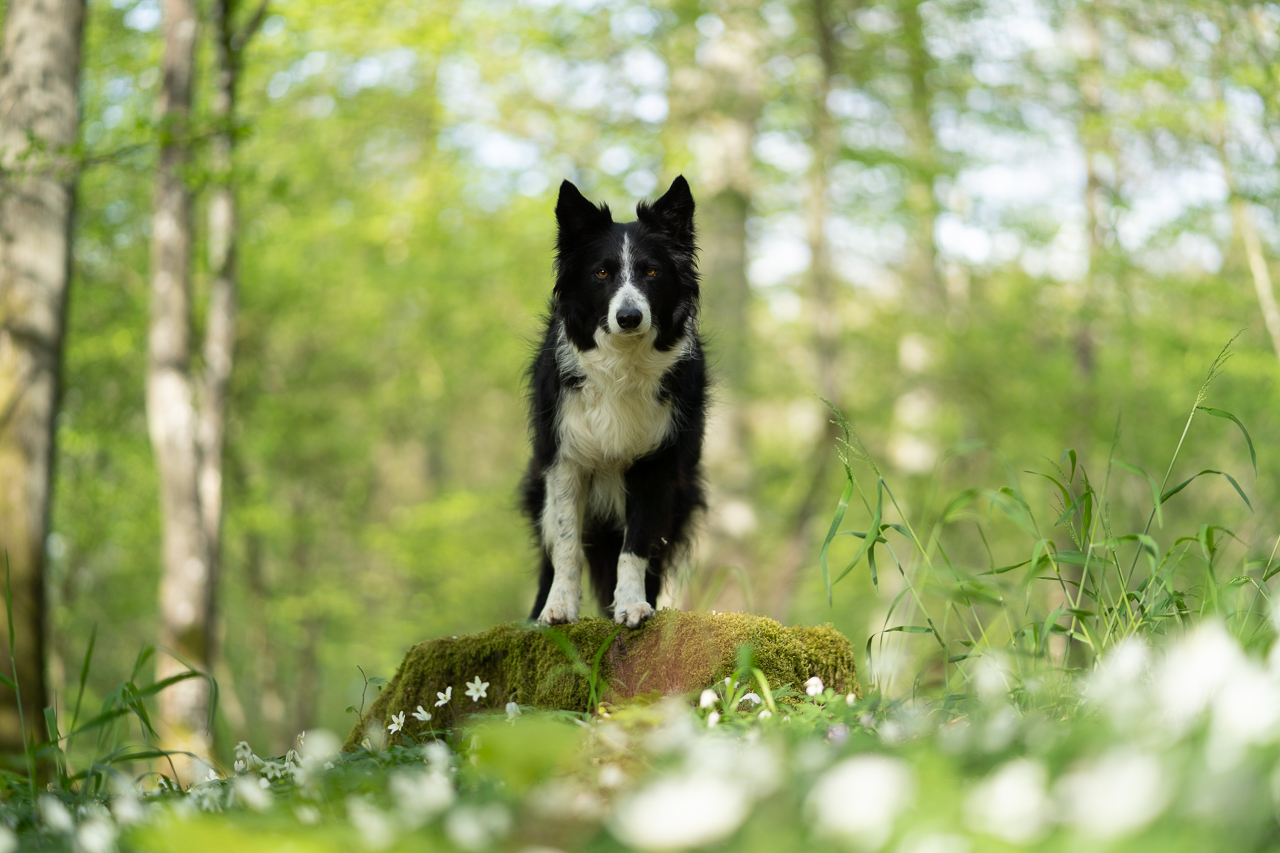
This one has a lot more of the histogram down the blacks and shadows end. This makes sense when looking at the photo, as we have Loki in black and a large shadow area to the left of the photo.

The highlights from the background are quite subtle and not blown out so they aren’t showing up as highlights or whites.
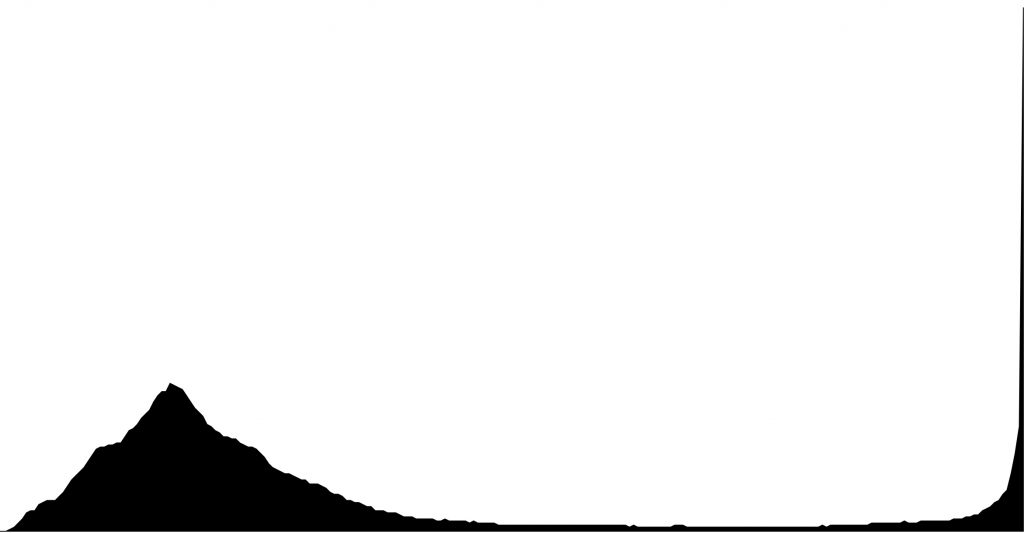
This image is mostly made up of a chunk of shadows (Journey and the plants in the foreground and tree in the background) and a big, problematic spike on the very right hand side, indicating some highlights that have been clipped/blown out and have lost data.

Below you’ll see the image if I lower highlights and/or exposure over those bright areas. See how there’s some parts which are just pure white with sharp edges? These are the blown out parts.

They can be very distracting for your audience as their eye is drawn to the brightest part of the image, and they can be extremely difficult to fix in a way that makes sense and looks nice.

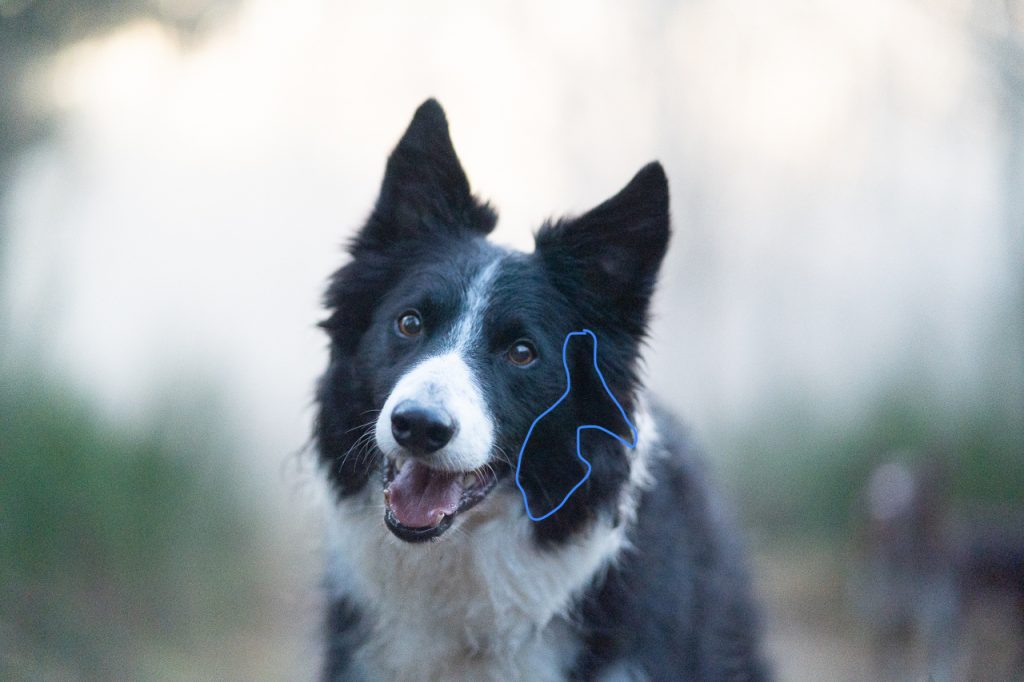
And this is the other end of the spectrum. Here we have a photo with a lot of data bunched up down the blacks and shadows end, with a little bit near the midtones and basically no highlights.

I would be more likely able to fix this photo in editing than the one above, if my camera has decent dynamic range and is able to capture that much data in the dark areas.

Here is the image with the exposure lifted to show you what data has been clipped in the blacks. I have circled this in blue.
Here, we have a photo with a big blown-out highlights problem. 

Look at the right hand side of the histogram. See that spike? This is the whites in the background that have been blown out and have no data left.

Editing this photo will be quite difficult, as I will be unable to “fix” these highlight areas easily. 

The shadow to the left is likely representing Journey.
At first glance, the histogram of this one looks like a bit of a disaster!

But look closely! You’ll see I’ve very carefully left a gap between the edge of the graph on the right hand side. So while the highlights are VERY bright, they aren’t blown out.

When I edited this photo I managed to recover a lot of detail from the sky.

Why is this important?

Get into the habit of checking your histogram, either when you’re previewing your photos after taking them but before you leave the location, or better yet, if you can have it up on your display as you’re taking photos.

This will allow you to accurately gauge the exposure of your photos. If you know your camera can’t handle underexposure but everything is bunched up down the left hand side, you may need to fix your exposure.

If you’re taking photos in backlight, and you notice a spike to the right hand side, you need to make a decision about whether to lower your exposure, or deal with the blown highlight.

I can’t make that decision for you: that decision depends on your camera’s capabilities, how the exposure on the subject is already, how your editing skills are and so on. 

Note! Your histogram may not show up very small blown out areas, eg., the small part of white on a dog’s snout or a white dog’s back or collar which will be getting a lot more light than the legs or chest. If you know this area is likely to be getting bright due to light shining from behind or directly on the white area, you may want to underexpose just slightly to make sure that those small spots aren’t accidentally getting blown out.

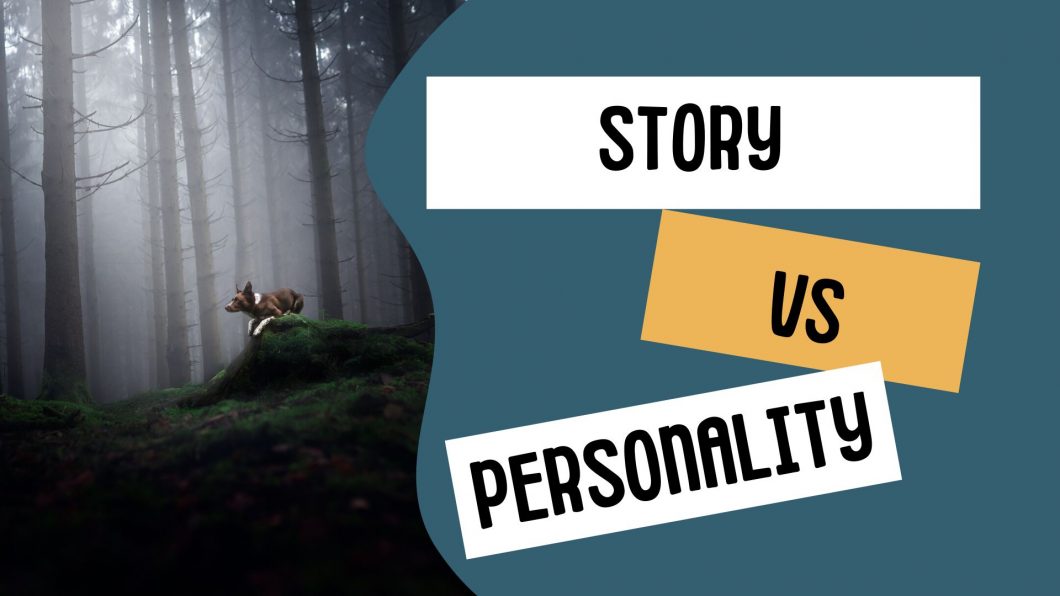
Story vs. Personality

I have noticed, since I started teaching, that there are two distinct feelings to the majority of my photos. That is: 

  • Photos which show something about the dog’s personality
  • Photos which tell a story where the dog is a character in his own world.

These two types of photo for me have very different feelings and require all the elements of photography: light, location, pose, expression and so on, to be used in slightly different ways. 

The first, personality photos, are those where it feels like the dog is aware he is having his photo taken. He may be less naturally posed or doing a trick, he may be looking at the camera, or he may be interacting with his environment in a way that he wouldn’t do if he was out in the wild by himself. Owners tend to like these photos the most.

The second, storytelling photos, feel like we’ve stumbled upon this creature in his own environment or world, and have managed to capture him through our lens without  interference. He may feel more naturally posed, may not be looking at the camera (though not always), the location may feel more closed in and intimate. 

Have a look at the two images below.

Both these photos feature Journey in the woods. Although there is some differences in editing and so on, there is a very different feeling from one to the other.

The image on the left, Journey is standing and looking at the camera in a pretty open scene. He’s reasonably close to the camera and it feels like he’s well aware of having his photo taken. In the other, he is further away, lying on a stump, looking to one side. There is more foreground element so it feels like we could be spying on him as he watches his world from his little throne. 

At least, that’s how I image it.

Of course, as with all art, this is subjective. What I see as a storytelling photo of the dog being unaware of my presence, might not feel that way to you. And that’s ok. 

But for me, there is something particularly magical about creating a real storytelling photo, where the dog is the main character, and we are just observers of him in his world. 

Things to Consider

As you work through this course you will learn a lot more about the “elements” of putting a photo together, but it’s worth keeping in the back of your mind how by changing some elements, you can go from a lovely personality photo, to a more captivating storytelling photo – if you want! If you’re taking photos for clients, it’s worth providing a variety of both!

The table below is a guide. In the example gallery below you will see some photos where I have made a more “storytelling” photo where the dog is extremely close to the camera and looking into the lens. So it is as much about how you create the intention of the photo as it is about the elements themselves.

Element
Personality
Storytelling
Light
Simple, clean light, soft and ambient, or bright and warm
Can be dark and moody with less visible light (NOT underexposed), creative use of light, more potential to shape the light in editing (maybe).
Distance from subject
Close-up, head and shoulders, detail shots, full body but filling a good portion of the frame
Possibly further away, taking up 1/3 of the frame, or even less
Pose
Any pose, particularly sitting, lying down, or with their paws or body on objects (logs, benches, tree stumps etc) in a way that they would not do “in the wild”. Tricks like standing/sitting up pretty, hi-5 etc.
More natural poses, as if the dog had been wandering in the woods and heard something, so paused to listen. Curves in the body. Standing on things if they comfortably fit. Chin down? More standing poses.
Expression & gazing direction
Any expression that is natural to the dog. Looking at the camera or very slightly over the photographer’s shoulder.
Looking more severely to one side, up, or away from the camera. Expression suits the scene/location/mood and is tied closely to it.
Location
Any but more open spaces, eg., roads, tracks, fields of flowers, flowers bushes in general.
More “closed” scenes, photographing through undergrowth/bushes/branches/leaves for a lot of foreground elements, the location helps drive the mood and is closely linked to the story.

By thinking carefully about how to combine these elements so that the photo you’re taking makes sense, you will create a much more powerful, interesting, and artful image – whether you are just taking photos for fun, or are looking to become professional. 

 
Not every single photo you take needs to be capable of winning awards, or to have hours of thought put into it. But the more you consider the elements above, the more impactful your photos will be once you are thinking about those things on a more subconscious level.


Examples

Personality/Aware/Posed

Storytelling/Unaware/Observed

Editing Dogs in Landscapes

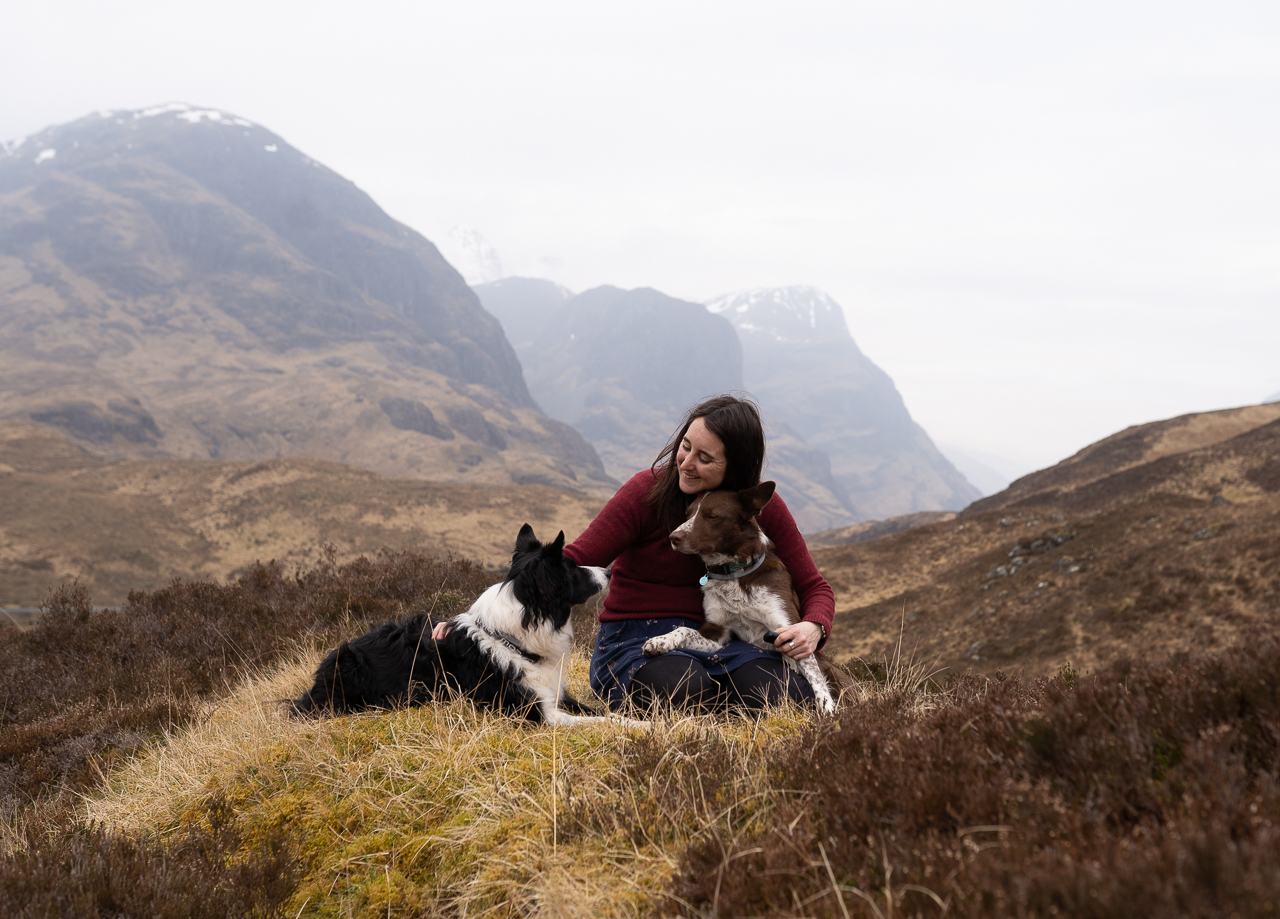
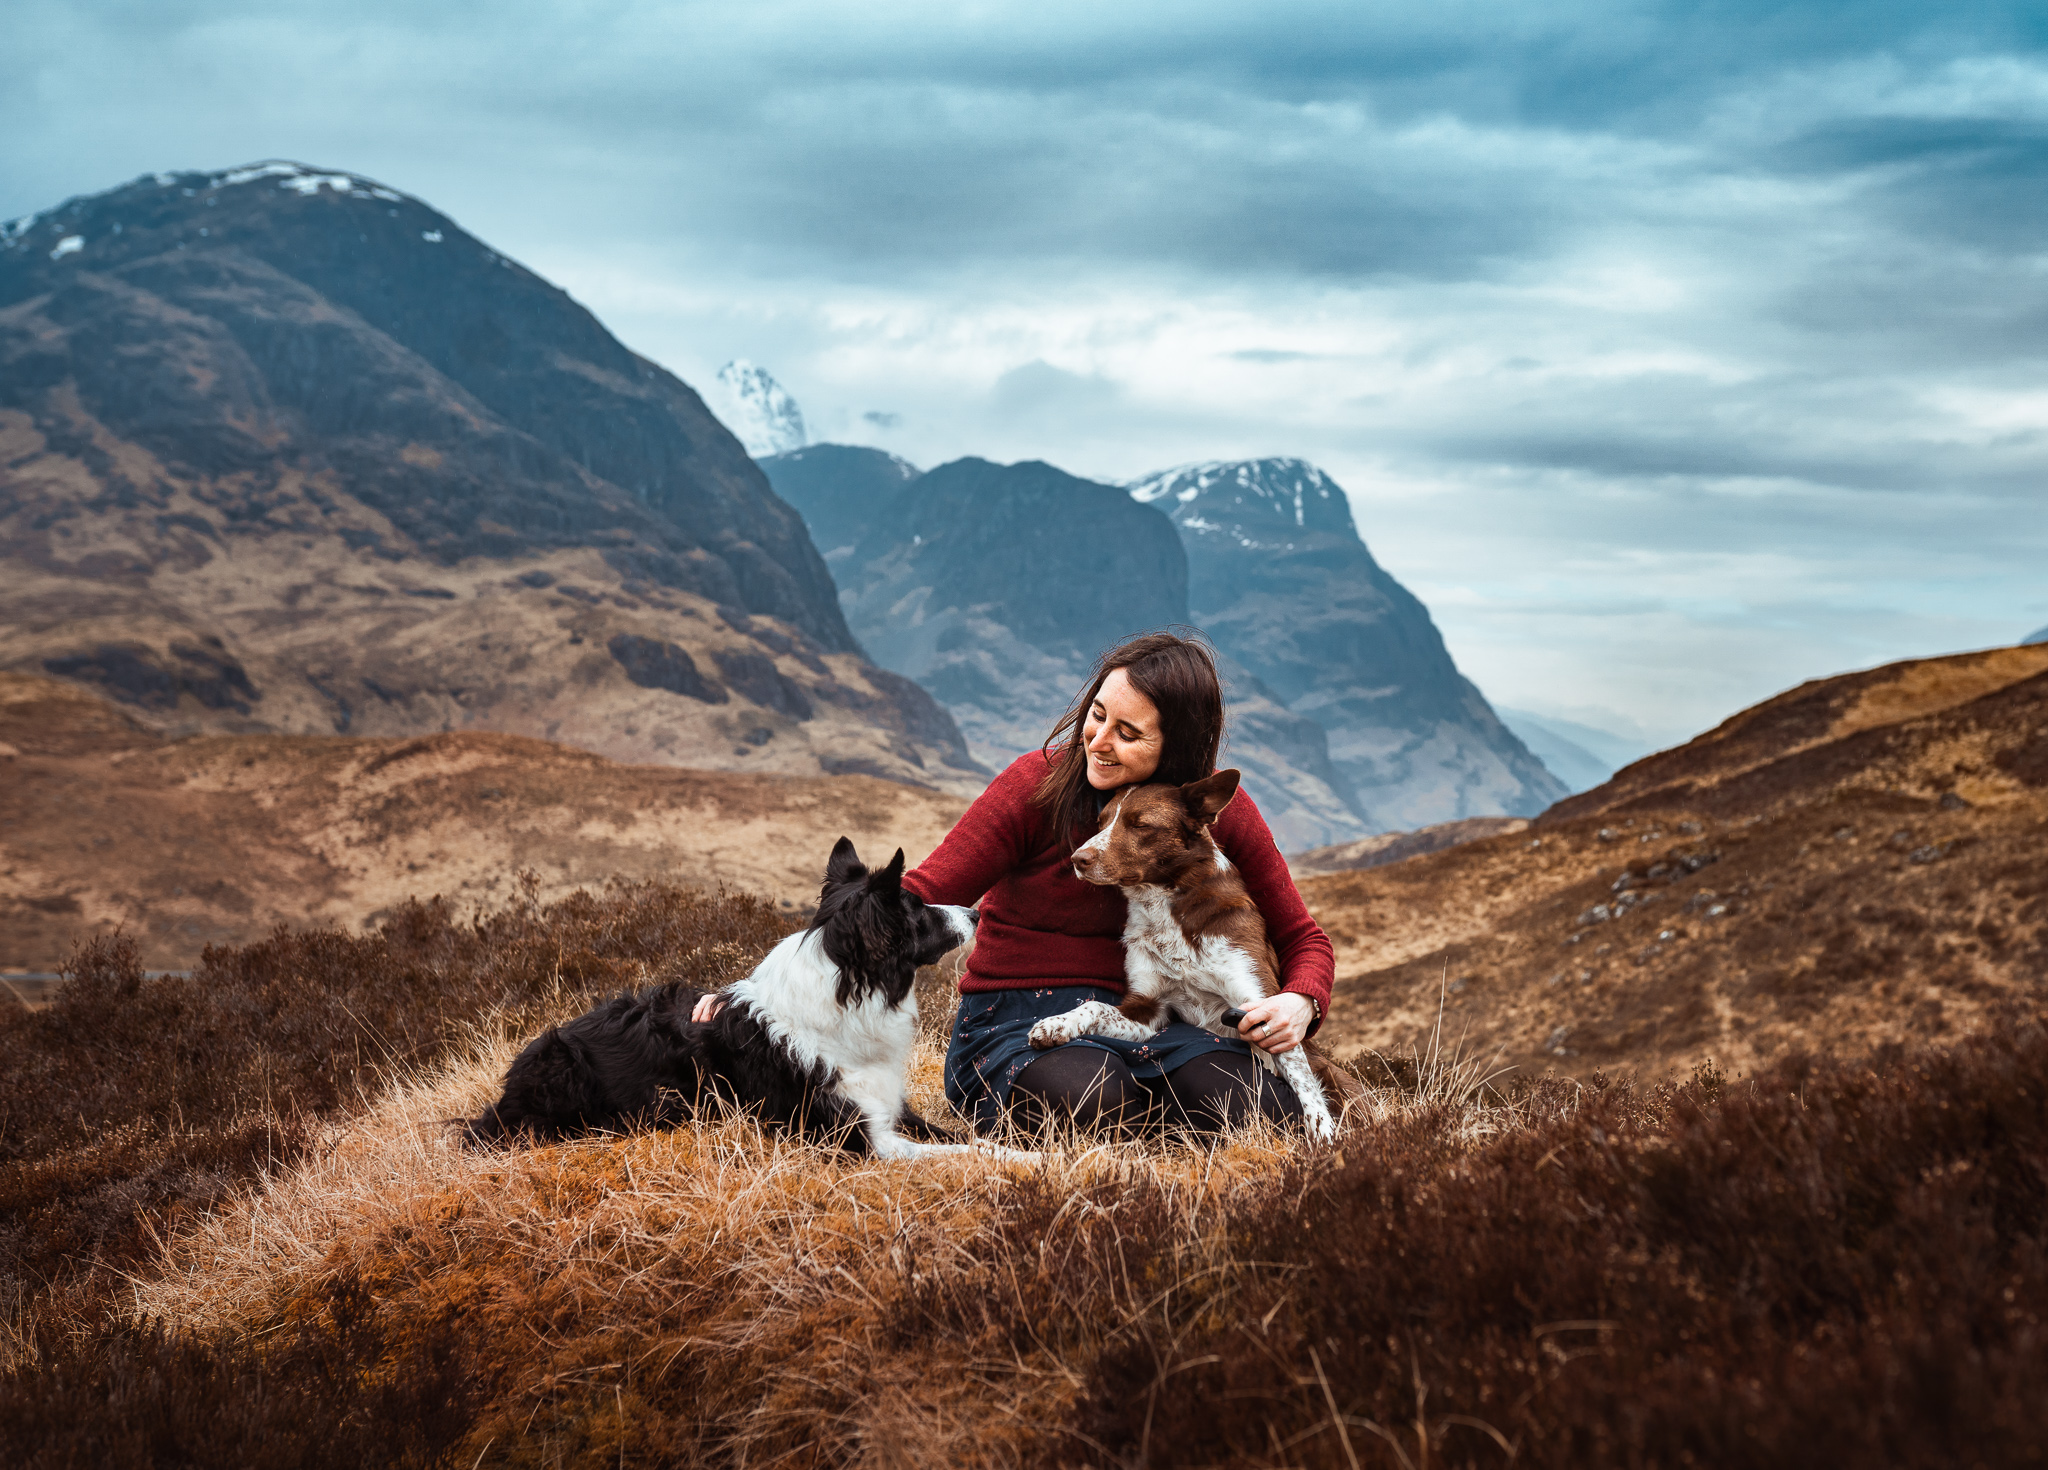
Watch the video tutorial below to edit this image step by step. My process for editing landscapes is a fair bit different to my normal process in that:

  • I don’t shape the light nearly as much
  • I’m a bit more flexible with colour-grading and don’t mind if the dogs get a little coloured
  • I am not obsessing quite as much about drawing attention to the subject (especially through use of light and dark) but instead about creating a balance between the subject and the landscape
  • I may use self-created presets for series of images taken in the same landscape with similar lighting, to speed up the process
  • I make more use of the HSL panel, and the colour grading panel in LR/ACR than I normally do.
DSC04402 DSC04402-Edit

Beware the glow!

Often, when editing our landscape photos, we need to quite dramatically darken the sky, while brightening our subject. Depending on how you do this, it can quite quickly create a glowing white halo around your subjects. If you’re using the adjustment brush to adjust exposures, this glow will be larger and soft. If you’re using “select subject”, it’s likely to be smaller and sharper.

It’s difficult to get rid of this glow without spending a lot of time very precisely adjusting your masks. Therefore I recommend gradually fading your exposure adjustments, using radial filters in a not-too-specific way, and avoiding as much as possible big exposure adjustments between subject and background. Not always possible! 

One way to see the glow is to zoom right out on your photo and look at it thumbnail size. And make sure you come back to it with fresh eyes later on!

Check your masks

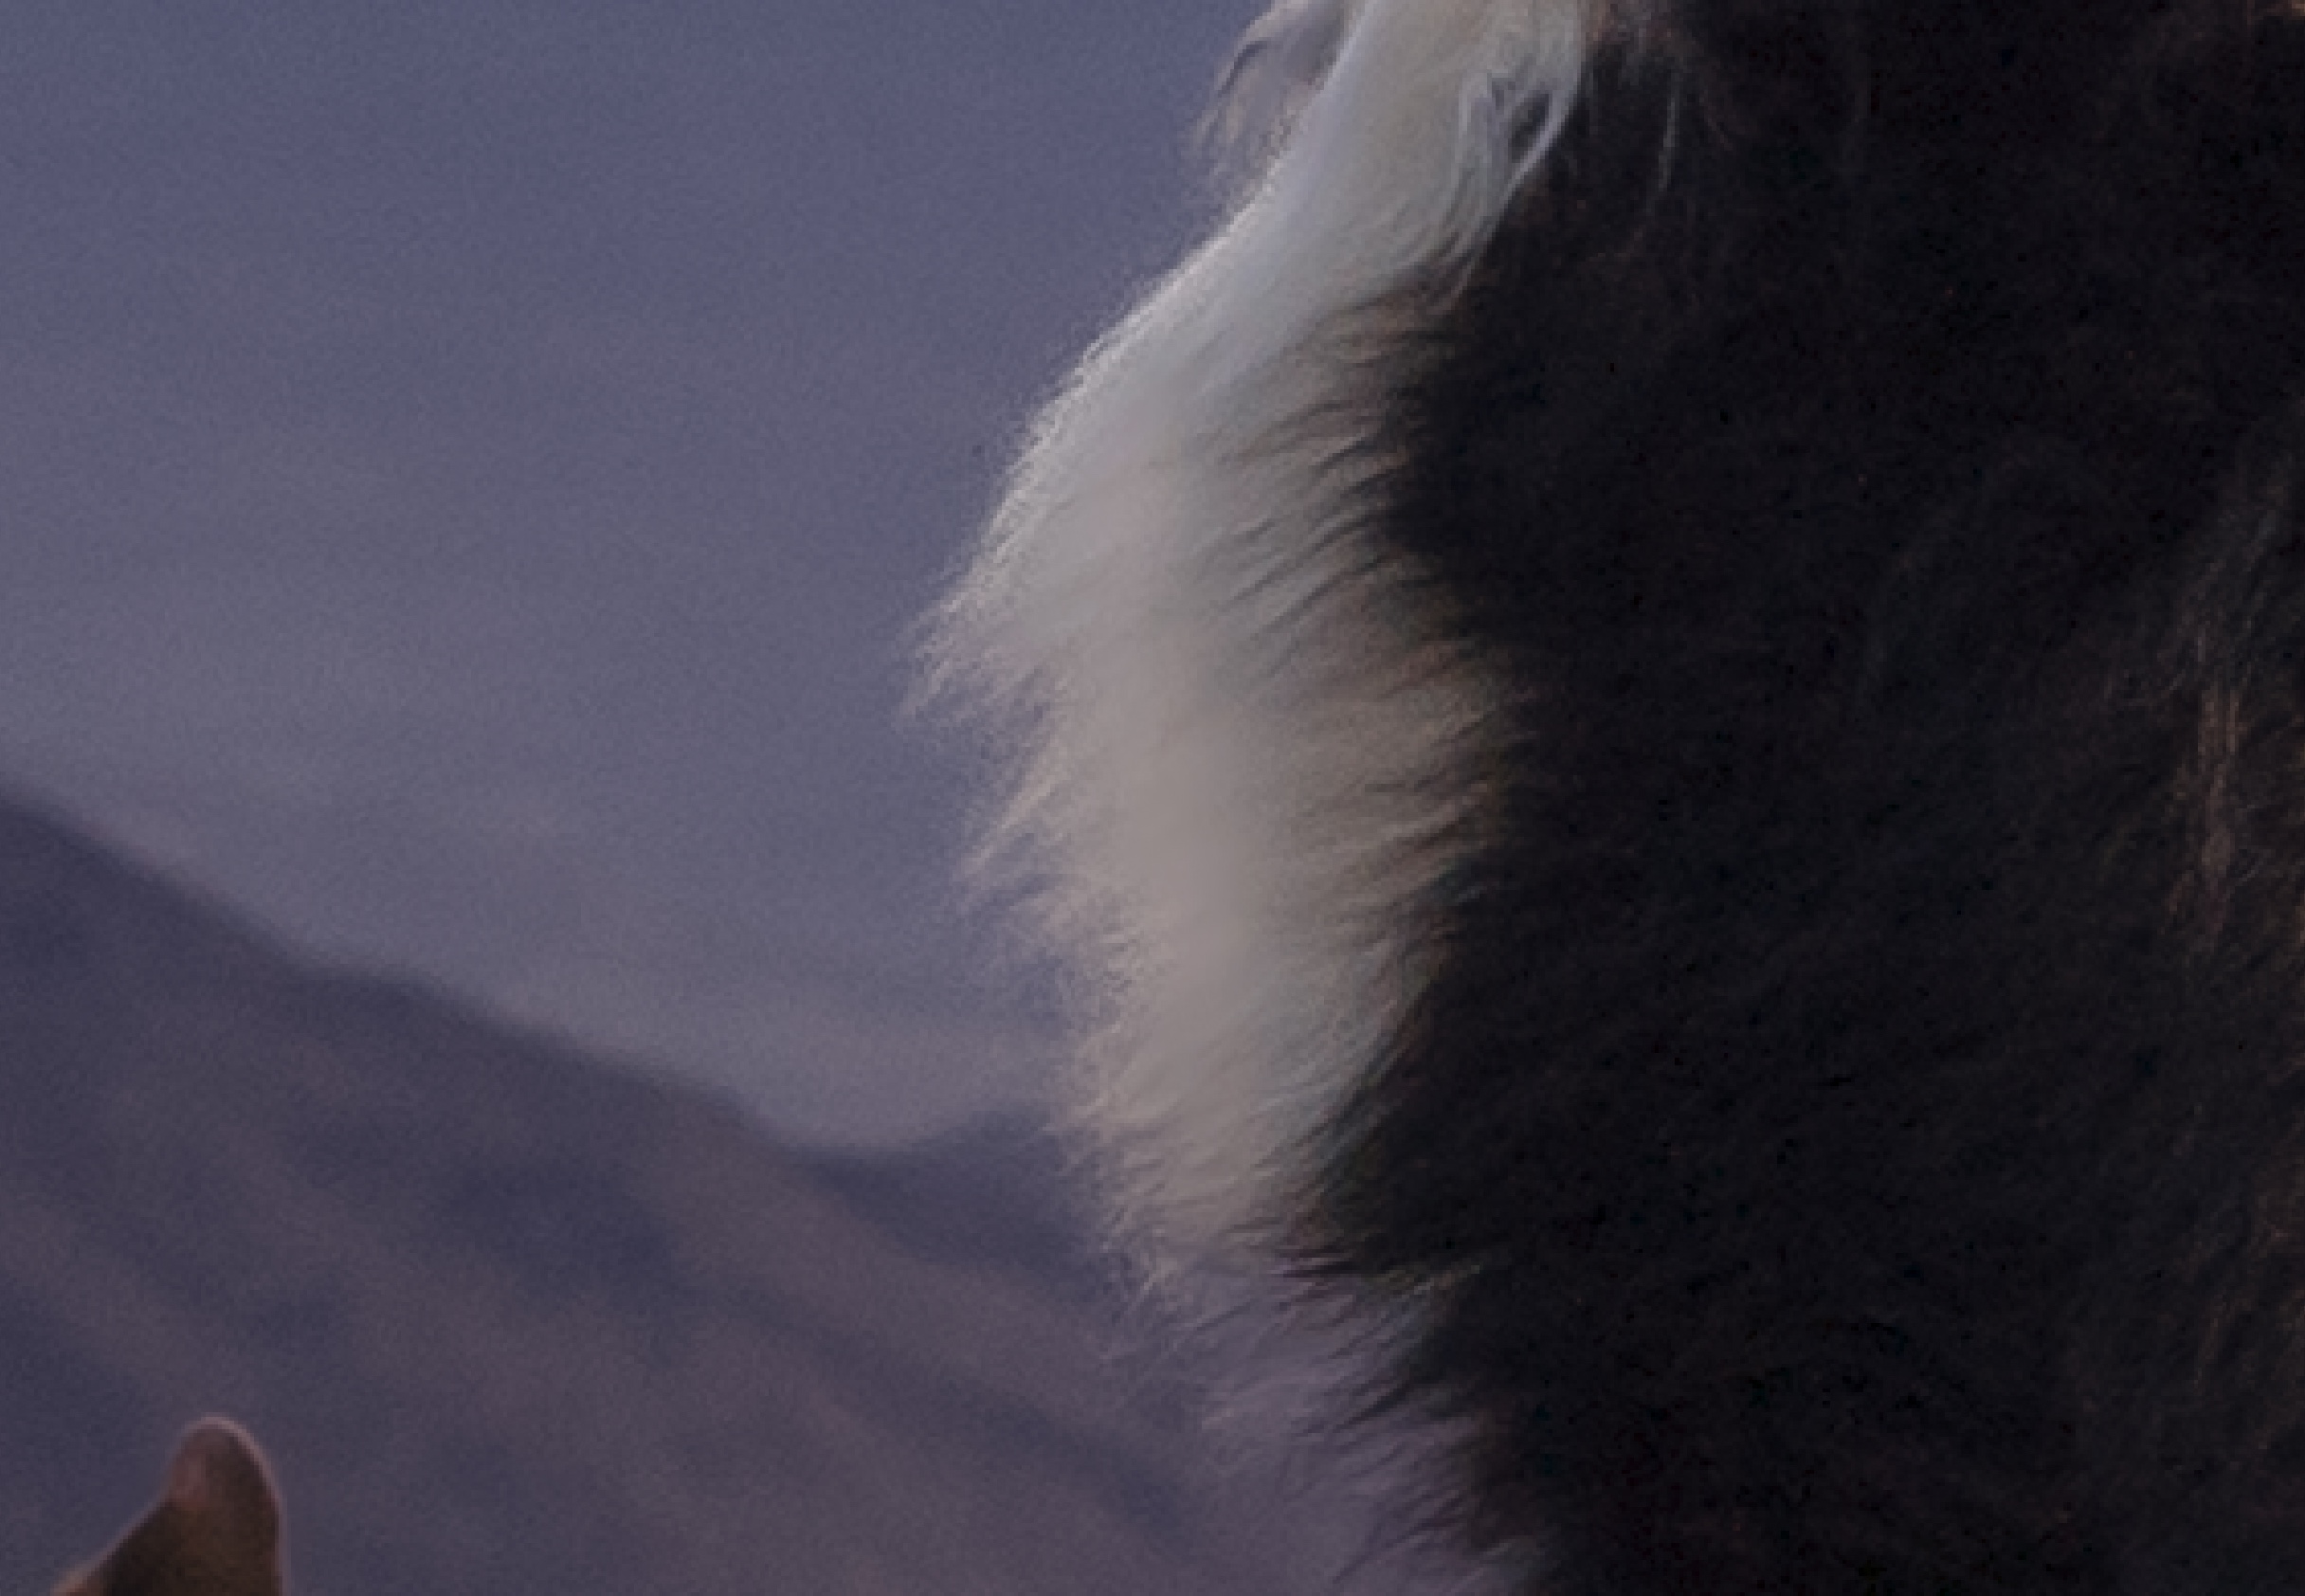
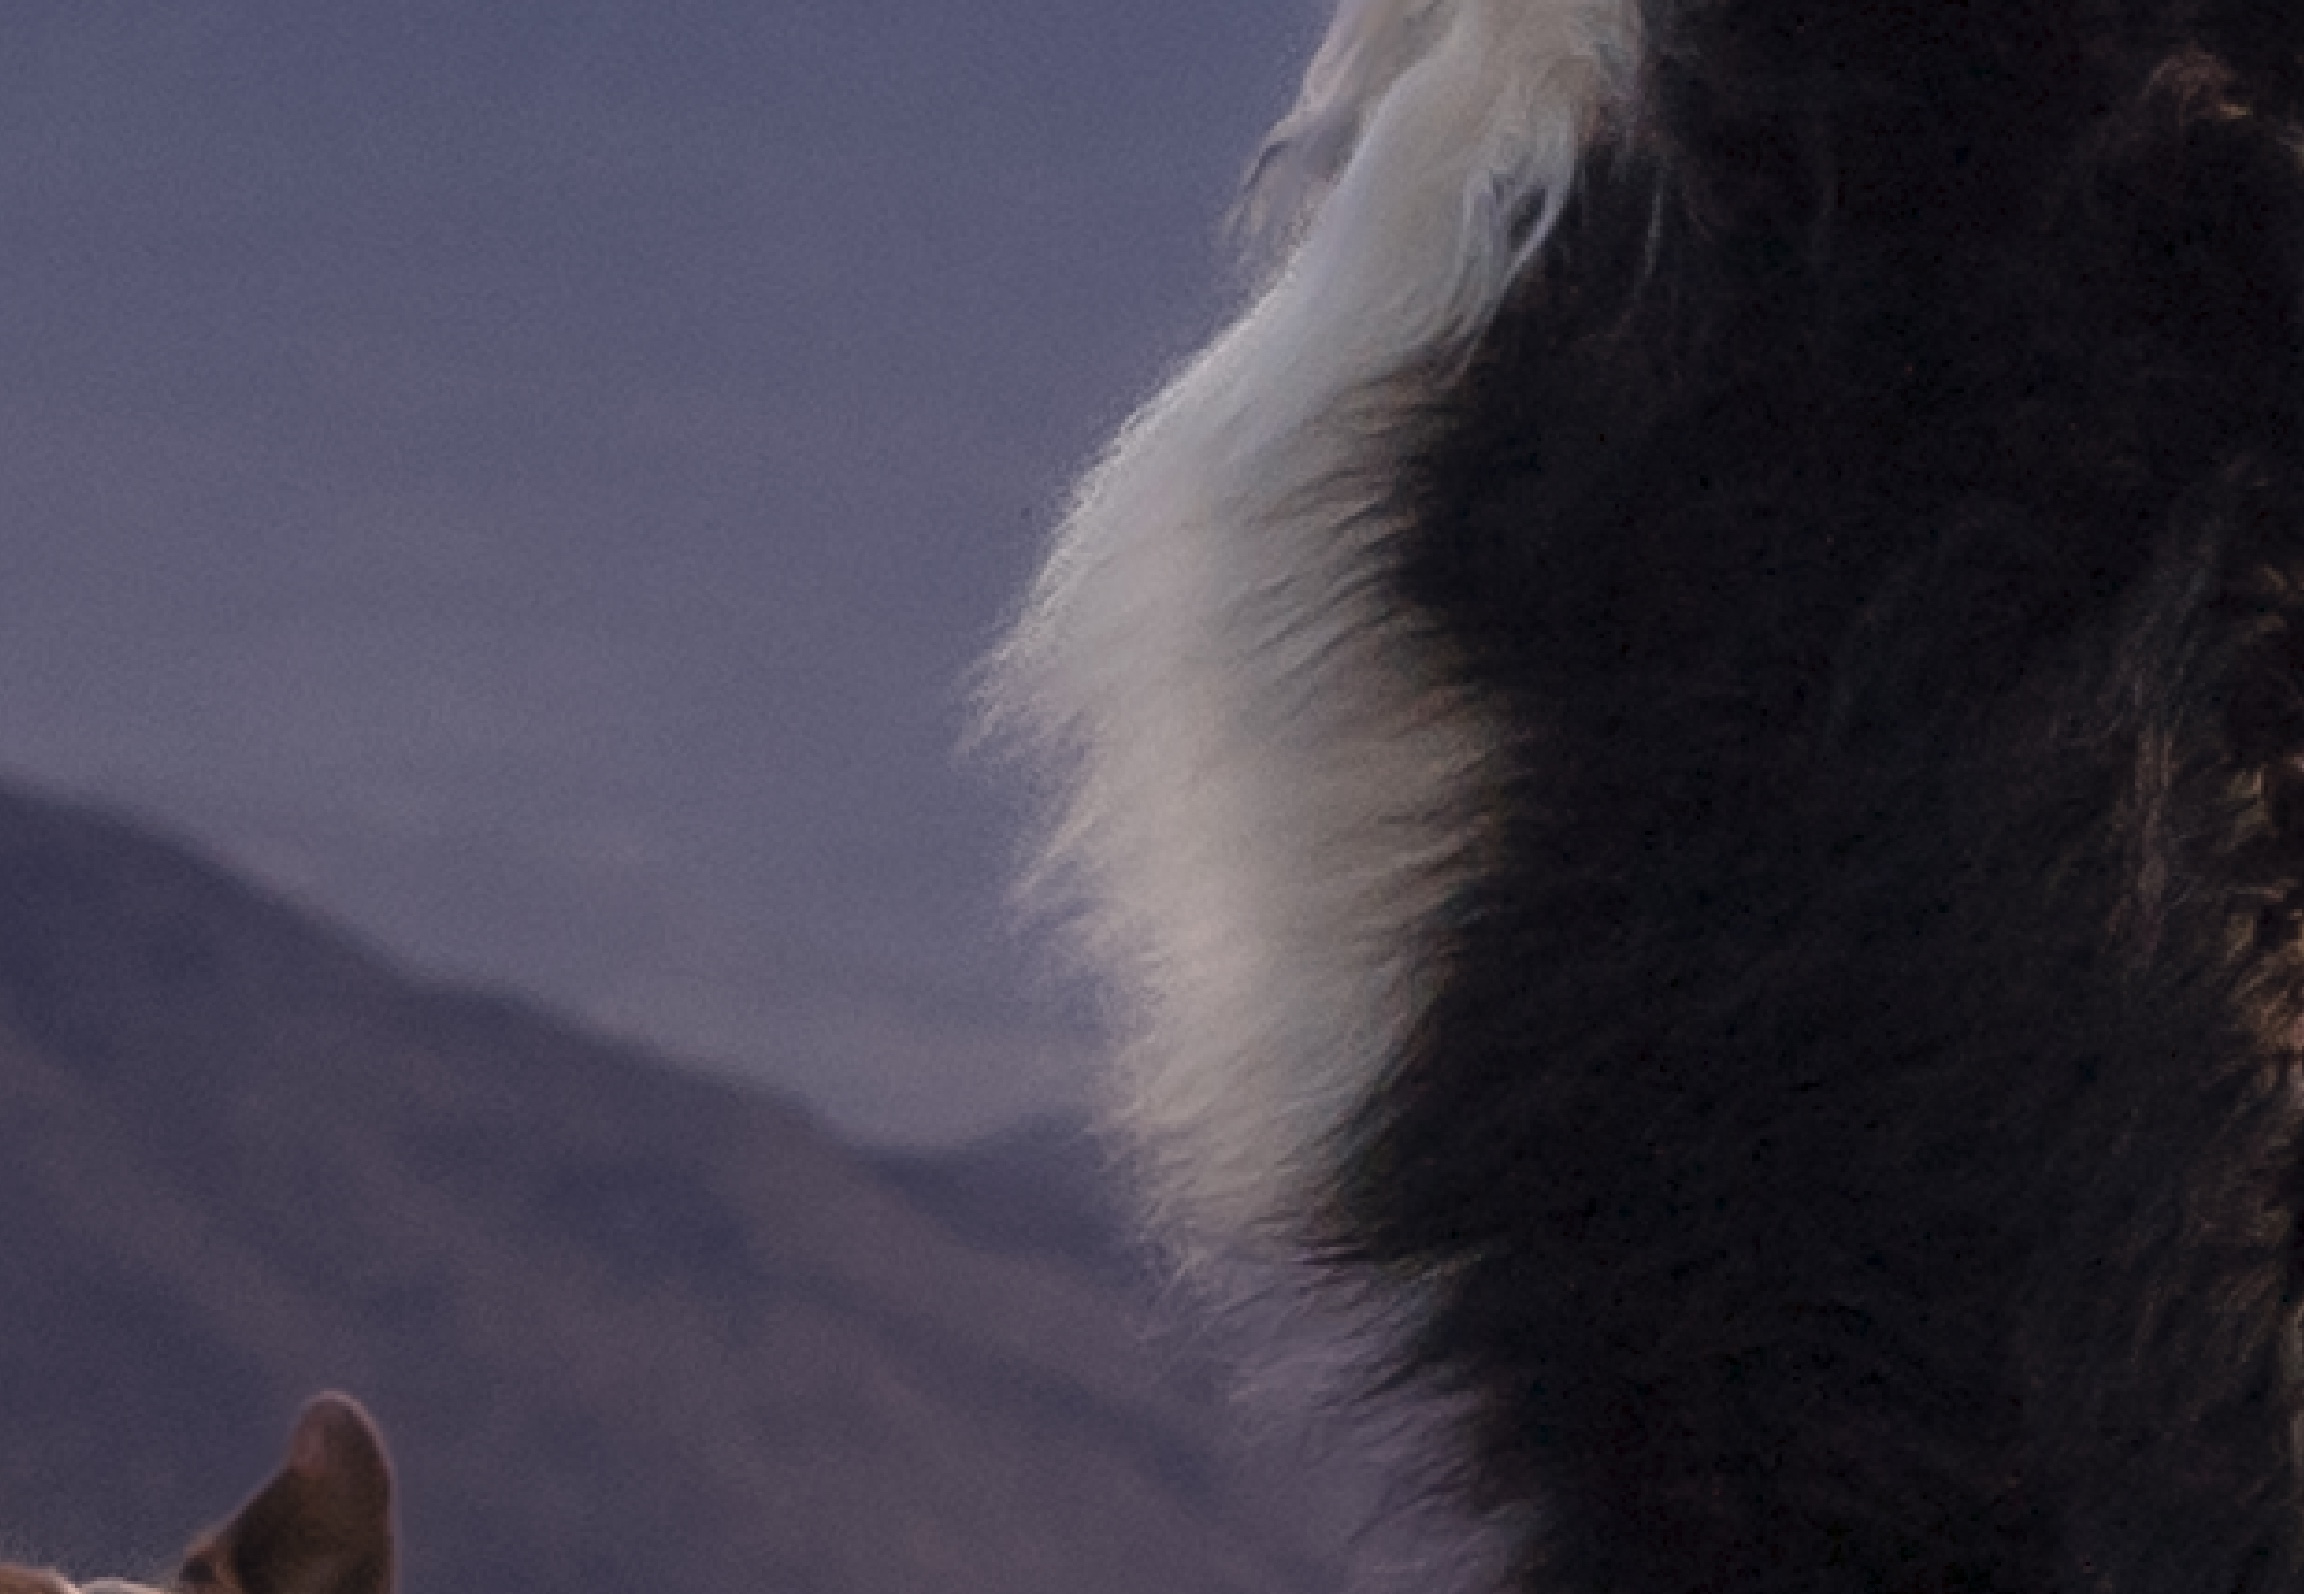
Similar to “beware the glow”, do a good, thorough check of your masks if you’re darkening the sky and brightening your subjects, especially if you’re using a “Select Subject” tool. Often, it can miss small bits and pieces (see below example!) and these can look very strange and out of place!

Watch out as well that the new masking features don’t just blur furry parts of your subject, or parts where some fur meets the background and it has a hard time finding the edges. You will want to fix these masks up.

Below: before & after. If you see these blurry edges, just use the brush tool to either add or remove the effect from where it’s blurry.

Mask blurred edges Mask blurred edges 2

Creating the Photo: Dogs in Landscapes

So, we’re in our landscape situation, now what?

We have to decide where and how to pose the dog, and consider gazing direction as well.

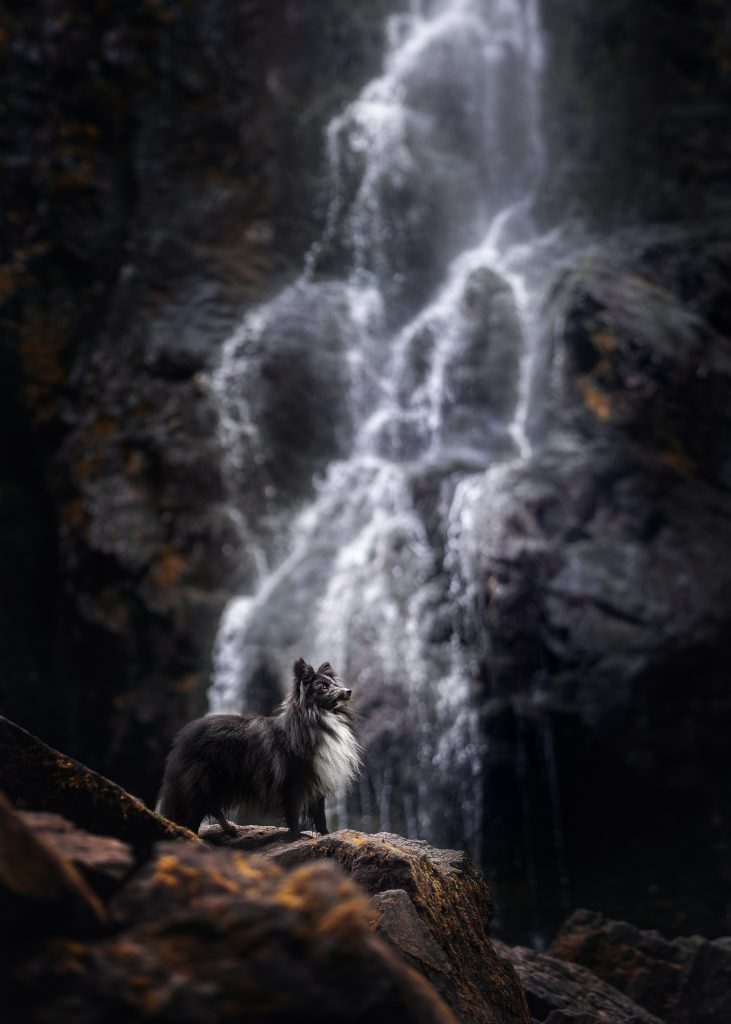
Often our options for where to pose the dog may be limited, if we’re in especially rocky places, beside a cliff, or in a gully or glen, or near a waterfall. So in some cases, you may need to just pose them on the nearest rock and try some different angles.

But afterwards, many of our composition ideas still apply.

Composition

When composing our photo, the best ones are going to feel balanced, and to draw attention to our subject in the surroundings. 

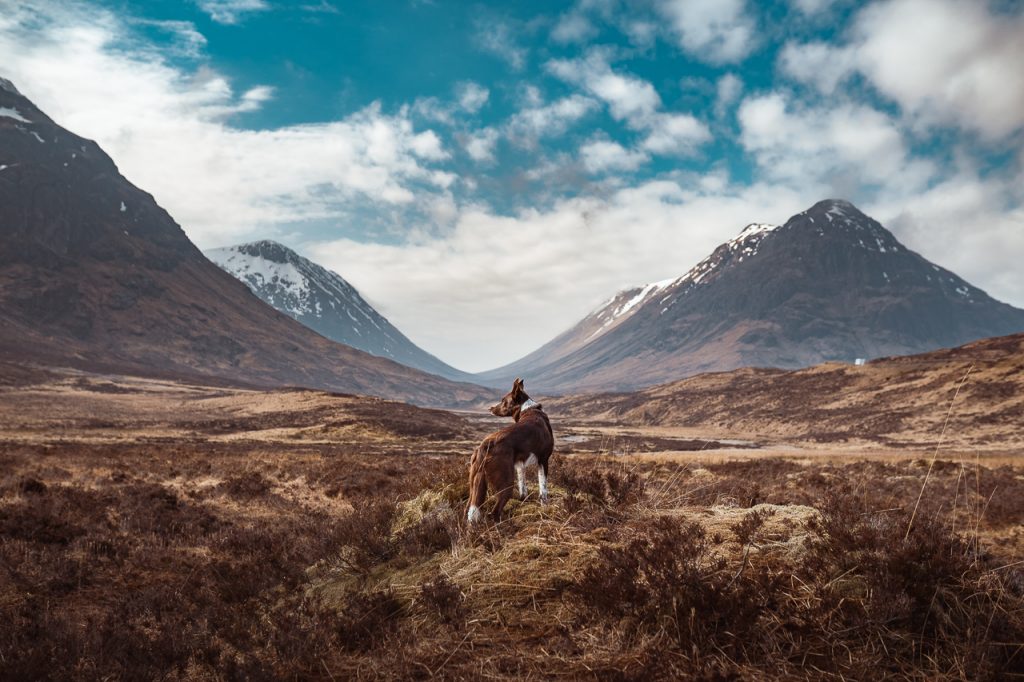
Mountain valleys can work very nicely for this as the mountains themselves can act as leading lines to the dog. Waterfalls, paths, bridges and trails can also create leading lines directly to the dog.

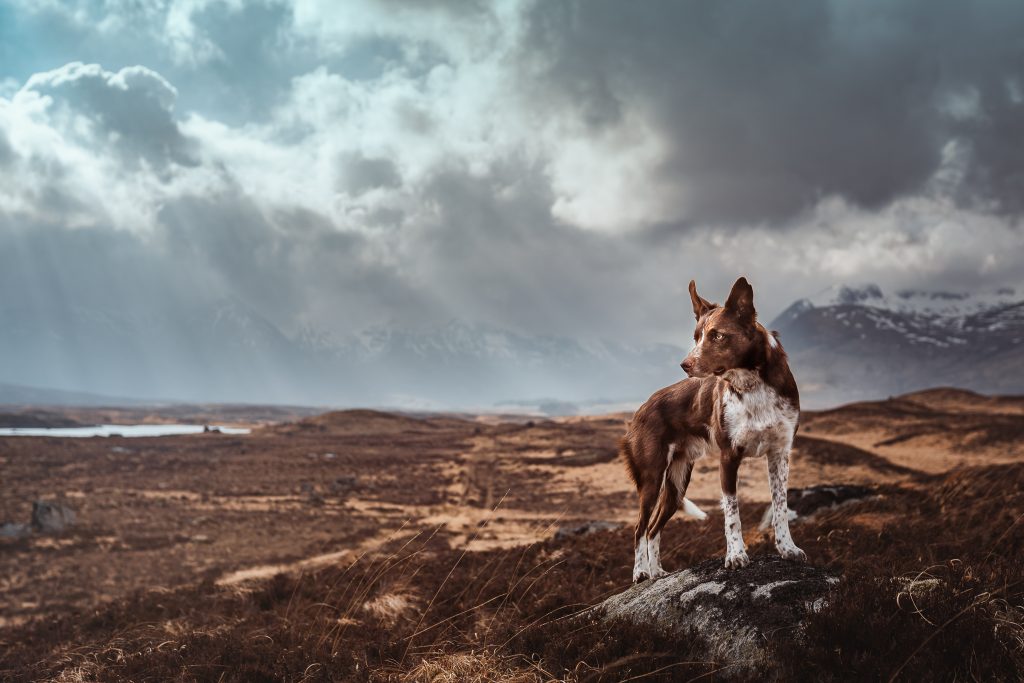
Keep considering your rule of thirds! You might want to dedicate 1/3 or 2/3 of your photo to sky, or in the case of the image below, 1/3 to sky, 1/3 to dog and mountains, and 1/3 to the ground.

It’s still worth trying to include some foreground interest if you can. In the photo above you can see the blurry grasses. Rocks, ferns or branches can also work as well! As with our portraiture, they add a sense of depth and dimension to our photos.

That being said, I would often prefer to put my dog on a rock or elevate him off the ground in order to help him have a bit more majesty and get less lost in the scenery – but this may mean I miss out on some foreground as I can’t be quite as low.

Using central composition and symmetry in your photos makes it very obvious and easy for your viewer to find your subject. The symmetry will help frame the subject, and will help the image feel balanced. Not always possible with landscapes! Using frames from branches, rocks, or other elements in our landscape images are just as relevant as in portraits – when you can find them!

Don’t forget that if the dog is looking to one side, we’ll want to give him space to look into. The more “severely” he’s looking to one side, the more space he’ll likely need to feel comfortable and balanced.

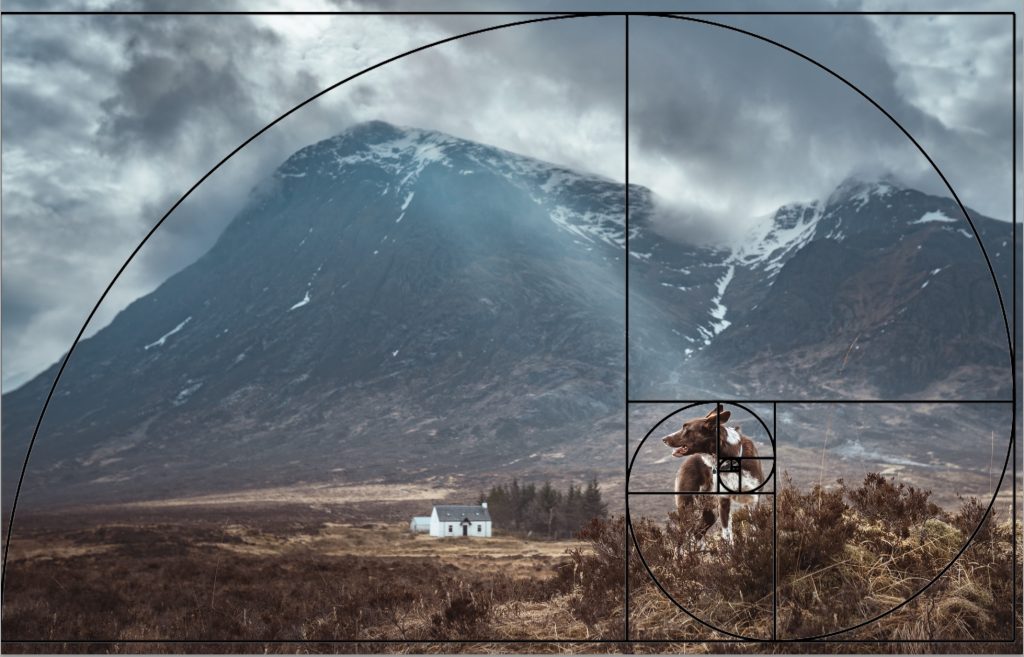
You can also consider using the golden ratio and golden spiral in your composition, but I wouldn’t stick too religiously to the eye having to be in the mid-point of the spiral, or the lines having to fit the curve exactly. The golden spiral certainly can make images pleasing, but I can’t say it’s something I’ve focused a great deal of when I’m on location and taking photos. If your brain works in such a way that you can visualise the spiral while shooting, more power to you! But don’t feel discouraged if you can’t.

I don’t find the composition of this photo particularly exciting but many of my landscape photos have the dog in the middle, so they don’t tend to fall in this golden spiral category very well.

Here, we have the curve of the mountain, more or less following the curve of the spiral, and then the vanishing point at the middle of the spiral is centred over the dog. We also have some blurry foreground/bushes at the lower part of the spiral.

Don’t be afraid to crop your images if it makes sense to do so! Take multiple images of a scene to create a panorama, then crop it so it’s narrower, making the scene feel long and more impressive than at a 3:2 ratio.

Pose

How you pose the dog and where he is looking depends on the type of photo you’re wanting to create.

If you’ve done my Next Level course, you’ll know I’ve talked about aware vs. unaware (posed vs. unposed) photos, and the same applies here.

Happy snaps, memories of your holiday, or a nice photo of your dog can feel more posed with the dog looking at the camera. It’s a nice photo of a nice dog in a beautiful scene.

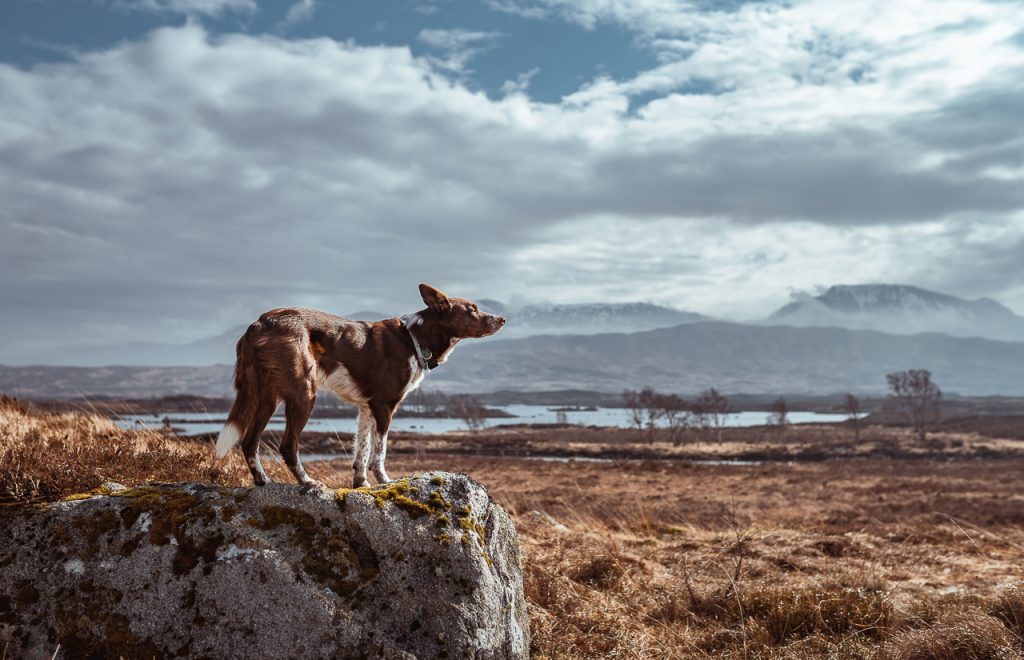
But playing with pose and gazing direction can change the feeling of the image completely. Suddenly the dog himself is enjoying this landscape he’s in, or he’s as majestic and powerful as the mountains, or he’s breathing in the fresh sea air, or he’s marvelling at the height of the waterfall. Even faceless portraits, where we can’t see the dogs eyes, can be incredibly powerful in landscape photography. Go have a look at some of your favourite dogs-in-landscapes photos and note how the dog is posed, and where he’s looking. Here are some examples of my favourites of more “epic” type photos.

Some of them are a bit old so there are some technical issues but the concept, pose etc I still love in a lot of ways

Weather & Light: Dogs in Landscapes

I would argue that the weather conditions or light conditions are even more important in landscape photography than in our normal portraiture.

Yes, in portraiture we don’t want patchy sun, or full sun looks harsh, but at least we can usually retreat somewhere shady, or find ways to kind of “hide” from the sun a bit. Or, if we get flat, grey plain white skies, we rejoice! A beautiful soft box! We can photograph anywhere! Hurrah!

But head into a landscape situation, where the top third of your photo is potentially going to be sky… or there’s nowhere to hide from the sun, and suddenly…

And while we can get nice soft light from flat grey skies, they do tend to be just that… flat and grey. Even clear blue skies with the sun behind the mountains is still pretty unexciting. It’s a bit like taking a portrait photo with a “meh” background on an open field. It’s fine. But it’s not going to be spectacular. As they say, “you can’t polish a turd”, and although you might have an incredible landscape in front of you, it will be very difficult to make it “next level” without something happening in terms of clouds or light. Go look at your favourite landscape or dogs in landscape photographers. Go and google “Award winning landscape photography”. Take note of the skies. 

I really don’t have many examples of landscapes with plain grey skies. I must instinctively just not shoot under those conditions! Below you’ll see a couple of clear blue skies, and one grey sky where I added a sky replacement to spice things up a bit. 

I cannot stress the point enough.

Weather events are your friend in landscape photos

Sunsets are all well and good. Sunsets with dramatic clouds? So much more engaging and awe-inspiring. 

Fog hanging in valleys? Great.

Clouds swirling around mountaintops without blotting them out? Perfect.

The sun shining through literally any cloud in any interesting way? Chef’s kiss. 

Of course, dawn and dusk and golden hours are still great, and the light is lovely etc… but they will probably be even cooler when broken up with clouds and colours. This is, in a big way, what makes landscape photography much more of a “right time, right place” kind of event. In portraiture, we can go out on basically any day it’s overcast, or at any golden hour, and make it work and get amazing results. But landscapes really require us to be there at that dawn, or on top of that mountain on that particular evening, or to wake up before sunrise for that fog-filled valley to be lit by dawn colours. 


These photos were taken three years apart. I returned to the lookout in 2022 with the hope of recreating something like the photo on the left, but without the MASSIVE blown out and ruined sky. 

Unfortunately, the entire week we were there we had nothing but clear blue skies, so I decided we would just go up anyway and hope something interesting would happen.

And the sunset was fine. There were very slight colours in the sky. But nothing compared to the drama of 3 years ago. Both photos are fine. I just know the one with the blown out skies could have been epic if I’d known how to expose it properly. And the new one is also fine… but to me, it’s not the most exciting photo I’ve ever taken.

These photos were also all taken at more or less the same location. The first, in 2018 so please don’t mind the editing. The last two were taken in 2021. We got up at dawn, hoping for light kissing the top of the mountain, cool clouds, or basically anything, but it just wasn’t meant to be. There were some vague clouds floating around, no sunrise sun… nothing much at all. I did a bit of editing magic to try and cope the kind of conditions I’d first seen in 2018 and to give it a true dawn feeling.

In the last photo here, you can see the clouds and sky how it was. Again, the photo is fine, but it’s certainly not spectacular.

But what if I have to take landscape photos in full sun?

Then, they will be what they are: photos in full sun.

There’s no way around this. There’s no magic solution to make the sun less sunny or less harsh unless you get up earlier or start later. Yes there are filters for your lens so the sky part of the image will be darker than the lower part (eg., a graduated ND filter) but this will not make the sky more interesting, or the light on the dog less harsh and intense.

If you are travelling, then yes, take the photos for your own memories – but don’t expect them to maybe be as dramatic or awe-inspiring as if the weather conditions had been different. There’s a reason landscape photographers primarily shoot early or late in the day and you rarely (if ever?) see stunning landscape photos in full, midday sun.

The sun had come out here and Journey turned his face into it. At least there were some clouds around but still I hate how there's this huge contrast of shining sun and deep shadow on his body. It all feels too harsh.

Artificial Light

One option, if you’re so inclined, is to introduce some artificial light into the scene, particularly if you’re dealing with full sun. There are a couple of photographers I can think of who employ this style, often they will use a very wide-angle lens and shoot with the sun somewhere behind the dog, at a very narrow aperture to create a sun-star, using a flash or strobe to overpower the sun and make sure the dog and the sky are both correctly exposed. 

In this case it becomes as much about this particular style as it does about the landscape, and it’s telling a very different story to this powerful, dramatic, majestic landscape scenes that I am usually chasing.

Since flash is definitely not my style, I probably can’t help you with achieving this particular look.

Lens Choice & Settings for Dogs in Landscapes

Table of Contents

Lens Choice

What lens you choose depends on if your landscape is grand (mountains, valleys, big skies, etc) or smaller/needing less to be shown.

Big landscapes work best with wide lenses, from 20-35mm.

Smaller landscapes like waterfalls, MAY work better with a 50mm lens, or even an 85mm. An 85mm lens can make a small-ish waterfall look much more impressive, due to the compression! So don’t feel like just because you’re taking a photo of a natural space that you need to whip out your wide-angle lens. Sometimes this can be too much detail.

One thing to remember as well is that compression can work to your advantage. If you’re especially far away from the mountain range, using a wide angle lens will make them look pretty small and insignificant. 

Use a 135mm and suddenly they appear much closer, much bigger, and much more impressive. Playing with compression even in landscape situations can really help make parts of that landscape appear larger (eg., bigger more imposing mountains) but the landscape itself won’t appear as large.

Taken with the 135mm lens.. These mountains looked really tiny and pathetic with a 35mm or wider.

Settings

It’s a popular belief that when taking landscape photos, a narrower aperture is better, to get more of the scene in focus. I would argue this is true when taking photos of landscapes alone, however as wth portraiture, too much detail can draw attention away from the dog. If we see every blade of grass and every rock on the mountain, we are creating more opportunities for our dog to be overwhelmed by the scene.

This is especially true if you’re already creating a much wider depth of field by: using a wider angle lens and being further away from the dog. There is already a large amount of the scene in focus.  It’s important to understand how to make your depth of field wider or narrower through lens length, aperture, and distance from your subject, to get the results you want.

Personally, I find slightly soft mountains prettier than highly detailed in-focus mountains, but that might be my personal preference in this case.

If you do find yourself shooting with a wide aperture (lower f/ number) don’t be surprised if you end up with ISO 100, and therefore having to use quite a fast shutter speed! Because we are in very open areas with lots of bright sky (with the exception of waterfall/ferny glade-type landscapes), they are typically quite well lit. There is never going to be a problem with making your shutter speed faster!

Depth of field: distance from subject

The first four photos here were taken at basically the same location, but each is closer to the dog. The settings don’t change however. All were taken at f/3.2 with the 35mm lens. Notice the way the background changes throughout the series.

So once again, it’s important to consider our depth of field in landscape photos. Because of course we want to be able to see the landscape, we have to remember that the dog is likely to be a smaller part of the overall photo, and is therefore already competing with some quite large elements that he has to stand out against. 

If I were to re-do the photo of Journey in the rocky mountain scene from above, I would for sure want much, much less detail in those rocks. There is SO MUCH going on there that he is totally lost in it all. And maybe that can be an artistic choice too: Look at all these cool patterns/textures etc… or maybe, it can just be too much. Don’t feel like your landscape photos must have an extremely wide depth of field with absolutely everything in focus in order for them to be good.

Exposing for Highlights

A very important factor for your landscape photo is retaining detail in the sky. After all, part of the drama or beauty of your landscape (if you’re doing a “big landscape” rather than a waterfall or similar) is going to be the sky. See more in the “Weather and Light” topic.

But this means we are going to potentially be facing some exposure challenges that we don’t normally face when in the woods.

We need to know how to choose our exposure settings so we keep all that detail in the sky (whether it’s cloud textures or sunset colours) so we don’t end up with huge white blobs in the sky, OR with it entirely washed out and white without colour.

or

we need to have tools to be able to make the situation work.

Personally, I try and generally capture the scene in one exposure (rather than taking multiple photos/bracketing) – just because I find it a bit annoying to have to match the darker sky photo to the brighter subject photo. But that’s just me, and I know my camera can handle it.

By keeping an eye on the histogram you can usually make an educated guess as to whether you’ve blown out the highlights…. however it’s not 100% accurate as you’ll see here:

Based on this histogram, the sky is a disaster. There is a HUGE spike on the far right hand side, indicating it was blown out. It’s going to be totally ruined, and I fully expected it to be, and I took another photo at a lower exposure (darker) so that I would be able to fix any areas that were blown out…

And yet….

This was the edited photo. There are one or two areas that are maybe a touch blown out but nothing compared to what I expected from the histogram.

Keep in mind that in our normal portraits, even a small spike to the right hand side when shooting backlight makes the bokeh totally white and without data. My suspicion here is that the sun was high enough and filtered enough by the clouds that although it was extremely bright, it didn’t actually loose data, unlike when you’re shooting through leaves and branches for texture, but the sun/sky on the other side is clear (and therefore has no further texture or filtering effect), and also that the balance of light is better, so we don’t need to underexpose as much to combat the light from the sky as we do when we’re in the woods.

In the gallery below, you’ll see some SOOC photos with their histogram, and the edited photo attached. Retaining detail in the sky is super important for me BUT… you are always going to have less blown out areas when there is a good amount of cloud cover, than if the sun is shining somewhere in the photo. You really cannot underexpose for the sun, and this is where you need a flash to overpower it. So making sure there’s clouds, or at sunset, making sure you keep the sun just out of the frame (you’ll see this in some of my sunset photos, the sun itself it just out of frame to the right) will make it less likely for you to blow out the highlights.

These photos are mostly only lightly edited. I wanted to show you the SOOC with the histogram, and an edit where I’d pulled out detail from the sky, to show you where some have blown-out areas, and others not. 


In general, watching your histogram is highly recommended, but if you find yourself in a situation where you are already underexposing your subject quite a lot (as above. I didn’t want to go any darker on Journey) or you know your camera doesn’t handle underexposing that well, then you may need to use bracketing to help.

Bracketing

Bracketing can either be done manually, by you taking 2-3 photos at different exposures, or many cameras have this as an option for it to take 3-5 photos in rapid succession, at different exposure settings.

The idea here, is that you can take one photo for shadows, one for midtones, and one for highlights.

I usually simplify my life, and take one photo for the subject to be decently-well exposed, and one for the sky/highlights to now be blown out. I then mask these two together in Photoshop.

This can take some trial and error, especially in regard to how light/dark each of your exposures is, and where the subject is placed! If you have the dog with a bright sky directly behind it, and try and mask in the darker exposure, it’s going to be precise, tedious work and probably not look so natural. Similarly if you’re underexposing other bright elements, like water reflecting the sun, and this is around the dog, the exposure of the two “pieces” of the photo will be “off” if they’re drastically different from one another.

Here is an example of bracketing but done reasonably subtly due to the issues with a big mismatch in sky exposure vs. subject exposure. The sky photo is only slightly darker than the subject one, so Loki was still underexposed, but not as much as he would have needed to be if I’d just tried to expose everything for the sky.

In this second image, the sun had this most incredible spotlight shining down – and only for a second. So I snapped the photo with whatever settings I had at the time, then took one at a lower exposure to try and save the sky. As you can see, even in the lower exposure image, there is still a blown out spot where the sun was. The changes I’ve masked in are just to try and take away some of the distracting blown-out areas in the original, rather than to replace the whole sky.

If your camera can do auto bracketing this is also an option, however you need to make sure that it isn’t dropping the shutter speed to be too slow, in order to get more light to the sensor. This could result in motion blur and unusable images.

Long Exposures

One more fun thing to try if you have very patient and solid dogs, is long exposures.

These are great for waterfalls, rivers, creeks and so on, to get that beautiful water-trailing effect.

In this case, you will be putting your shutter speed right down to about 1/10 of a second. I highly recommend you have your camera on something: a tripod, rock, your camera bag. There is already a very high chance of motion-blur from the dog simply breathing without adding in your hand motion. I also use the self-timer function on 2 seconds, or my remote shutter release with these photos, as it means there is no movement at all to the camera when I press and release the shutter button.


1/10 sec, f/5, ISO 100

Since you’re letting in SO much light from the slow shutter speed, it’s highly likely your ISO will easily be at 100. Your image may still be overexposed, so in this case you will need to narrow your aperture, since there’s no other way to bring the exposure down (without a filter on your lens!). 

1/10 sec, f/5, ISO 100

You could theoretically also create these photos in two parts: one for the dog at a faster shutter speed, and one for the water much slower… but in the case of the photos above, I think masking around the dog will be a pain. And there may be a difference in noise or depth of field, since raising the shutter speed for the dog means needing to either raise the ISO, or widen the aperture. Of course, adding some noise to your background waterfall part of the image isn’t that difficult.

Methods for Getting Attention

Table of Contents

Modelling is a job.

I’m going to say that again.

Modelling is a job.

Think back on the last lesson and all the things we’re asking our dog to do, most of which is way more boring than what they would rather be doing (sniffing, running, chasing squirrels, etc). So, they need to be paid appropriately.

Imagine showing up for work. And work is boring. You’re just sitting there, at a zoom meeting, for two hours. You can’t move. You can’t look anywhere else but at the screen. You can’t scratch or roll over or watch a bird. And at the end of the zoom meeting, the boss says: Ok cool thanks, you can go now. 
And that’s it.

That’s it?!

How often would you continue to show up for your zoom meetings? For some of us, if we had been paid in the past, we might continue to show up to those meetings for a little while, hoping the boss would remember to pay us. But gradually, we’d come in later. We’d drag our feet. We’d look for other things to distract us. We’d zone out and watch a bird out the window and wander off halfway through the meeting. Eventually, we’d stop coming at all. For some of us, who had never been paid at all, we’d never come back after that first meeting. For some of us, who inherently want to be good, we would come back hoping to be told we’re good. And some of us wouldn’t care about pleasing the boss at all.

Currency

Ok, so, that’s an easy analogy. I’m going to deepen it a bit now. 

You arrive at your boring zoom meeting. You have to sit there, paying attention, taking notes, being good, not getting distracted (and for some of us this is very difficult!). At the end, the boss pays you in McDonalds coupons. Enough that you could feed yourself for a few weeks! 

Only problem is… you’re a vegetarian. Ok, McDonalds has some fries and maybe an oily vegetable burger on the menu, but you’d much rather be paid in, y’know, cash. 

Or, let’s look at it this way: Your boss does pay you in cash. Like, actual, physical cash. Maybe you’re someone like me who literally never spends actual cash, but does everything on card. This money is almost worthless to you unless you remember you have it, and you get it out of your wallet and then you want to carry change around for the next however-long. It’s fine, but it’s not that great.

Or… your boss pays you into your bank account! But in Tunisian Dinar, or Georgian lari, or Bangladeshi taka. This is great… if you’re in Tunisia, or Georgia, or Bangladesh.  It’s perfectly valid currency, and very valuable for people from those countries, but it’s not very useful to you. 

What’s the point of all this?

Every dog has currency. Their currency can be stronger or weaker for one form of reward compared to another form, due to their breed, age, personality, prey drive, training history, and so on. Rewards can be really varied:

  • treats
  • play (tug)
  • play (with a ball/toy fetch)
  • play (personal/wrestling)
  • opportunity to sniff
  • cuddles/physical praise
  • opportunity to meet a person/dog
  • opportunity to do a favourite thing (swim, roll on grass, zoomies, chase someone, dig a hole, whatever).

It’s really important to learn your dog and know their currency, so you can pay them appropriately for their hard work. Of course this is a little different with a client’s dog but theoretically, if you see a client trying to feed an obviously disinterested dog – one who is wiggly and excited about the idea of meeting you, for example, they don’t have to feed their dog! For some dogs, being “forced” to eat when they’d rather play/say hello/be allowed to run free, makes the task even more laborious. 

Journey is one of these dogs! He likes to eat. He likes to train. He doesn’t care much for being rewarded with food. It’s boring. It’s boring especially when he knows that we could just as easily play a violent game of smash and growl with a leaf or piece of straw. So, this is his currency, and it’s incredibly convenient.

With the wriggly pup mentioned above, the reward could be to say hello to you! Use some release word like: “Ok say hello!”. You’ll be amazed at how quickly they will associate waiting & paying attention with getting to do something they love.

Try throwing a ball into the sea and not letting him fetch it, for maximum crazed expression.

Food

Obviously, one of the first and easiest methods to get the dog’s attention is by using treats. With my dogs, I just use kibble, and only for Loki, since this isn’t Journey’s currency. Some dogs will want more valuable currency (hotdogs etc), and others just want the food. 

You can use the treat to lure the dog into position. I find this works especially well to create a curve in their body (there will be a video coming soon). 

If you’re using a wider lens length which allows you to be close to the dog, you can hold the camera in one hand (I highly recommend a hand strap like the Spider Holster (for DSLRs) or the Spider Lite (for mirrorless) and hold a treat just above the lens with your other hand. Some larger treats may be able to balance on the lens itself, assuming the dog will continue to watch it. 

You can throw a treat off to one side if your dog is used to tracking food with his eyes. He should look off to where it landed so you can quickly snap some “looking to the side photos”. Just be aware that he may be looking down and this means no catchlights, and generally doesn’t make sense in the photo (why is he looking at the ground?). You could also have a bowl off to one side with a couple of food pieces in it, but again, it’s likely the dog will be looking down. Get creative! Can you balance it in a bush? On a tripod? 

With Loki, I can also hold up one hand (with or without food in it) and out to one side (my left hand. Hence why he’s always looking left! 😂) and he will look up and slightly to one side. If your dog knows you’re holding food, this might also work.

Obviously, when working with a client’s dog, ask them to bring food that the dog can eat. Have some handy as well, but triple check that there are no allergies or special requirements before feeding the dog. 

With owners, you have a lot more flexibility. They can be much closer, regularly feeding the dog and reminding him that they have food. They can move to one side and shake a bag or container with food in it, throw bits of food up and down in their palm, or rattle it in a food bowl. Just remember to feed often so it isn’t an empty promise of food.

Want a little head tilt? Tims to sound like an idiot.

Sounds

Of course making sounds is another way to get the dog to lift their ears and pay attention. There’s a variety of different  “types” of sounds you can use, and which you choose and how much/how little you use them will really depend on the dog and their individual personalities. 

Silly noises

The easiest sounds are silly noises/sounds you make with your mouth.Hooting, howling, whining, clucking, quacking, neighing, sneezing, meowing, beeping,  whispering, low and high pitched noises, making popping or clicking sounds. The more ridiculous you sound, the more successful you’ll probably be. Think Dory from Finding Nemo when she’s trying to speak whale and you’ll be on the right track.

For some dogs, like border collies or other “high drive” breeds, simply sucking in your breath like you’ve head something scandalous will work.

For other dogs (Loki!) just having a casual conversation about the weather is enough to get head tilts (for real though). 

You can also bring squeaky toys, rattles, bells, whistles and so on to your photoshoots.

Hunting calls

As well as the props mentioned above, “Hunting noisemakers” tend to do a great job too as they imitate the sound of a prey animal (depending which one you get). If you search your local online shopping website for “Duck call” or “bird call” or similar, you’ll find a variety of options. 

Familiar Words

Another option is using words the dog knows very well. Thinks like: “outside? Walk? Dinner?” and so on. Words that have special meaning to them and cause some excitement.

Depending on the dog you might want to be a bit careful with this as they’ll start to “mistrust” you saying anything because you keep lying, and they’ll stop responding to anything. Journey is like this. I use his favourite words very carefully.

Other dogs on the other hand can hear a favourite word 500 times and still be interested in it. (Loki). 

Again, be very conscious of turning high-drive dogs crazed. If I start saying: “Readdyyyyy…… readddyyyyyy?” to Loki, he looks like he’s about to leap out of his skin. It’s too much. Instead, calmly and happily asking: Lolo, do you want a…. CARROT?! Usually gets happy eyes and a big head tilt. Find the words that work for that dog.

Apps & YouTube Videos

Another great and “passive” option is using an app or finding a YouTube video. There are a ton out there, just search for “dog sounds” or “animal noises” and you’ll find them.

I have an app (Called “Dog sounds” with a picture of an Aussie shepherd puppy as the cover). 

I often balance my phone on the top of my camera and lens, screen facing up, so I can jab randomly at one of the sounds, and when it goes off, the dog looks directly at the camera.

The best part of the dog sounds apps is that you can very quickly switch between different sounds, which will hopefully prevent your dog from getting bored of modelling too quickly. Not only this, but sounds are much more passive than you constantly asking for attention. So dogs who are more sensitive won’t feel like they’re supposed to be doing something, but instead can just listen to the sounds.

A Helper/Helper Dog

Having a human helper provides you endless possibilities.

They can run in circles, do star-jumps, throw a toy up and down, lure with food, shake a plastic bag, do somersaults or cartwheels or bang sticks together.

If you don’t have a helper, and/ or if your client has more than one dog, I’ve often found it helpful to get the other dog involved. 

Most dogs LOVE knowing what their dog sibling is getting up to, and many have a real jealous streak. Use it! What happens if the client gently plays with the inactive dog while the other one models? I bet you the active/model dog is going to be watching pretty intently. If the active dog doesn’t have a solid stay (I’ve photographed trained agility dogs using this method and they were fine. Most dogs probably wouldn’t stay!) you might need to tie them up. Just make sure to keep the jealousy playing fairly low key so the modelling dog doesn’t go crazy.

If you’re by yourself with more than one dog, this technique can also work. Often, if Journey is modelling and looking bored, I’ll throw some food or a toy off to one side and tell Loki to “Go find! Go find!!!” and he’ll run off and excitedly search all around. Journey hates missing out on the action, so he does something like this:

Novelty

Obviously, many dogs get “wise to the game” pretty quickly, and will start looking disinterested if you try using the same prompt again and again.

Be creative! Find novel toys, sounds, props, apps. Anything that’s going to surprise and interest them at least once. And be ready! 

3-2-1 Game

One game that Journey knows from training a stay is the 3-2-1 game. Basically, when he’s in a stay, I will count down, very tense: 3…… 2……… 1…………… BREAK!

We’ve played this game hundreds of times in daily life – much more than we ever do it in a photoshoot. So at home, waiting for a game of tug to start, before running agility, whatever it happens to be. Therefore, there is a VERY strong connection between me getting to 2, or 1… and him KNOWING the game is about to start. Usually, his pupils will dilate, he will go very still, very alert, and very tense, about to leap into action.

Luckily with Journey he doesn’t look too crazed. If you have an especially crazed dog you might want to avoid this one. 

The main thing here is:

  • this is not a photography game necessarily. It’s a game which means :fun stuff is about to happen. And you occasionally use it during a photoshoot and the fun stuff still has to happen. You can’t count down then just ignore the dog or walk off. That defeats the purpose. 
  • You can’t lie. There’s no counting: 3… 2.. 1….. And then continuing to take photos for another 5 minutes, then counting down again. If you want to ruin the effectiveness of the countdown, then get to 1 and not release the dog. 😉 This will only work if you follow through with the fun thing. 
  • Use it sparingly, or it too could lose its effectiveness.
This dog does not need the 3-2-1 game. She is crazed enough.

Getting Attention

Table of Contents

Obviously sometimes we want to direct the dog’s attention in a particular direction, either to have them look into the camera for a more connected photo, or off to one side for a more whimsical story-telling image. There are some factors we must consider, and several methods we can use to get the dog’s attention when we need it.

Be Prepared

I get asked very often about getting a dog’s attention for photos, people complaining that their dog is more interested in the birds and their surroundings than in staring at them. And honestly, I don’t blame the dog. Because I know even myself, I often ask my boys to wait for FAR too long between rewards, to sustain attention even when I’ve got the shot already. And they are trained, and they are border collies (eg., they will do anything just to be able to work). 

One crucial step in getting your dog (whether it’s your dog, or a client’s dog) is to set up the shot before you ask them for anything. If they are patient, they can wait in position, but don’t call their name endlessly while you adjust ISO, Shutter Speed, Aperture and so on. Have all your settings ready before you make silly noises or try to get their attention in any way. 

If they are not patient, let them sniff around and relax while you set up the shot. Even with my boys, most of my locations go something like this:

  • see the location. Run through my 3-point location checklist in my mind.
  • grab my camera. Get down as low as I’ll be to take the photo.
  • Dial in the settings needed for the light in the location.
  • Focus on a point where the dog is going to be. If this is difficult, put your camera bag there and focus on it.
  • Check that everything looks good in terms of exposure and location.
  • Get the dog in position
    • if it is your dog who won’t stay, check out the “But My Dog Won’t Stay” lesson. 
    • Try tying their leash to something. Factor this in when finding and setting up the location.
    • Try positioning them ON something
    • If it’s a client’s dog who won’t stay, keep them on leash.
    • Tell and SHOW the client where you want the dog to be, and where you want THEM to be. The more specific and clear the instructions, the better.
  • Have your back button focus activated already, thumb pressed down with focus point over the eye,
  • As soon as you make the sound, be prepared to fire off a series of photos.
  • Remove your thumb, let them relax for a second, and then try a new sound.

The more you “nag” them unnecessarily, the more likely they’ll be to tune out completely. 

Release them, let them know the job is over for the moment, reward them in a way they love, THEN check your photos to see if they worked. Don’t make them stand there endlessly while you check. Talk about a Snoozefest.

Location

Are there birds?! Squirrels?! Children?! Is it worth even trying to get your dog's attention at this point in time?!

The next factor to consider is the location. Are you in a place where the dog is going to be physically capable of paying attention to you? 

For many (of our own) dogs, we have hounded them so often that we seem really desperate and not that fun any more when it comes to this photography gig. Imagine being taken to your favourite place (the woods!!) then being told to sit and stay, and just sit there, and then your person makes all these noises…. and … nothing happens? And if you look at the birds, the person makes more noises, and calls your name, and says your favourite words, and then… nothing happens… so you look at the squirrels, and suddenly your person starts up again but now they’re kind of OTT and it’s all a bit weird and you’d really rather just look at the squirrels now…..

There’s many issues in the above scenario – one being the owner who completely switched their dog off to paying attention for photos, and two being the fact that they basically sent them to the environment for reinforcement – by being so needy and weird, and taking so long, the dog started to look for other things to distract him… and found it. 

Ok now imagine the above scenario but at a dog park. 

For some dogs, there are going to be places where they are just NOT going to be capable of turning their attention on you without significant training without your camera being a part of it. SpiritdogAcademy has some GREAT courses on getting and keeping your dog’s attention in general, so this idea could fill courses by itself.

Suffice it to say that you will be fighting a losing battle if you have set your dog up in situations where the environment is fundamentally more exciting than you can ever hope to be, especially when crouched behind the camera. This kind of program requires you to either move to a less exciting location, and/or to do quite a lot of focus training when you’re not taking photos. 

Temperament & Pressure

The intensity of a dog who loves pressure.

The next consideration is the dog’s temperament. This will obviously be easier to determine with your own dog, but learning to quickly read and adjust to different personalities of different dogs can help you best decide how to get their attention, how many times to ask for it, what to do if you can’t get it or when they stop offering it, and so on.

Obviously everybody knows that all dogs have different personalities. Some are shy, some are sociable, some like to work, some are couch potatoes and so on.

But there is another distinctive trait that I believe isn’t recognised enough even in dog trainers, and it is really only through working sheep with my two very different dogs that I began considering the implications of how this could also apply with photography. 

This is the idea of pressure

Pressure is how well a dog handles, steps up to, and engages with pressure. For herding dogs, this is centred around the “eye” and the needs and desires of the owner (shepherd). In non-herding dogs, responses to pressure could look very different between breeds – from switching off completely/aloof independent behaviour because they don’t feel/read/care about that pressure (think about many hounds), to nervous wriggly energy and wanting to bounce all over you (think retrievers and spaniels who have been bred to work very closely with people, to appease other dogs and so on), or even to getting “stubborn”/naughty (terriers!).

Pressure can come in many forms but for our purposes, we have:

  • the camera lens (a big black eye)
  • our eyes (think about how dogs use eye-contact with one another. Direct staring is often not a good sign!!)
  • us asking/saying/doing things to get attention, without actually being clear about what we want. Asking the dog to “perform” but without giving them a job

Some dogs love pressure, and lean into it. My dog Loki is like this. The more I talk, make noises and look at him, the more he engages. You see this with him on sheep too. If a sheep stares at him and stomps its foot, he rushes in and bites at it. He takes no prisoners. In work, he is bold and brave.

This is very typical Journey when responding to pressure. Head down, ears back, eyes averted, face turned slightly away. He isn't listening to or look at anything in his environment, he's just avoiding pressure.


Some dogs move away from pressure. This is Journey. He is quite sensitive, wants to be a Very Good Dog at all times. If a sheep stares at him he will slow down and creep in on it, but he won’t be bold and brave. The more I try to get his attention but saying special words, making noises, and calling his name, the more pressure he feels to “perform” in some way, and the more he tries to avoid it.

So, getting attention from a dog who thrives on pressure is probably easy. What about the pressure-sensitive dog?

  • First, lower your expectations. Do not ask these dogs to be “on” constantly. 
  • Second, ask less of them. Make a silly noise once, take the photo, and don’t continue repeating the noise ad nauseam. 
  • Third, use an “external source” of getting their attention – whether this is a noise-making app or noise-maker of some kind, or a helper (although in the case of a dog’s owner, this won’t help probably). These dogs will work best when there is not pressure being put on them to do or not do something, but rather just showing/playing something novel which will give a moment of attention.

Crazed Dogs

On the other side of the spectrum, you’ll have dogs who get wound up on pressure. Think most working dogs, especially high-drive trained working dogs with owners who want their dogs to do the best (for me, this is my usual client, as I work with a lot of agility folk… highly trained, often high-strung dogs, with owners who want them to be ON and usually FULL ON). 

By asking and asking and cueing and throwing a toy and making sounds, these dogs go from pretty and calm to OMG IF YOU DON’T GIVE ME THE BALL RIGHT NOW I THINK I’LL EXPLODE in about two seconds flat.

The key with these dogs is often less is more. Calm down. Don’t give them cues. Just let them settle. Say something in a sing-song way that doesn’t sound like a command. Play a funny noise (Loki loves duck noises).

Although this “high intensity” expression might be reflective of part of that dog’s personality (though they don’t go through life and most of every day being crazed), it’s definitely much harder to do pretty edits of crazed dogs, due to all the tension and intensity in the expression.

Can you see the difference in these expressions? One will be much, much easier to turn into a bright, vibrant, happy springtime photo. The other will always have a “disconnect” due to the bugging-out eyes, half-closed mouth and tension in the face.

Below, a much more subtle example, but there is definitely one photo I would use, and one I wouldn’t. 

Although this “high intensity” expression might be reflective of part of that dog’s personality (though they don’t go through life and most of every day being crazed), it’s definitely much harder to do pretty edits of crazed dogs, due to all the tension and intensity in the expression.

And while tension and intensity has its place in the agility field, it’s not the pretty, cute look your dog owner is probably used to in every day life. This expression likely comes out when there’s a toy, food, or excitement. Why not make the toy part of the story, as an explanation for that crazed expression?

Below, you’ll see examples of both my boys with “normal” expressions, then looking crazed. But note how in Journey’s “crazed” photo, we suddenly have a context and story behind why he’s looking like that, unlike with Loki who just looks randomly crazed.

Following are some other examples I took very quickly in my living room as examples for this lesson, of how you could incorporate story into these photos, to make them make more sense.

Taking Advantage of Candid Moments

Lastly, do you need the dog’s attention, or can you let it simply look around?
Some of my favourite photos have been taken when the boys have looked at birds overhead in the branches, or when they have sniffed the wind, eyes closed, simply enjoying the smells.

Sometimes it’s better to let candid moments drive the story. And in this way, you let your dog just relax, know that it’s ok to look around and take a break, give them time with no expectations or pressure on them. Then, when you’re ready, try one of the methods for getting attention and be prepared for the moment they look at you. 

In the gallery below you will see a small selection of photos with a candid expression

So, this isn’t to say the photo itself was candid. In most (all?) cases, the dog was positioned and posed… but the direction he looked in, or the expression I managed to capture (eyes closed or similar) was totally unplanned. 

If you look at the editing I’ve chosen for these photos compared to my more “normal” photos, you’ll see that these more candid expressions can really open up whole new worlds, and tell totally unexpected stories. And that’s why I love them so much.

Dusk & Dawn

Table of Contents

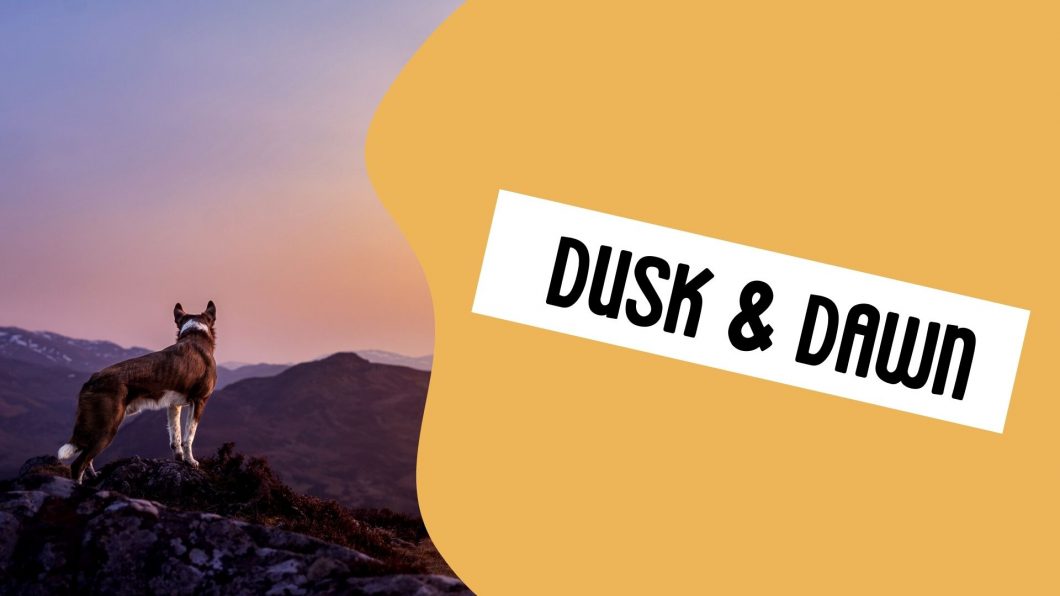
Dusk and dawn are also known as “blue hour” – the time just before and just after the sun rises or sets. 

Imagine pastel skies, changing colours, and possibly dramatic clouds.

These conditions can be beautiful, but challenging!

Profile

Dusk and dawn is the time before or after the sun is lighting up the world. So expect low-light conditions, tinged in blue, and possibly other interesting colours depending on the day.

  • Dusk & dawn photos are one time where I feel like you can be a little bit more creative with the white balance, since there does tend to be more colour-casts from the sky in general. To try and strip these out may end up in photos which look a bit strange.
  • Colours are usually best captured in big, open skies, particularly (but not always) with interesting clouds. Have a look at the overcast lesson for thoughts on choosing different settings if you want to capture more cloud detail.
  • It can be interesting to get colours filtering through trees, but because of the lack of light, you really need a good amount of open sky in front of the dog. I would NOT be attempting dusk & dawn photos anywhere inside a forest! 
  • Make sure to watch your highlights with big open skies. It’s easy to blow them out here, and this will result in ugly white patches of sky. Sometimes it can be difficult to tell exactly how bright is too bright, especially if the sky is bright, so keep an eye on your histogram. 
    • It is very easy to severely  under-expose your subject in this situation. Be aware that even at a low ISO (eg., ISO 200), having to brighten and lift shadows a lot in editing may still result in a lot of noise.
  • Be very conscious of changing conditions – watch your highlights at dawn as the world gets brighter, and watch your ISO at dusk as everything gets darker. 
  • Dusk & dawn can be a really interesting time for silhouettes! This allows you to use some interesting settings, since you don’t need to worry about severely under-exposing the subject! You could choose a narrower aperture for more cloud detail in the sky, and/or you can also keep quite a low ISO!

Bracketing for Perfect Exposure?

If you are a fan of taking photos with bright, open skies, but you can’t necessarily under-expose the dog so much, one technique you could try is called bracketing.

It’s not something I do very often, mostly because I’m too lazy for it. It’s used a lot in landscape photography and is best when the scene lines up exactly (eg., using a tripod). Usually, it’s when the photographer wants the foreground to be a higher or lower exposure than the background (eg., the background mountains are still being lit by the sun, but the foreground is in shadow).

The photographer would take two shots – one exposing for the foreground, one exposing for the background – and merge them together in photoshop.

I’ll try and find an opportunity to use this technique in the near future for some example photos for you.

Shade

Table of Contents

Taking photos in the shade can either be a blessing, or a curse.

On one hand, open shade (solid, non-dappled shade) can provide nice, soft, even light.

On the other hand, dappled or patchy shade with strong sun coming through is a nightmare. There will be hotspots, and strong shadows. 

This lesson aims to look at shade in terms of a lighting condition where the canopy of the trees (or a wall, roof, or other structure) shields the main light source. In my experience, going into the woods on an overcast day is exactly like shooting out in the open on an overcast day, just darker.

Shade Profile

Here are some of the features and things we will likely notice when taking photos in shade.

  • Blue tones if in “open shade’, eg., beside a wall or building on a clear day. This is due to the light source being the open (blue) sky. You will also get blue tones in the shade in the woods if the sky is clear (again, shooting in the woods on an overcast day is just shooting like on a darker overcast day) as the light source is the blue sky. 
  • Possibly lots of colour-casts/bouncing colours from other areas of the image (forest floor, trees, branches, leaves, etc).
  • On a “normal” (non-overcast day) there should be plenty of light in any kind of shady location but then you may need to deal with patchy/dappled shade
  • Be very careful of patchy/dappled shade as it can cause weird hotspots which are extremely difficult to edit if they’re on your subject
  •  Be very careful of open shade caused by a roof/tree/wall, with a large bright zone in the background

What is "Open Shade"

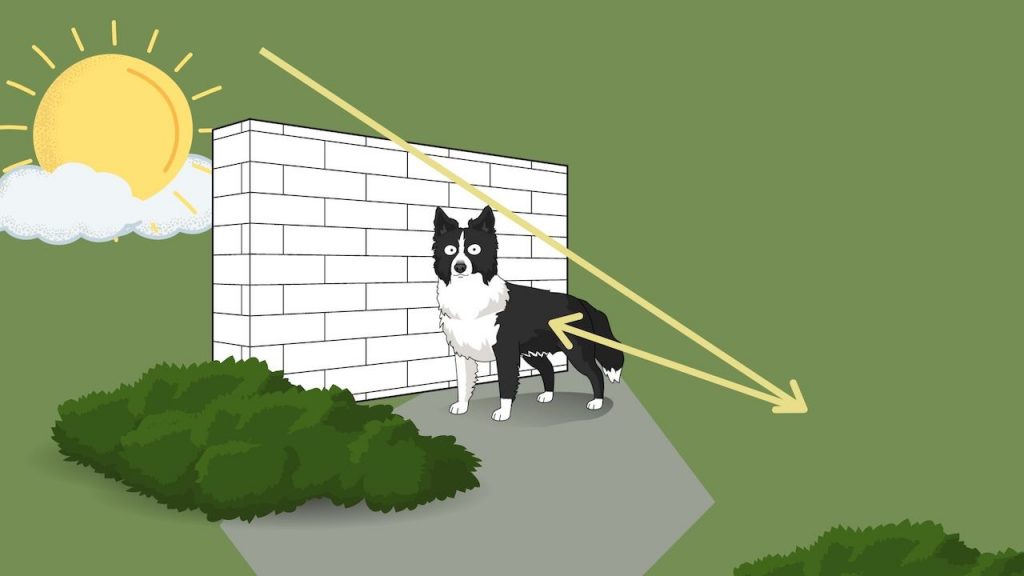
Open shade is a shaded area with ambient light all around. For example, when the dog is shaded by a wall, a roof of some kind, even the solid shade caused by a very thick tree trunk.

If you were to look at the ground in this scene, you would see the patch of shade that Loki would be standing in. He would be getting plenty of soft, even light on his face from all the ambient light around, and that is bouncing off the ground.

You want the subject pointing out toward the light. Unfortunately this often means there is a wall or large object behind them. Failing that, there is likely to be a very bright area where the sun is hitting. Writing this, I’m not sure which I like less – full sun, or shade on sunny days.

In any case, when using open shade, check:

  • Does the dog have enough light on the face? If not, try moving them closer to, but not into, the line of the sunlight. 
  • Are there hotspots behind?
  • Is the exposure difference from the shaded area to the sunny area too great?
    • This will usually be the case if the shade is very “closed” and the light behind is very bright (eg., shining off snow/a white building, etc). As you will be exposing for highlights (I hope?) this big difference in exposure could lead to you needing to seriously underexpose your dog…. and then have to do a lot of crazy editing to fix the disparity. Not great.
Theoretically you can face your subject toward the bright area outside of the shade (so they will face the wall) and achieve some backlight effects this way. I haven’t tried this myself (might be a challenge next time I’m out in the sun and happen upon some shade!) but I’m skeptical it would work well with such a bright background and getting no ambient light on the face. A reflector would definitely be a good idea in this case.

Or, according to people portrait photographers you can… simply … overexpose the background. 😳
And look, this could be a stylistic decision. You could produce “bright and airy” photos with very light backgrounds and perfectly exposed dogs.
It’s just definitely not my style!

How to Work with Shade

The main thing I suggest that you really try to avoid are dappled shade, and areas where you need to severely underexpose the image because of large bright areas behind the dog.

What you’ll want to look for therefore are: 

  • Areas of solid shade, with more shade, a wall or so on behind
  • Forest shade, without a lot of highlights
    • or, if there are a lot of highlights, using tree-trunks, a reflector or other things to try and “block” the amount of hotspots on the dog
The main thing to be conscious and aware of is avoiding extreme contrasts as much as possible. So, if we’re talking about shade specifically on sunny days, it’s best to follow many of the principles in the “Sun” lesson: wait till later/start earlier, and so on.
If you are shooting in the forest/under trees and it is slightly dappled, this can probably be fixed with some clever editing. It’s best to avoid any hotspots on the dog itself, as this will be much more difficult to edit than hotspots in the background.
Try and use trees to block this patchy light, a diffuser, or even a person to block and minimise as many of those highlights as possible. Be prepared to edit for colour-casts as well.

Examples

What's Wrong with Dappled Shade? It's so pretty

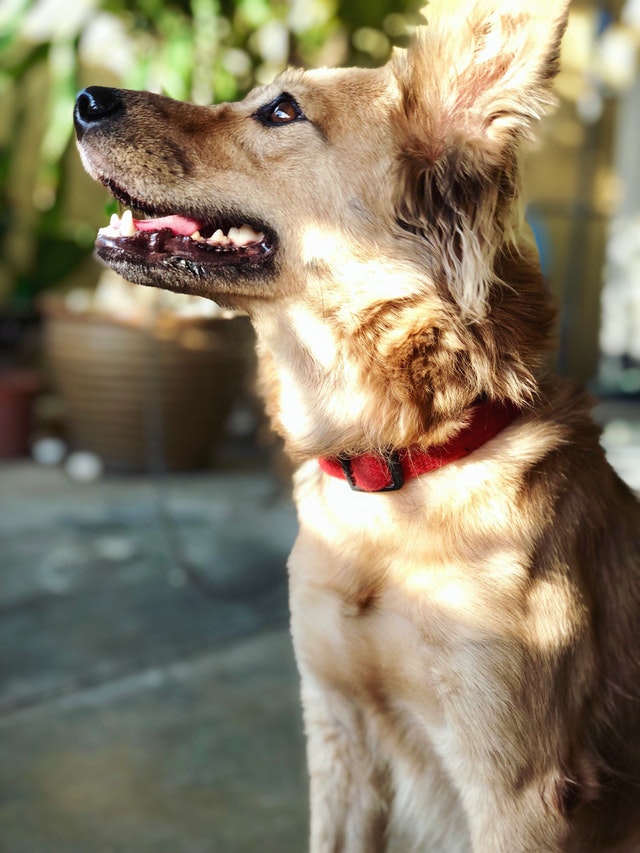
Dappled sunlight is beautiful in person. To see the sun filtering through the leaves from above, making everything all speckled and sunny… reminds me of summer days, wandering in the woods.

Unfortunately for our camera and photography, this kind of lighting is a real nightmare. Because while our eyes see the lovely sunny patches as pretty and nice, the camera sees ALL THE HIGHLIGHTS! So, you try and tone the highlights down, but then everything is really underexposed, and the highlights are still there as hotspots and basically it’s the worst.

Your camera may also struggle to focus on the eyes if there’s dappled shade on the face, as those crazy contrasts of light and dark are much easier for the camera to pick up on compared to the tiny contrast of catchlight & pupil.

See below.

Patchy/Dappled &Problematic Shade Examples

pexels-artem-beliaikin-2613329

Patchy shade here, with the dog in one area of bright sunlight, which maybe wouldn't be a problem if half their face wasn't shadowed. From pexels.com

pexels-catherine-sheila-2409007

Super dappled shade on the dog creating distracting hotspots that are pretty impossible to edit out (especially if they're blown out). Avoid hotspots like this on the dog! From pexels.com

pexels-rrinna-2071555

Another image with some hotspots in the background. Not ideal as our eye is drawn to the brightest part of the image. Also the dog is tinted blue due to the shade. From pexels.com

pexels-johann-2904343

Some more dappled shade, creating areas of dark and light in the background.From pexels.com

pexels-hemant-gupta-1001976

A couple of hotspots in the background and on the dog's head from the sun coming through the leaves. Just a slight shift in where the dog and/or photographer was could have hidden this hotspot and avoided the bright light on the head. From pexels.com

pexels-freestocksorg-1029412

More hotspots and dappled shade. From pexels.com

DSC09590

Some dappled shade and hotspots, although Journey is evenly lit, the top left corner is a problem.

pexels-freestocksorg-168023

Dappled shade in the background and hotspots on the dog.

pexels-dids-1383813

Big bright area in the background and blue tint to the dog. From pexels.com

pexels-pixabay-257540

Another very bright area behind the puppy. From pexels.com

pexels-viktoria-b-1078090

Nice even light on the dog but the bright square in the top corner is very distracting. Our eyes are drawn to the brightest part of the image. From pexels.com

DSC00437

Big bright area in the background.

The main thing I suggest that you really try to avoid are dappled shade, and areas where you need to severely underexpose the image because of large bright areas behind the dog.

What you’ll want to look for therefore are: 

  • Areas of solid shade, with more shade, a wall or so on behind
  • Forest shade, without a lot of highlights
The main thing to be conscious and aware of is avoiding extreme contrasts as much as possible. So, if we’re talking about shade specifically on sunny days, it’s best to follow many of the principles in the “Sun” lesson: wait till later/start earlier, and so on.
If you are shooting in the forest/under trees and it is slightly dappled, this can probably be fixed with some clever editing. It’s best to avoid any hotspots on the dog itself, as this will be much more difficult to edit than hotspots in the background.
Try and use trees to block this patchy light, a diffuser, or even a person to block and minimise as many of those highlights as possible. Be prepared to edit for colour-casts as well.

Dappled Shade BTS

I recently took my camera out into the woods at the beginning of spring, when the canopy overhead wasn’t quite so thick as it is in the middle of summer. I wanted to use one small location where we were experiencing quite a lot of dappled shade, and show you what would happen if the dog was placed IN these patches of sun, vs. when I blocked the sun with a tree trunk or similar. One thing I did here was to position him, then move in a 360 degree circle, taking 4-6 photos at each 90 degree point.

Now, there are going to be some of you who look at the photo taken with the dappled shade on Loki and think: “Well I prefer that one”. 

Try to look past the expression or location, and more to whether the light is even and flattering, as well as considering the increased time and skill level required to edit and fix up this uneven lighting when it’s falling on the dog. 

With all of these, I have only done VERY QUICK lightroom edits.

Example 1
DSC06668-2 DSC06668

In this example, Loki has sun shining all over the side of his body, but his face is evenly lit. While it’s nice soft light for his face, I’m now having to deal with this super shiny black fur. Since he had no hotspots on his face and I know how to expose without blowing out the highlights, this didn’t end up a complete disaster.

Click to enlarge.

Example 2

In this example, Loki has patches of sun shining on the top of his head and side of his chest. Actually in this example, I’d put him behind this large tree trunk to try and block the sun but he crept forward and got patches on his face anyway! In the next example you’ll see the difference when the light is totally blocked and even. 

Again, it was possible for me to “soften” these contrasts because I had made sure to not blow out those highlights, and the sun was still filtered a bit through the trees so definitely not as strong as it could have been!

Click to enlarge.

DSC06676 copy DSC06676-2
Example 3

Here, Loki is properly behind that tree, or I’d moved myself around just slightly. The light on his face is even, and while he’s a little dark, this is a quick fix in Lightroom.

This photo, with the more solid background and even light, was far fewer steps to edit than the ones above.

DSC06694-2 DSC06694
Example 4

Here, Loki is in some dappled shade again. It’s making weird bright patches on his head, front leg, chest, and the tree stump

DSC06718-2 DSC06718
Example 5

Here is the same location, but when the sun has gone away behind some clouds a little. Notice how much more even and less “loud” the light is in the surrounding scene, as well as on Loki.

DSC06726-2 DSC06726
Example 6

One final example that I’m not going to edit.

This is a good example of when these hotspots can really be a bit more of a disaster.

Because of the bright highlights, I had to underexpose the image a bit more, resulting in his face being extremely dark, while the side of his snout and chest is still almost so bright that it’s close to being blown out.
 

Old Video

You know the drill by now. This video is old, but could still have some useful bits and pieces!