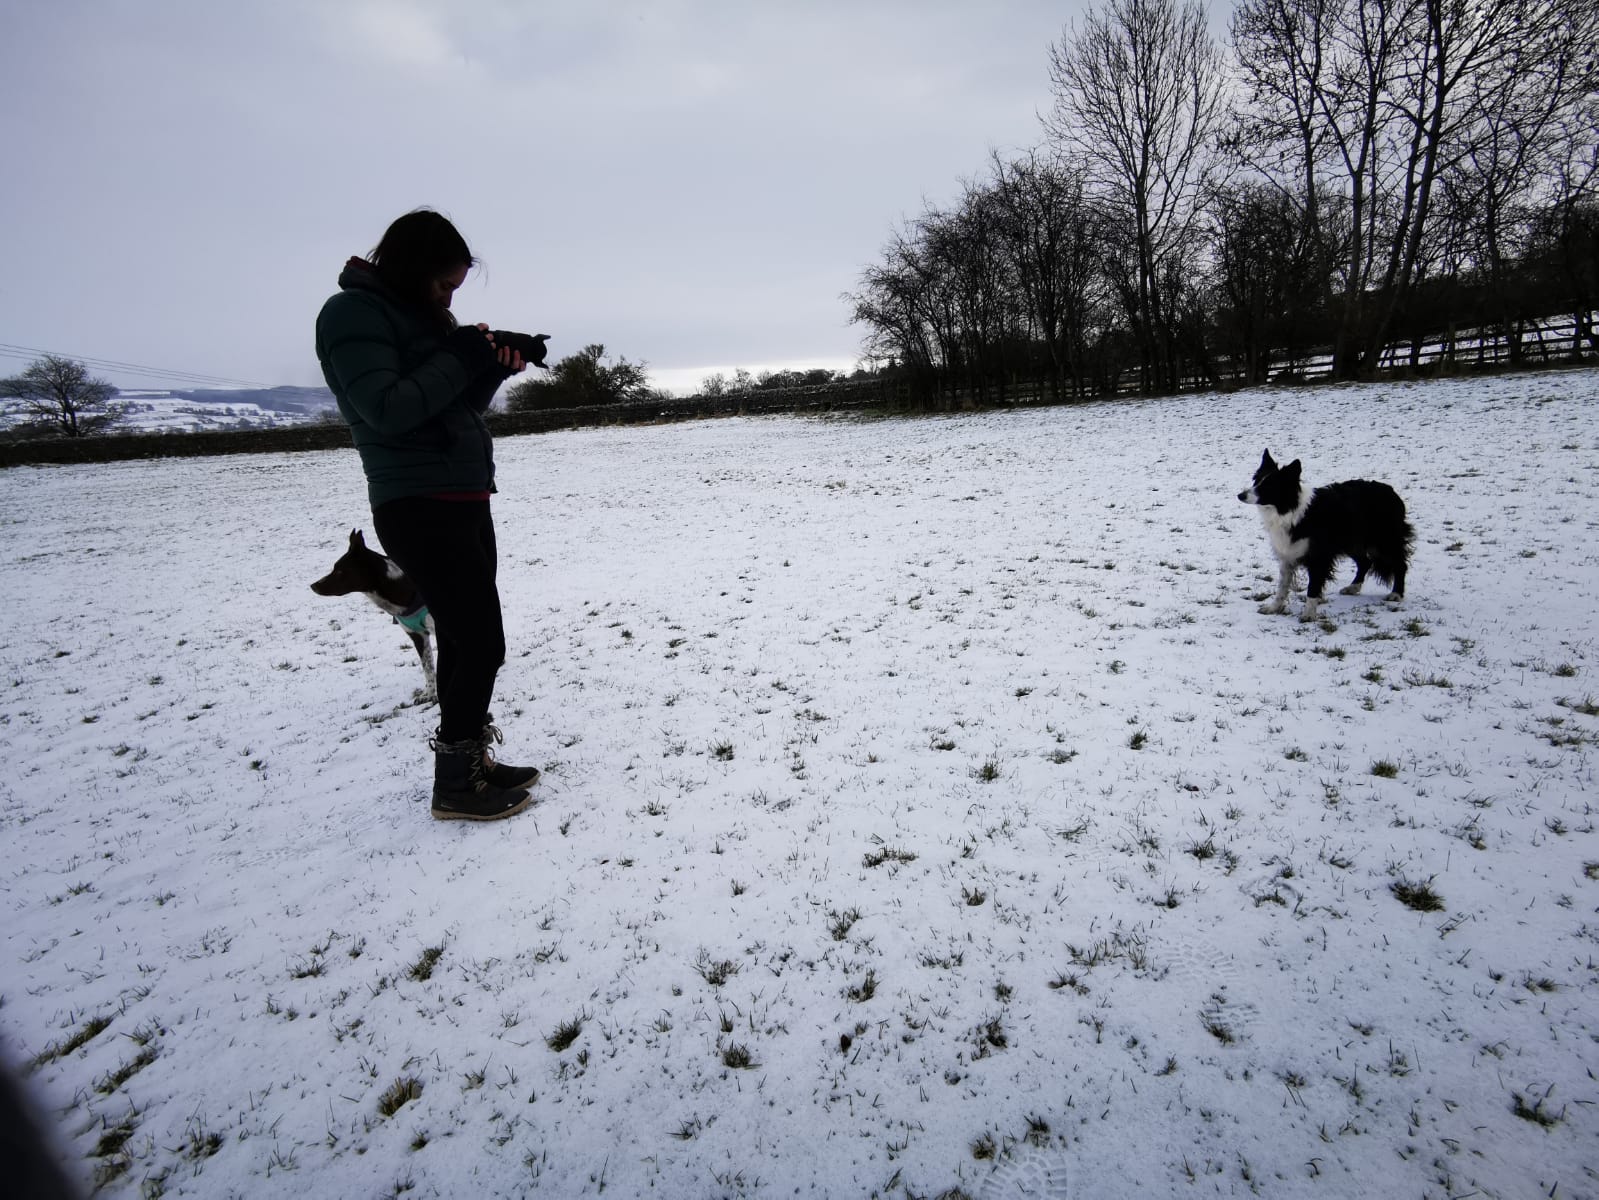
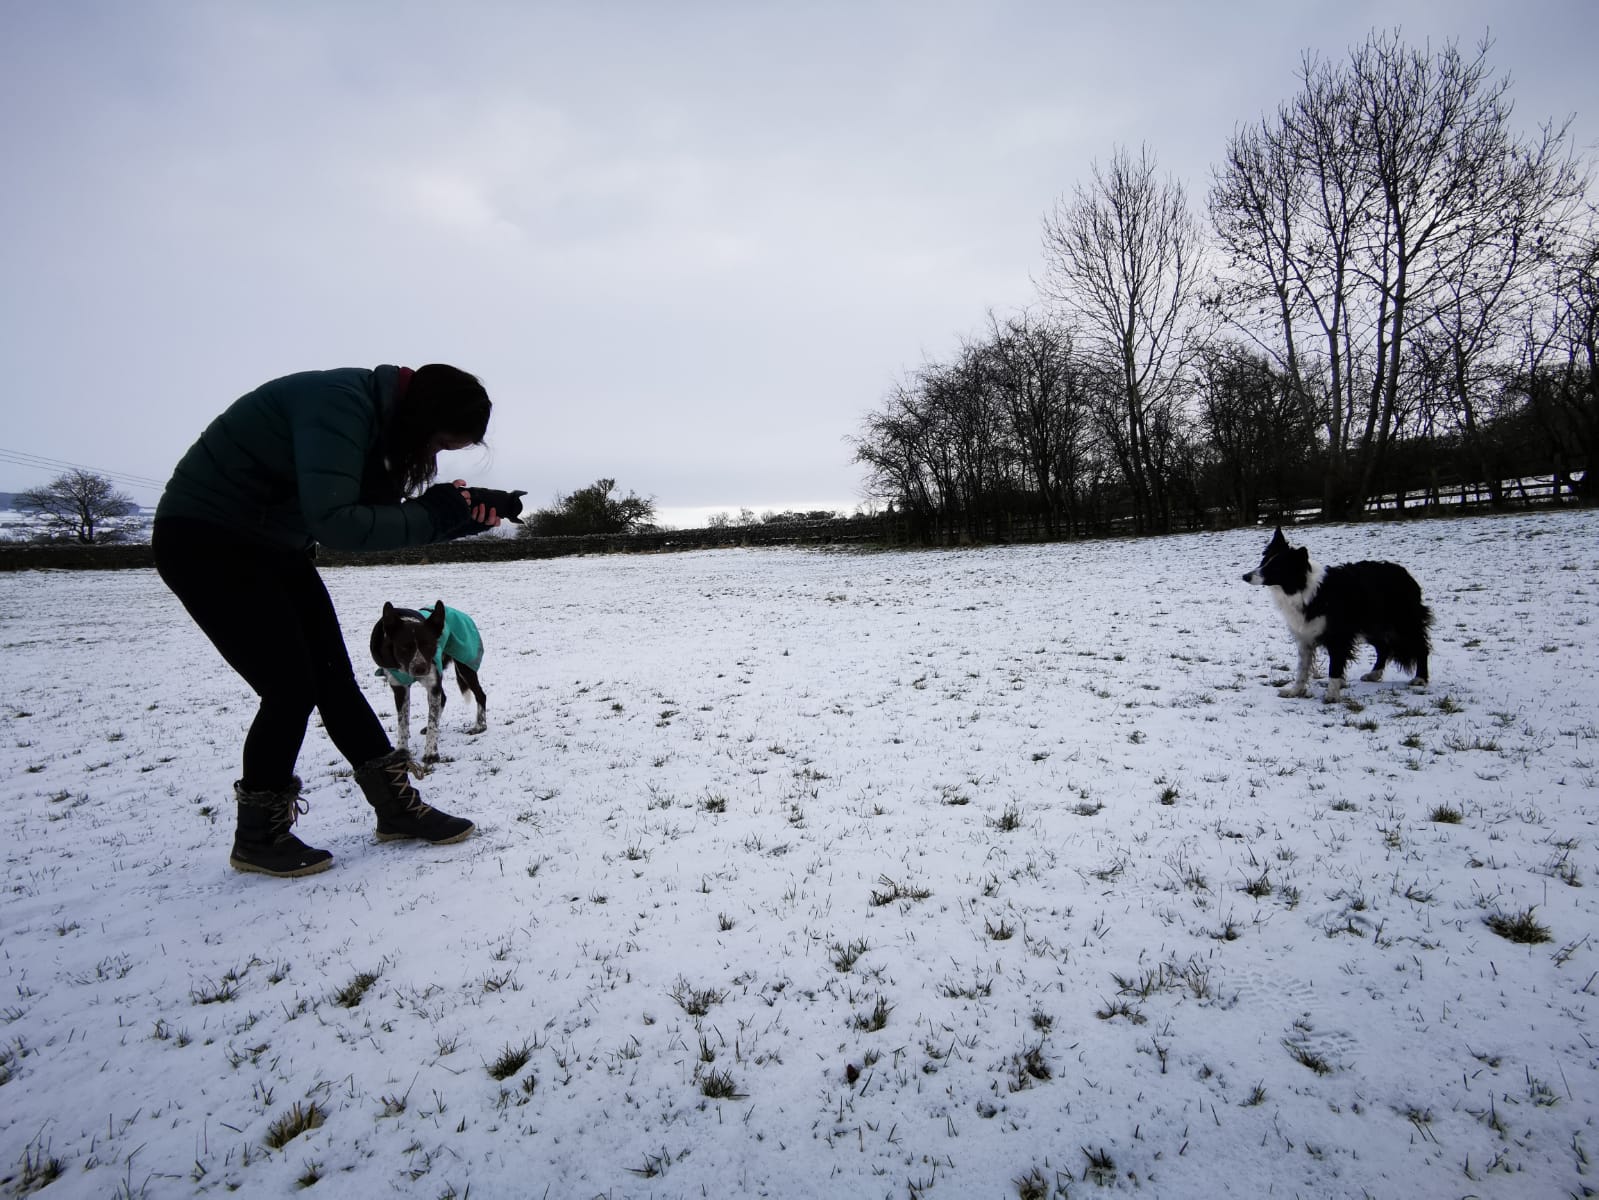
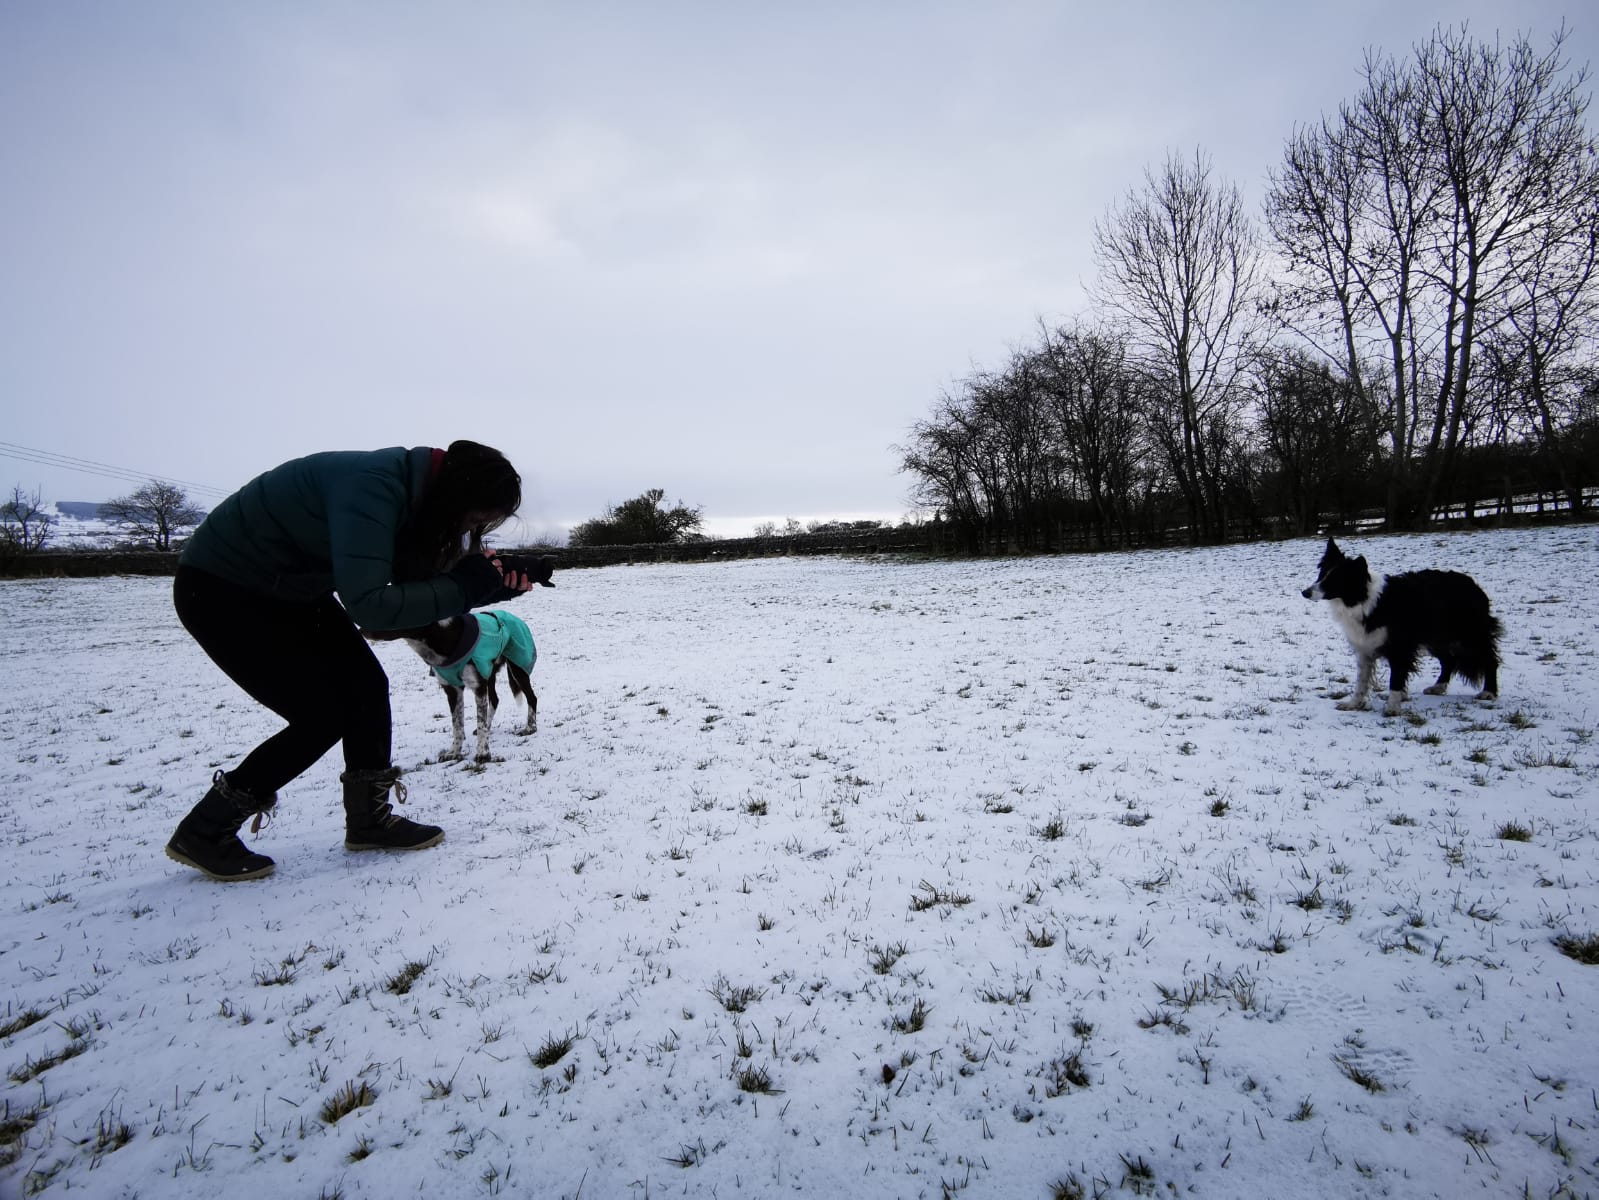
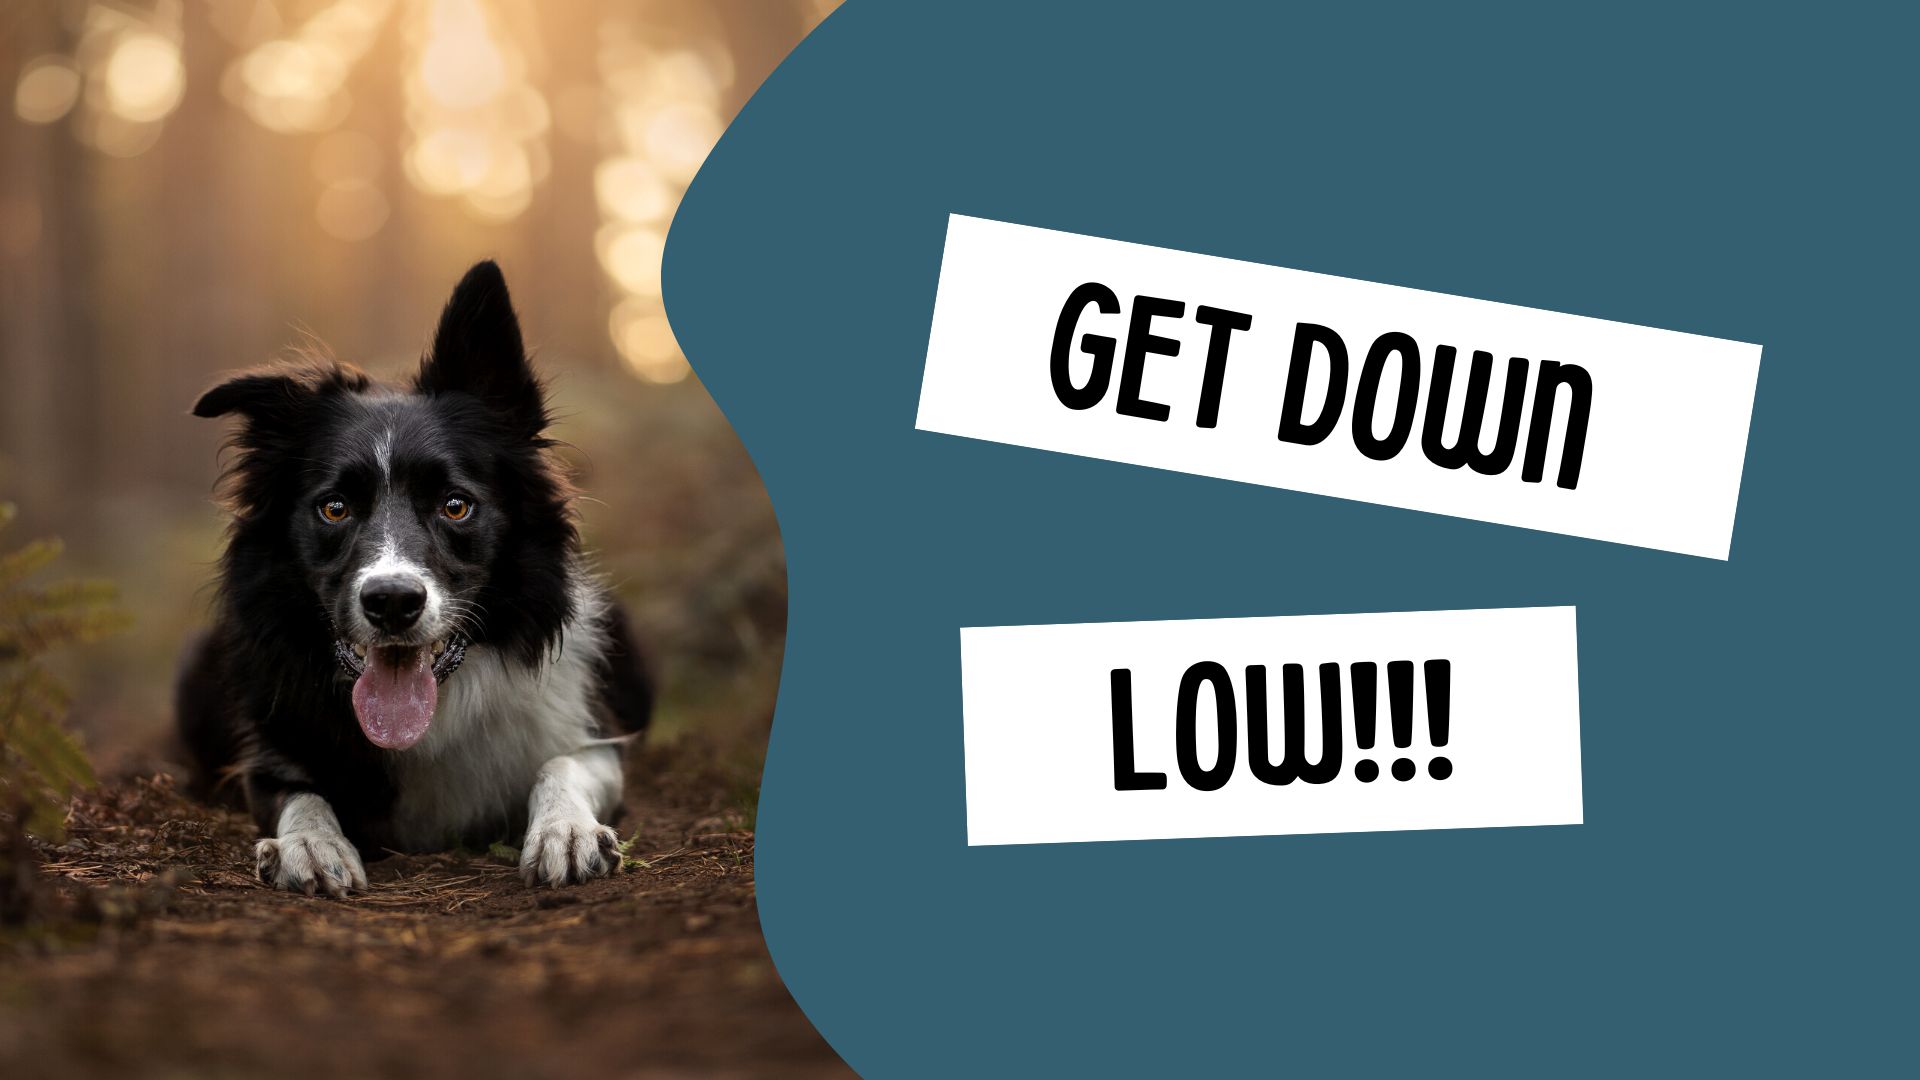
I would say that my #1 piece of advice is to get down low to the ground.
And no matter how many times I say it, whenever I teach a workshop or a lesson, I usually STILL need to tell the student to get low. Nope, lower than that. Keep going.
You may need to be lying on your belly, or crouching over your camera if you have a flip-out screen. The important thing is to (almost always) get down low.
As with all my lessons, these ARE guidelines – not hard and fast rules. It’s up to YOU to analyse the situation you’re in, and determine what is going to look best for the location, the pose, the subject, the background, and the story you want to tell.
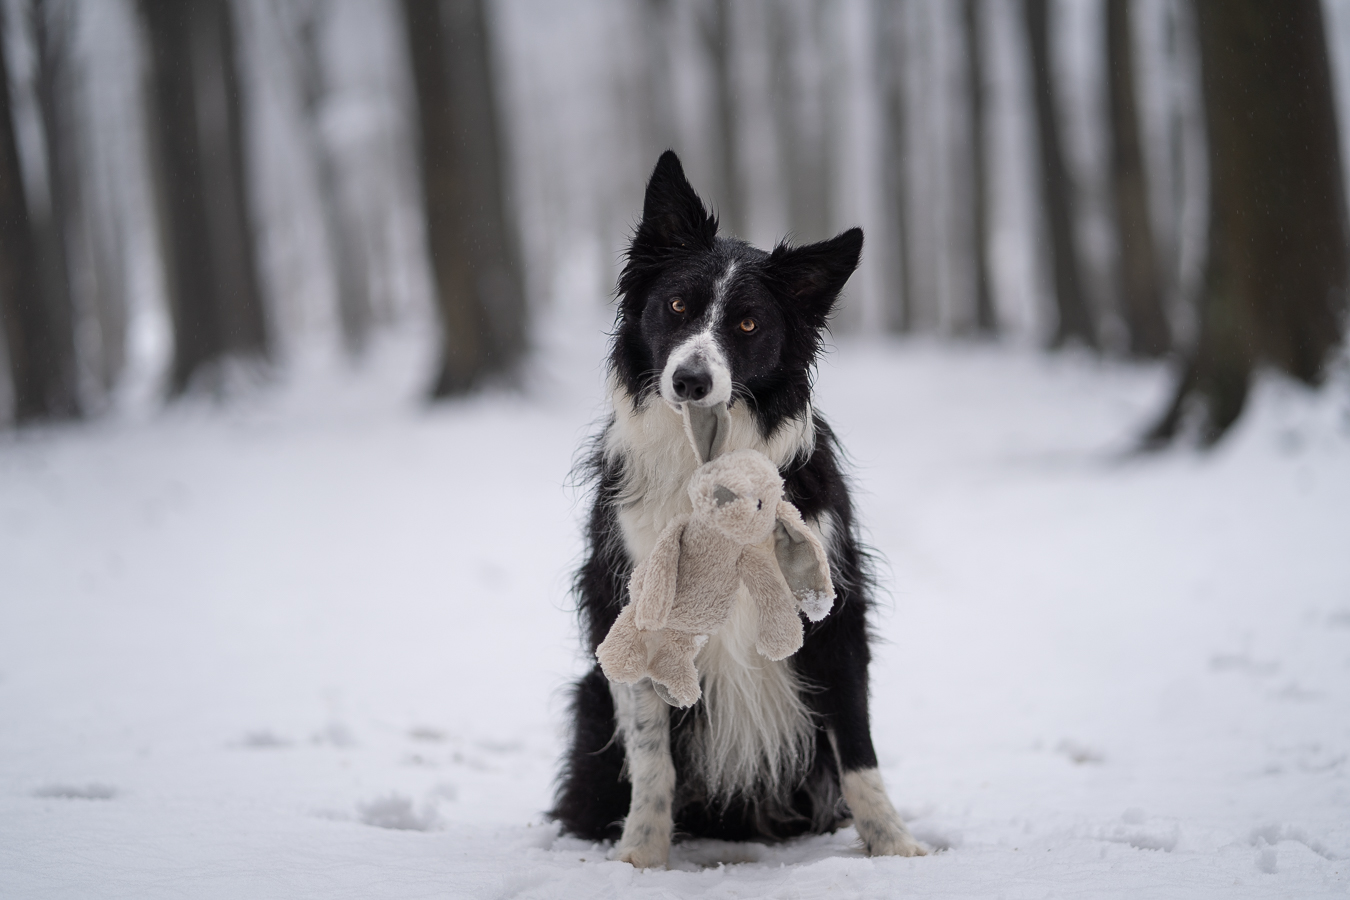
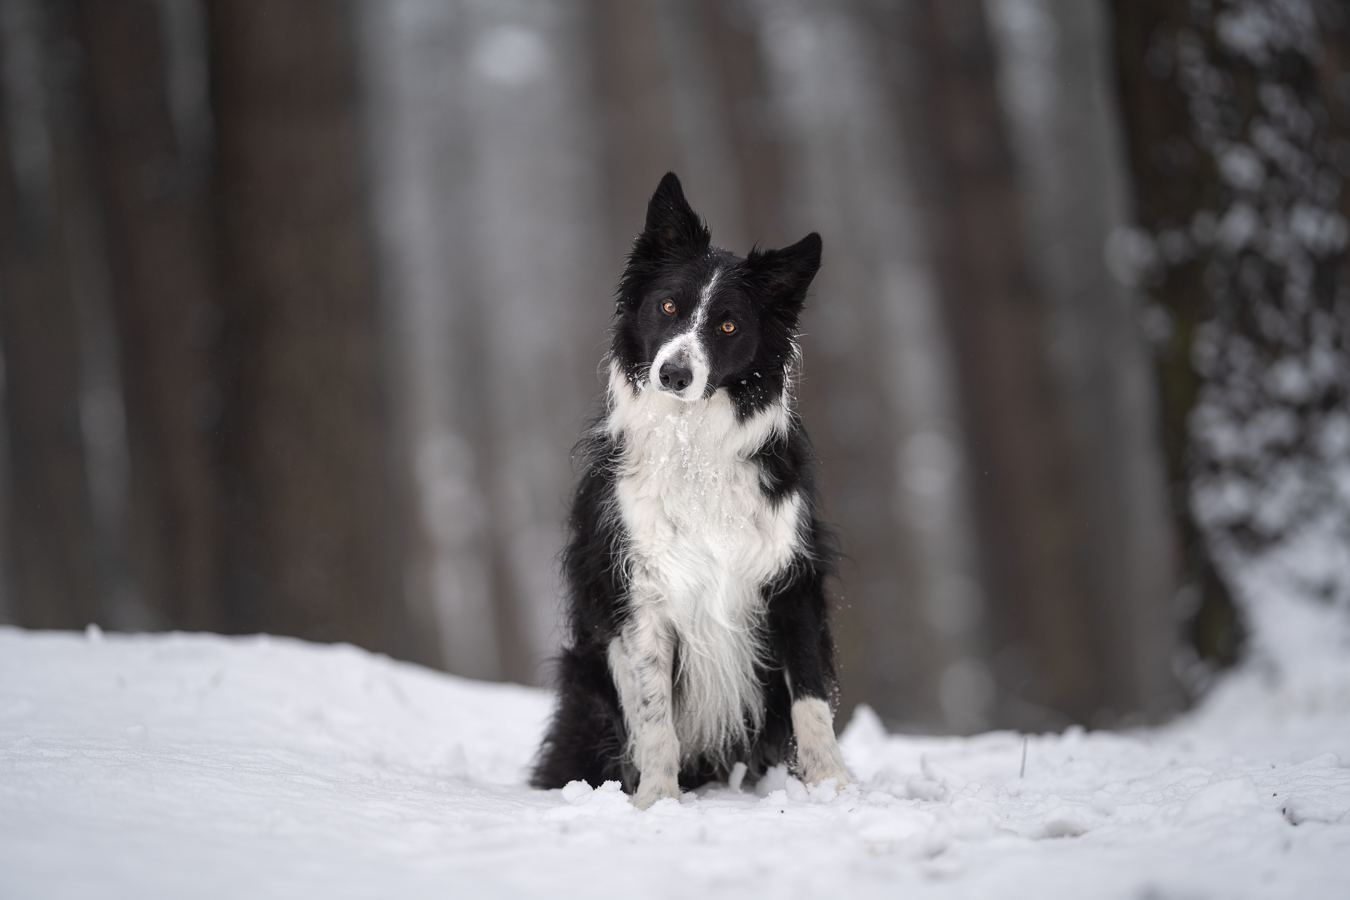
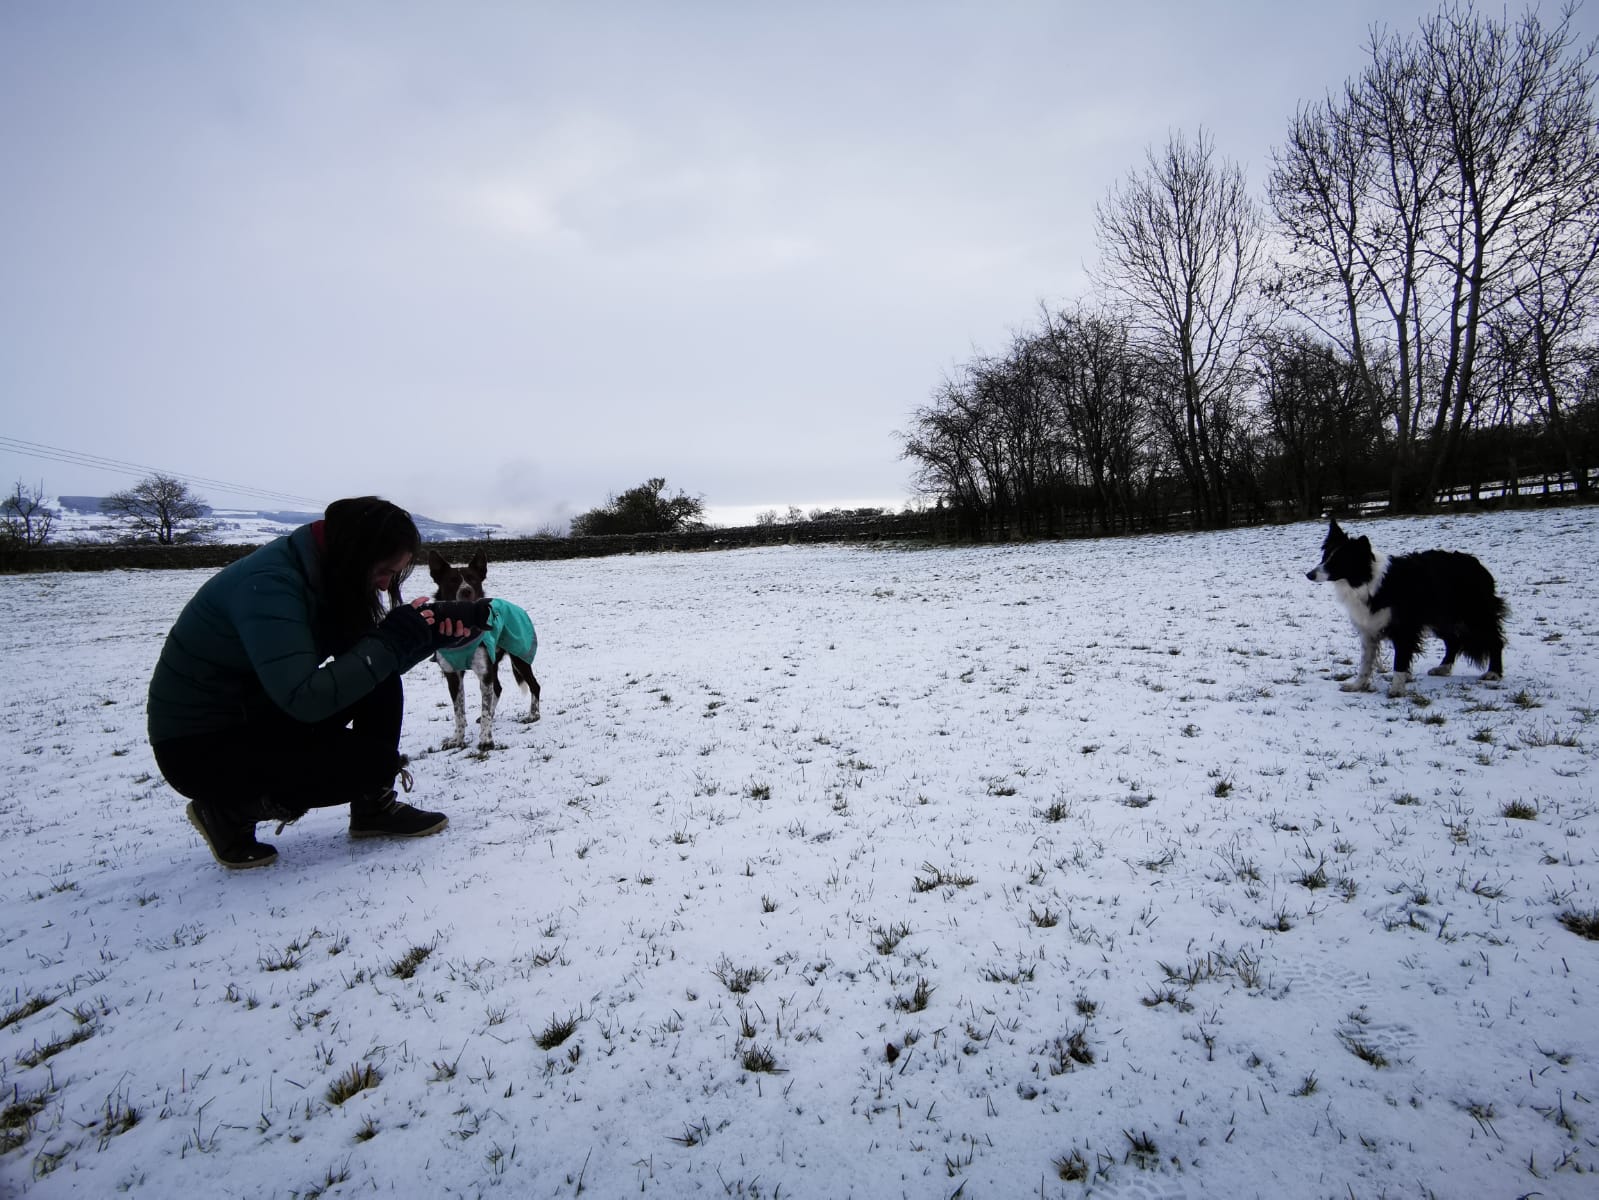
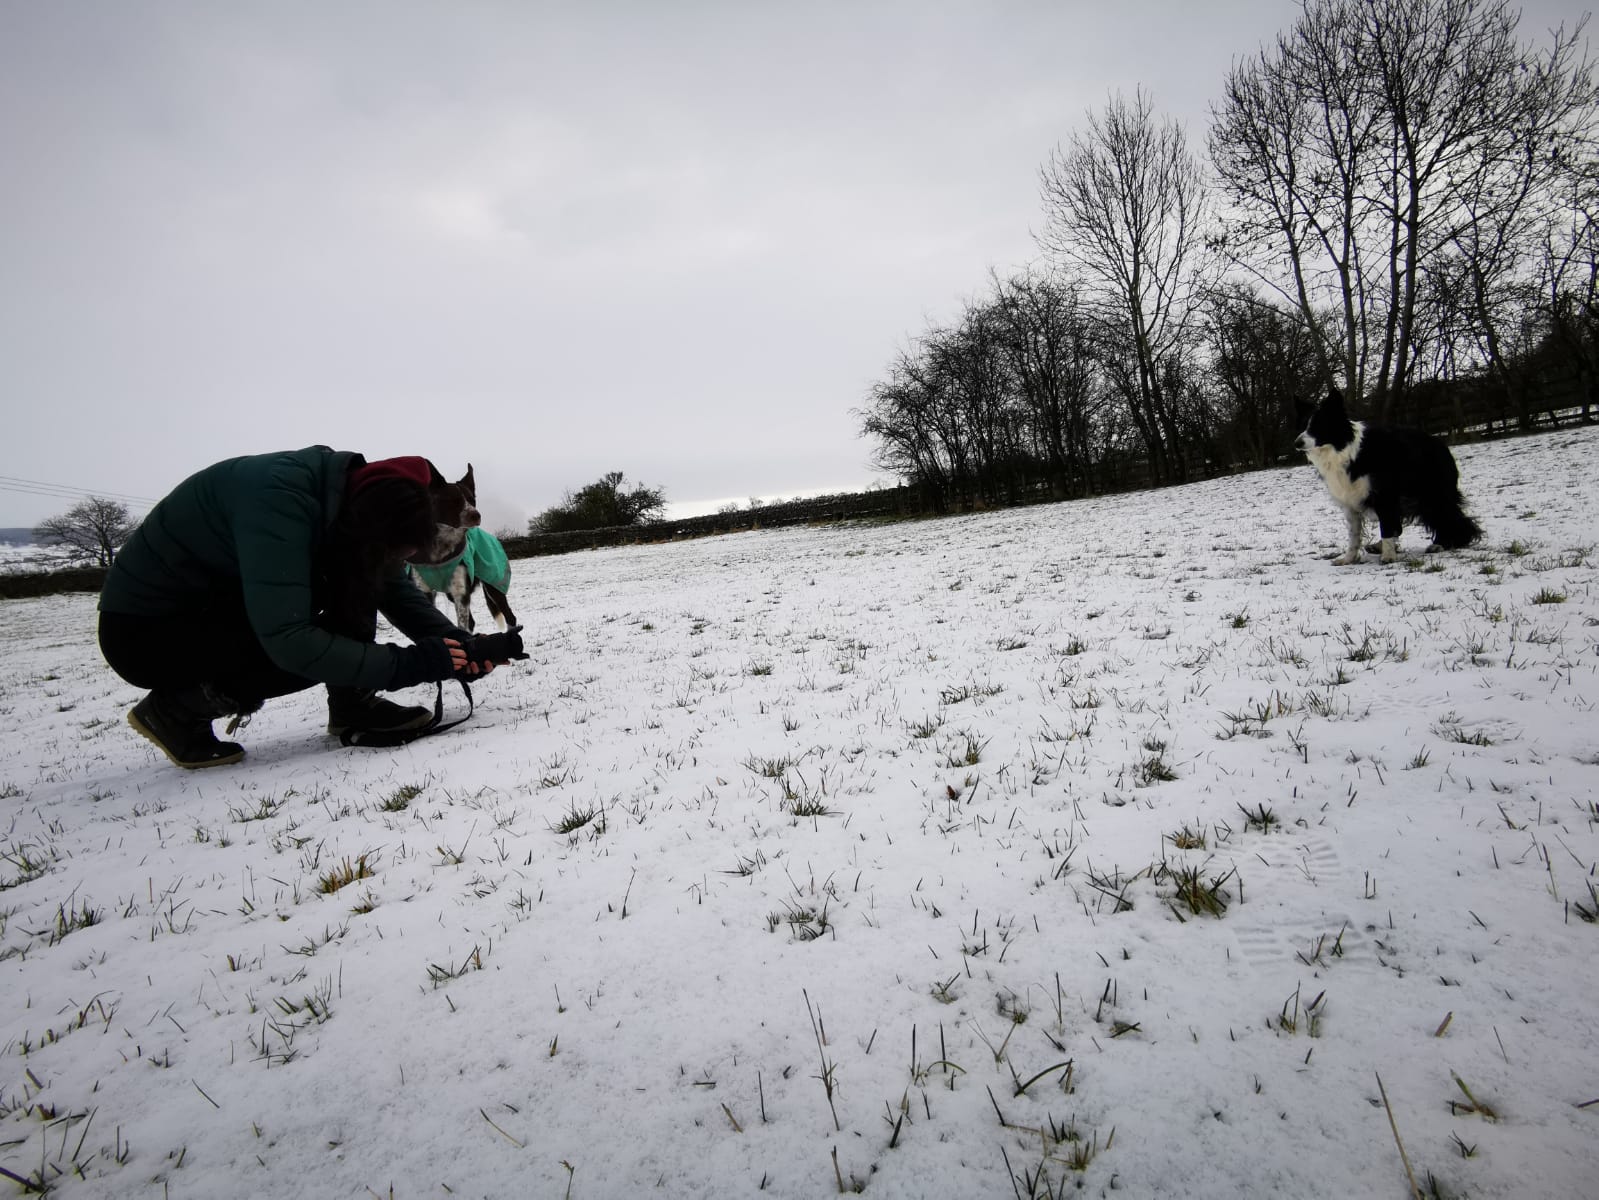
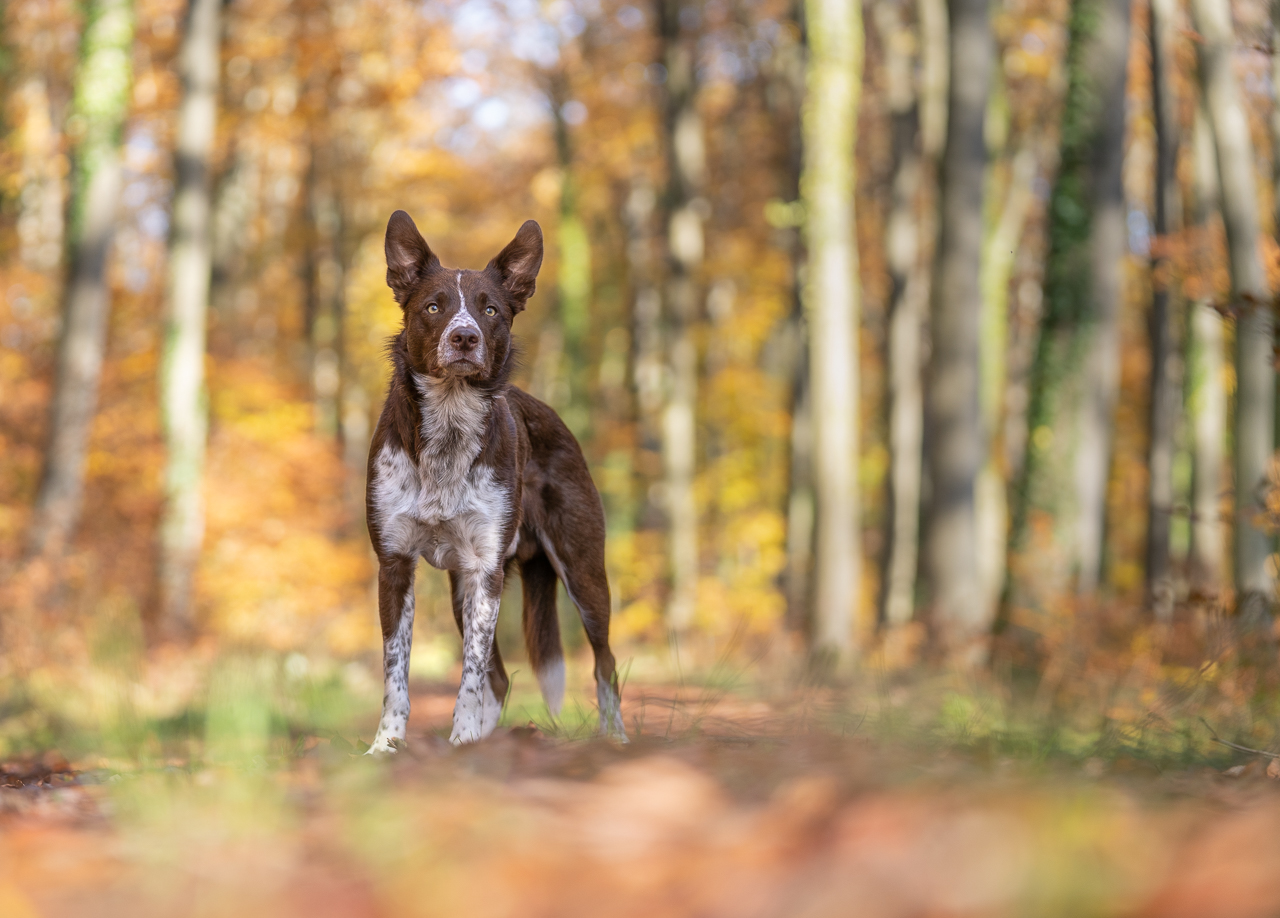
Take a look at the photos below.
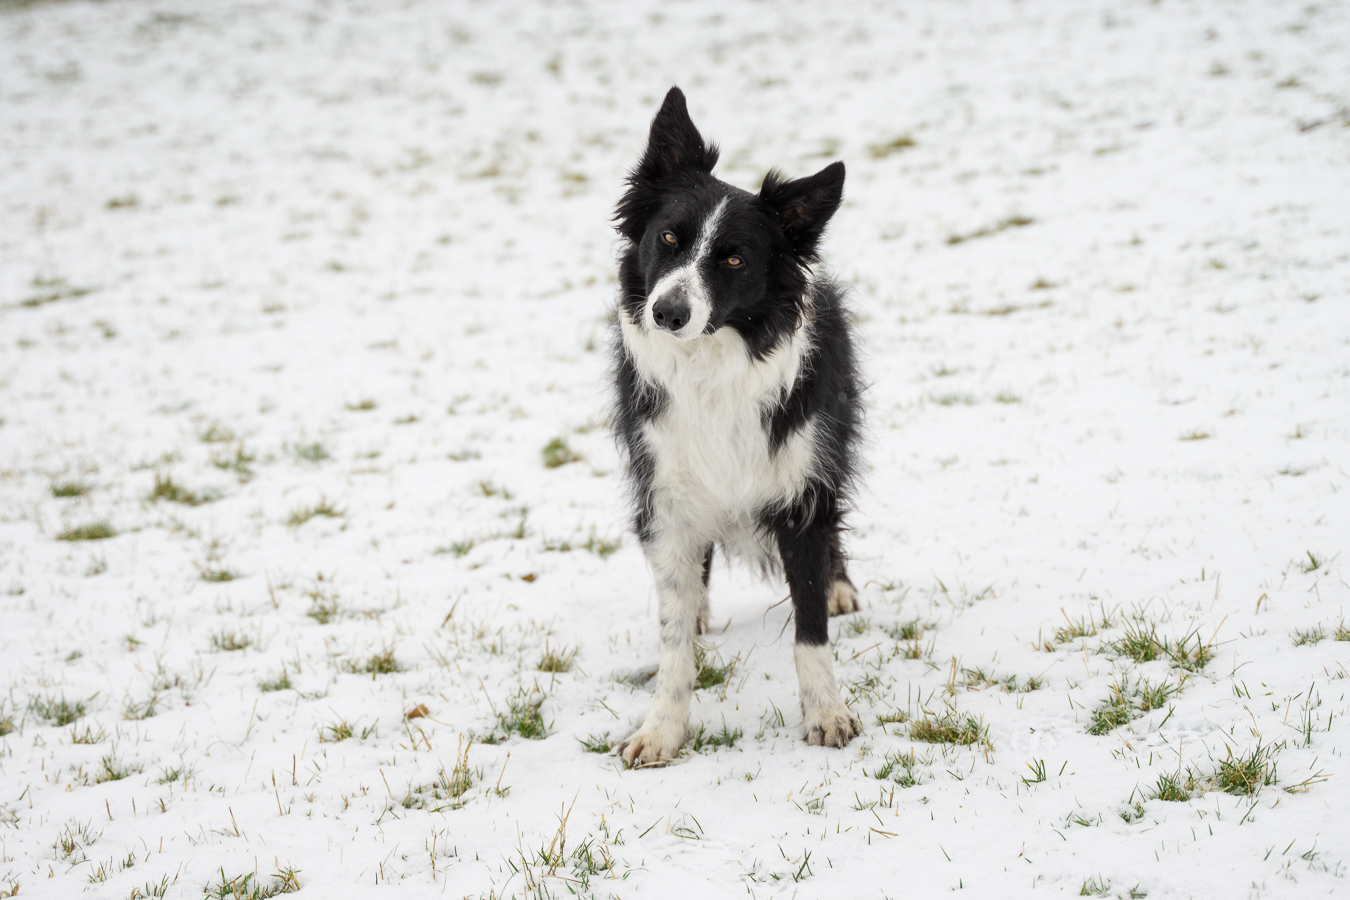
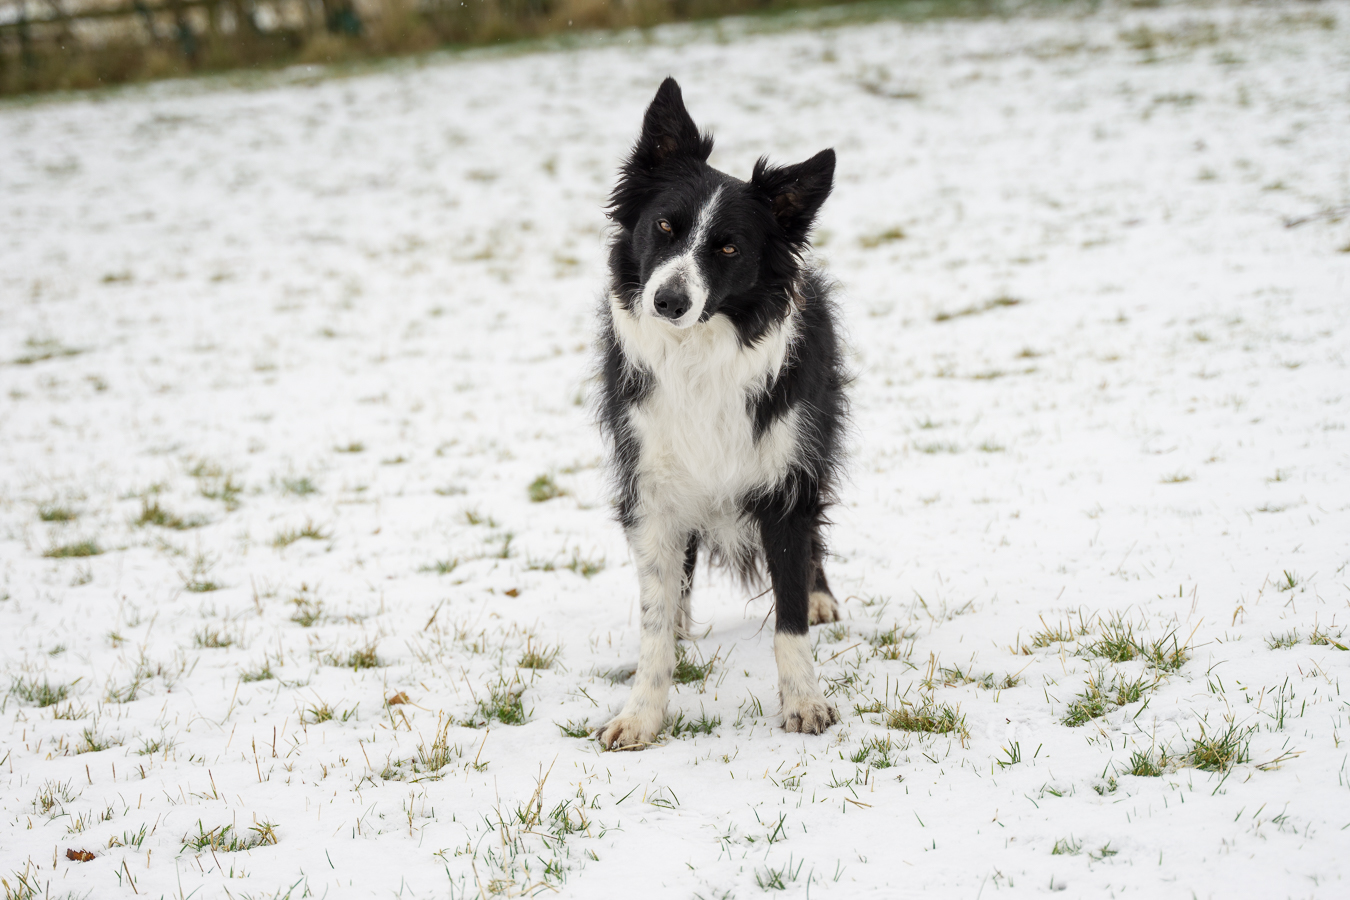
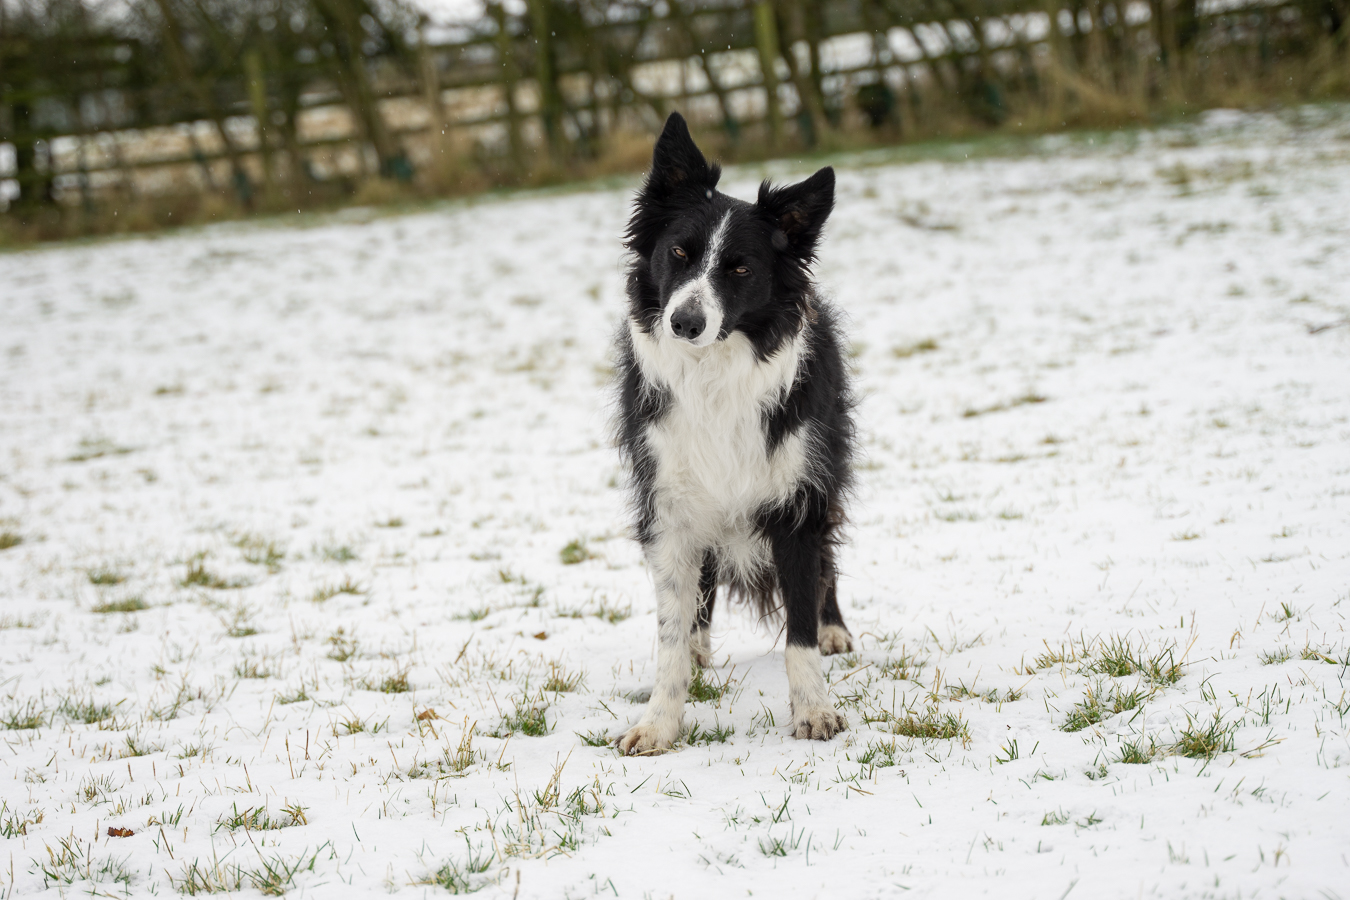
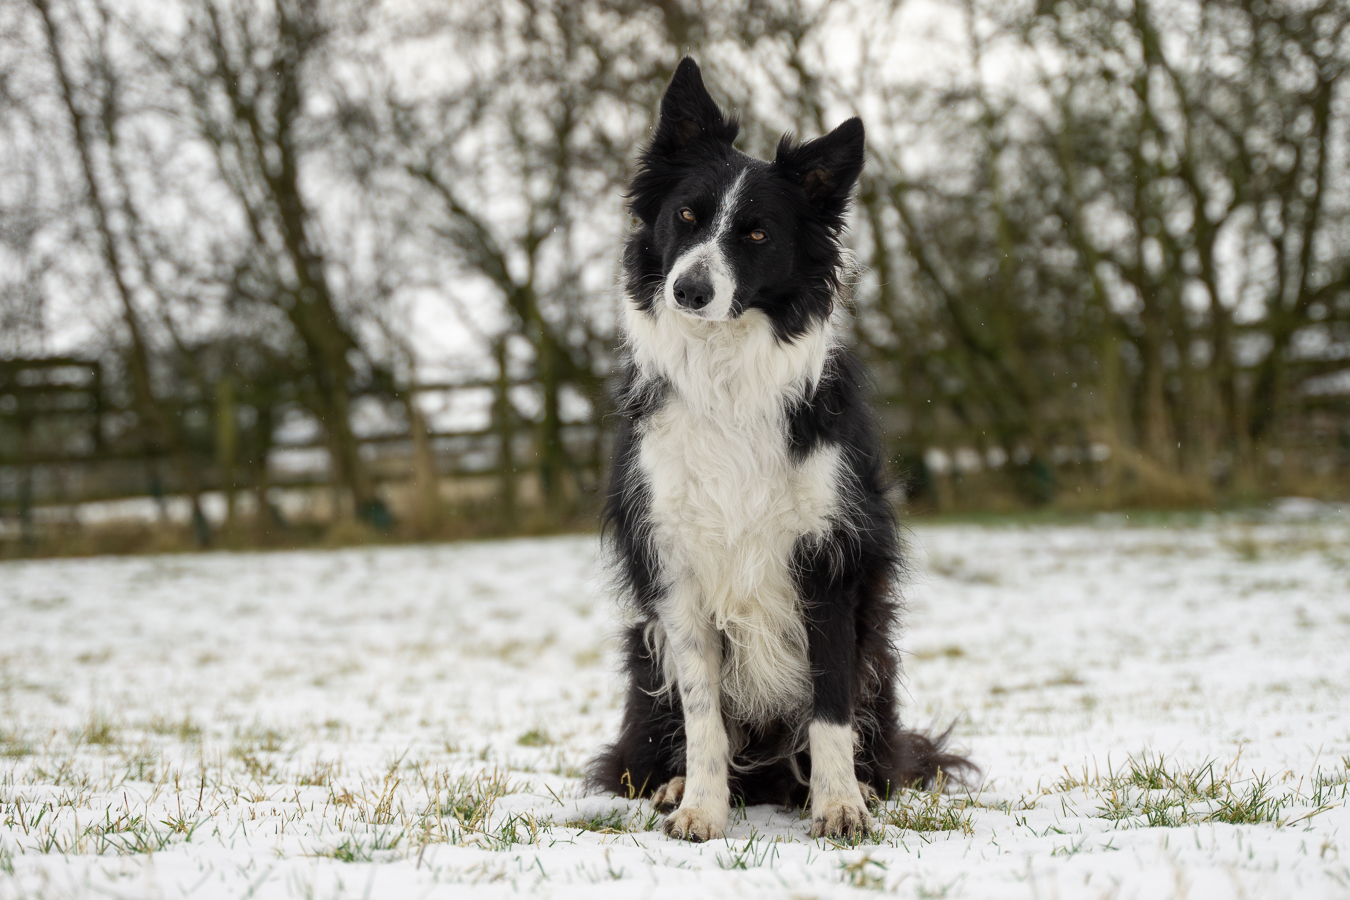
Which one connects you with the dog more? (okay, Journey’s expression in one is TERRIBLE)
Which one gives you more of a sense of “place”?
Which one FEELS like a more interesting photo?
These were all taken at the EXACT same location. I didn’t move, I simply got closer to the ground!
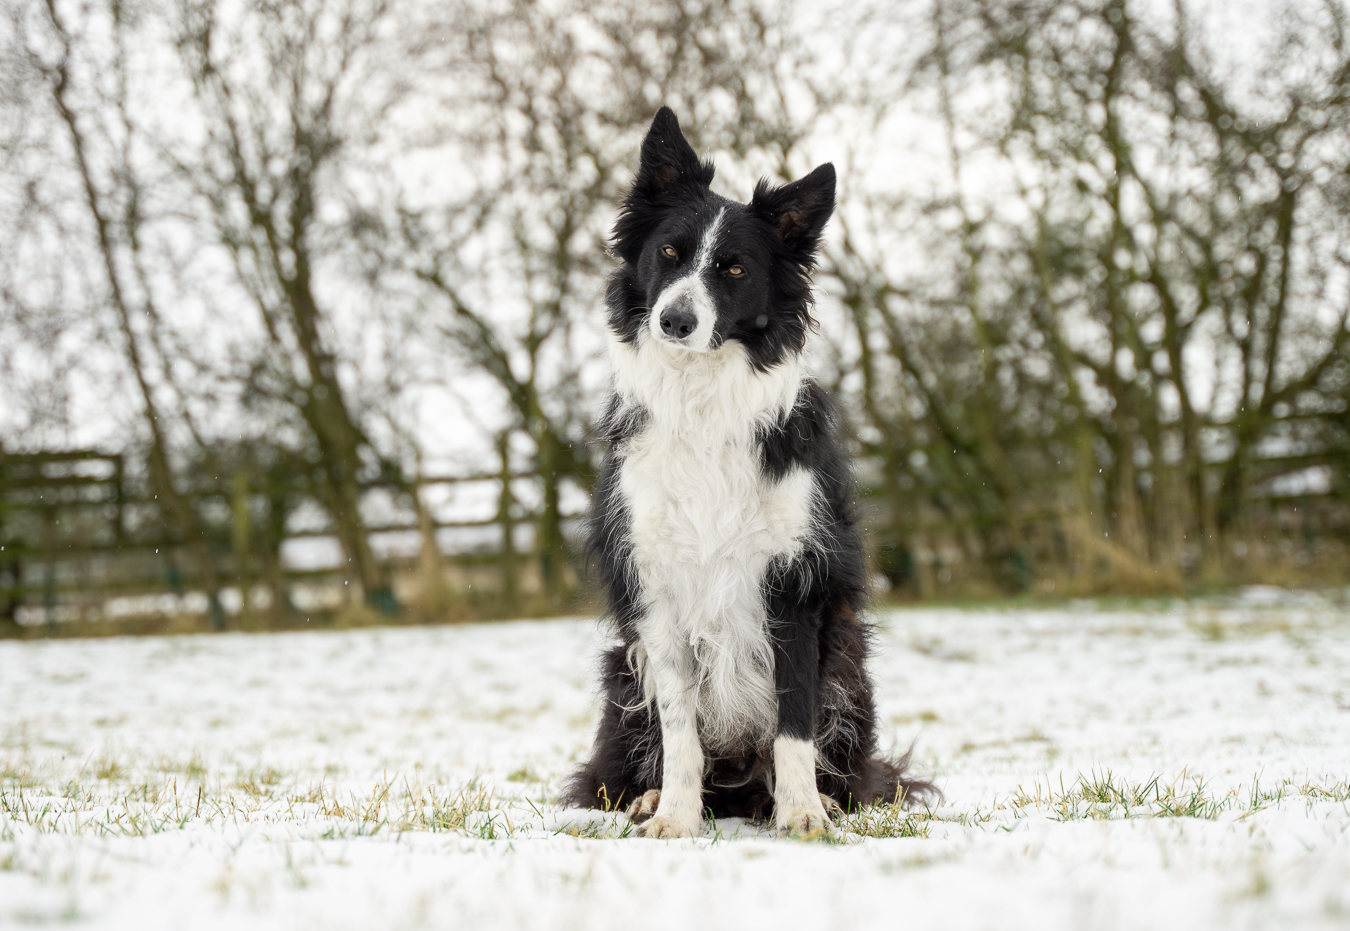
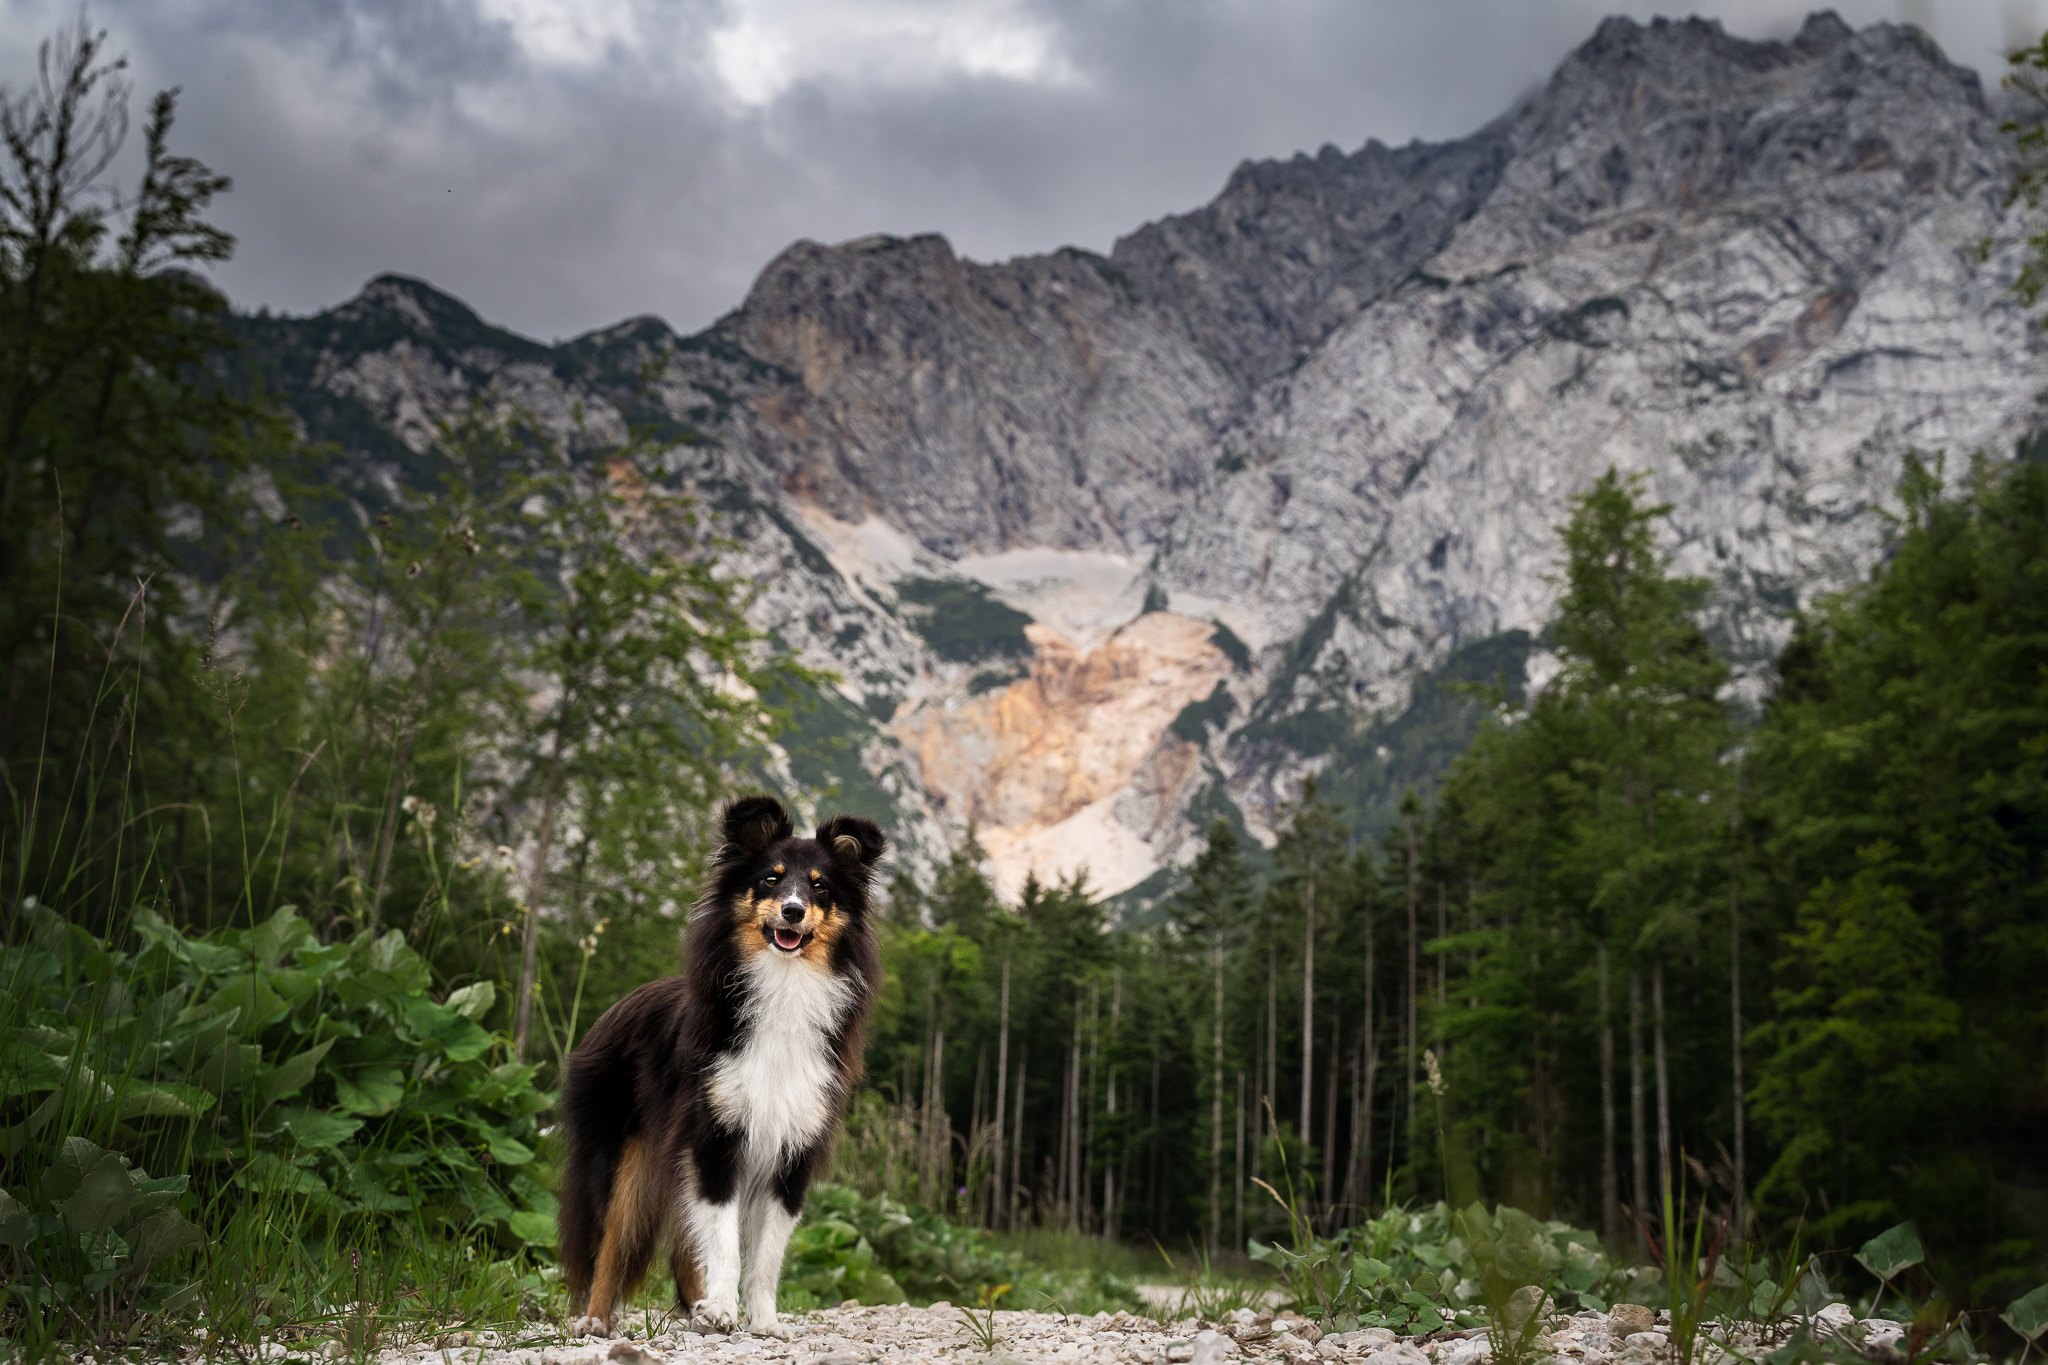
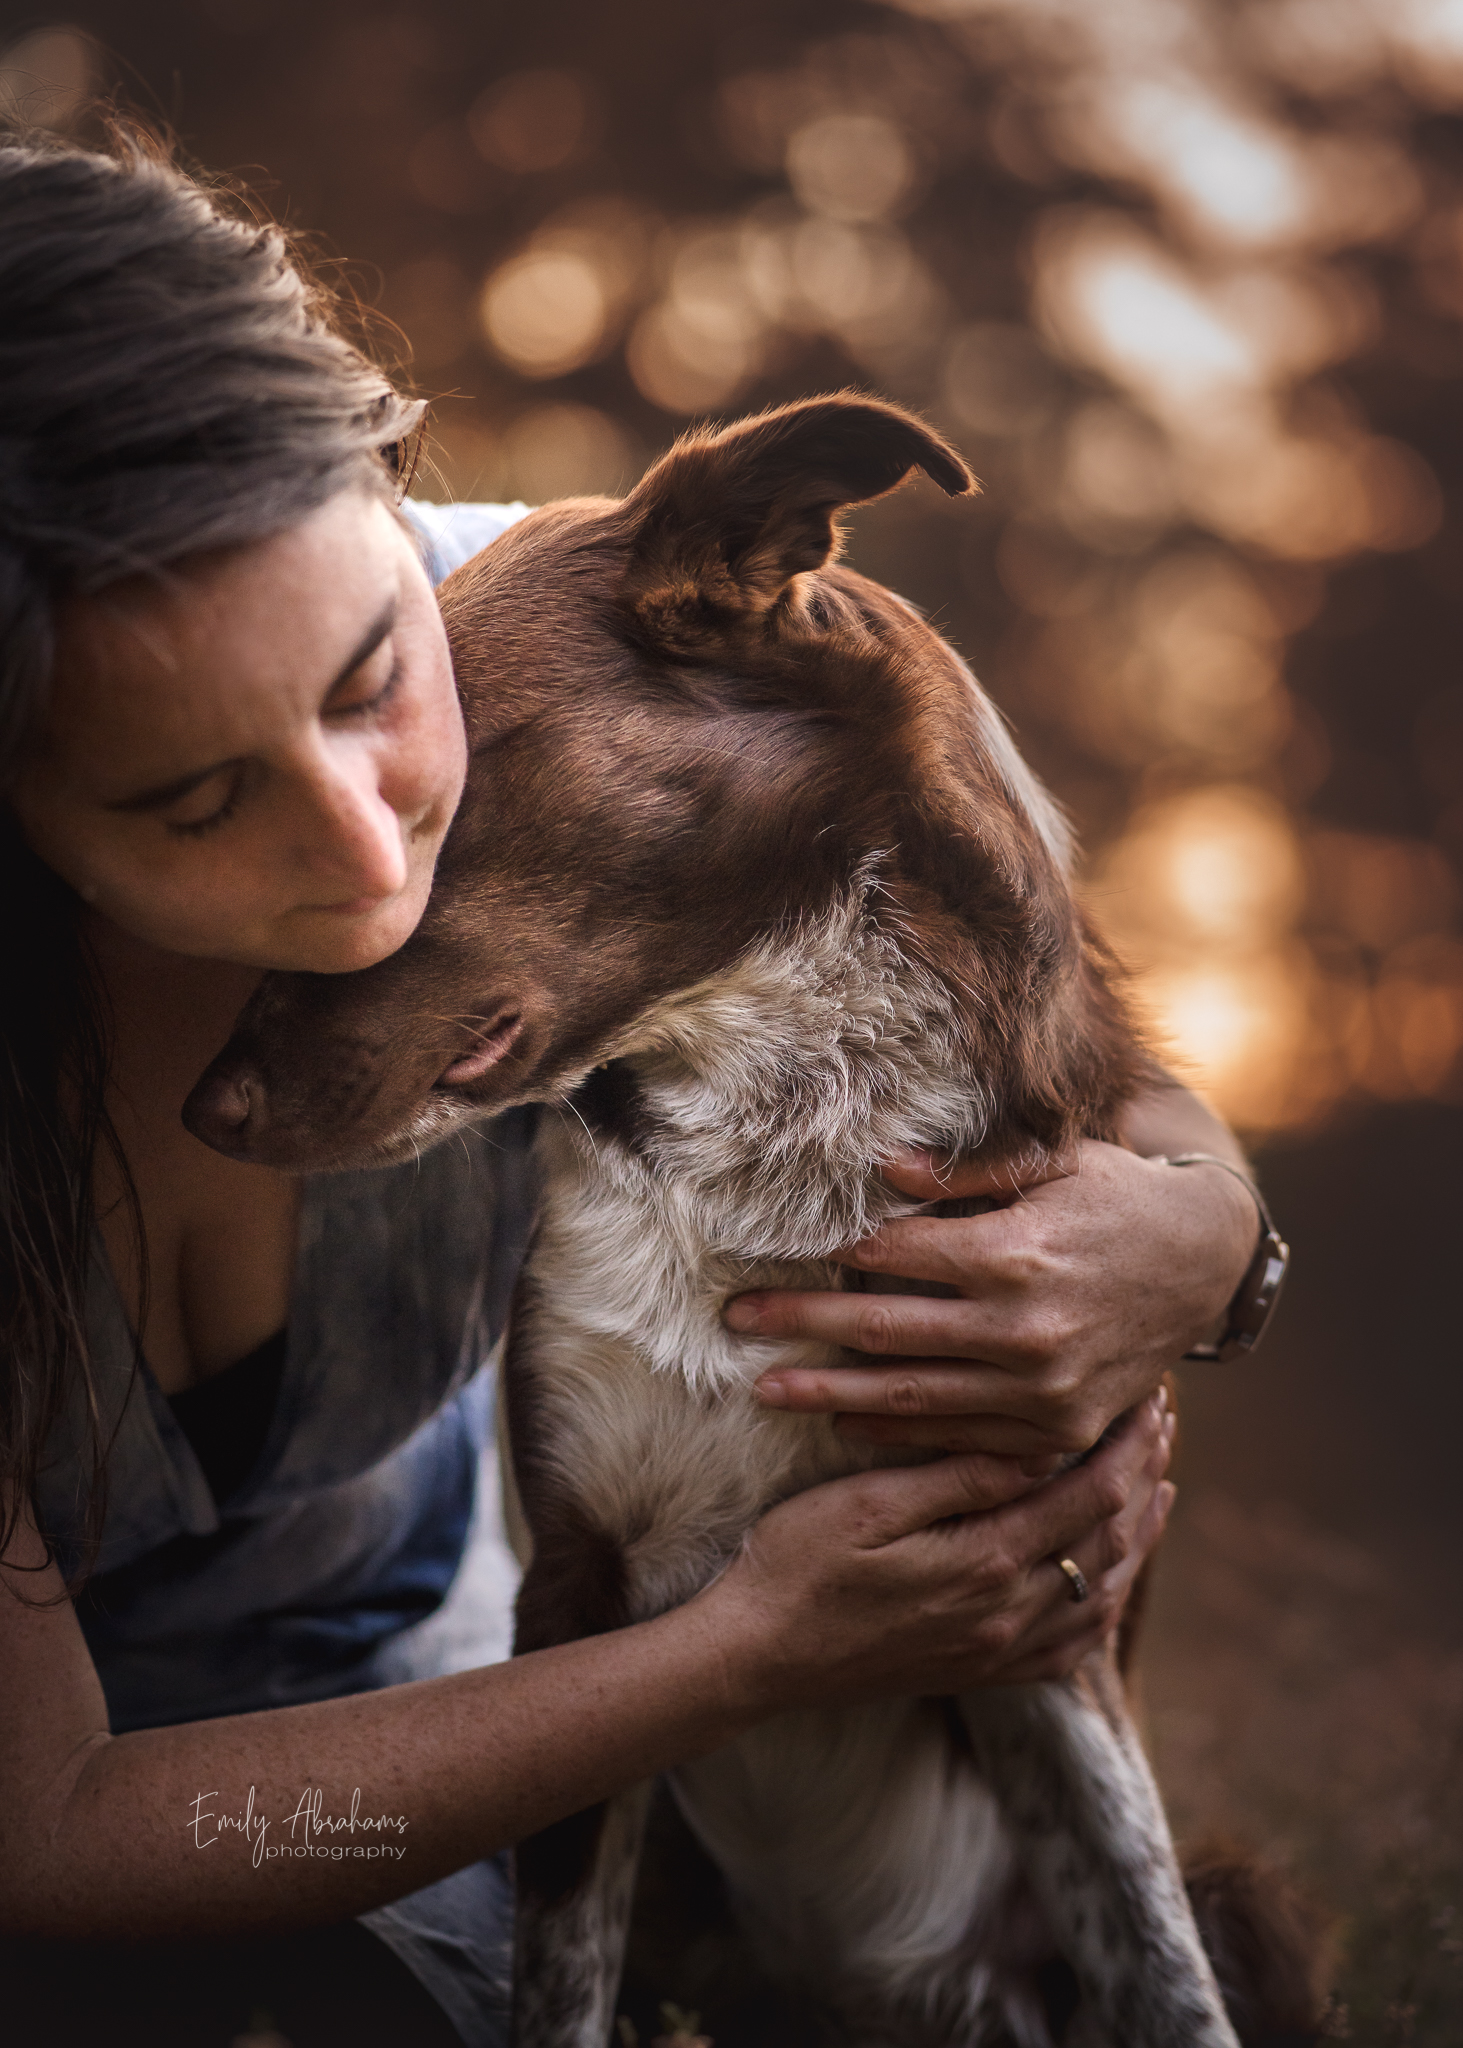
I think it goes without saying that the perspective or angle at which we take our photos can determine whether they are impactful portraits with a sense of depth and context… or not. It can determine how majestic our dog looks, how connected we are with the dog, how powerful they come across, and can often separate a professional-feeling photo from an amateur one.
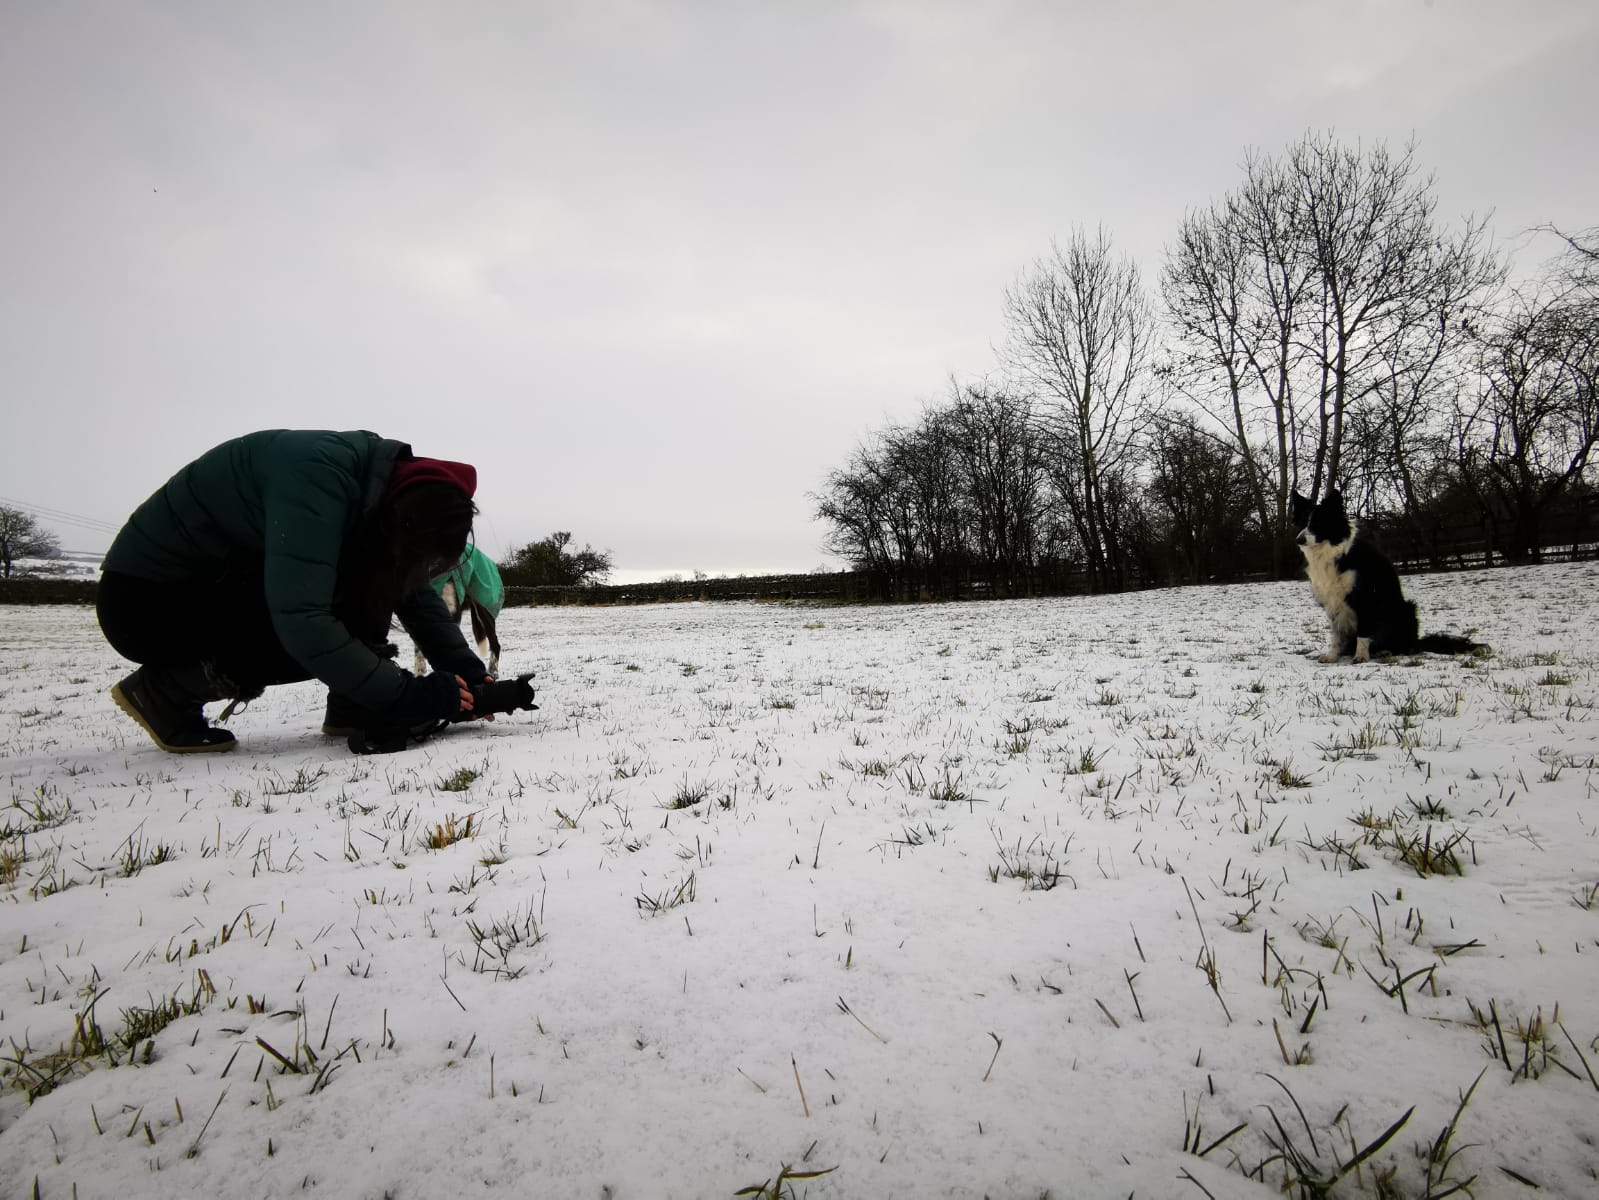
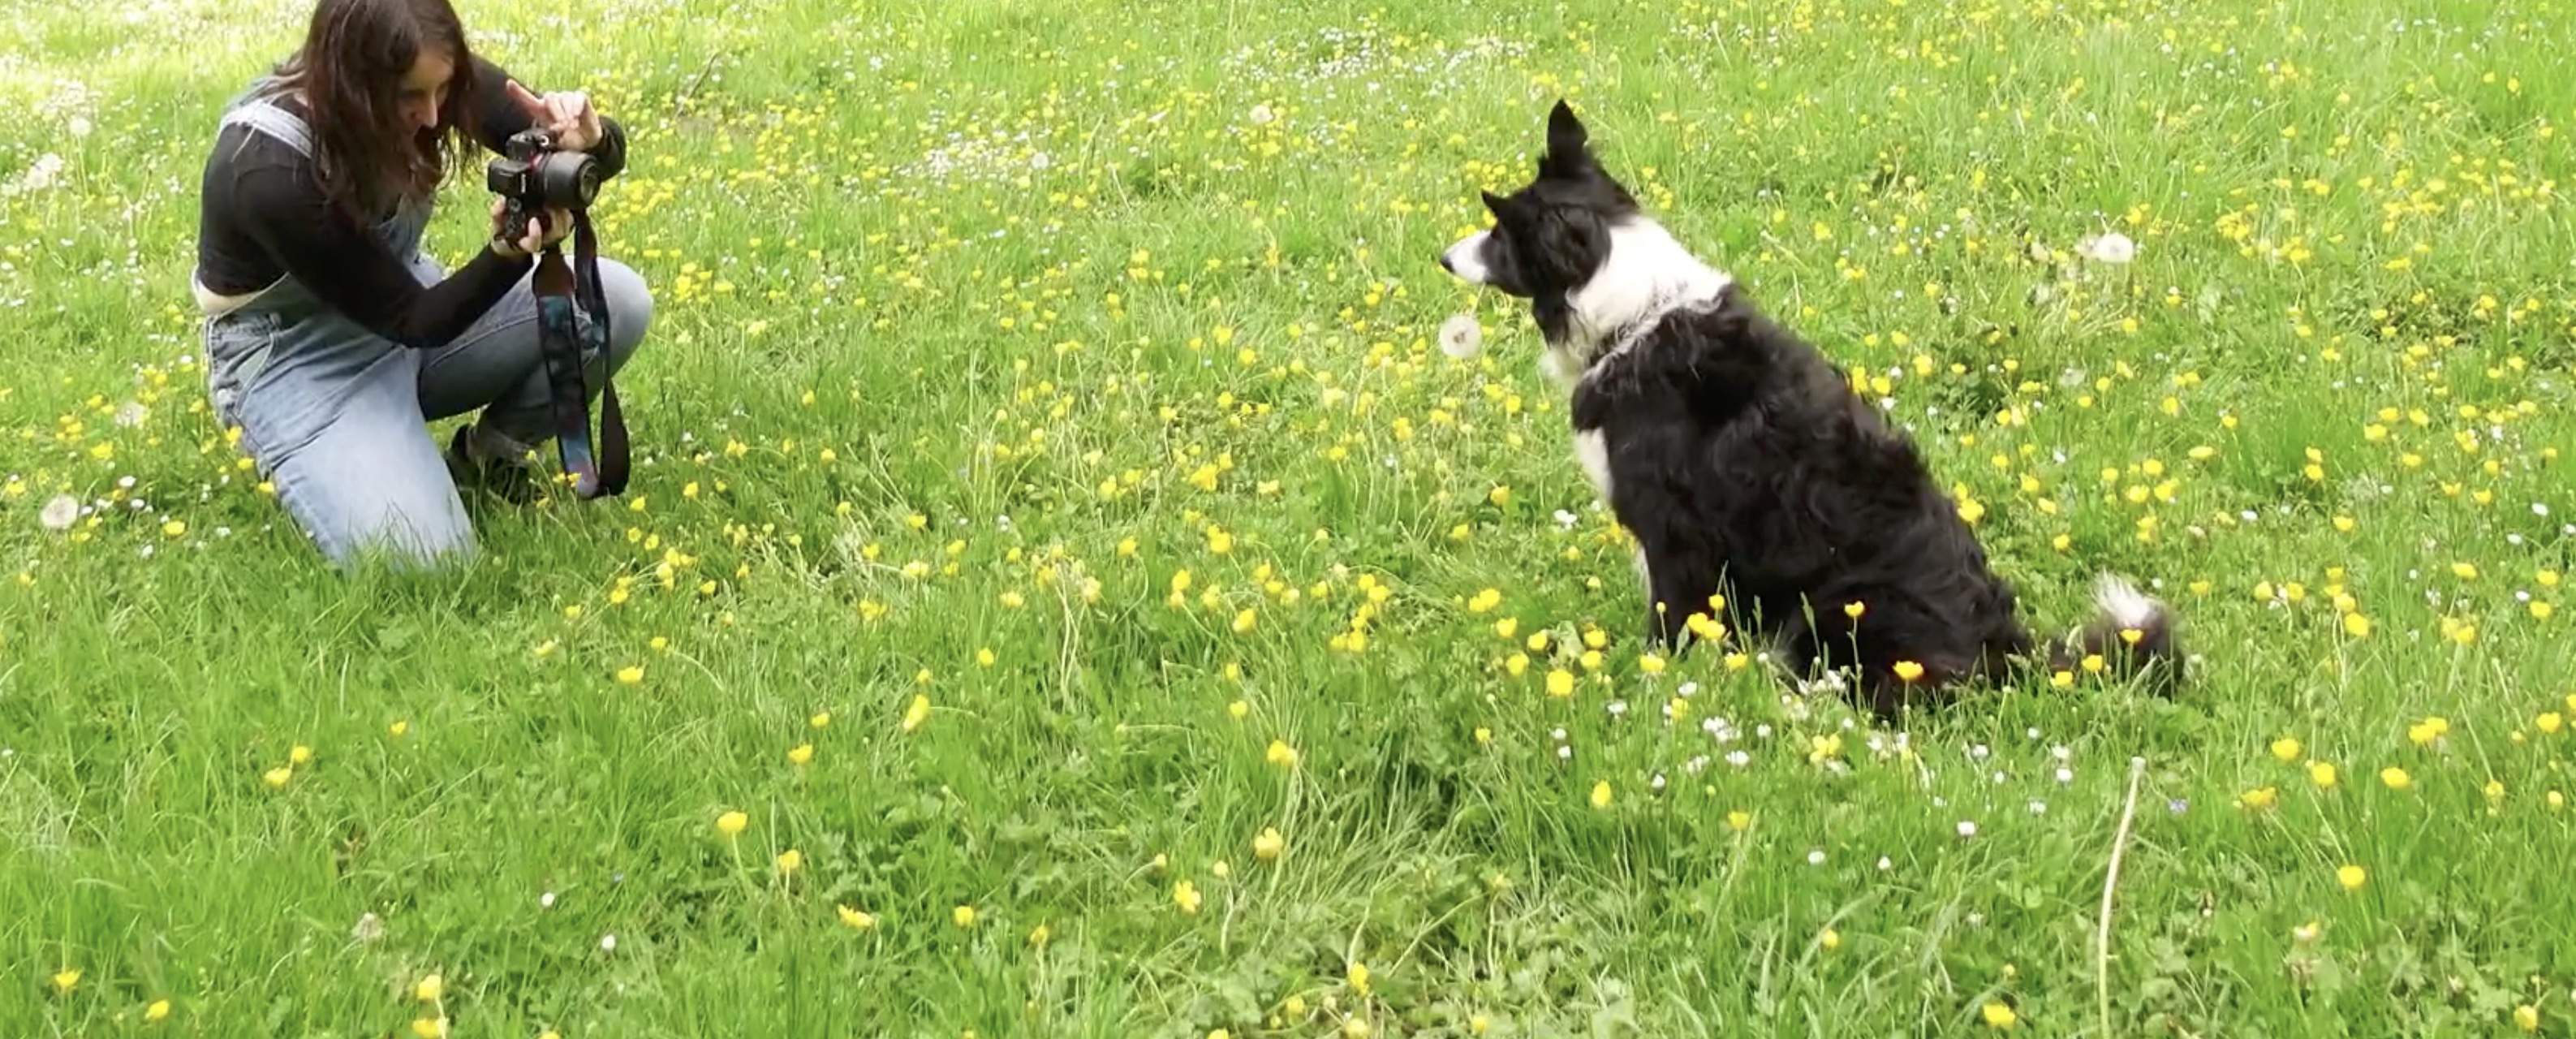
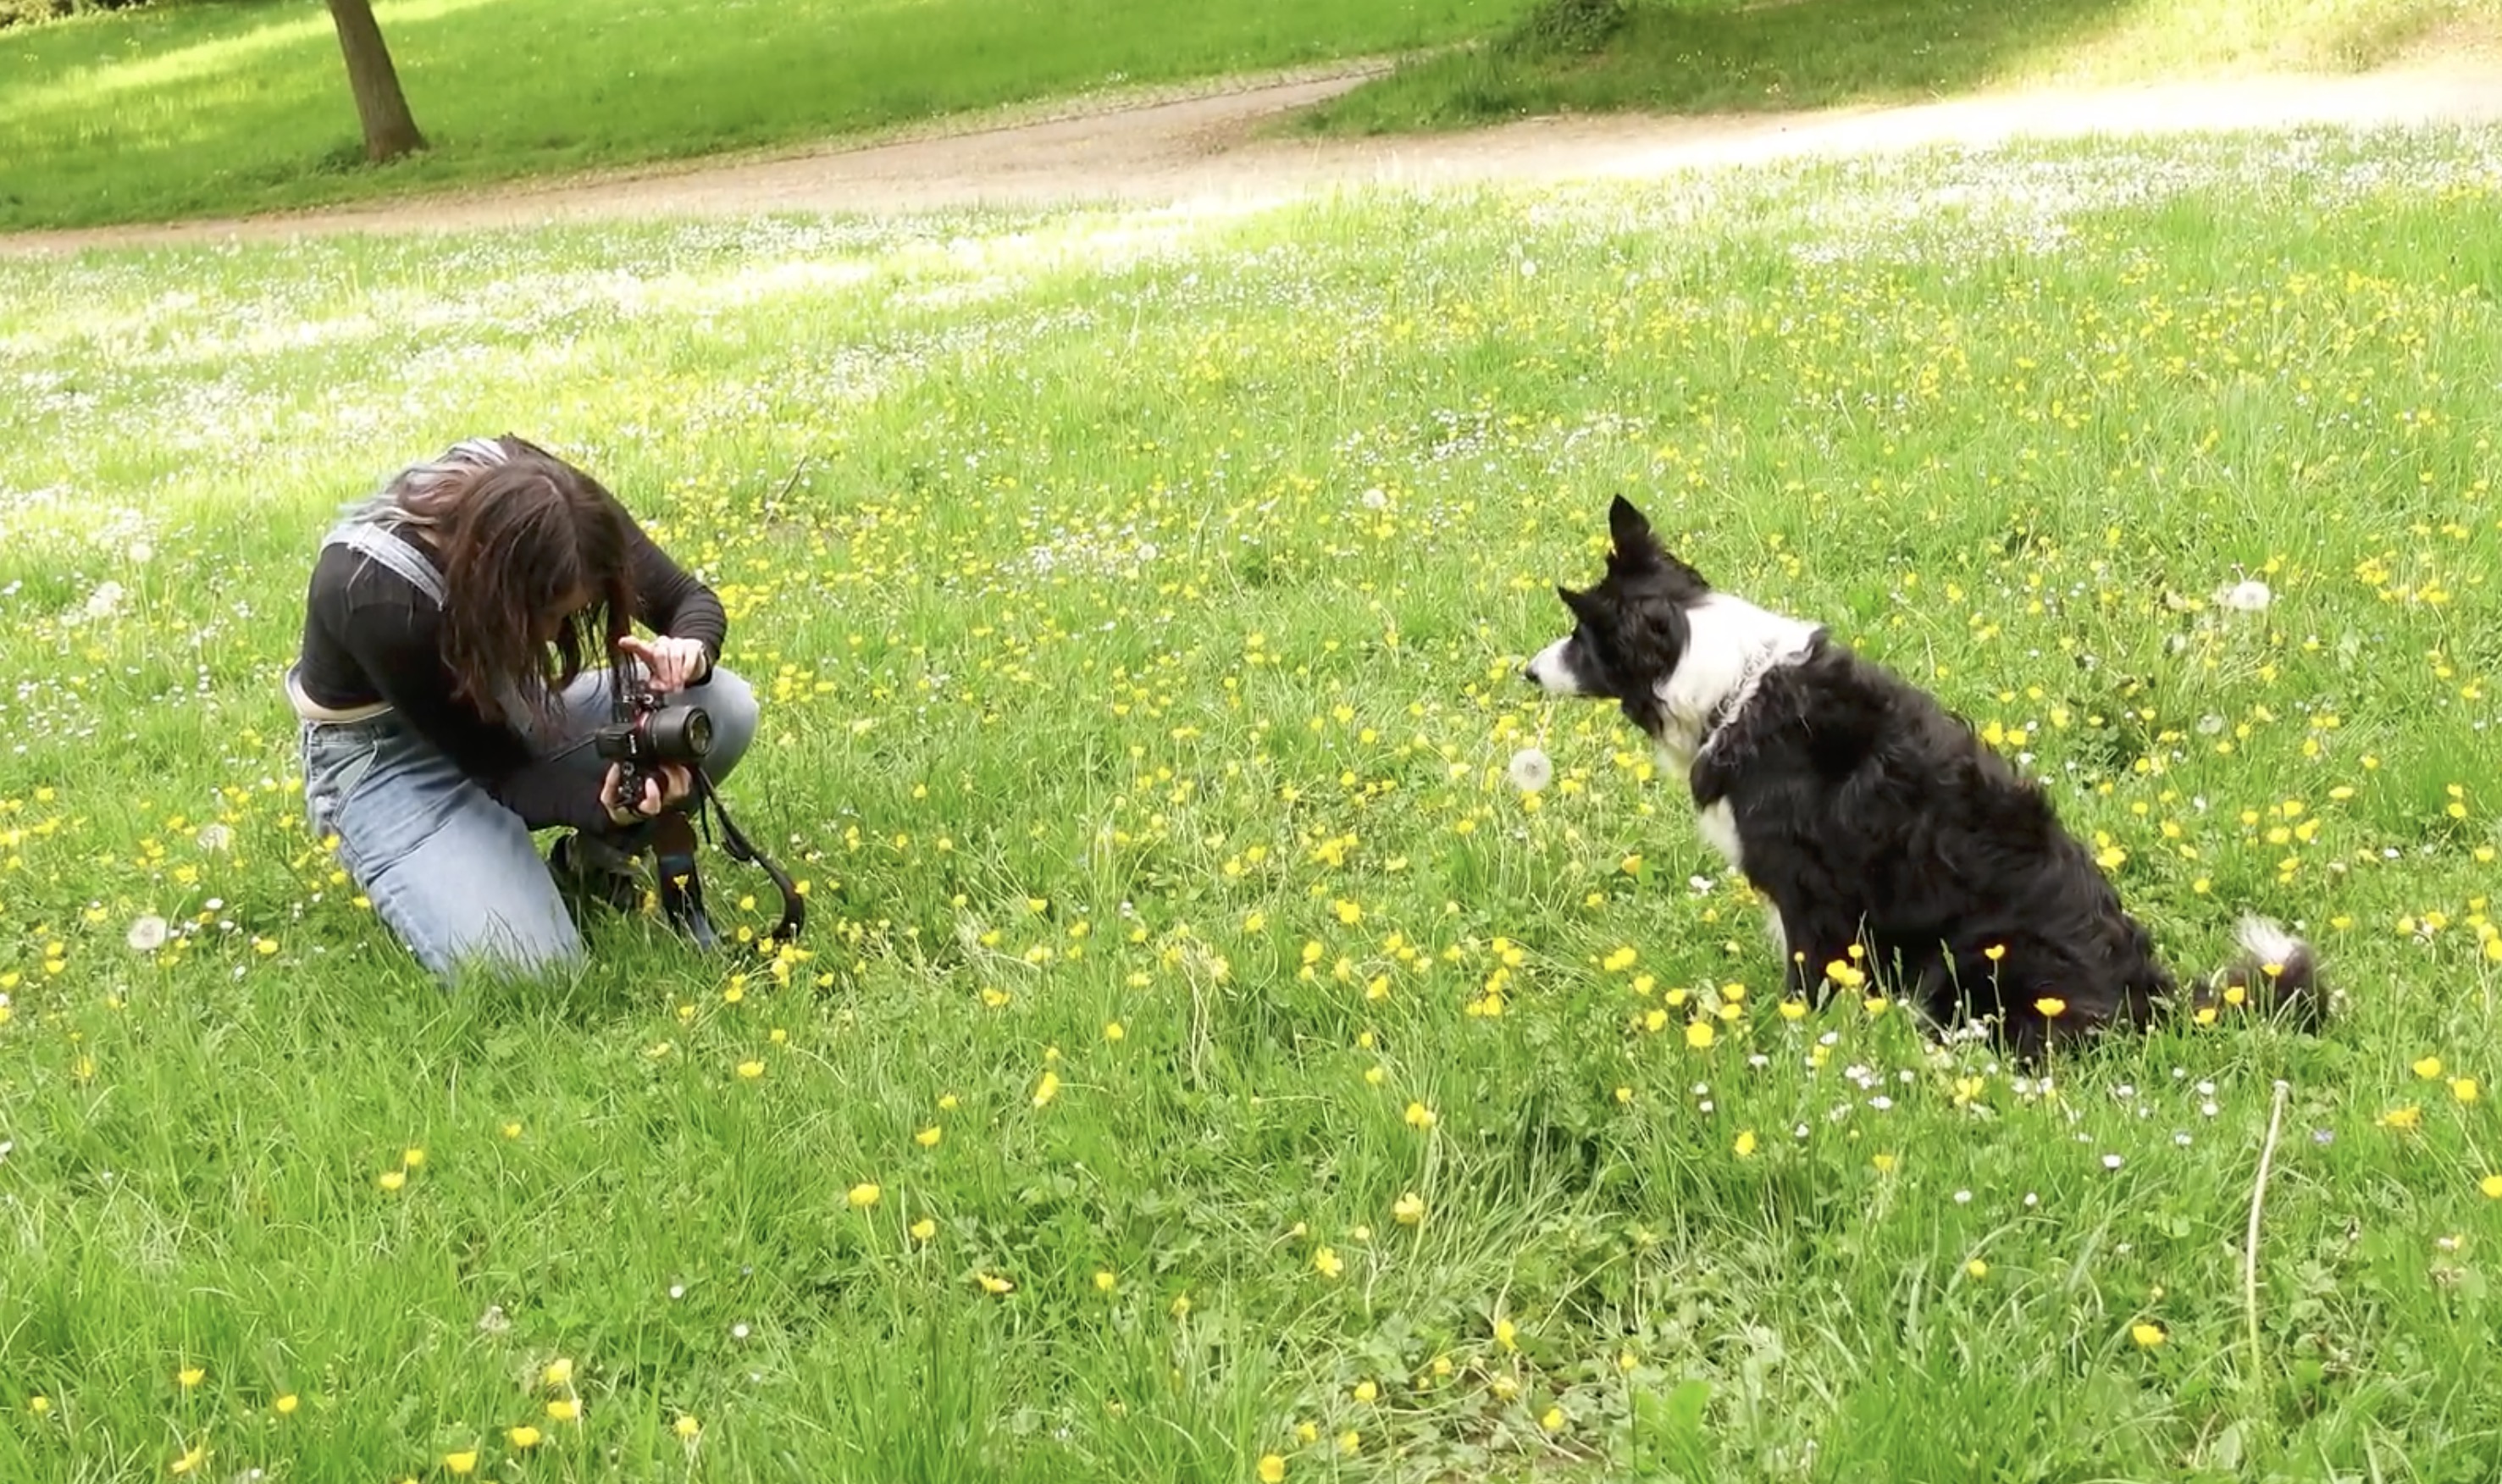
Have a look at just how low I get while taking a photo of Loki.
Portrait Photos / Portraiture
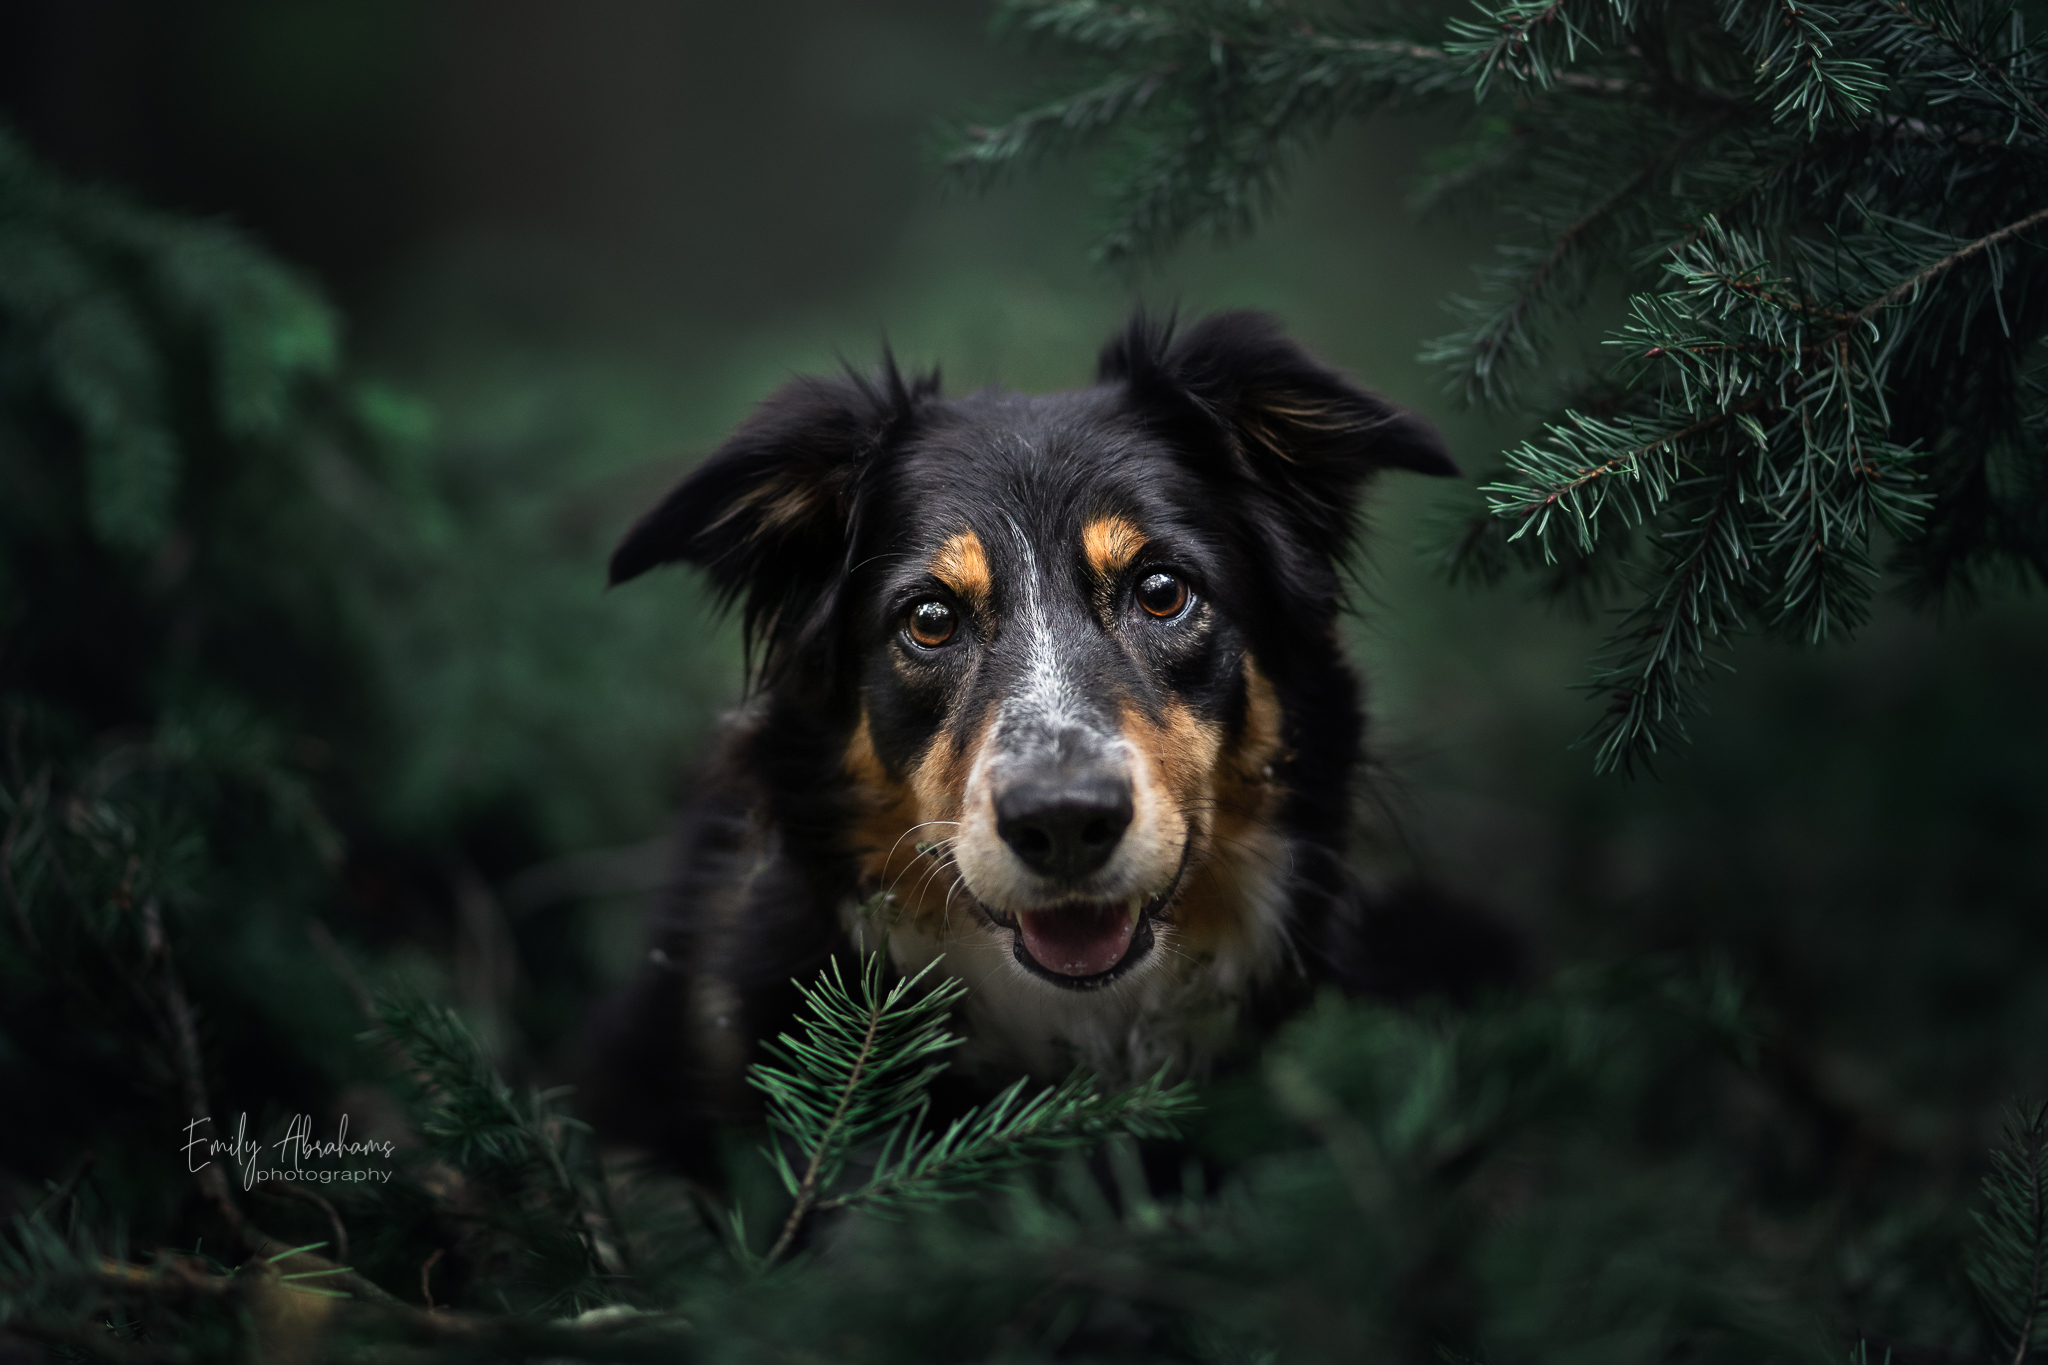
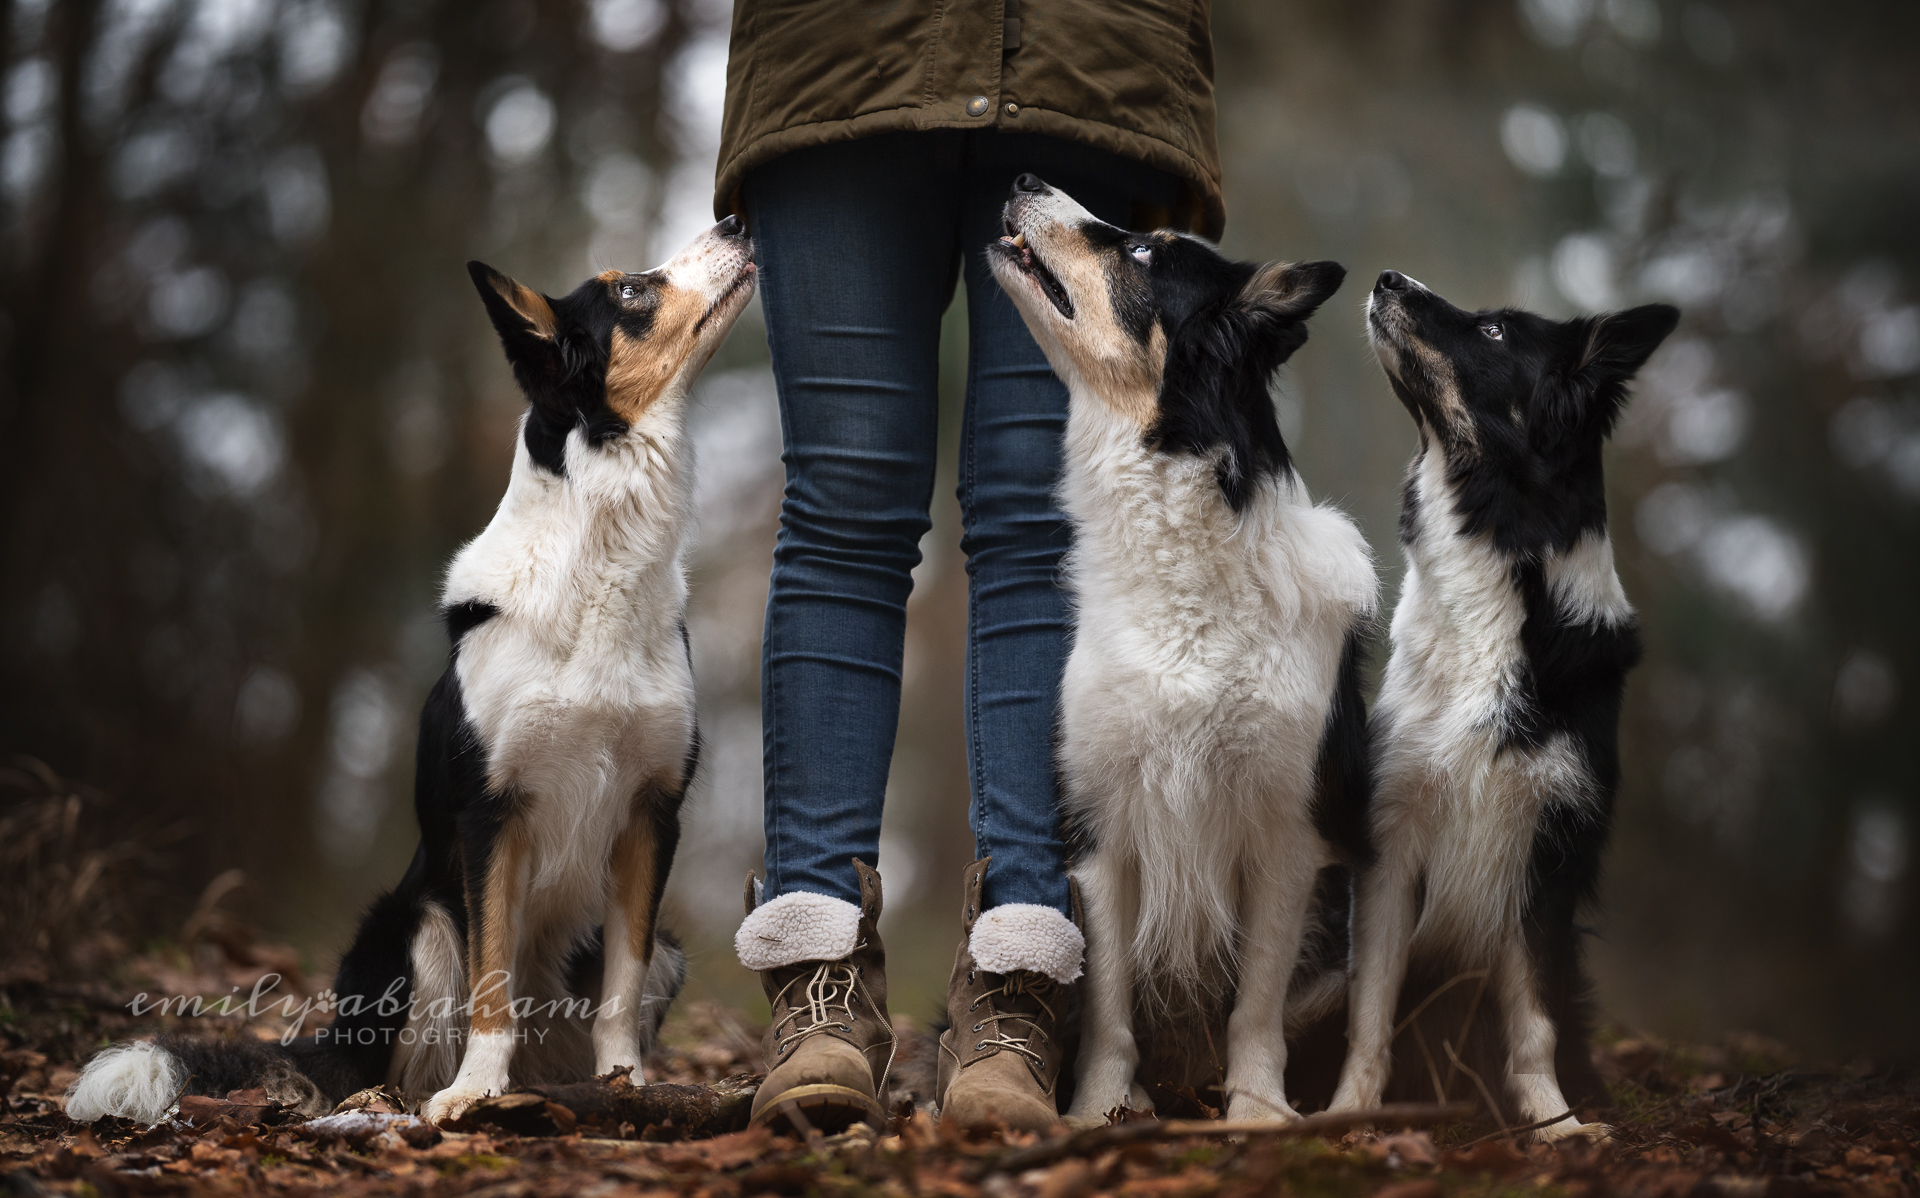
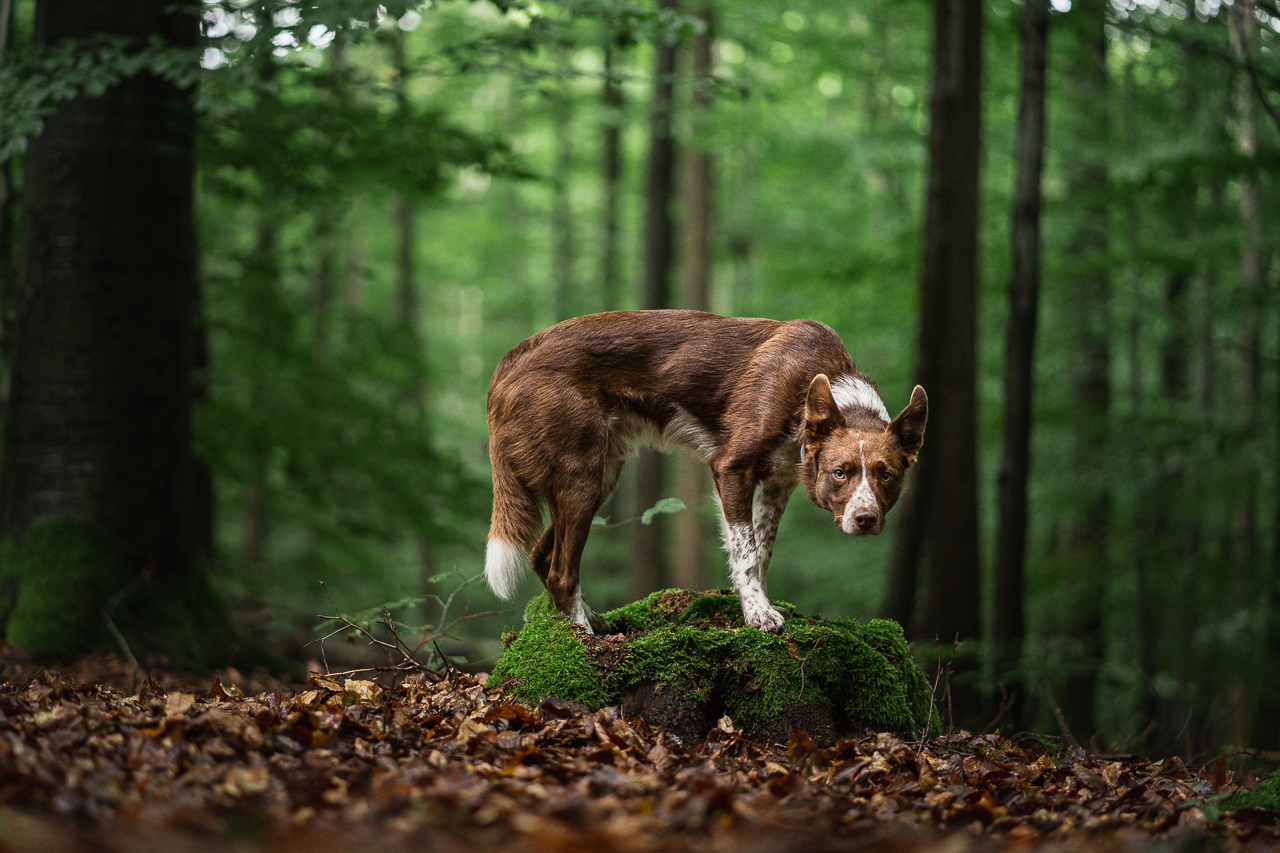
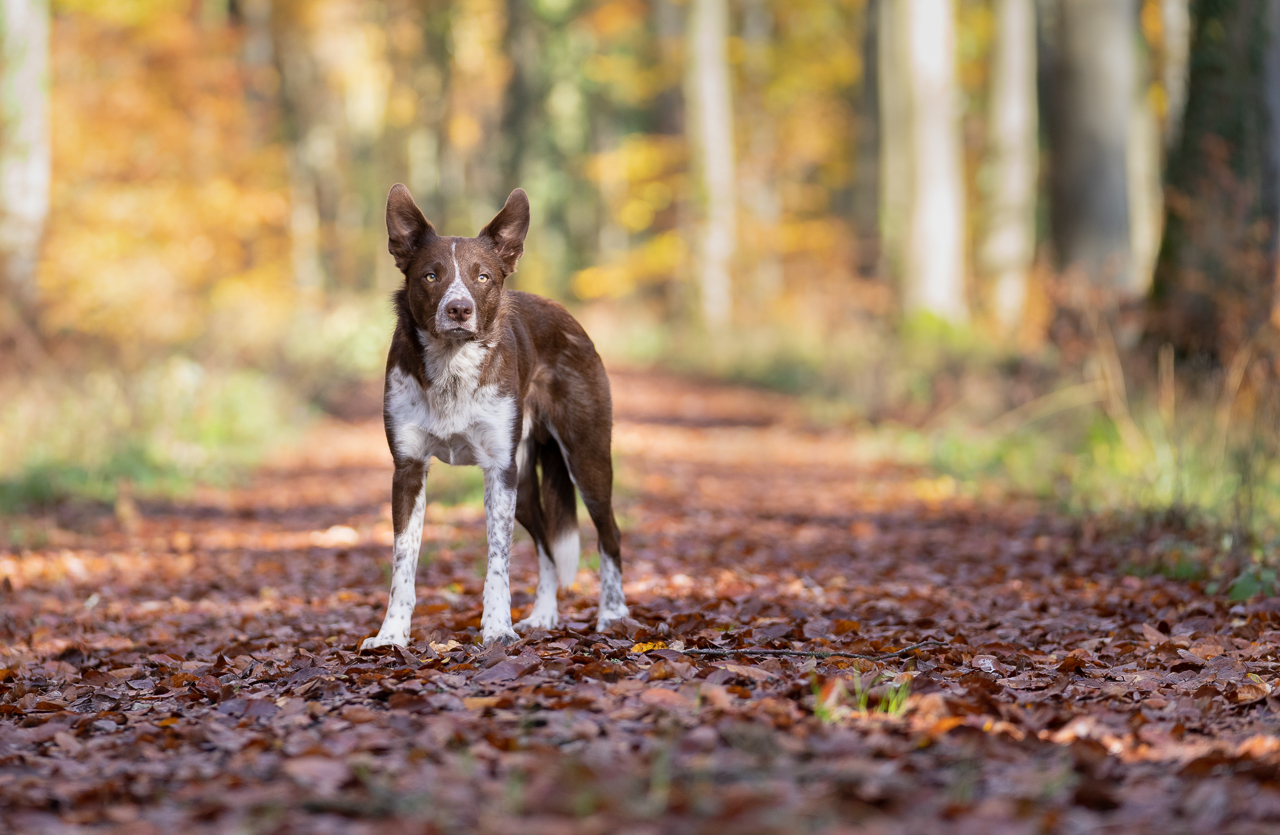
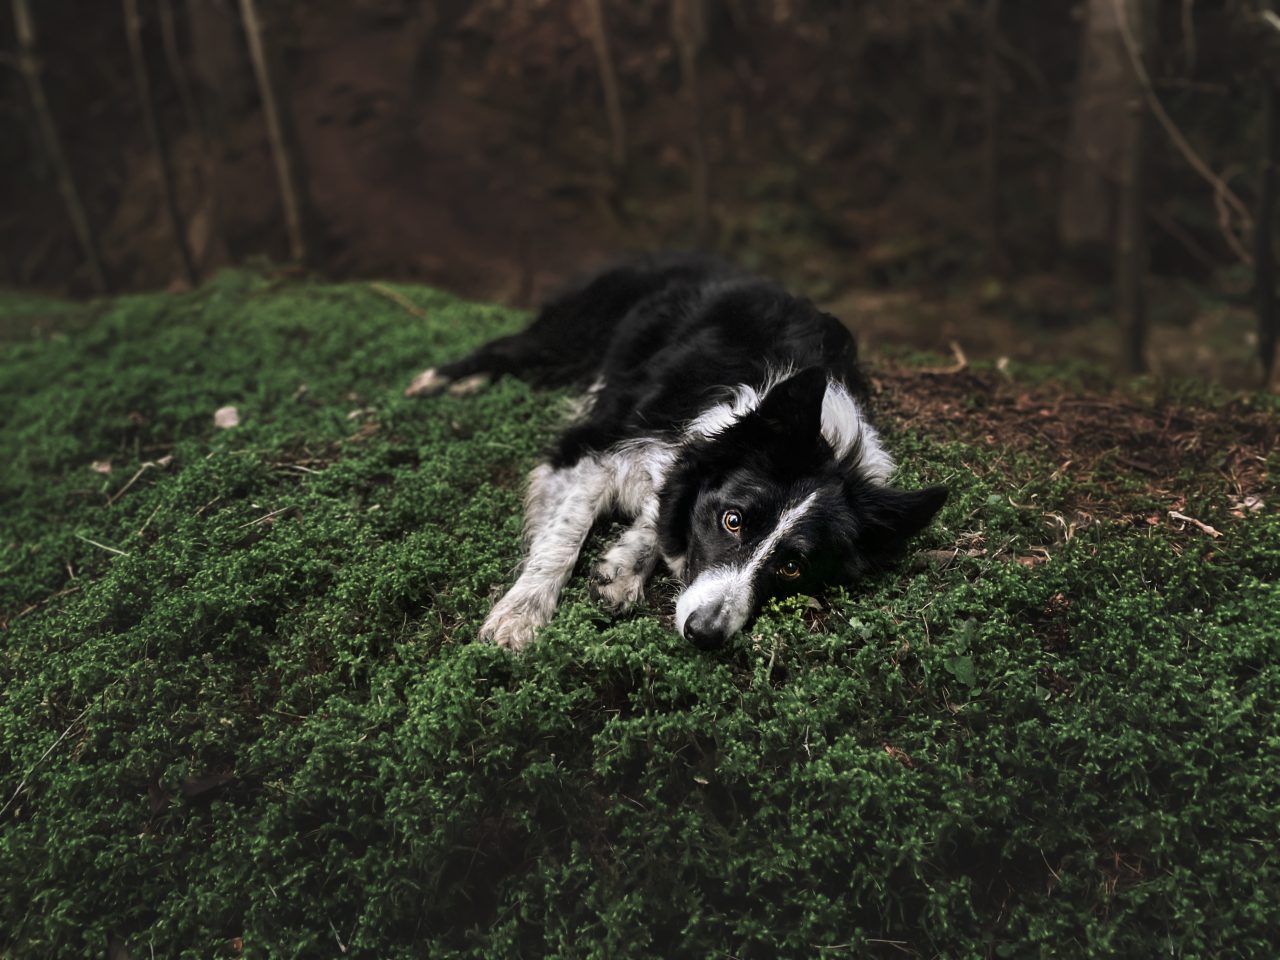
In general, for our portrait-style shoots, we want the dog to have presence, power and connection (after all – it’s ALL about the dog). Most people think this means we need to shoot at the level of the dog’s eyes, but I’d go one step further and say you should be at the level of their elbow, at the highest. Most of the time, my camera is about 10cm off the ground, unless there’s a lot of foreground & bushes.
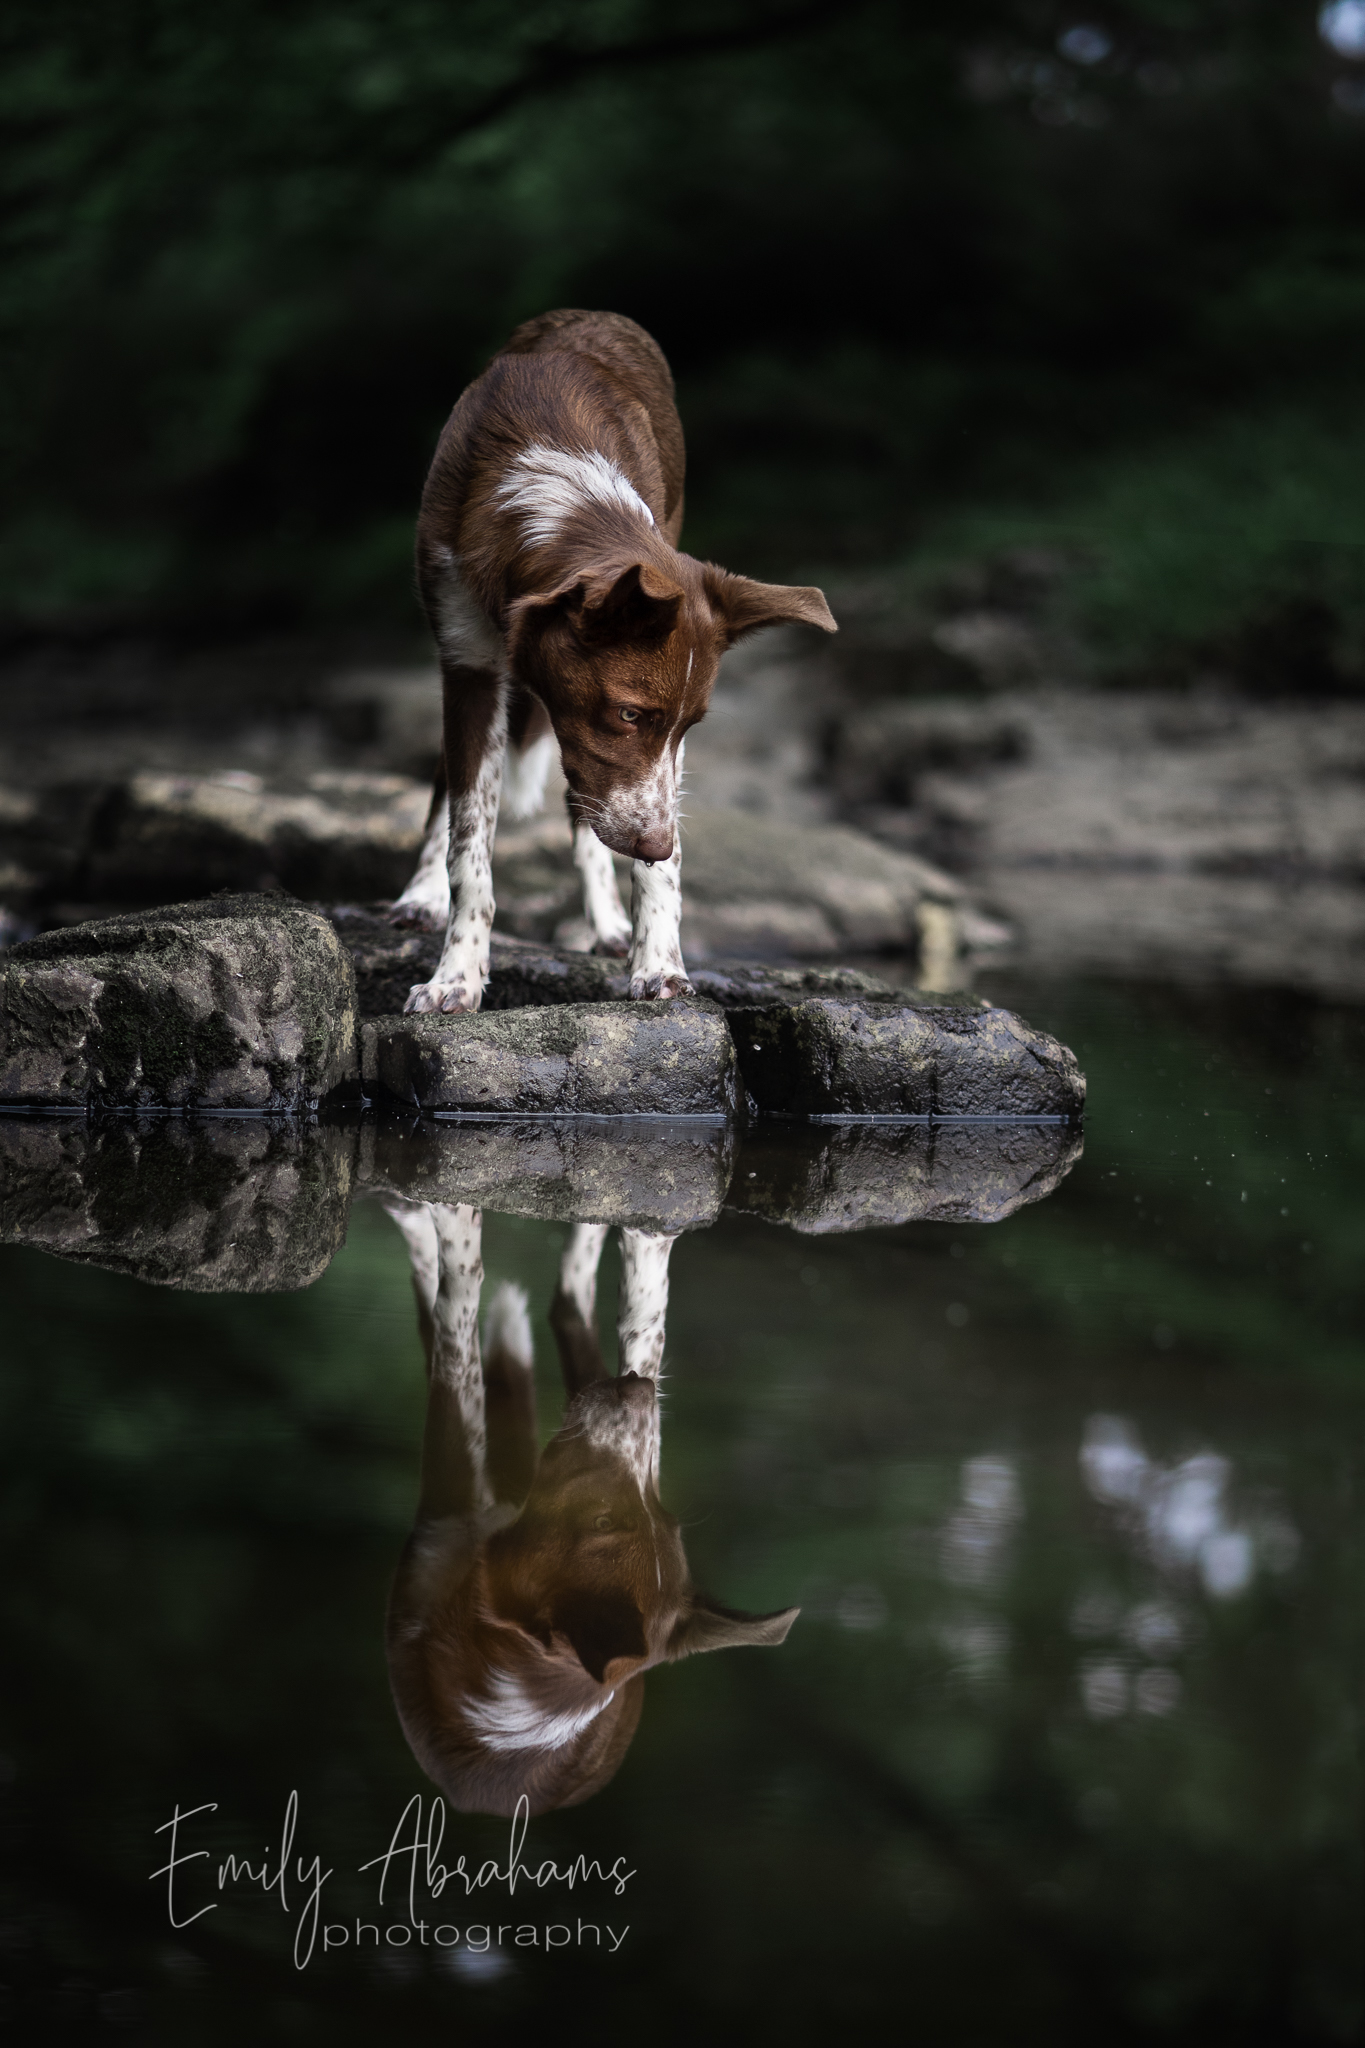
Getting down low also helps to give a sense of depth and perspective, and to really place the dog within the scene. By having a foreground, we create an extra layer and more depth to out image. These layers can really help our images feel more 3D, and invite our viewers into them.
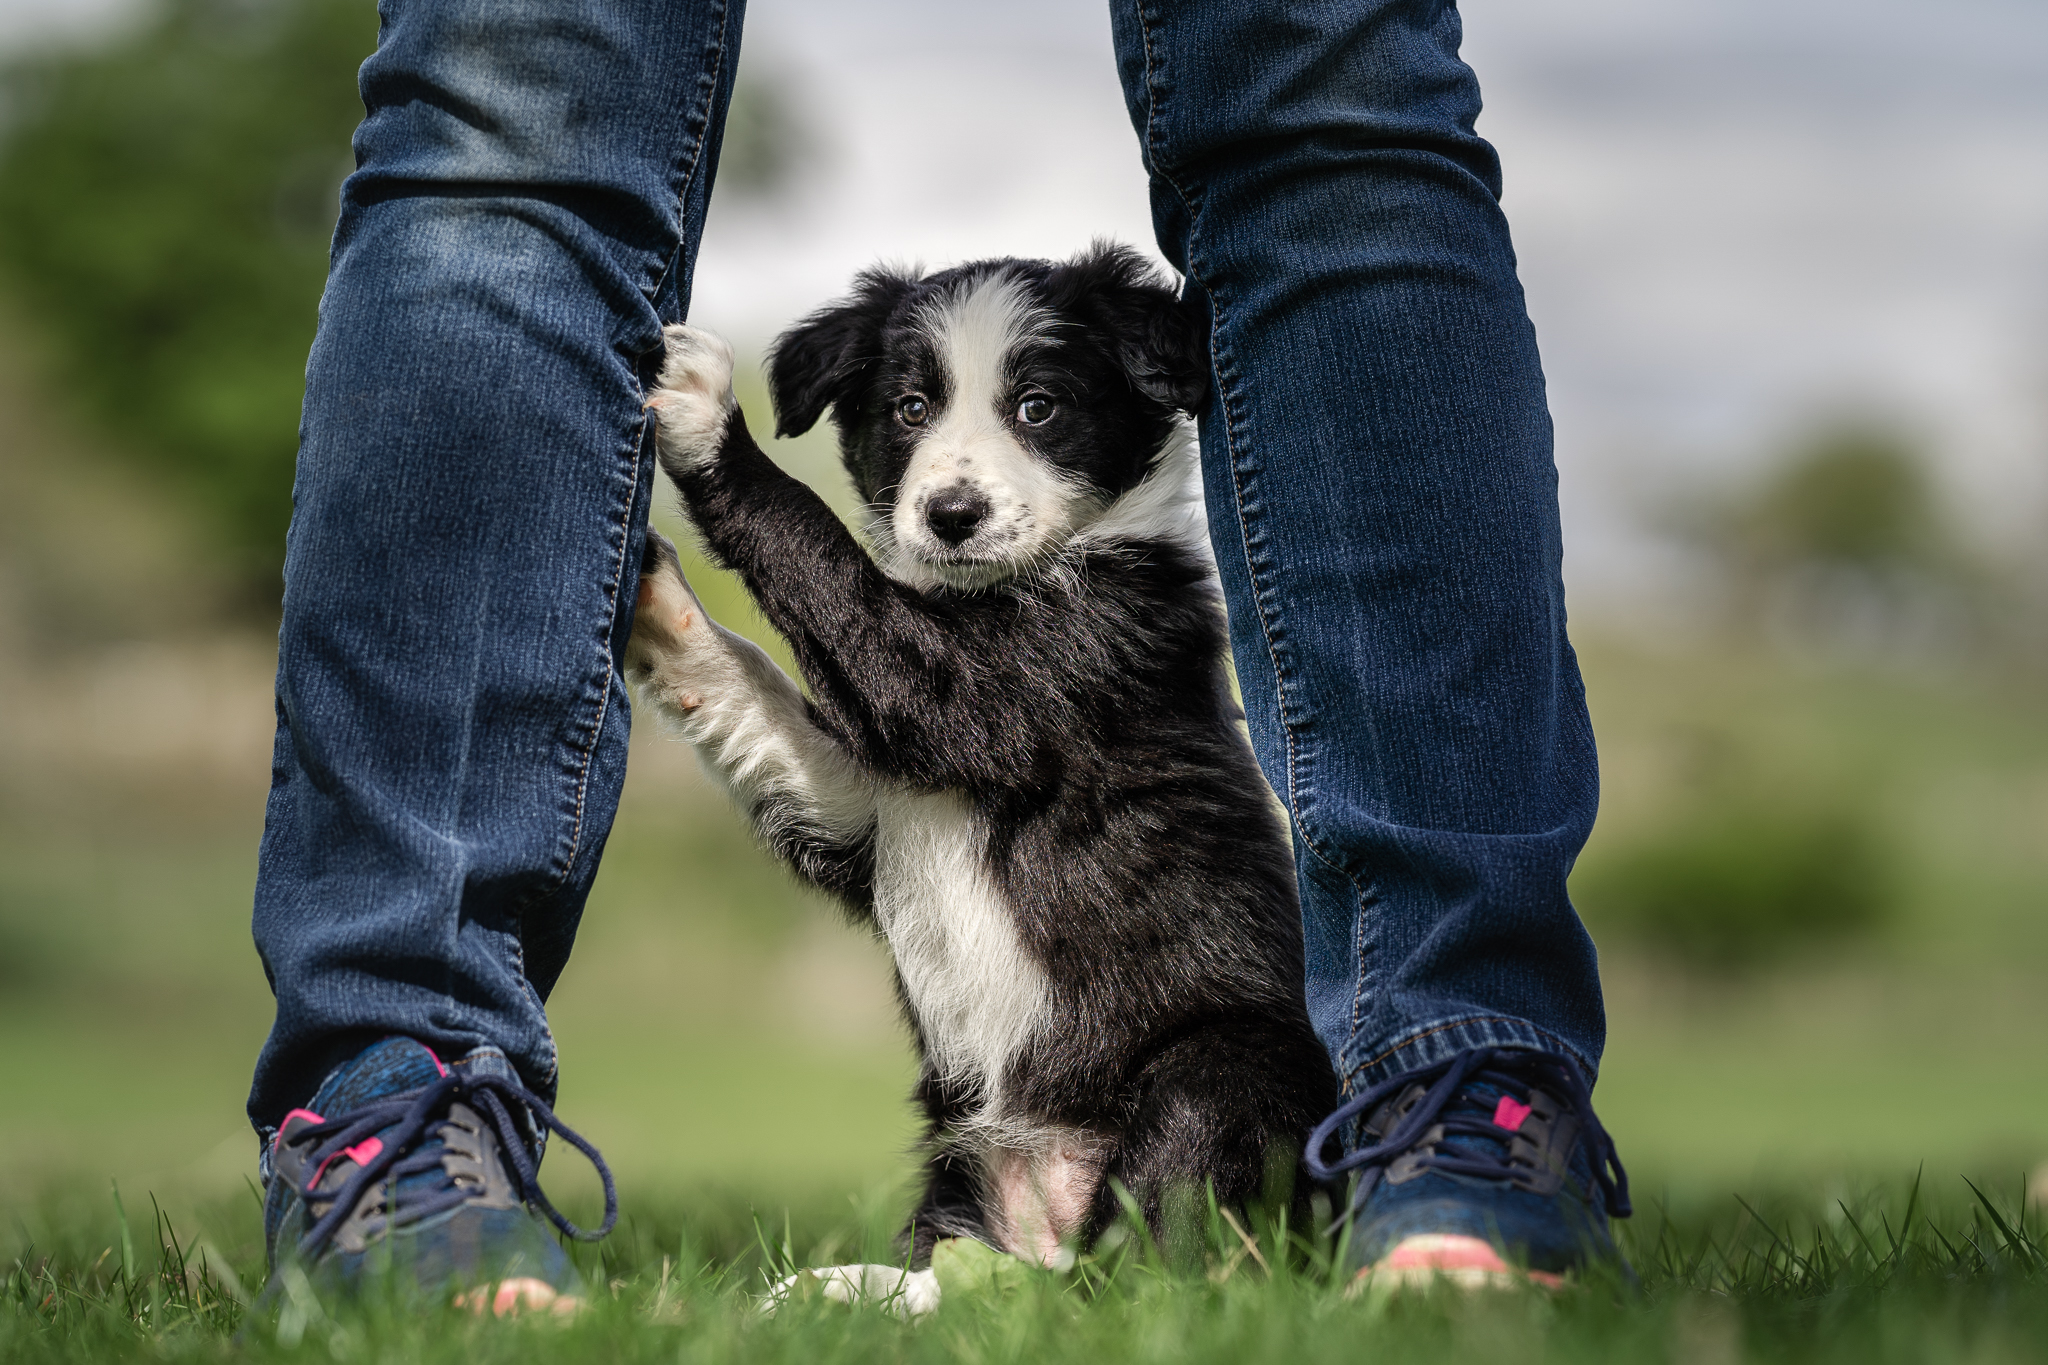
Our subjects need to have presence. If you’re here,I can only assume it’s because you’ve moved beyond taking happy snaps of your pet, and want to create something beautiful, with presence. Maybe you want to find your style, and make something that could be powerful, or emotive, dramatic, intense, or joyful. In any case, I would argue that our subjects always need to have some kind of presence in the scene, whether it’s a close-up headshot, or they are amongst a mountain range. Without presence, we may as well continue scrolling.
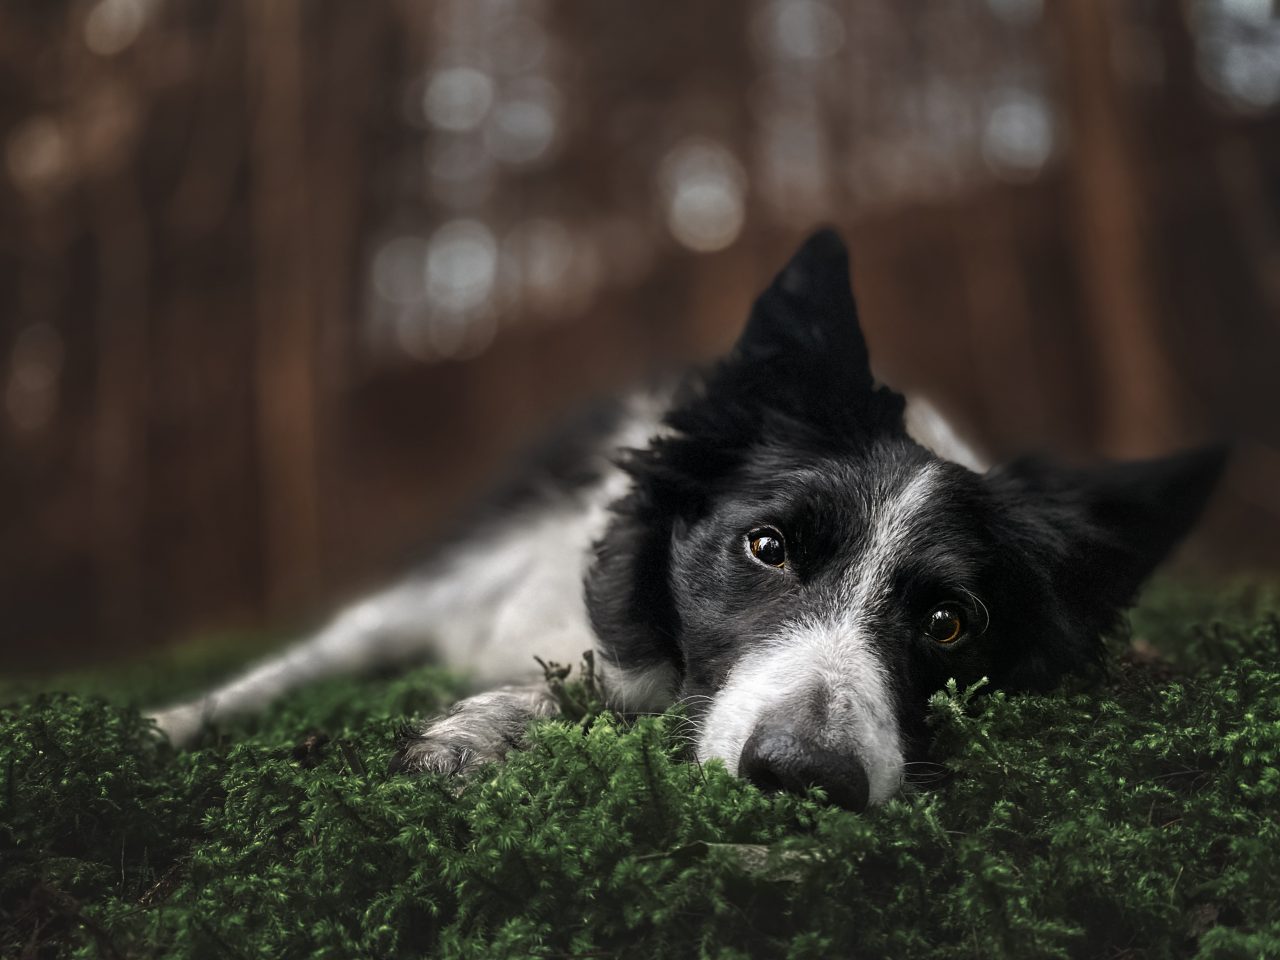
Even just slight changes in height and angle can affect this feeling of presence and depth.
You can play with the angle and perspective. Sometimes shooting straight across works better, sometimes shooting with your lens angled upward works better. There’s more information and behind the scenes clips coming up throughout this lesson.
I’m always trying to achieve a balance between the amount of blurry foreground in the image, and the rest of the scene. Getting low doesn’t mean you need 1/3 of your image to be blurry foreground!
Above, note the blurry foreground, and how this adds depth and layers to the image, but also that by having more background rather than just the GROUND, we have more depth in that direction too. Below are the two different angles at which I took these photos. You’ll see the 2nd one isn’t even THAT low – but it makes a big change from the first one. This is with a 50mm lens, which shows more of the scene than my normal 85mm or 135mm, and therefore I didn’t have to be quite as extreme with it.
As always, adjust to your individual locations, scenarios, and equipment.
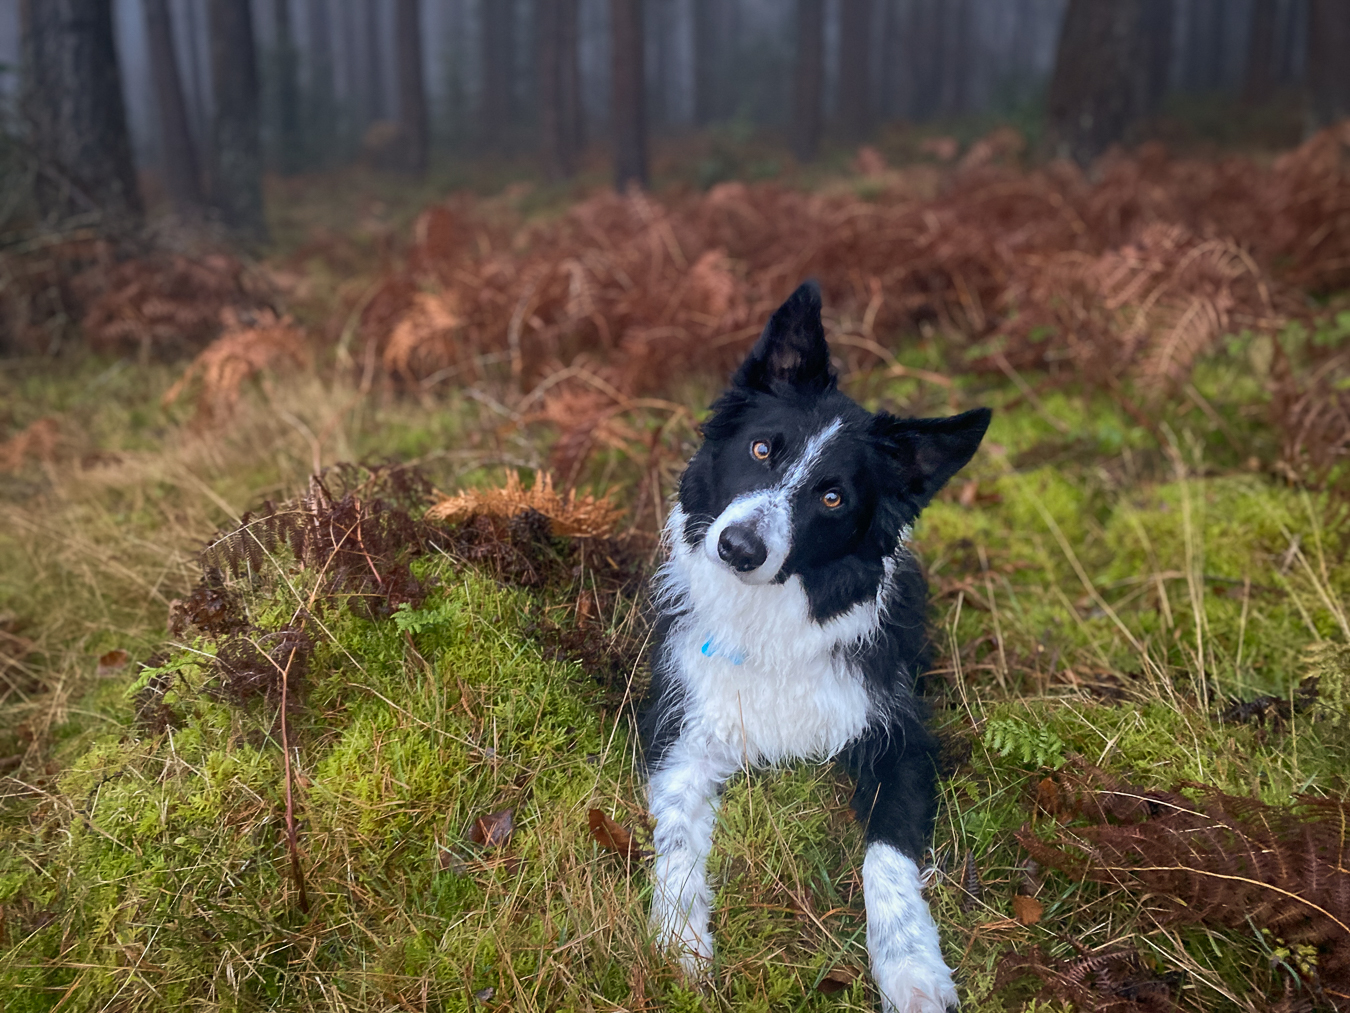
Below are two sets of two very similar photos in terms of mood, location, lighting and so on, but to me one of them definitely feels like you are more drawn into the scene, that you have a sense of the whole scene, and of Loki or Journey’s presence within the scene.
Notice how that bit of extra foreground blur just adds an extra element of depth to the scene. Notice as well in all of the examples in this lesson and upcoming topics, how much of the GROUND you can see (which is relatively flat/no depth, and uninteresting) vs how much BACKGROUND you can see. For me – unless the GROUND is interesting, I really don’t want to include very much of it. And if it IS interesting, I want to include it in a way that’s very PURPOSEFUL. You’ll see more about that in the “times to not get low” topic.
This concept applies equally to Phone photos, as well as wider-angle lenses… however! You may need to play around a little more to get the perfect angle, as going too low can look a bit comical and strange with wider angle lenses. The photo examples below: one taken higher, or the normal angle I see many new photographers using, and one getting very low, were all taken with my iPhone 11.
How low do I need to be though, really?
This really depends a lot on the foreground and even on the camera and lens you’re using.
My camera which has an articulating screen, for example, means I don’t have to (myself) get quite so low, however my camera is usually still very close to the ground.
In order to achieve this we may need to lie on our belly, kneel down on hands and knees, be on all fours with our elbows and knees on the ground, crouch down with one knee on the ground and the other up – you’ll see that I do this quite often because of my screen.
We may be able to sit cross-legged and really lean forward if you’re flexible enough. I’ve even seem people lying on their back and kind of twisting forward, so it really depends on the situation, the location and exactly what you’re trying to achieve.
You’ll see some behind the scenes examples in the upcoming Behind the Scenes: Getting Low comparisons.
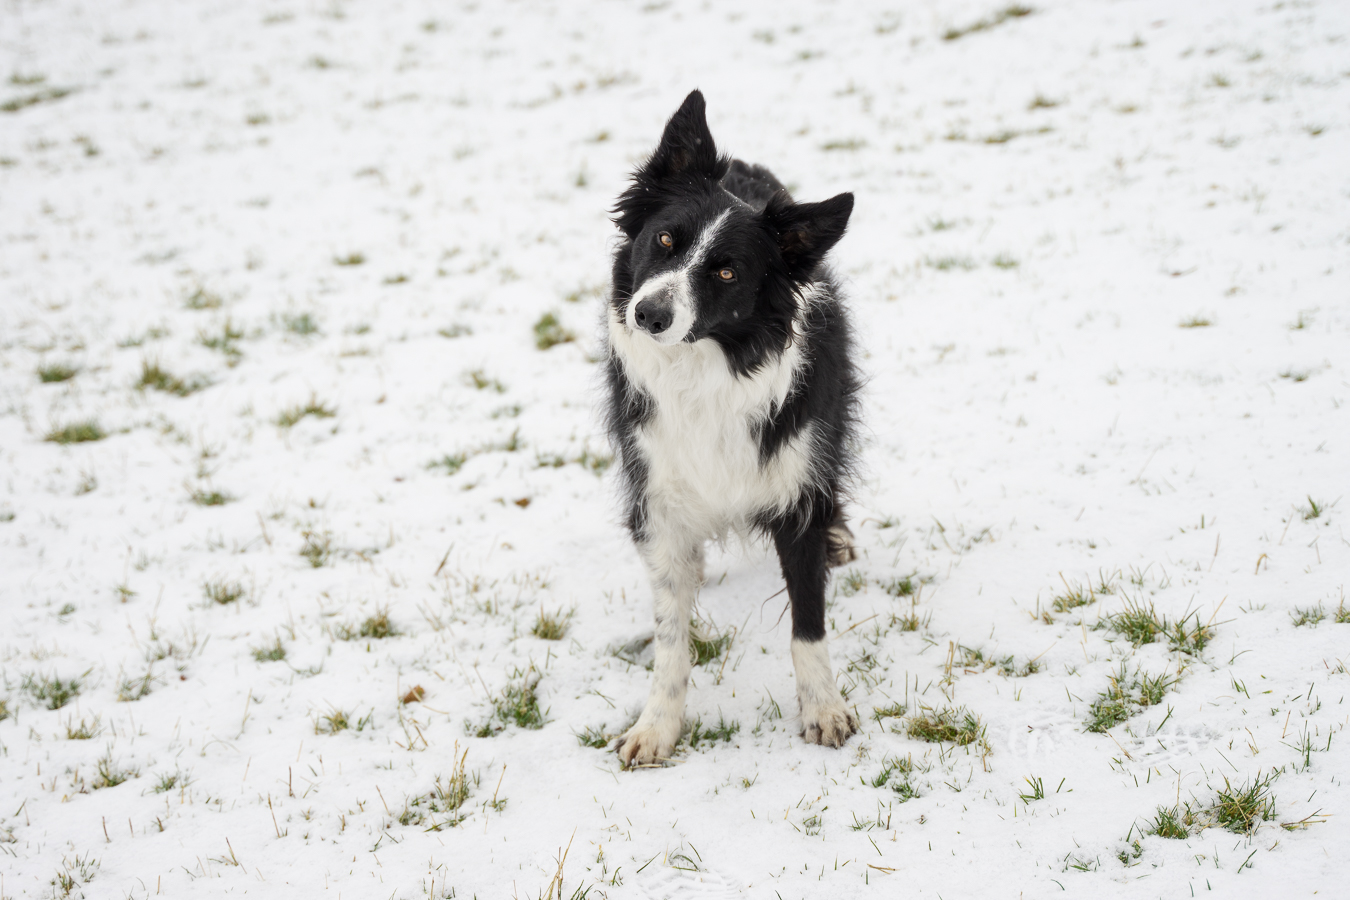
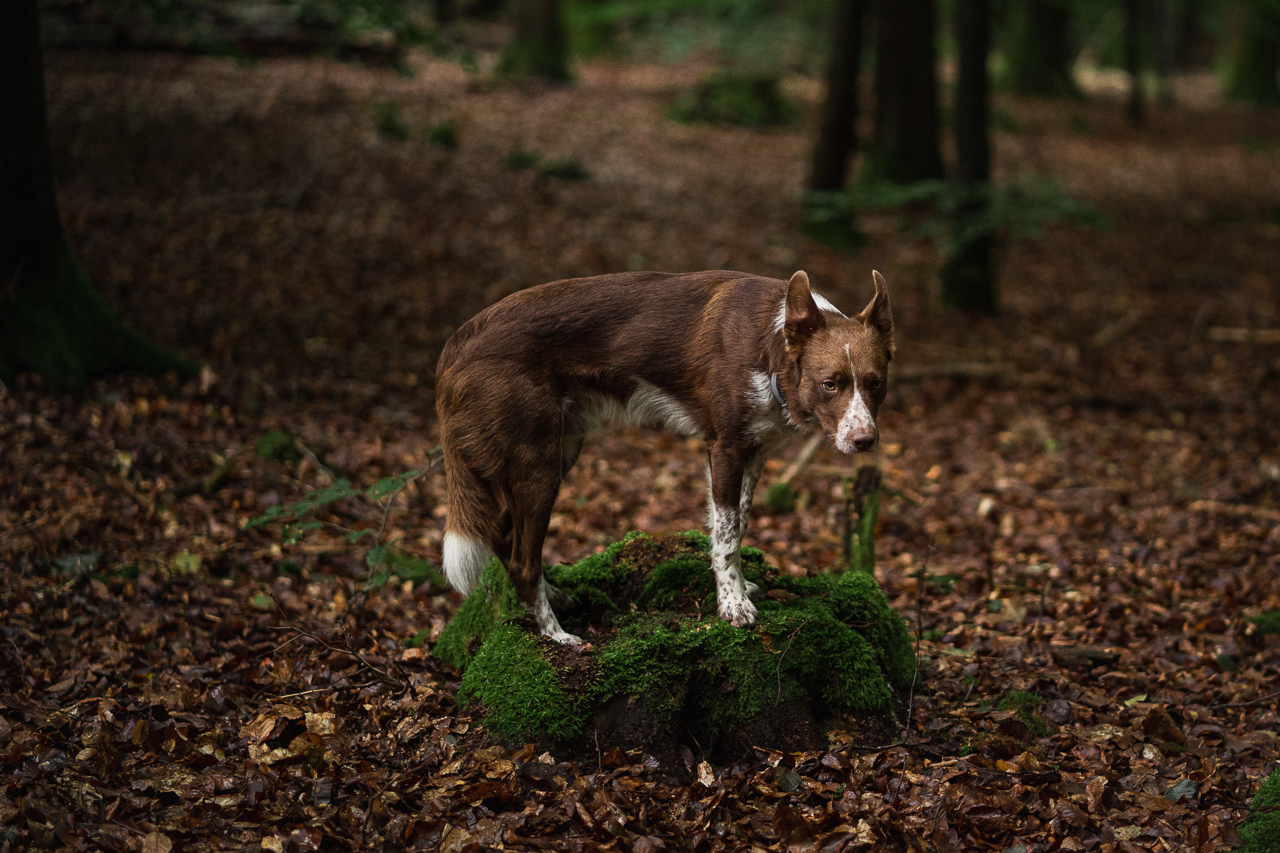
After having critiqued hundreds (thousands?) of photos, here’s what we’ve found: if your photo is more than 30% ground, rather than background, you probably weren’t low enough (or there was a hill in the background). This makes the photo pretty flat, lacking depth, and lacks connection. If you were doing something with a landscape, sure. But otherwise, check! How much of your photo is ground? How much is background? Take a look at the photos below as well!
As you look at the images above, think about how you may have been positioned when taking your most recent photos. Have a look through some recent photos and ask yourself: is the dog powerful? Do you have a sense of the scene? Are there layers to the image? Do you get a sense of the dog’s size and presence?
Could you be even lower?
Other Creative Options?
Of course there are a lot of other creative ways that you may want to pose your subject, so how high or how low you need to be is really relevant to the location itself, the dog, the pose, your gear, and kind of mood and aesthetic that you’re going for.
If you want your dog really towering over you then you’re going to need to be quite low. I would however, caution that in most cases being slightly above your dog is usually not the most flattering angle, or the most impressive. Taking photos from “eye level” or kneeling like in my examples above, usually results in a photo that feels more like an amateur happy snap – USUALLY.
It doesn’t really tell a story and it doesn’t really do much to enhance our images at all.
In general it’s better to err on the side of being slightly lower, assuming that the dog still has catchlight in their eyes, so whether you have them posed somewhere interesting or doing something interesting it usually works better in our favour if we are lower rather than higher.
I can’t really think of very many examples except for the overhead shots where I would want to be taking photos of my dogs from a higher perspective but you will find more information in the upcoming topics.
We use cookies on our website to give you the most relevant experience by remembering your preferences and repeat visits. By clicking “Accept All”, you consent to the use of ALL the cookies. However, you may visit "Cookie Settings" to provide a controlled consent.
This website uses cookies to improve your experience while you navigate through the website. Out of these, the cookies that are categorized as necessary are stored on your browser as they are essential for the working of basic functionalities of the website. We also use third-party cookies that help us analyze and understand how you use this website. These cookies will be stored in your browser only with your consent. You also have the option to opt-out of these cookies. But opting out of some of these cookies may affect your browsing experience.
Necessary cookies are absolutely essential for the website to function properly. These cookies ensure basic functionalities and security features of the website, anonymously.
Cookie
Duration
Description
cookielawinfo-checkbox-analytics
11 months
This cookie is set by GDPR Cookie Consent plugin. The cookie is used to store the user consent for the cookies in the category "Analytics".
cookielawinfo-checkbox-functional
11 months
The cookie is set by GDPR cookie consent to record the user consent for the cookies in the category "Functional".
cookielawinfo-checkbox-necessary
11 months
This cookie is set by GDPR Cookie Consent plugin. The cookies is used to store the user consent for the cookies in the category "Necessary".
cookielawinfo-checkbox-others
11 months
This cookie is set by GDPR Cookie Consent plugin. The cookie is used to store the user consent for the cookies in the category "Other.
cookielawinfo-checkbox-performance
11 months
This cookie is set by GDPR Cookie Consent plugin. The cookie is used to store the user consent for the cookies in the category "Performance".
viewed_cookie_policy
11 months
The cookie is set by the GDPR Cookie Consent plugin and is used to store whether or not user has consented to the use of cookies. It does not store any personal data.
Functional cookies help to perform certain functionalities like sharing the content of the website on social media platforms, collect feedbacks, and other third-party features.
Performance cookies are used to understand and analyze the key performance indexes of the website which helps in delivering a better user experience for the visitors.
Analytical cookies are used to understand how visitors interact with the website. These cookies help provide information on metrics the number of visitors, bounce rate, traffic source, etc.
Advertisement cookies are used to provide visitors with relevant ads and marketing campaigns. These cookies track visitors across websites and collect information to provide customized ads.
By registering for this website, you agree to be contacted occasionally by email about special offers, events and updates. You are welcome to unsubscribe at any time


1 Comment
The ones lower to the ground definitely are more attention grabbing and a sense of place