Archiveslearning journey

Composition Rules and Guides

There are a few compositional rules or guidelines within photography. If you use Lightroom, when you’re in the crop tool, you can press “O” on your keyboard to cycle through a variety of different compositional options!

The most well known of these is the “Rule of Thirds”

Rule of Thirds

This divides your image up into equal thirds. The idea is that you should position important elements (such as the eyes) of the image either along the horizontal or vertical grid lines, or, even better, on an intersecting point. 

I’ve found this can be a little bit hit and miss with dog photography, given the perspective at which we shoot, the size and height of our subjects and so on. I would definitely advise against squashing your dog into the frame just to get their eye on an intersecting point. 

You can also use rule of thirds for more landscape based photos, where one third might be the sky, another third might contain your subject and the “scene” and the lower third could be foreground.

Rule of thirds is a nice place to begin really thinking about composition because it’s pretty safe and well known, it’s generally easy to line our subjects up on one or another of the grid lines, and many cameras even have a rule of thirds grid-line overlay in their display, so you can compose the photo with the rule of thirds already in mind. 

Here are some examples.

Other Options

There are actually other grid options you can play with! You may find yourself getting creative if you explore some of these other grids. I haven’t used these grids very much, but have recently begun to play with them a bit to see how they could help me create more interesting images.

Diagonal

This grid is great when there are diagonal elements in the image. You can also use it along with the rule of thirds grid to see if there is some/any crossover (and if so, it should be a compositionally strong image!).

Triangle

This one seems like a fun and interesting option. The idea is to place points of interest within each of the triangles.

Press Shift + O on your keyboard to rotate the grid. 

Maybe something like this??

Golden Ratio

This is thought of as a more “advanced” version of the rule of thirds, but with more emphasis on the corners and less on the centre.

The idea is the same place interesting things on the grid lines or at intersecting points. It’s possible that when I’m breaking the rule of thirds rules, I’ve been accidentally using this grid. I’ll have to check that!

Golden Spiral

The golden spiral is a mathematical concept, created by making squares from Fibonacci numbers.

This doesn’t mean a lot for us. Suffice it to say that golden spirals and Fibonacci sequences are seen all throughout nature and classic art. 

For photography, the idea is that the most important or detailed parts of the image should be located at the smallest part of the coil, and the rest of the elements of the image should help lead the viewer toward that point. 

Since nature is made up of plenty of curves, we should be able to use this concept within our images. I would say many of us do, in the way that we (myself especially) darken areas and create the “flow” through the image. Remember back to the “Location and our photography goal” lesson, we looked at how a viewer might travel through our image? This is much the same! 

When I tried this overlay on many of my photos, the spiral ended up somewhere over their nose or face. I’m not sure how “perfect” you need to be with this, or if it should lead to the face in general, rather than the eyes specifically.

I like this example especially, as the bushes at the bottom of the frame perfectly follow the line, you reach the dark edge of the photo so travel back across, reading the dark edge behind Journey, so are brought back into his face again, exactly as I had wanted, but without realising the spiral fit within it like this.

Leading Lines

It can be fun to experiment with “leading lines”. These are lines within the photo which lead the viewer’s eye to your dog. 

The most obvious example is train tracks, but this has been done to death, is often illegal, can be very dangerous, and is clichéd now. Please don’t use train tracks for leading lines. See what other lines you can find out and about. Can a tree trunk, branch, tree roots or fern frond lead the viewer to your subject? How about using a path? Are there other lines within nature, or urban landscapes which can be used to lead toward your dog? 

Playing the Check-in Game with Lola

In this video, I introduce Lola and her owner Melanie to the idea of the Check-in game. 

Please make sure you’ve read about the concept of the game before you watch the video.

Keep in mind, this is NOT a game to play during your photography shoot. That isn’t the point of it.

It’s more for your OWN dogs, who find certain things highly distracting, to get them to CHOOSE to orient to you. 

Personal

A lot of pet owners I see, seem to feel like their dog falls into this category, when they really don’t.

I suspect the only dogs who are really in this category are extremely people-oriented dogs like Golden Retrievers, some spaniels, and so on, who would do ANYTHING for a kind word and scratch on the head. 

Of course, many of our dogs can find praise rewarding. Both my boys are reasonably happy if I just celebrate them in a positive voice because I left the real rewards at home…

But for most dogs, especially those who aren’t naturally biddable or have that real intrinsic desire to please, this just isn’t going to be enough. 

Toys/Play

According to Polona, there are 2 main types of players, and these usually go back to their breed/breed history as their method for playing is closely linked to their instinctual needs.

They are:

  • Chasers
  • Fighters

I actually think there’s a third category but I have a feeling it’s pretty rare, and can’t figure out what purpose it serves from an “instinctual” perspective… so I’m going to call it:

  • Show-offs.

Chasers

These dogs love movement.

They tend to be your herding dogs: collies, Aussies, kelpies, who are a bit obsessed with the movement of their stock, and having to chase it/outrun it/circle around it to stop it from moving. 

How many Border Collies or other herding breed dogs do you know who would literally fetch until they dropped dead?

Loki is one. Fetch might be right up there with food as a preferred reward, but unfortunately for him, the dangers of fetch far outweigh the benefits, and he’s just as happy to eat as he is to fetch – with eating being much safer! 

Journey, on the other hand, will fetch… because it’s a job. He fetches in the water more eagerly, but usually because we follow with his favourite game. Fetch is NOT his favourite thing. 

Other dogs who may love the chase are your retrievers, whose job it is to literally run out, grab the thing, and bring it back. 

Chasers may not love “fetch”… but they MAY love the chase. These are your hunting-instinct dogs, the ones who chase deer or rabbits and have a “strong prey drive”.

These are dogs who might love a fluffy toy attached to a long string, and chasing it as you run away. They may love a fluffy toy on a string made into a rabbit, running away, darting, hiding, twitching… They will NOT appreciate toys that “come to them” and leap into their mouths. 

They also probably won’t really be that into the tug/kill part of the game. 

These dogs will thrive on movement and chasing, so find what works best for your individual dog. Maybe they chase the “rabbit” on the string and catch it. Instead of starting a game of tug or taking the toy away, have it “play dead” until the dog is distracted… then the game starts again!

Or how about a game of 500-balls! This was one of Lumen’s favourites (Loki’s too but he was only running because he was chasing Lumen, not the balls!). I had a bag of about 20 different balls, and a huge space. I would throw a ball to the left. She would run to it and pick it up (or not. She had her favourites. I didn’t care, it’s not about bringing it back). I would yell: “READY?!?!?!?!” and throw the next ball to the right. She would run past me and pick it up (or not) and so the game would go back and forth. Lots of chasing, no boring bits. 

For some dogs, just chasing YOU might be enough!

For a dog like Loki, snapping grass out of the air is also a great on-the-go game for when there’s no toys. It’s movement and stopping movement. 

Fighters

These are usually your bully breeds and protection/guard dogs. 

These dogs love the SECOND/THIRD part of the chase>catch>kill>eat cycle. 

They are going to want games of tug. Lots of physicality. Head-shaking and violence. 

There’s some really important things to note with these dogs:

  • Texture of the toy. Every dog is different. Some dogs LOVE rubber toys, others love fur, others love hard canvas material. Try everything, then use what the dog loves.
  • Pressure on/off.
    • Imagine being in a boxing match with a friend, where your opponent is just constantly pummelling you and pushing in to your space and getting up in your face the whole time. At first you might put up a good fight… but pretty quickly it’s going to get WAY too much and you’re going to need him to back off so you can regain your composure. 
    • Picture how dogs play tug together. The worst games are where one dog is going overboard, thrashing, growling, head-shaking, biting closer and closer to the other dog’s snout… and the other dog is just holding on and not reciprocating… cos the first dog isn’t really giving him a chance to. Similar, it’s probably not all that fun for the enthusiastic dog that his partner was so passive.
    • The point is, there needs to be a GIVE and TAKE in this game. Pressure on, pressure off.
    • Pressure can be a lot of things in a game of tug: eye contact on or off. Hitting the sides of the dog vs turning away from the dog and showing the back. Actively tugging by shaking the toy vs. holding it more still, being very close to the dog or looming over the dog vs. being smaller and angled away, blowing on the dog’s face/being right up in their face vs. looking away/turning away, letting the dog climb on you etc. 
  • Letting the dog win. There’s some old myth out there that if the dog wins at tug it will somehow go feral/not respect you any more/some kind of alpha theory BS. Let me say that Journey wins ALL THE TIME (as do many other dogs) and it doesn’t mean anything. In fact, it can make them want to play MORE. However, it’s all about balance:
    • Imagine you’re playing a game with a friend, or doing an arm wrestle. Your friend is physically very strong but you think you have a chance. Somehow, you constantly win, even when you’re not trying very hard. How long before you get bored and go find something else?
    • Same scenario as above. This time, your friend wins every single time, absolutely demolishing you, so you don’t even stand a chance. How long before you give up and go do something else?
    • Same scenario as above. This time, you are sometimes winning, and sometimes losing. The game feels very evenly matched. You have to put in a lot of effort to win, but you are winning those rounds! Sometimes, you slip or get distracted and your friend wins. These losses and wins make you more determined each time, because the game feels fair, achievable, and well-matched. How long until you go and do something else?

Tug should be a give and take, not dragging the dog around at the end of a toy, not with the dog just hanging on cos he should (Loki is like this. He’ll “play tug” but he’s not really playing. He’ll hold on for an eternity and not engage in any way, and when he wins he just spits out the toy and waits for it to “come alive” so he can chase it). 

Games of dog should be realistic in some way. Maybe it’s the rabbit trying to escape the dog’s jaws. Therefore, if the dog DROPS the tug, it should NOT spring immediately back into the dog’s mouth! How boring!

OR… if simulating a game between two dogs, if one dog were to win the toy, would that dog immediately give it back to his friend? NOPE! He would likely turn quickly and run off, flaunting his prize, inciting the other one to chase and grab the toy again. 

These dogs MAY also love PERSONAL play, eg., wrestling with you without toys. They might grab your sleeves or clothes (Journey did this as a puppy a LOT) or just wrestle with you. Loki can’t do this, because he doesn’t want to bite me. He will always grab a toy. He doesn’t understand this game AT ALL. For some dogs with soft mouths (like retrievers) they may play like this, but I suspect it’s challenging for most dogs to wrestle without mouthing and accidentally hurting us. 

If you have a dog who likes personal play, many of the same guidelines as above apply re: give and take and pressure. Think about how dogs play with one another, and try and copy that.

Be the dog.

Show-Offs

I think these dogs are pretty closely related to the fighters, but there’s some slight differences. I haven’t met many of these dogs, but Journey is definitely one so I’m going to be framing this very much from my experience with him.

Imagine these dogs just want to prove how brave, strong, fierce and tough they are.

They might not want you to grab their toy and tug on it. They might just want to “tease you” with their amazingly cool toy, but when you try and get it, they either start a game, or leap off. Think about dogs who LOVE a game of keepaway! We often squash this game because it’s inconvenient to us, and the game is “supposed to be” bringing the toy BACK, not running off with it….

But imagine if instead, you found ways to work with this game. If you have a dog who LOVES to play keep away, what happens if you embrace it? Chase that dog! Pretend to try and get the toy! Sneak up on them! Make a lunge for the toy!

If you manage to grab it, suddenly the tables turn! Now YOU run away with the toy! YOU guard it and spin away with the dog tries to get it. 

In this case, you will need a system for telling the dog that the game is over now and it’s time to quit. Maybe a word that means “drop the toy”, or some signal or cue that says: “come on here now, we’re not playing any more.”.

Of course, rewarding those interactions is a little more tricky if the biggest reward is keep away, but it can be done. Try this:

  • You play the game of keep away.
  • When you’re “done”, tell the dog to come in to you. 
  • When it does, throw a party and start the game again.
  • Repeat.

This teaches the dog that coming to you doesn’t automatically end the game… in fact, it COULD mean the game starts again! Sometimes, the game ends. Sometimes, it doesn’t! And if it does end, then a bit of food probably wouldn’t go astray.

Journey isn’t a keep-away dog, but he is a show off.

His favourite game is to have a leaf and to spin, leap, and to bash my hands with it.

He doesn’t want me to take his leaf and play tug. He wants to be fierce. 

When he has a tug toy, most of the time he just pushes it and bashes it into my hands again and again. Or he climbs onto my back while he’s bashing me.

He’s happy if we play tug, but that’s not his ultimate goal. I’ve never met a dog who plays like him, so learning what he loved and how to play in a way that he found the most fun in the world was INCREDIBLY important to our relationship. 

When he was younger, I tried bringing a toy on walks. When he came in for a recall, I would pull it out and try and give it to him for a game of tug.

He hated this. He wouldn’t engage at all.

But, when I let HIM carry a toy on the walk… he would come RACING back to demand I play a game, bashing my hands with it and leaping around growling. Yes, we would tug a bit, but it was almost as if I had “outsmarted him” and had managed to get a hold of the toy… so he would try and get it back, and when he “won”, he would get all bashy again. 

Food

Many dogs will work, in one way or another, for food. 

It’s one of the most basic physiological needs, and therefore they will probably do SOMETHING for food. How enthusiastically or how much they care about food really depends on the dog and the situation/environment they’re in.

For example. Journey works very well for food at home. He is enthusiastic and enjoys learning. He eats happily and engages in whatever kind of training we’re doing. He learnt many tricks and behaviours as a puppy and young dog for food. 

However. If Journey sees a deer in the woods and runs back to me… he will spit out his food, demanding to play with a toy/leaf/something instead. Why? Because it’s his preferred reward. It’s more rewarding for him to play, than to eat. Similarly, at the agility hall. For a long time I tried to train him behaviours using food, as this often allows us to teach more specific behaviours. However, as soon as I rewarded him once or twice with a toy, he understood the behaviour MUCH faster, and MUCH more accurately. More on Journey and his play preferences later.

Why he prefers a toy over food is anyone’s guess, and it’s not right or wrong. Maybe it’s because he’s always been well fed. Maybe it’s just preference, the way some of us would prefer to do some other activity over going out for dinner, or some of us just find food a boring part of being alive, and we eat because we have to!

Some dogs, on the other hand, are happy enough just to eat. 

Loki is a great example of this. He is a dog who will eat until he physically cannot fit any more in his stomach (this is about 1kg of kibble, for reference.) He will eat enthusiastically under almost any circumstance (screaming at agility is MAYBE the exception and he only won’t eat then because he’s over threshold and too high to know his own name). Any type of food is his favourite food. He will do any trick or any behaviour at 500% for the most boring piece of kibble. 

Some dogs prefer food, but are not obsessed by food. The food is the end part of the hunt->kill-> eat cycle, and in order for food to be rewarding, it needs to be a part of this cycle. 

Lumen was one of these dogs.

To just feed her, even very rewarding treats like hotdogs, was… fine. She didn’t care that much. 

But… when I made food into a GAME… when food became rapidly moving prey that she had to track, hunt, chase and eat… THEN she was happy. Every food reward had to be a high energy game with Lumen, and I had to invent ways to make this work for us. 

  • Food in containers that I could swish around on the floor and throw, for her to chase, bring back, and open.
  • Food in little velcro pouches that I could swish around, throw, and she could open and eat by herself.
  • Large chunks of food that I could move about rapidly then throw in one direction, then the other direction, so she could hunt it back and forth.
  • Big pieces of food like pig’s ears, attached to string that could “run away” from her like a rabbit. 

Notice how in all these examples, the food is not food. It’s prey

Metering Modes

Metering modes are ways that the camera reads the light in the scene and determines that settings to use. 

They are really only important if you’re shooting in any auto mode, or priority modes.

This includes if you’re shooting in Auto-ISO.

The mode you use will determine how much/what part of the scene to read the light from. This is important to note because if you choose a setting where the camera will only read the exposure of your subject or a very small area of the photo for example, and your dog is black… it will likely determine that the subject is VERY underexposed and set the settings based on that analysis.

Again, this is only important when you’re not shooting in manual exposure. Our goal should still be full manual exposure, so you have the maximum control over the settings.

In any metering mode, there is no difference to the image with ANY metering mode. The only difference I found while conducting some experiments, was the exposure reading, which would tell me if it’s ±0.0 (correctly exposed), +1.0 (one stop over exposed), -1.3 (1.3 stops underexposed) and so on. 

Given that I personally use the histogram as a much more accurate readout of the WHOLE image, the exposure reading isn’t really important for me. If you enjoy using the exposure reading, you may want to take a bit more time to find out what each of the metering modes in your specific camera do.

Each camera will have different modes.

Most of them have some combination of:

  • Matrix/Evaluative: generally the default mode, it breaks up the scene into “zones” and evaluates the exposure. Particular importance is based on where the focus point is, and this zone will be given priority. This is a good mode to use if you don’t need something specific or fancy for some reason.
  • Centre-weighted. Exposes only based on what’s in the centre of the frame. Could be useful with a not black or white dog, if they’re in the centre of the frame… I guess.
  • Spot metering: evaluates the light only based on where your focus point is. This could theoretically be useful if, for example, you’re shooting an agility competition on a day where the clouds are coming and going and the event is faced- paced, so you don’t want to have to constantly keep an eye on your ISO but need it to be auto. Having the metering on spot will mean the subject will be correctly exposed (assuming you focus on them), but could blow out the background elements if they’re especially bright… which is maybe not such a big deal in this particular example.


Other cameras may have other modes, eg., Sony has a “highlights” mode, which reads the entire scene and meters based on the highlights. If I shot in some kind of auto mode, this would mean the settings could be chosen based on not overexposing the highlights.

Check your camera’s manual for any special modes, IF you need them.

But again, if you’re shooting in manual, which I hope you will be, you really don’t need to worry, and leaving it on the default matrix/evaluative is totally fine.

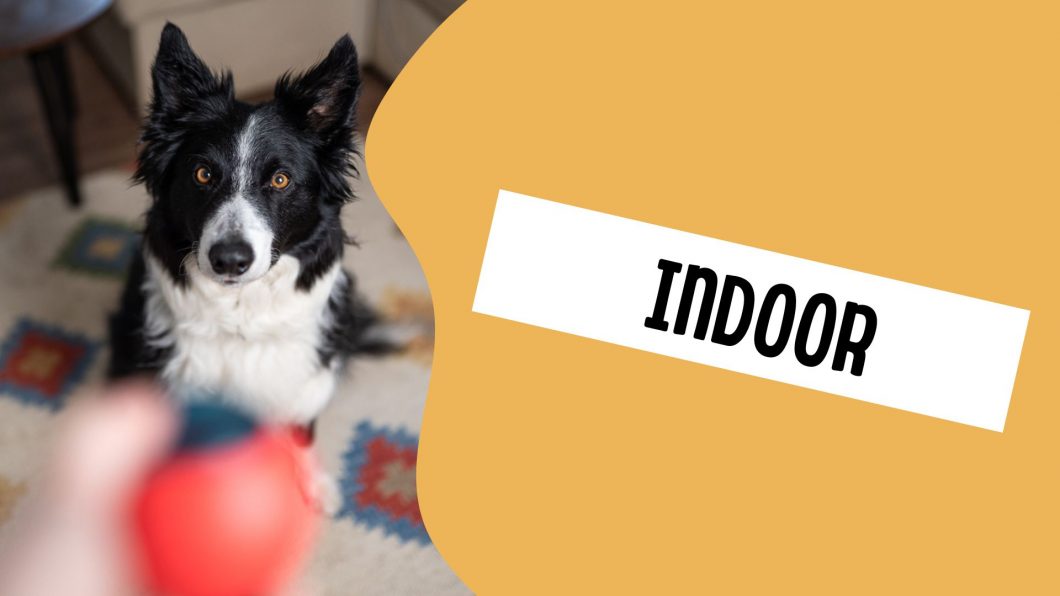
Indoor

I will admit, up front, that indoor photos do not form a large part of my photography. They’re not my style, and I would rather be out in the woods.

That being said, for those of you with cats, or who might want to get into commercial work (which is when I do my indoor photos) this lesson might be interesting for you. Just keep in mind I am definitely no studio lighting expert. 

Lighting types

Indoors, you have a few options

  • window light
  • constant light
  • flash/strobes

Since I don’t even own a flash, we’re going to leave that for another day.

The photo to the left was taken with Journey facing a really large floor set of windows.

Window light

Inside, most of your light is going to either come from lights on the ceiling, or windows. Windows could also be sliding doors or skylights.

Because of the nature of a window (being a square or rectangular space to allow light in), the light can be very directional. 

Consider if you had a window on one side of your pet’s face, and a wall on the other side. There would be a HUGE contrast between the light side and dark side, unless the wall was bright and reflecting a lot of that light.

The sun can also shine in through the window, leading us to experience many of the issues faced in the “full sun” lesson, or even the “patchy shade” lesson, since it could be shining in a sharp beam somewhere on, or near the subject. If you really have no option but to shoot while the sun is coming in through the window, try using a diffuser or even a sheer curtain or white sheet hung in the window, to soften the light. 

Because larger light sources make the light softer (the reason why an overcast sky will provide softer light than the sun, for example), having the pet quite close to the window itself should make the light softer.

Then, you want to consider light direction. Facing them into the light/window will mean they get that light evenly on their face, as well as nice bright catchlights in their eyes. 

If you are in any typical European or UK house, you may not have an abundance of window light!

Unfortunately, without an external light source, there’s really no way around this. 

In terms of camera settings, you need to figure out what the slowest shutter speed you’re happy with is. For me, this tends to be no slower than 1/320 second, or I just notice too much blur. 

You probably want your aperture wide open, unless you’re doing a product shoot where you need to show the full product or label.

Your ISO is likely to be very high if you’re relying solely on window light.  There’s no secrets to get around this.

Continuous Light

A photo taken recently for a dog bed company using my two continuous lights

Another option is continuous light.

Without a specialised light set up (which could just be a set of two studio lights with soft boxes from Amazon), this is probably going to mean turning on all the lights in your house.

Unfortunately, this might not have the best result.

With all these lights can come crazy and unexpected areas of contrasts, shadows and highlights, that make editing annoying and complicated.

Different globes can throw different colour casts, and colour casts can also be thrown from walls, soft furnishings, and other coloured objects in your house. 

Of course, this might be the only option if you’re taking a quick snap of your sleeping pet, but if you’re wanting to consistently take photos of your indoor cat, I would recommend investing in a simple 2-light set up.

These usually come with soft boxes, and you honestly don’t need to spend a fortune to get decently bright light with different colour and intensity settings.

By being able to select the light temperature, and turning off other lights in the vicinity, you can reduce or eliminate colour casts, which will make editing a lot faster and easier. 

So that your photos don’t look flat and one dimensional, you probably don’t want to have the light shining directly onto the subject, but having them staggered, or even having one at a slightly less intensity can create gentle, soft shadows and therefore provide a bit more depth to the photos. 

Using my two continuous lights, even at night in my lounge with all other lights off, means I can be shooting at 1/320, f/2.5, ISO 640. Without the lights, the ISO would likely be ~ 2000.

It’s possible that if you have only a single window or lack of natural light from outside, that even a simple ring light would be better than nothing!


Taken in my lounge with my two lights. You can see there’s quite harsh shadows, but the soft boxes aren’t that big, and I need them at full strength to output enough light, so it ends up more harsh than I would like.

This photo was taken before my two-light set up, by turning on all the lights of the house, and trying to make use of the window camera right. I turned on the salt lamp in the background as an “ambient light” (you’ll notice they do this in movies all the time). But you can see how yellow everything is, there were colour casts everywhere and if you look at the quality of the photo it’s obvious the ISO was much higher (1250 vs 640)

Light fall-off

Keep in mind that depending on the room (size, number of windows, etc), the rest of the room could appear quite dark, as the light won’t reach all the way. 

In this case, in order to balance your exposure, you may want to move the subject a bit further into the room….

Or, embrace the dark, and try making a classic “black background” portrait, often seen with horses in stables, where the horse is standing on the threshold of stable and out in the soft ambient light, so the background appears very dark compared to the lighter foreground area.  

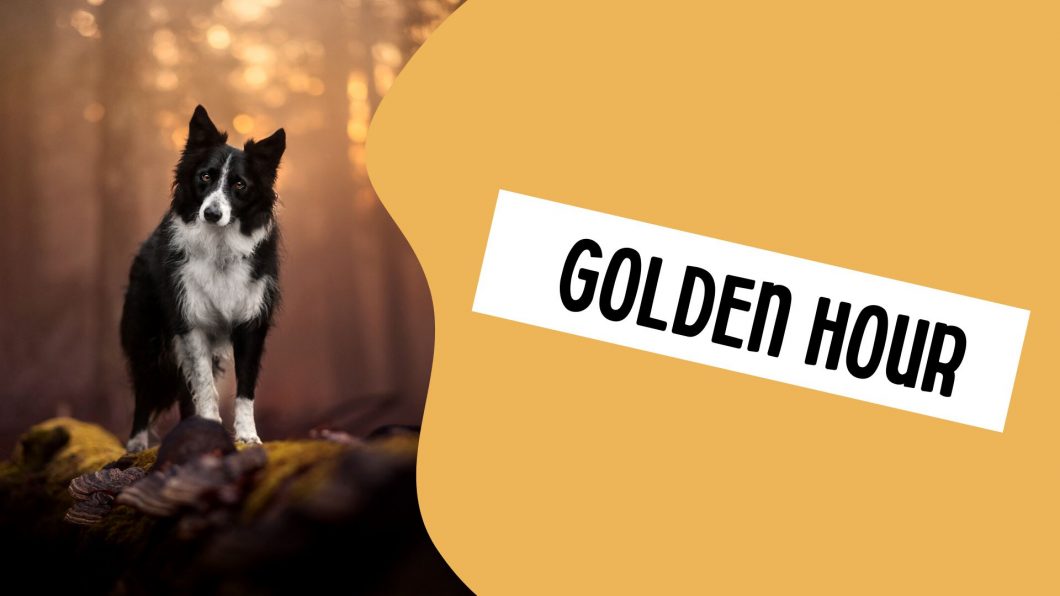
Golden Hour

Table of Contents

You may have heard the term “golden hour” thrown around by photographers as being the ideal time for photography.

While it’s not without its challenges, and generally requires you to have an understanding of how to utilise backlight, it can create some really beautiful portraits, with creamy, warm, soft light.

Quick Profile

Golden hour is the hour or two after dawn, or before the sun sets. There has to be some amount of sunlight for golden hour to occur. If there is nothing but thick clouds that the sun can’t break though, there won’t be a golden hour.

If the sun can break through the clouds though, you could have golden hour with dramatic cloud formations.

The light temperature is noticeably warmer, sometimes insanely orange or yellow, or sometimes a more gentle cream, depending on other atmospheric conditions.

The light of the sun is much softer than midday sun, and because it is low, there are likely to be long shadows.

Benefits

  • Softer light than midday/afternoon sun, but not as soft as overcast
  • Warm glowing light
  • Sun can be blocked by things like tree trunks, people, the dog, etc. 
  • Perfect for backlight
An adorable black and white dog peacefully sitting in the woods lit by intense golden light, captured beautifully through pet photography techniques and editing
This evening had the most INCREDIBLY orange light, it really was like fire. It worked absolutely perfectly as backlight behind Amie.

Challenges

  • Dogs can still be shiny and highly contrasty if being directly lit by golden hour sun
  • The golden tones can make the fur colour of the dog go crazy, and setting the white balance will be a big challenge as the light was naturally warmer, and the dog might look “wrong” when edited to its correct temperature
  • Backlight is challenging to master (but worth it!)
  • It can be difficult to balance the light or expose for highlights when shooting into the sun for backlight, sunset photos, etc.
  • Planning for golden hour doesn’t always work out when you’re booking in client shoots, leaving you with really low-light situations if the sun just doesn’t show up but you’re shooting in the last 2 hours of the day!
  • Lens flare can be an issue

Now look, I know there’s a lot of challenges listed, but mastering golden hour and how to use it can really create some beautiful photos!

This photo has golden hour light shining directly on Journey's face. See how he's still shiny and kind of a weird colour?

How to Use It

Because the light is still coming from the sun, you need to treat it as directional.

That means:

  • pointing your dog’s face into the light, whether they are side-lit and therefore looking to the side, or the light is shining directly onto their face (from behind you)
  • or using backlight, so having the sun behind the dog. There is a lot more on backlight in the Backlight lesson.
Personally, I tend to almost exclusively use golden hour for backlight, or MAYBE sidelight for a dramatic effect. I’m not a fan of how shiny the fur gets when directly lit, or just how the face looks when being hit by the sun. 
 
That being said, if you’re at the beginning of your photography journey, you may wish to start with direct lighting, and move into backlight and side light as you progress.
 

It’s important to be aware of your shadow when shooting at golden hour, if you’re using it as direct/front lighting. Shadows are much longer at this time of day so you may need to try and get yourself extra low to the ground, zoom your lens in more, or adjust your angle to hide the shadow.

Photoshop CAN remove some shadows, depending what else is on the ground/in the scene.


Otherwise, you will want to follow either the principals of backlight, OR, of getting that light nice and even on the face.

Shooting at golden hour is the MAIN WAY that I achieve the beautiful warm orange tones in my images, because this is the natural temperature of the light.

Backlit Golden Hour

Side Light & Direct Light Golden Hour

It was really difficult finding photos that showed golden hour from this direction. It’s not something I do, ever!