
Your Result:
Your colours are off. And it could be affecting the mood of the photo.
White balance is one of those things that’s easy to overlook because your eyes adjust to it, OR, you don’t even know you’re SUPPOSED to be looking for it. After all, your camera took the photo, you make some edits and go about your day…
But… is your dog the correct colour? Is he the colour he looks in real life?
Throughout my years of critiquing photos in the Learning Journey, white balance is something that comes up every. single. month – usually multiple times. Black dogs who are blue. Cream dogs who are grey. Red dogs who are purple.
But here’s the other thing: colour temperature affects mood. Photos that are too cool tend to feel flat, cold, a little melancholy. Which is fine if that’s what you’re going for. Not so great if you were going for magical, joyful, full of life.
In my experience, most people edit too cool without realising it.
The simplest check is this: does your dog look the colour they actually are in real life? Not slightly blue. Not slightly grey. Actually the colour they are. If the answer is no, your white balance needs adjusting.
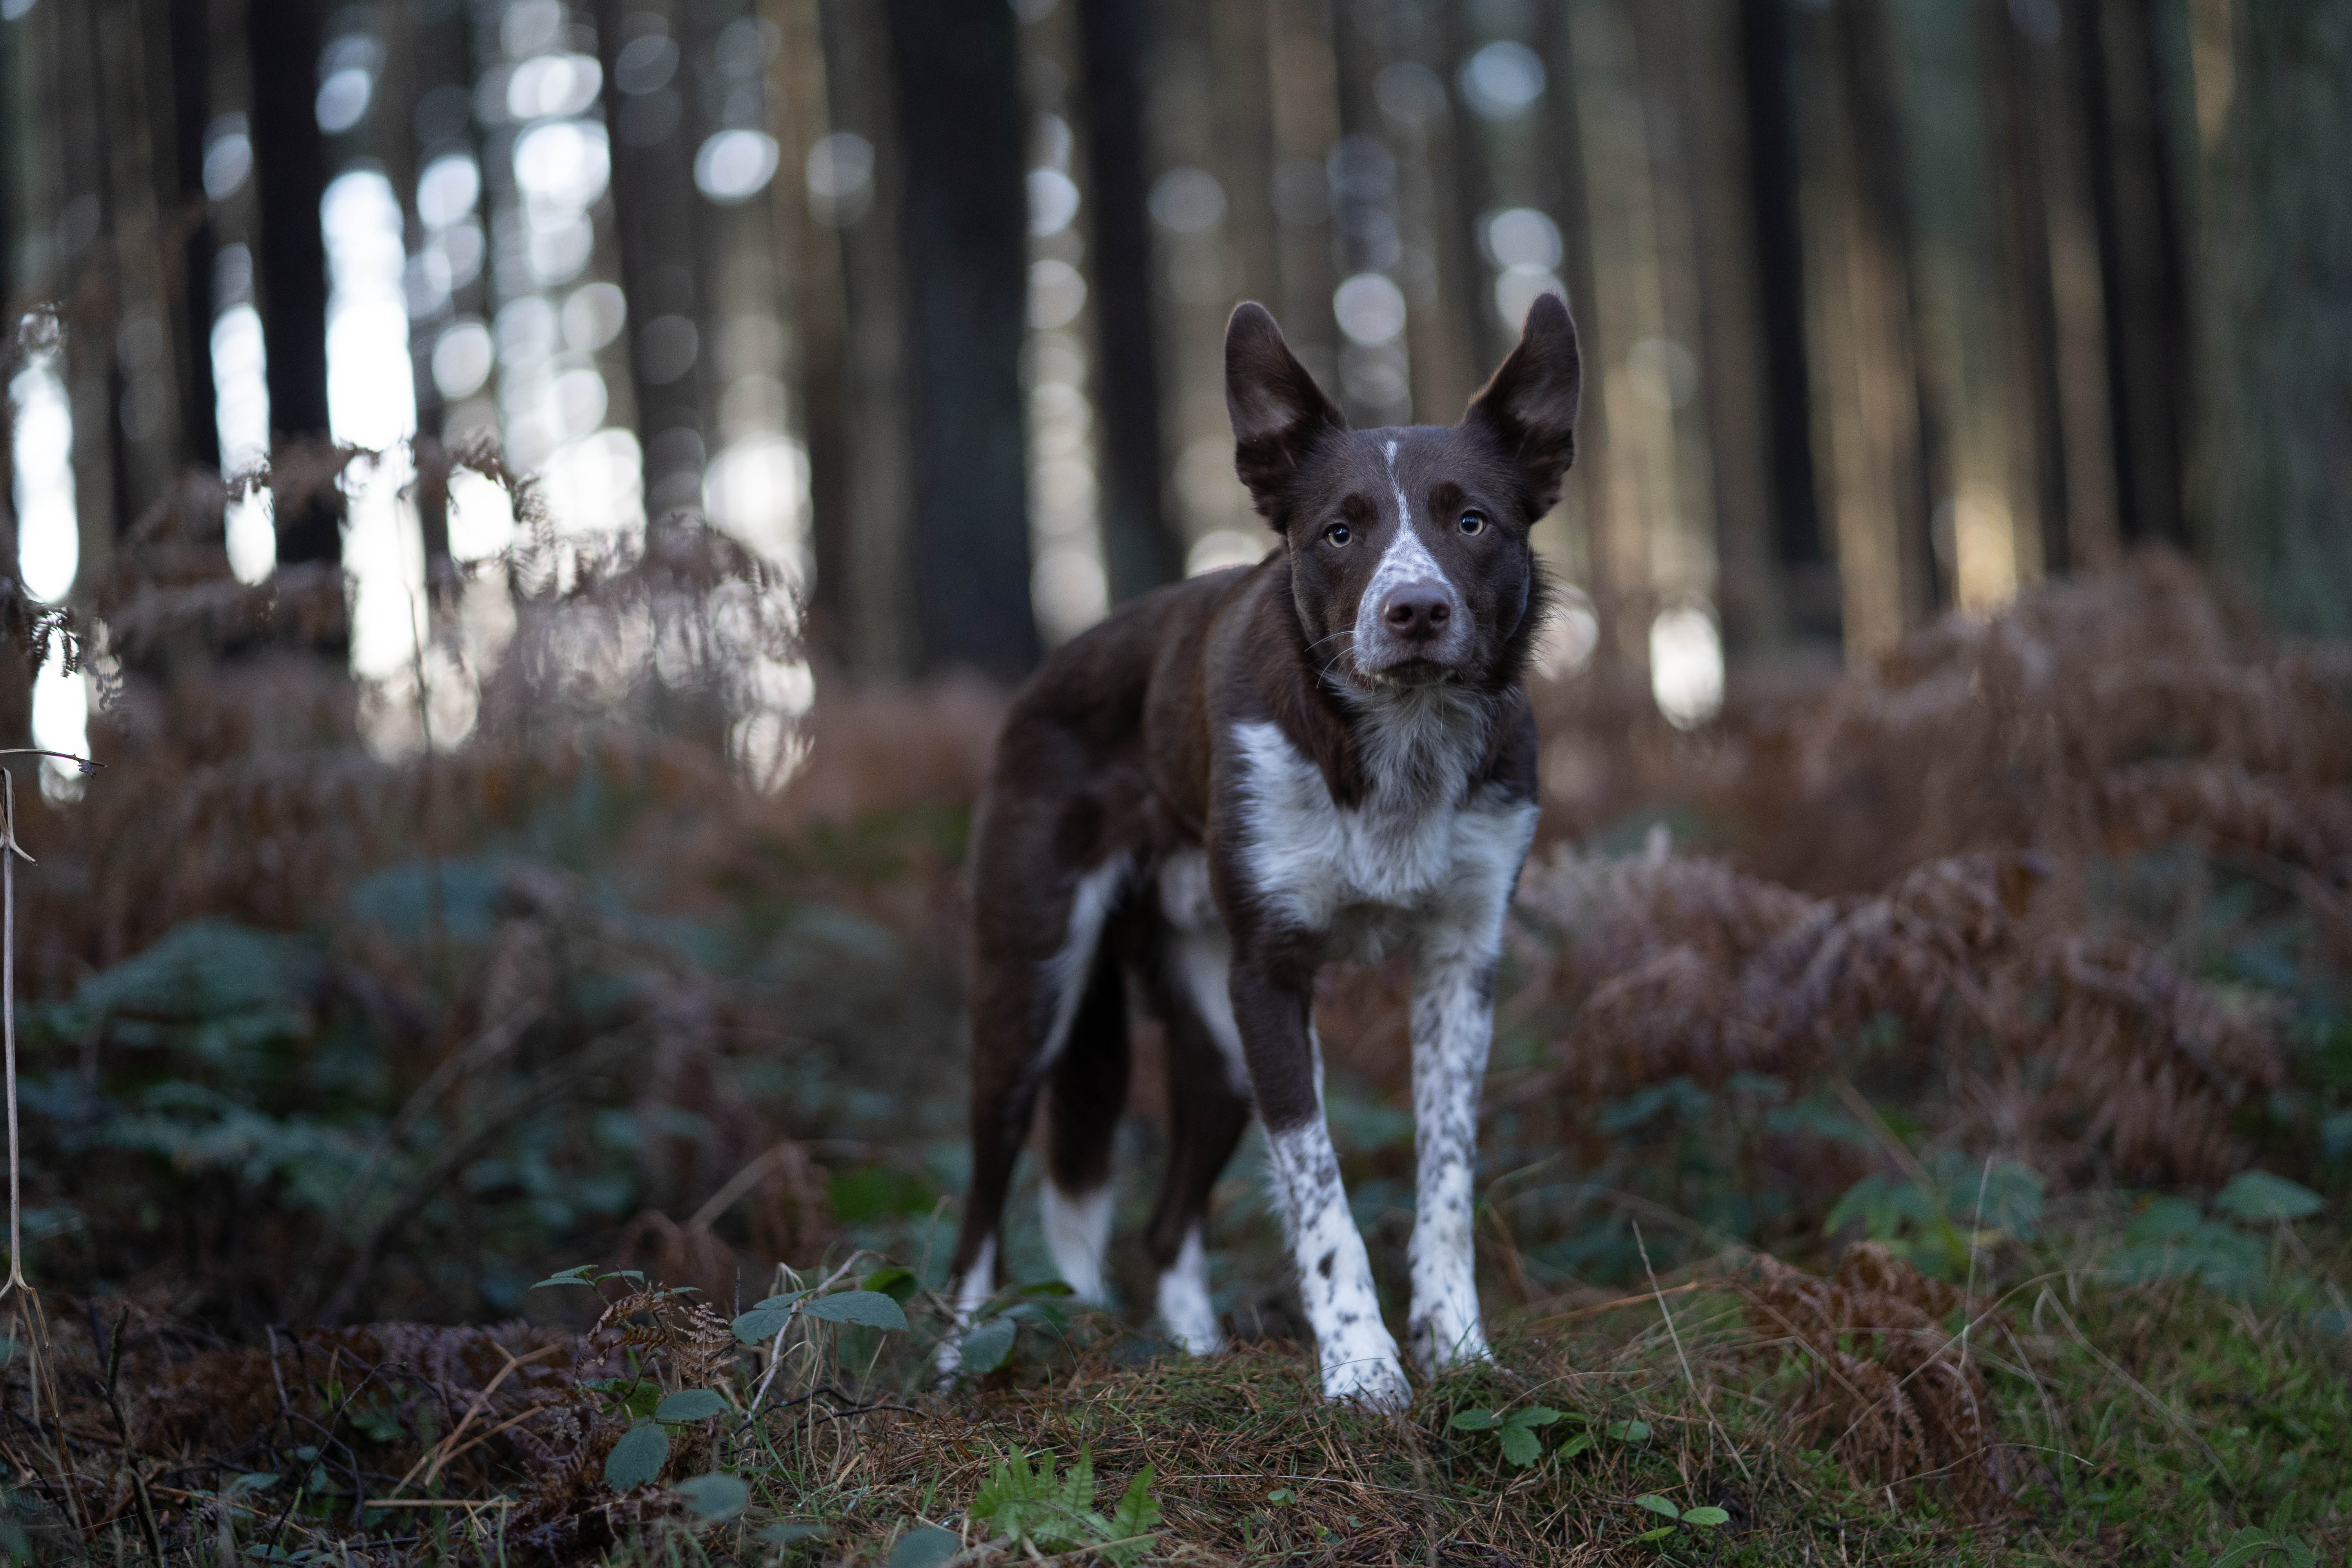
Above: A few unedited photos. Can you see the blue??
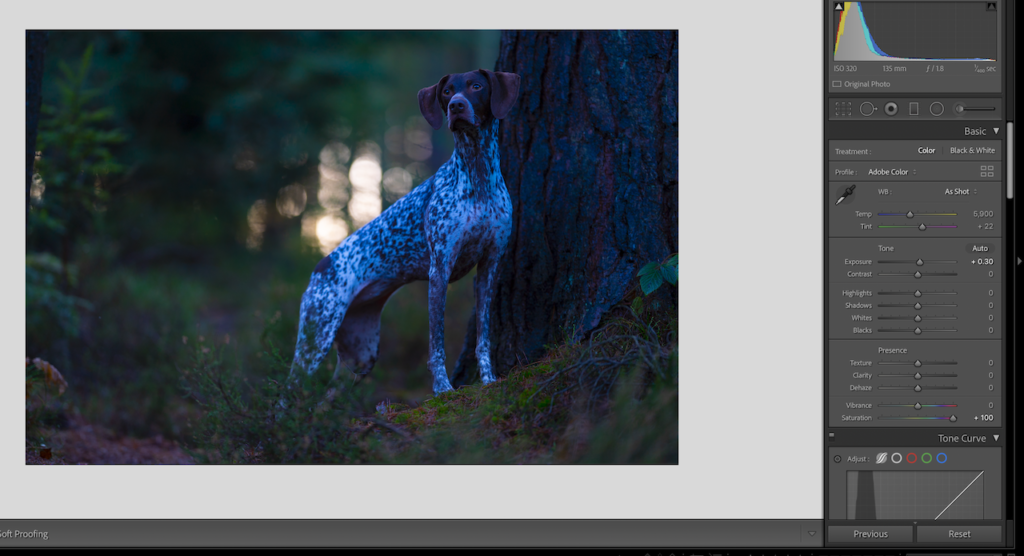
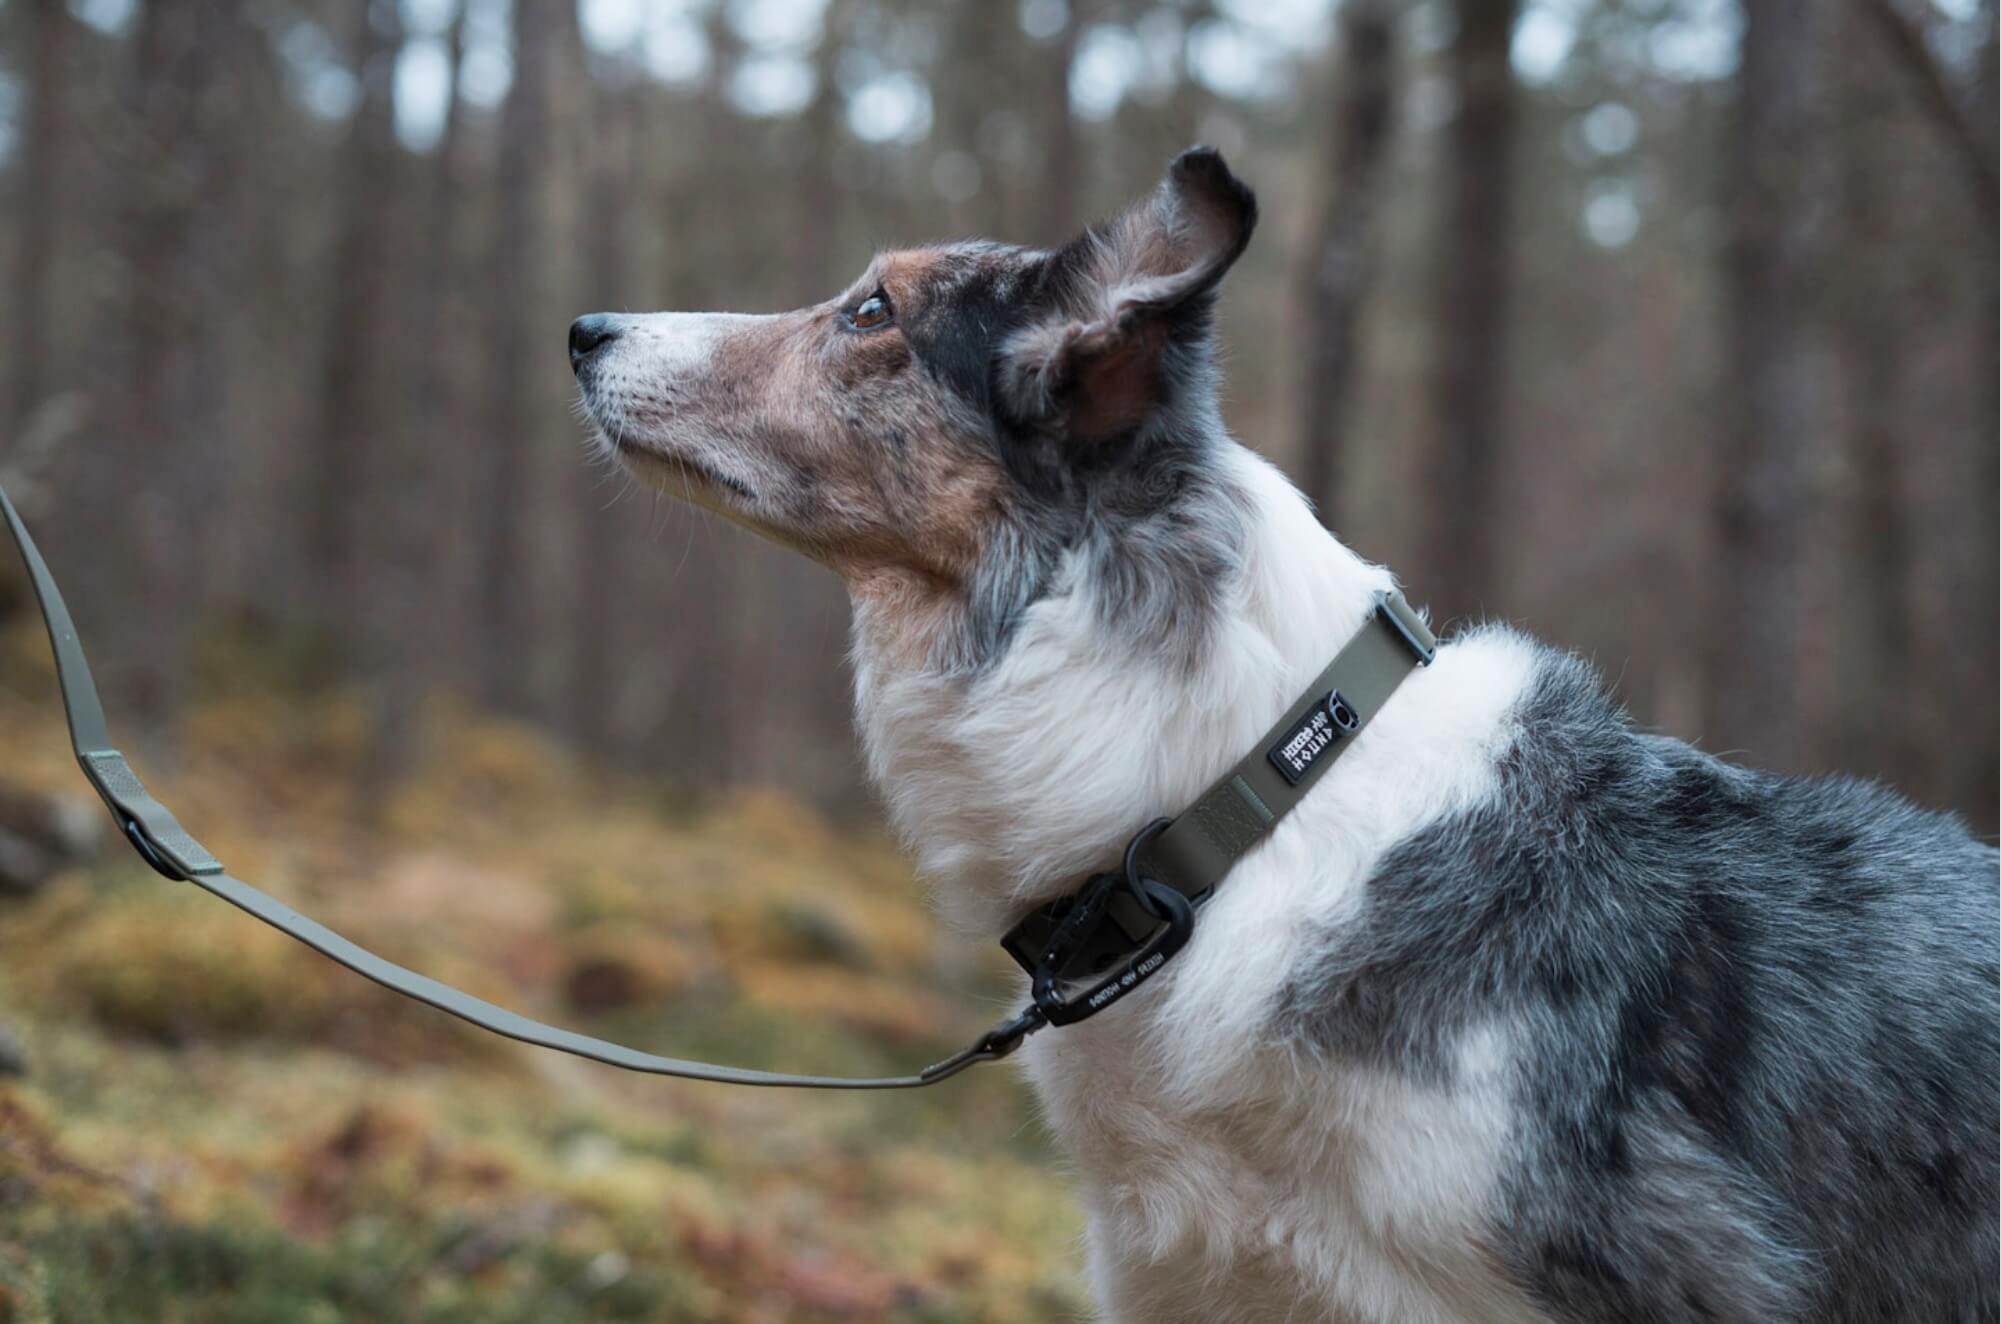
How about now? (basically the same photo of Robin as the one above. Slightly different expression).
One thing to try:
In your editing software, try the eyedropper tool on an area of pure white or pure black in the photo — it’ll set the white balance automatically based on that (keeping in mind that black dogs aren’t really pure black, AND there will be areas of colour-cast). Or manually adjust your temperature and tint sliders until your dog looks like your dog again. If you’re not sure, try bumping your vibrance and saturation temporarily- it makes colour casts much easier to spot.
One thing worth knowing: colours look different on every screen. Your laptop, your phone, your iPad will all show the image slightly differently. You can’t edit so that every device shows it perfectly. That’s just the reality of screens — not something you’re doing wrong.
Want to go deeper?
Beginning to edit, using Lightroom for more than just applying a present, but actually doing start to finish edits, are covered in the Starting Point membership.
Ready to fix this properly?
Most people think they need to learn “magical edits”. In reality, most people need better foundation skills.
Starting Point is the entry tier of The Learning Journey, my membership for pet photographers who want to take photos that actually feel how they imagined them.
It’s not a quick fix or a beginner’s sampler. It’s a curated library of foundation lessons covering the things that make the biggest difference to your photos… in the order that makes sense to learn them.
50 lessons. Around 30 to 40 hours of video content. All the things I wish someone had told me at the beginning.
What's Included in Starting Point?
📸 Capture the Moment
- The Beginning Stage lesson library including the 4 core courses with around 50 lessons and 30 to 40 hours of content:
- Mastering the Foundations
- Light
- Camera Settings
- Beginning Editing.
- Starting Strong: A 5-week guided beginning for new members, so you know exactly where to start and what to focus on first. Recordings included and available!
- Selected event replays: Access to replays of events where the content is relevant and useful for where you are.
💡 Learn, Grow & Connect
- The Inspawration community: The same community as Complete Access members. One space, no hierarchy, genuine peer feedback and connection.
- Monthly challenges: Structured prompts to get you shooting with intention, not just waiting for the perfect moment.
- Edit and Chill sessions: Watch me edit in real time. No performing, no perfection. Just the actual process.
- Critique video access: Watch monthly critique sessions and learn from the feedback given to other members’ work.
All for only €14 per month!
No contracts, no minimum term.
Or… find out more!
