
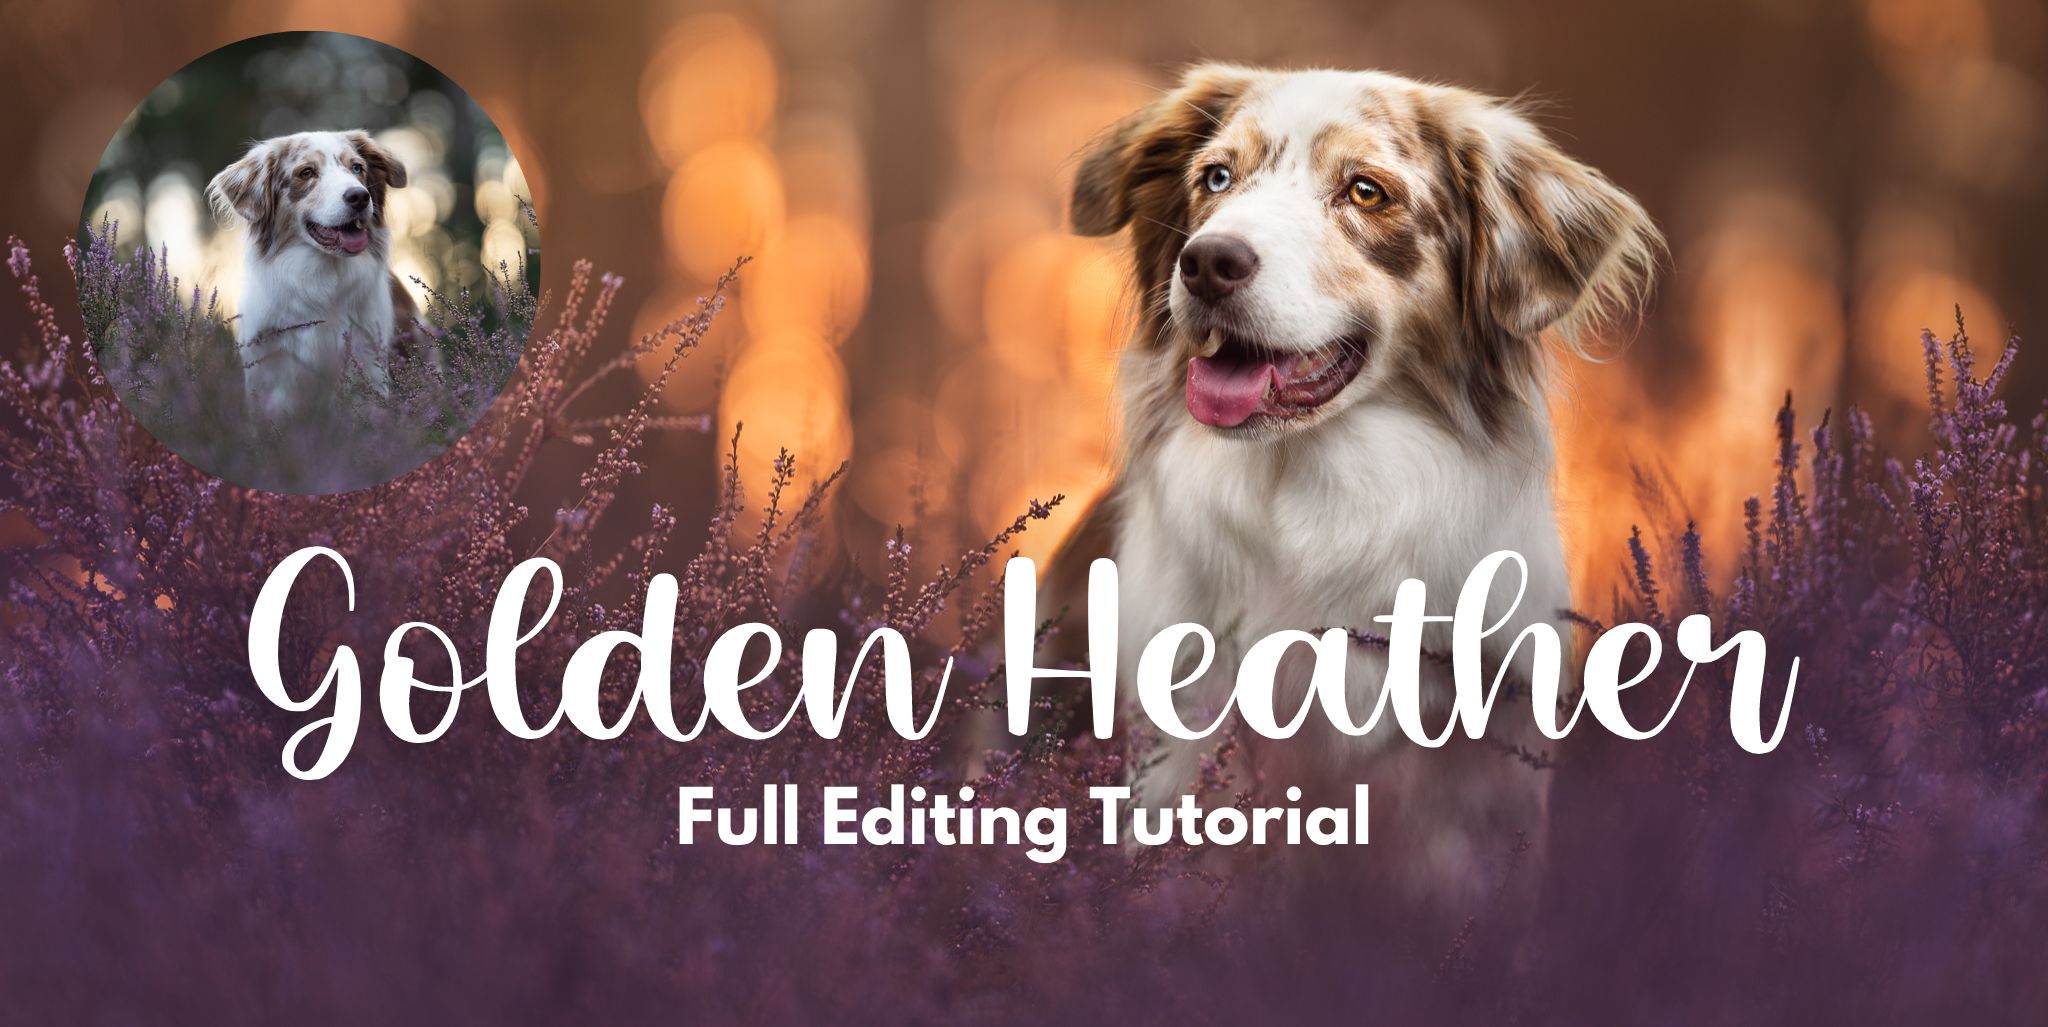
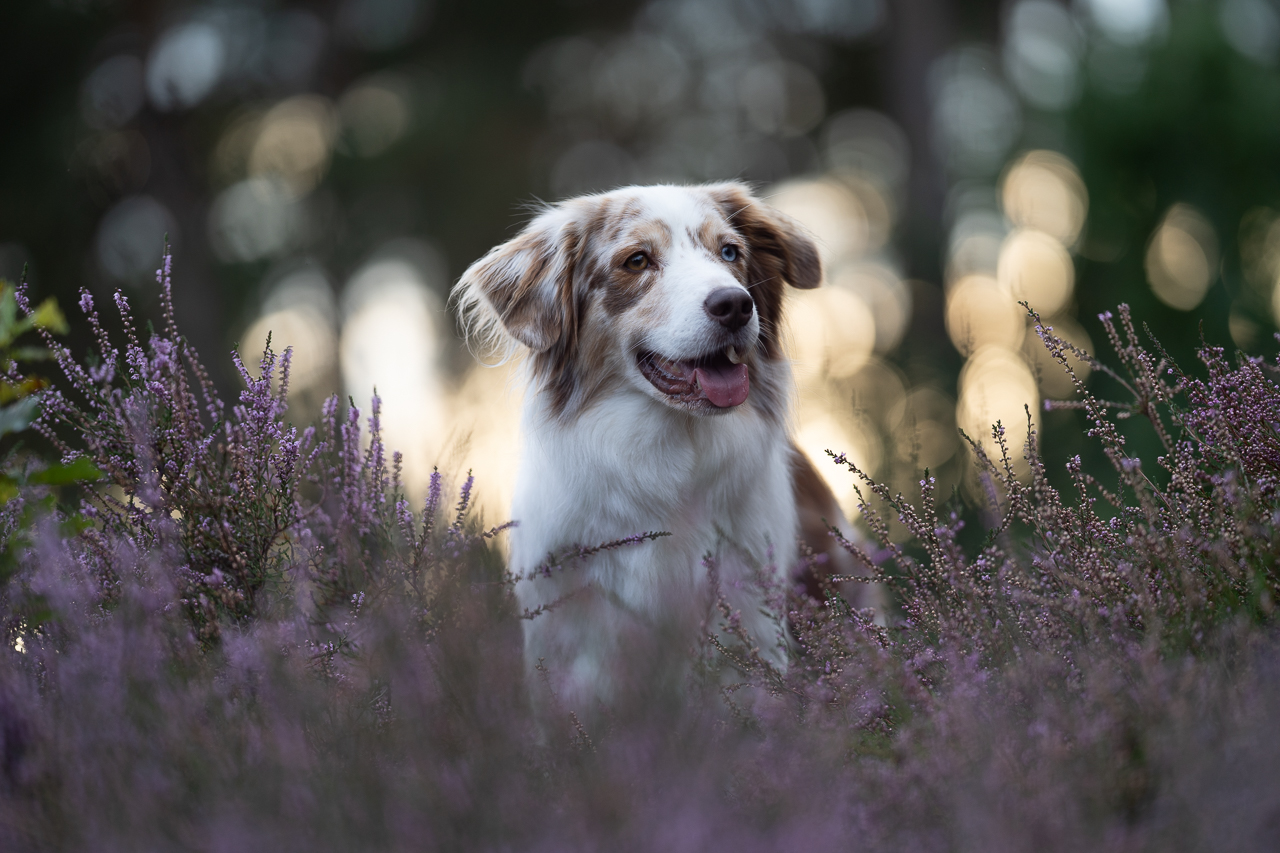
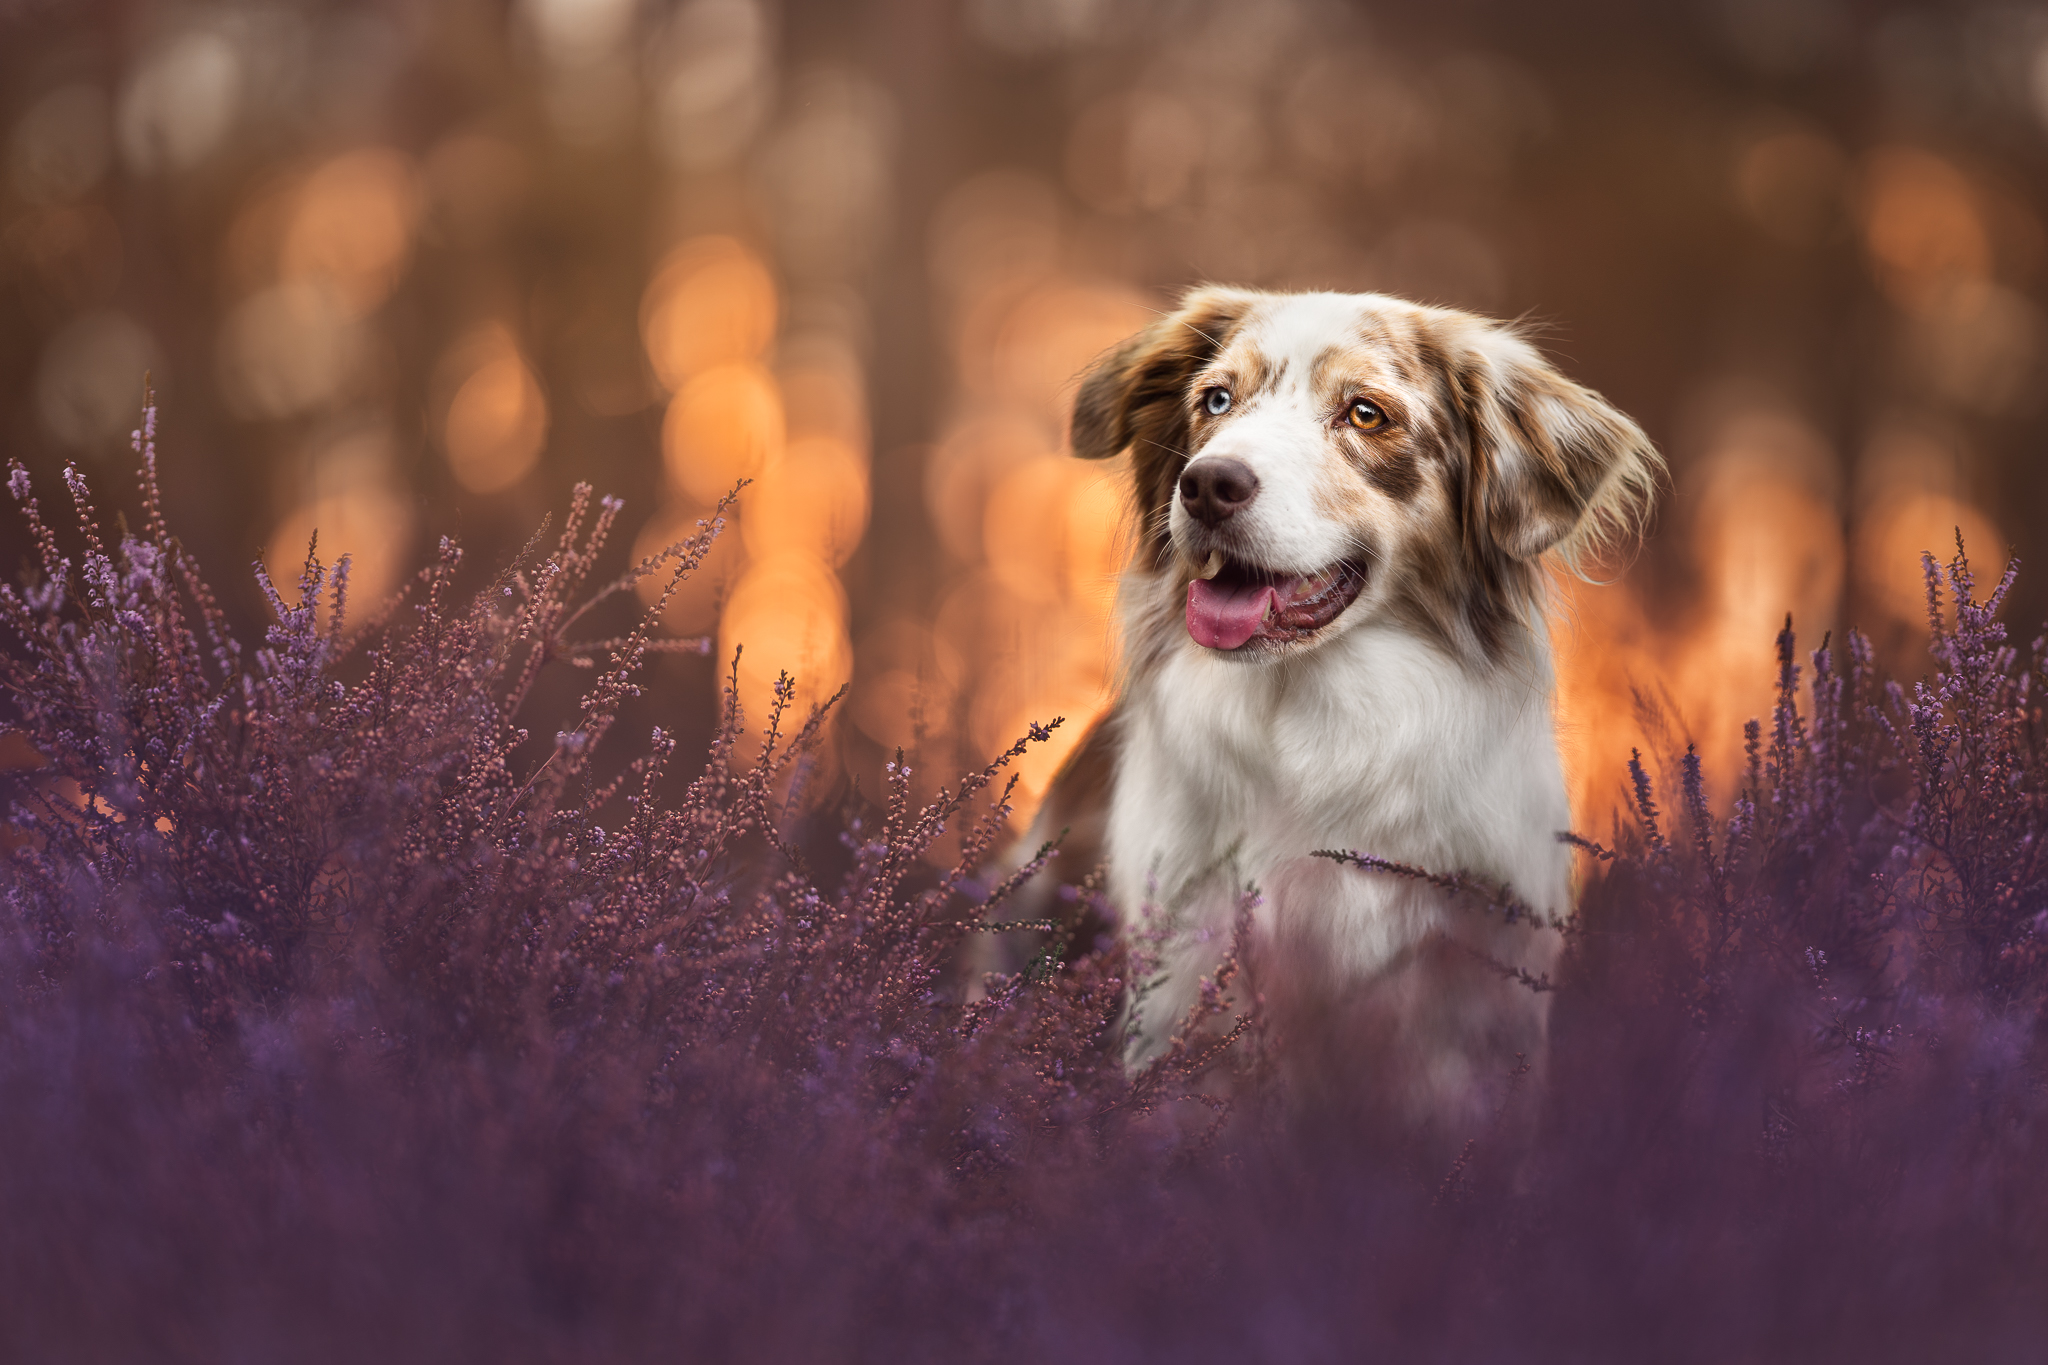
In this tutorial using Lightroom & Photoshop and following most of my normal process, we are going to work on a well-exposed photo of Luke, a red merle Australian Shepherd.
You will need decent knowledge of Lightroom & using radial filters, as well of how to use masks and adjustment layers in Photoshop.
In this tutorial we will:
- Set the white balance
- Talk about my Lightroom process & goals
- Work on distractions
- Bring detail & light to the dog
- Flip the image and extend the canvas
- Add some gaussian blur to an area of cloned heather, to make it fit in better
- Use curves layers to shape the light and add richness to the colours
- Use a selective colour layer to bring out those rich orange tones
- Use a combination of colour balance and a radial gradient to enhance the purple (you don’t have to make it QUITE as purple, if it’s not your thing).
- Add a gradient behind Luke for a little bit of extra background separation
- Remove some colours from his chest (note: not all!)
- Dodge and burn/contouring using curves layers.
- Final touches in Lightroom by checking the histogram.
Note: I probably wouldn’t (and didn’t!) give my client the flipped version of the photo. Why?
Because Luke has two VERY distinctive sides to his face, with his mismatched eyes and mismatched ears, and I want the photo to properly represent him, rather than flowing more comfortable. For social media though, I’ll post the flipped version.
(Visited 640 times, 1 visits today)
